Regency HZO42-NG Owners & Installation Manual
Hzo42 outdoor gas fireplace
Hide thumbs
Also See for HZO42-NG:
- Owners & installation manual (44 pages) ,
- Owners & installation manual (44 pages) ,
- Owners & installation manual (44 pages)
Table of Contents
Advertisement
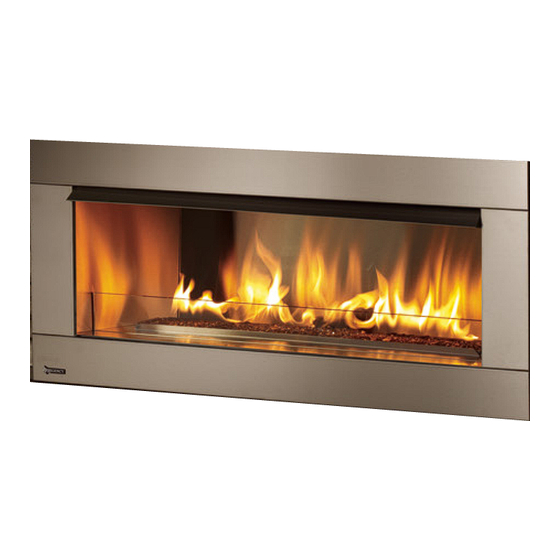
Regency HZO42 Outdoor
www.regency-fire.com
WARNING:
If the information in these instructions are not followed exactly,
a fire or explosion may result causing property damage,
personal injury or loss of life.
FOR YOUR SAFETY
Do not store or use gasoline or other flammable vapours and
liquids in the vicinity of this or any other appliance.
Installation and service must be performed by a qualified
installer, service agency or the gas supplier.
WARNING:
Improper installation, adjustment, alteration, service or maintenance can cause injury or property
damage. Read the installation, operating and maintenance instructions thoroughly before installing
or servicing this equipment.
FPI FIREPLACE PRODUCTS INTERNATIONAL LTD. 6988 Venture St., Delta, BC Canada, V4G 1H4
918-976e
Gas Fireplace
Installer: Please complete the details on the back cover
and leave this manual with the homeowner.
Homeowner: Please keep these instructions for future reference.
Installation Manual
MODELS: HZO42-NG
LISTINGS AND CODE APPROVALS
These gas appliances have been tested
in accordance with AS4565 / NZS 4558
and have been certified by the IAMPO
Oceana for installation and operation
as described in these Installation and
Operating Instructions.
Your unit should be serviced annually
by an authorised service person.
WARNING: FOR OUTDOOR USE ONLY
FOR YOUR SAFETY
What to do if you smell gas:
Do not try to light any appliance
Do not touch any electrical switch:
do not use any phone in your
building.
Immediately call your gas supplier
from a neighbour's phone. Follow
the gas supplier's instructions.
If you cannot reach your gas
supplier, call the fire department.
Owners &
HZO42-ULPG
January 30, 2017
Advertisement
Table of Contents

Related Manuals for Regency HZO42-NG

Summary of Contents for Regency HZO42-NG
- Page 1 Owners & Regency HZO42 Outdoor Installation Manual Gas Fireplace MODELS: HZO42-NG HZO42-ULPG LISTINGS AND CODE APPROVALS These gas appliances have been tested in accordance with AS4565 / NZS 4558 and have been certified by the IAMPO Oceana for installation and operation as described in these Installation and Operating Instructions.
- Page 2 To the New Owner: Congratulations! You are the owner of a state-of-the-art Gas Fireplace by REGENCY . The HZO42 Outdoor fireplace has been designed to ® provide you with all the warmth and charm of a fire at the flick of a switch. As it also bears our own mark, it promises to provide you with economy, comfort and security for many trouble free years to follow.
-
Page 3: Table Of Contents
880 S.I.T. Valve Description .........13 Burner Assembly ............37 Aeration Adjustment ............13 Accessories ..............38 Unit Assembly Prior to Installation .......14 Standoff Assembly ..........14 Nailing Strips............14 WARRANTY Wall switch installation ..........15 Wiring Diagram ............16 Limited Warranty: ............40 Regency HZO42 (Aus) Gas Fireplace... -
Page 4: Data Badge
® improved. Check the label on the unit and if there is a difference, the label on the unit is the correct one. Primarily a decorative appliance - not certified as a space heater. Regency HZO42 (Aus) Gas Fireplace... -
Page 5: Dimensions
DIMENSIONS UNIT DIMENSIONS 960mm 1059mm 1110mm 491mm 1099mm 387mm 341mm 16mm 102mm 37mm Regency HZO42 (Aus) Gas Fireplace... -
Page 6: Installation
LATED SPACE AND SHALL NOT BE instructions. The appliance should be enclosed. USED IN A BUILDING, GARAGE OR ANY OTHER ENCLOSED AREA. 4) Inspect the burner before each use of the appliance for blockage and any signs of deterioration. Regency HZO42 (Aus) Gas Fireplace... -
Page 7: Installation Checklist
Open side at least 25% of total wall area In case of balconies, at least 20% of the total wall area shall be and remain open and unrestricted. Regency HZO42 (Aus) Gas Fireplace... -
Page 8: Components In Outdoor Appliances
This will create a pressure zone • Only Regency approved media should be used in the firebox (i.e. at the firebox and will prevent the unit from venting stones/glass) •... -
Page 9: Minimum Clearances To Combustibles
C: Mantel Height (min.) 457mm Top of Fireplace Opening D: Mantel Depth (max.) 304mm From Wall E: Alcove Width 1148mm Wall to Wall (Minimum) F: Alcove Depth 914mm Front to Back Wall (Maximum) Notes: No Hearth Required Alcove Regency HZO42 (Aus) Gas Fireplace... -
Page 10: Framing Dimensions
Metal Stud on edge Important Note: Two (2) ventilation grills are highly recommended for all enclosures. This is to alleviate moisture and allow for air to circulate. Minimum recommended size: 508 mm² ea. Regency HZO42 (Aus) Gas Fireplace... -
Page 11: Mantel Clearances
Facing 457mm 279mm Standoff To Unit 584mm Base Top of Fireplace Opening NON-COMBUSTIBLE REQUIREMENTS 1110mm Non-combustible Material 967mm Non-combustible Material 167mm A minimum thickness of 12mm non-combustible board complant with AS1530-1 and AS1530-3 is required. Regency HZO42 (Aus) Gas Fireplace... - Page 12 The finishing of the walls surrounding or damage to board. The non combustible board must be Regency is as critical as the installation itself. The temperatures around a minimum of 12mm thick and comply with AS1530-1 and linear gas fireplaces are typically higher than would be acceptable for AS1530-3.
-
Page 13: Finishing
For material such as brick, stone, etc that extend up to 38mm, the minimum opening dimensions noted below must be adhered, when finishing around the faceplate. This is to ensure the removal of the faceplate and for the safe operation of this appliance. 967mm 38-1/16” ” Unit shown without faceplate 1145mm 967mm Regency HZO42 (Aus) Gas Fireplace... -
Page 14: Gas Line Installation
6) When finished reading manometer, turn off the gas valve, disconnect the hose and tighten the screw (clockwise) with a 1/8" flat screwdriver. Note: Screw should be snug, but do not over tighten. Regency HZO42 (Aus) Gas Fireplace... -
Page 15: Unit Assembly Prior To Installation
Nailing Strip Note: Flush w/unit Factory Set Depending on the material used for finishing, the nailing strips must be set accordingly so that the finished material is always at the 38mm edge of the flange. Unit Regency HZO42 (Aus) Gas Fireplace... -
Page 16: Wall Switch Installation
(Two-Wire) When Using Wall Thermostat (CP-2 System) Wire Size Max. Length 14 GA. (2mm²) 15.m 16 GA. (1.5mm²) 9.5m 18 GA. (1mm²) 20 GA. (0.5mm²) 3.5m CAUTION Do not wire millivolt wall switch wires to 240V wire. Regency HZO42 (Aus) Gas Fireplace... -
Page 17: Wiring Diagram
Proflame SureFire™ Switch 0.886.001 Proflame Valve Standard Wall Switch Standard Main On/Off Switch or Optional Wall Switch Remove the protective coating from the following components before proceeding. Carefully follow stainless handling instructions on following page. Regency HZO42 (Aus) Gas Fireplace... -
Page 18: Inner Panel Installation
2) Install a side panel next (not important which side goes in fi rst). Position the panel with the bend in the panel facing towards the outside or wall of the unit. Position side panel and secure with a clip and one screw. Regency HZO42 (Aus) Gas Fireplace 02/19/10 918-900... -
Page 19: Glass Crystal Installation
IMPORTANT NOTE: Only the supplied and approved pebbles / glass crystals are to be used with these fireplaces. Use of any other type of pebbles, glass crystals or other material can create a danger and will void the warranty. Firebox (Around Burner) Packages Unit Glass Crystals Pebbles HZO42 1.4kg 1 package (3 x bags pebbles) Regency HZO42 (Aus) Gas Fireplace... -
Page 20: Volcanic Stone Installation
Volcanic Stones Ivory /Tan + Glass Crystals For the PTO30, PTO60 For the HZO42 & HZO42AUS & Plateau Series only only Volcanic Stones Slate /Grey + Glass Crystals For the HZO42 & HZO42AUS only 919-050 06/27/11 Regency HZO42 (Aus) Gas Fireplace... -
Page 21: Optional Log Set Installation
3) Install log E on the right side of the burner as shown below. Orient log E in the same way and in a similar position as depicted in Diagram 4. Diagram 4 Regency HZO42 (Aus) Gas Fireplace 918-899 02/15/11... - Page 22 5) Install log F on the right side of the burner as shown below. Orient log F in the same way and in a similar position as depicted in Diagram 6. Diagram 6 Final Install Regency HZO42 (Aus) Gas Fireplace...
-
Page 23: Heat Deflector Installation
HEAT DEFLECTOR INSTALLATION 1) Install the heat deflector to the top inside of the firebox with 4 screws as shown below. Heat Deflector Heat Deflector Installed Regency HZO42 (Aus) Gas Fireplace... -
Page 24: Faceplate Installation
There are 3 slots on each tab so the faceplate to accommodate different finishing materials. Trim Piece To remove - reverse steps. Final Install Install logo onto faceplate. 43.250 1098.55 Faceplate Dimensions Regency HZO42 (Aus) Gas Fireplace... -
Page 25: Glass Wind Shield Installation
Starting from one corner - slide the cover over the corner, then stretch the cover until it is fitted over all four corners. CAUTION: Never start the unit with the cover on. Let the unit cool before installing the cover. Turn off gas supply to unit before installing cover. Weather Cover Installed Regency HZO42 (Aus) Gas Fireplace... - Page 26 (C) 326-081 x 6 Midsection (D) 326-076 x 2 Header (E) 326-060 x 1 Corner Brace (F) 326-005 x 2 Vertical support - back (G) 326-083 x 1 Midsection support (H) x 2 Wafer Screws Regency HZO42 (Aus) Gas Fireplace 12.23.15 919-145...
- Page 27 (B) pieces. Part B positioned fl at side fl ush with A tab. Important: (B) - (tall vertical supports) must be positioned as shown to ensure the correct installation of (C). Regency HZO42 (Aus) Gas Fireplace 919-145 12.23.15...
- Page 28 fl at side of each inner Part B as shown below. Secure each (C) to bottom (A) with 3 wafer screws (one on each side and one at top as shown below. 1135mm (C)Screw (B)+ (C) - fl at sides back to back locations Regency HZO42 (Aus) Gas Fireplace 12.23.15 919-145...
- Page 29 16) Install vertical back support to back of assembly with 2 screws at top and bottom in locations shown below. (F) corner brackets positioned in opposite corners Note: Confi rm assembly is level and square before proceeding with further materials. Regency HZO42 (Aus) Gas Fireplace 919-145 12.23.15...
- Page 30 25mm and could be seriously damaged. 1” Max. 2” Min. 50mm WARNING: Inspect all hoses and if there is evidence of excessive damage, it shall be replaced. Diagram 1 Inspect all hoses prior to use. Regency HZO42 (Aus) Gas Fireplace...
-
Page 31: Operating Instructions
Unit will repeat step 2. SHUTDOWN PROCEDURE 1) Turn ON/OFF switch. 2) If service is to be performed - you must discon- nect both sources of power to the unit, the main power and battery. Regency HZO42 (Aus) Gas Fireplace... -
Page 32: Copy Of Lighting Plate Instructions
L'unité répétera l'étape 2. c) Unit will repeat step 2. appliance. 918-892a Jan 19/10: Created draft for approval Feb 16/10: Changed size of decal except being wider than cut ed clearance. for approval e of decal Regency HZO42 (Aus) Gas Fireplace... -
Page 33: Maintenance
4) The heater is finished in a heat resistant paint and should only be CLOTHING OR OTHER FLAMMABLE MATERIAL SHOULD refinished with heat resistant paint. Regency uses StoveBright Paint - ® NOT BE PLACED ON OR NEAR THE APPLIANCE. -
Page 34: Valve Assembly Replacement
7) Remove the screw and panel clip on the left side. Remove the left side panel once the clip has been removed. 8) Remove the back panel once the 2 side panels have been removed. Regency HZO42 (Aus) Gas Fireplace... -
Page 35: Battery Replacement
14) Remove the DFBC from the unit - see page 37. 3) Install 4 - AA batteries and reverse steps. 15) Remove 6 screws an lift out valve tray. 16) Replace with new valve tray and reverse steps. Inspect gasket condition, replace if necessary. Regency HZO42 (Aus) Gas Fireplace... - Page 36 3) Disconnect the Black sparker wire with black spade connector from CN3. See Diagram 2 below. Diagram 5 Valve wire Diagram 2 Sparker Wire 4) Disconnect the white and green On/Off switch wires. See Diagram 3 below. White Green Diagram 3 ON/OFF wires Regency HZO42 (Aus) Gas Fireplace...
-
Page 37: Main Assembly
5) 904-777 Orifice # 29 (NG) 911-013 Wiring Harness 904-434 Orifice # 47 (LPG/ULPG) 918-976 Manual 6) 326-574/P Valve Assembly NG 326-576/P Valve Assembly Propane/ULPG 7) 326-007/P Front access panel 8) 326-008 Burner Tray Cover Regency HZO42 (Aus) Gas Fireplace... -
Page 38: Burner Assembly
Valve NG SIT 880 326-930 Log Set 911-025 Valve LPG/ULPG SIT 880 11) 326-048 Burner Tray Cover 12) 911-006 Pilot Assembly - NG 911-007 Pilot Assembly - LPG/ULPG 911-037 Flame Sensor 911-038 Igniter 910-432 Pilot Tube Regency HZO42 (Aus) Gas Fireplace... -
Page 39: Accessories
Part # Description Reflective Stainless Steel Inner Panels 326-021 Rear Panel Stainless 326-022 Left Panel Stainless 326-023 Right Panel Stainless 14) 940-368/P Glass windshield 15) 326-554 Faceplate Brushed Stainless 946-676 Copper Glass Crystals 946-695 Garden Stones Regency HZO42 (Aus) Gas Fireplace... -
Page 40: Warranty
FPI Fireplace Products International Ltd. (“the manufacturer”) through its wholly owned subsidiary, Fireplace Products Australia Pty Ltd (for Australia and New Zealand customers) and sold under the Regency® brand of fireplace products (collectively referred to herein as “FPI”), extends this Limited Warranty to the original purchaser of this appliance provided the product remains in the original place of installation. - Page 41 FPI has no obligation to enhance or modify any unit once manufactured (i.e. as products evolve, field modifications or upgrades will not be performed on existing appliances). Revision Date: November 2016 Regency Outdoor Products Warranty Regency HZO42 (Aus) Gas Fireplace...
- Page 42 FPI may void this warranty. INCORRECT INSTALLATION OR GAS PRESSURE SETTINGS ARE NOT COVERED BY WARRANTY. A SERVICE OR CALLOUT FEE WILL BE CHARGED IN THESE CIRCUMSTANCES. Revision Date: November 2016 Regency Outdoor Products Warranty Regency HZO42 (Aus) Gas Fireplace...
- Page 43 (b) Loss means any expense, cost or damage of any kind and includes Consequential Loss and a fine or penalty imposed by a statutory or other authority. Revision Date: November 2016 Regency Outdoor Products Warranty Regency HZO42 (Aus) Gas Fireplace...
- Page 44 Product Registration and Customer Support: Thank you for choosing a Regency Fireplace. Regency strives to be a world leader in the design, manufacture, and marketing of hearth products. To provide the best support for your product, we request that you complete a product registration form at http://www.regency-fire.com.au/Customer-Care/Warranty-Registration.aspx...
- Page 45 Product Registration and Customer Support: Thank you for choosing a Regency Fireplace. Regency strives to be a world leader in the design, manufacture, and marketing of hearth products. To provide the best support for your product, we request that you complete a product registration form found on our Web Site under Customer Care within ninety (90) days of purchase.
- Page 46 Regency HZO42 (Aus) Gas Fireplace...
- Page 48 Dealer Name & Address: ______________________________________________ ___________________________________________________________________ Installer: ___________________________________________________________ Phone #: ___________________________________________________________ Date Installed: ______________________________________________________ Serial No.: __________________________________________________________ Regency is a trademark of FPI Fireplace Products International Ltd. Printed in Canada © Copyright 2016, FPI Fireplace Products International Ltd. All rights reserved.
Need help?
Do you have a question about the HZO42-NG and is the answer not in the manual?
Questions and answers