Satel VERSA User Manual
Hide thumbs
Also See for VERSA:
- Programming manual (87 pages) ,
- User manual (42 pages) ,
- Operating instructions manual (32 pages)
Table of Contents
Advertisement
Quick Links
Advertisement
Table of Contents

Related Manuals for Satel VERSA


Summary of Contents for Satel VERSA
-
Page 1: User Manual
USER MANUAL GDAŃSK versa_u_en 10/12... - Page 2 CAUTION! The security alarm system is fitted with a battery. Do not throw the used-up battery away, but recycle it as required by the existing regulations (European Directives 91/157/EEC and 93/86/EEC93/86/EEC). The declaration of conformity may be consulted at www.satel.eu/ce...
- Page 3 Changes made to the firmware version 1.03 User functions Diagnostic functions allow you to obtain information on the status of 433 MHz detectors supported by VERSA-MCU controller.
-
Page 4: Table Of Contents
User Manual SATEL CONTENTS Introduction ........................4 Technical Performance of Security Alarm System ............4 Alarm System Operating Costs ..................4 Glossary ..........................5 Control Panel Compliance with EN 50131 Standard Requirements for Grade 2 ....6 Operating the Alarm System with Keypad ................ 7 Display [LCD keypads] ...................... - Page 5 SATEL VERSA 6.18 Auto-arming deferment ......................32 6.18.1 Simple auto-arming deferment ....................32 6.18.2 Auto-arming deferment by means of function ................32 6.19 Setting the system time and date ..................32 6.20 Programming the timers ....................... 33 6.20.1 Programming the weekly schedule....................33 6.20.2...
-
Page 6: Introduction
SATEL 1. Introduction We are happy you have chosen a product offered by SATEL and hope you will be satisfied with your choice. Please be assured that we are always ready to provide you with professional assistance and information on our products. -
Page 7: Glossary
SATEL VERSA 4. Glossary Alarm – reaction of the alarm system to detection by the detectors of an intruder in the protected area, or to another event within the protected area (e.g. glass pane break, gas detection, etc.). The alarm can be signaled in keypads, proximity card arm/disarm device, or by sirens (during a defined time or until cleared). -
Page 8: Control Panel Compliance With En 50131 Standard Requirements For Grade 2
User Manual SATEL Proximity card – a passive transponder that allows the user to operate the alarm system by means of a proximity card reader (INT-CR and INT-IT proximity card arm/disarm devices are provided with the reader). Reporting – reporting events that occurred in the alarm system to the monitoring station. The information about occurrence of an event can be transmitted via telephone line, Ethernet network, etc. -
Page 9: Operating The Alarm System With Keypad
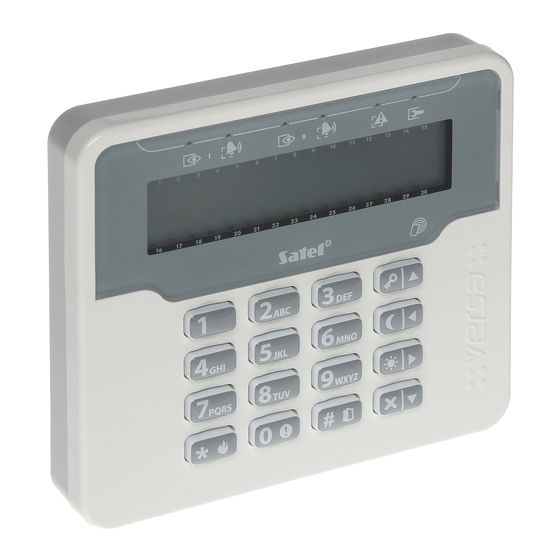
The keypads are available in a variety of color options for the display and key backlight. The color variant is indicated by the additional designation in the keypad name (e.g. VERSA-LCD-GR – green display and keys backlight; VERSA-LCDM-WH – white display and keys backlight). - Page 10 User Manual SATEL Fig. 2. VERSA-LED keypad. Fig. 3. VERSA-LCDM keypad.
-
Page 11: Display [Lcd Keypads]
SATEL VERSA 6.1 Display [LCD keypads] The liquid crystal (2x16 character) display in the LCD keypad facilitates communication between the user and the alarm system. It provides clear information about the system state and presents functions which are available to the user. If required, the display can be back- lighted. -
Page 12: Leds Presenting Zone Status [Led Keypads]
User Manual SATEL 6.2 LEDs presenting zone status [LED keypads] Note: If the GRADE 2 global option is enabled by the installer, the LED keypad LEDs will only present the zone status after the code is entered and confirmed by using the key. -
Page 13: Keys
- press and hold down the key for approx. 3 seconds in the LCD keypad to switch the display from normal mode to zone status presentation mode, and vice versa. The function is not available, if the installer has enabled the G 2 option. -
Page 14: Buzzer
– disabling the chime signal in keypad with the key; – switching over the LCD keypad display from the normal mode to the zone status presentation mode, and vice versa, by means of the key. 4 short beeps and 1 long beep – confirmation of: –... -
Page 15: Beeps Generated During Programming
SATEL VERSA 6.5.2 Beeps generated during programming 1 short beep – pressing any number key. 2 short beeps – entering the user menu, submenu or a function, or going to a next programming step. 3 short beeps – exiting the service function on pressing the key. -
Page 16: Arming Without Partition Selection
User Manual SATEL Notes: • The day/night arming modes are available if the installer has defined which zones are to be active in this armed mode. • If exit delay is programmed for a partition, you can leave the partition through the exit route without triggering alarm after the partition arming procedure has started. -
Page 17: Arming Without Delay
SATEL VERSA 6.7.4 Arming without delay The arming without delay means that the delayed zones will act as the instant ones (there will be no exit or entry delay). To arm without delay, the key corresponding to the selected arming mode ( ) should be pressed and hold for approx. -
Page 18: Failure Of Arming Procedure
User Manual SATEL "Violated zones 1=Ok 2=Check" – a warning that an alarm zone is violated in the partition, beyond the exit route. The user can: – press the key to cancel the arming; – press the key to force the arming – the arming procedure can be initiated despite the violated zones;... -
Page 19: Disarming And/Or Alarm Clearing In Selected Partition
SATEL VERSA Note: If no partition is armed or reporting alarm, you can enter the code and press the key to start the arming procedure. It is recommended to use the key for disarming/alarm clearing. 6.8.2 Disarming and/or alarm clearing in selected partition 1. -
Page 20: Triggering The Alarm From Keypad
User Manual SATEL To terminate the function of partition status presentation, press the key. The keypad will exit the function automatically after 2 minutes. 6.10 Triggering the alarm from keypad The installer may permit the alarms being triggered by means of respective keypad keys. -
Page 21: Step By Step" Programming Method
SATEL VERSA For example, to start the zone inhibiting function, enter the user menu and press successively the keys, where: - enter submenu 4. B YPASSES - start function 1. I NHIBIT Notes: • When using the numerical shortcuts, remember that the sequence of digits which starts a function e.g. -
Page 22: Entering Digits
[95#] 5. MS1 test test of telephone reporting to station 1 [96#] 6. MS2 test test of telephone reporting to station 2 [97#] 7. VERSA version checking firmware version of control panel [98#] 8. Expander ver. checking firmware version of system modules [99#] 9. -
Page 23: Entering Hexadecimal Values
SATEL VERSA Fig. 4. Examples of presenting decimal values by means of LEDs in the LED keypad. Example A: value 931708 has been programmed; example B – value 1605. Use the keys designated with numbers to enter digits. In the LCD keypad, the digits are presented on the display. -
Page 24: Change Own Code
User Manual SATEL key moves the cursor to the right, and the key – to the left. The deletes the character on the left side of the cursor. Characters available after next keystroke " & < > Table 2. Characters available in the LCD keypad when entering names. The lower case letters are available under the same keys (to change the letter case, press 6.13 Change own code... - Page 25 5. Step 5. Adding 433 MHz keyfob. If the INT-RX, INT-RX-S or VERSA-MCU module is connected to the control panel, the user may be assigned a 433 MHz keyfob. To add a keyfob, press in turn the...
- Page 26 User Manual SATEL – press any keyfob button – reception of the transmission by the module which supports the 433 MHz keyfobs will be acknowledged by two short beeps. Press the keyfob key again – two short beeps will confirm reception of the second transmission by the module which supports the 433 MHz keyfobs.
- Page 27 SATEL VERSA 39. Arming partitions 1 and 2 – full armed mode 40. Arming partitions 1 and 2 – night armed mode 41. Arming partitions 1 and 2 – day armed mode 42. Disarming / clearing alarm in partitions 1 and 2 43.
- Page 28 User Manual SATEL 10. Step 5e. Assigning function to 433 MHz keyfob button 3. Proceed in the same way as in Step 5c, and then press the key. 11. Step 5f. Assigning function to 433 MHz keyfob button 4. Proceed in the same way as in Step 5c, and then press the key.
- Page 29 SATEL VERSA corresponding to one of the following confirmation manners (see: E ) and NTERING DIGITS press key: 0. On LED is on, when the control panel has acknowledged receiving information on pressing a button 1. Output 1 state LED is on, when the selected output is active 2.
-
Page 30: User Editing
User Manual SATEL use the keys to scroll through the list of available devices, displayed in the lower line. In the LED keypad, the LEDs corresponding to the addresses of devices connected to the control panel, while the keys can be used to select one of the devices (the LED corresponding to the selected device will start blinking). -
Page 31: Removing A User
SATEL VERSA however when assigning functions to the buttons the control panel does not suggest the functions provided for by the user schedule. – edit functions assigned to the keyfob buttons, provided that the user has a 433 MHz keyfob – press in turn the keys. -
Page 32: Canceling The Telephone Messaging
User Manual SATEL 2. Select the user who is to be removed. In the LCD keypad, you can make your choice by scrolling through the list of users by using the keys. In the LED keypad, the system users are presented by lit LEDs with numbers corresponding to those of... -
Page 33: Zone Isolating
SATEL VERSA – zone is inhibited; – zone is isolated. Pressing any number key will change the displayed symbol to one of the following ones: – the zone is to be inhibited; – the zone is to be unbypassed. Press the key to switch the keypad over to graphic mode. -
Page 34: Auto-Arming Deferment
User Manual SATEL Note: If the installer has enabled the G 2 option in the control panel, he can use two RADE functions to view the event log: – enter the user menu and press in turn the keys to display all events stored in the control panel memory;... -
Page 35: Programming The Timers
Press suitable number keys to enter in turn the year, month and day, and then press key. 6.20 Programming the timers The VERSA control panels enable 4 timers to be programmed. Using the timers, you can control the partition armed mode and the 15. C outputs. The timer compares the ONTROLLED time with the control panel clock and executes the selected function at a preset time. -
Page 36: Programming An Exception
User Manual SATEL digit, the time will not be programmed). In the LCD keypad, the values being programmed are displayed, the key moves the cursor to the right, and the key - to the left. In the LED keypad, the whole sequence of 8 digits is to be entered at once. As only the first 6 out of 8 digits can be presented on the LEDs, programming by means of the LED keypad is not recommended. -
Page 37: Programming The Telephone Numbers To Be Notified
SATEL VERSA 6.21 Programming the telephone numbers to be notified This function can be started by the user who has the P right. ROGRAMMING 1. Enter the user menu and press in turn the keys. 2 short beeps will confirm entering the function, and the LED will go on. -
Page 38: Programming Codes To Acknowledge Messaging
User Manual SATEL Special character Function description switch-over to pulse dialing switch-over to tone dialing (DTMF) waiting for additional signal 3 second pause 10 second pause signal in DTMF mode signal # in DTMF mode other signals generated in DTMF mode Table 5. -
Page 39: Trouble List
SATEL VERSA – partition status (disarmed/armed mode) – this information is always presented. If the G 2 option is not enabled, only information about troubles is displayed. RADE 6.23.1 Trouble list The display in LCD keypad provides information on troubles in the form of messages. The list can be scrolled through by using the keys. -
Page 40: Trouble Memory And Clearing The Trouble Memory
Note: In the event of failure of the control panel processor system (HSE), when you have exited the 7. S function by using the key, the "Make VERSA panel YSTEM STATE restart? 1=Yes" message will be displayed on the LCD keypad, and the LED will start blinking rapidly in the LED keypad. -
Page 41: Tests
SATEL VERSA LCD keypad After starting the function, information on the first of the 15. C type outputs ONTROLLED will be displayed, the output number being shown in the upper line and the output name in the lower line of display. You can scroll through the list of outputs by using the keys. -
Page 42: Output Test
6.25.3 Checking radio signal from wireless devices Using the keypad, you can check: – if the VERSA-MCU controller is connected to the control panel – the quality of radio signal received by the controller from 433 MHz wireless detectors; – if the ACU-100 or ACU-250 controller is connected to the control panel – the level of radio signal received by the controller from ABAX wireless devices. -
Page 43: Checking The Firmware Version Of Control Panel
SATEL VERSA Messages with information on the currently realized operations will appear on the display. 6.25.6 Checking the firmware version of control panel Note: The function is only available in the LCD keypad. Enter the user menu and press in turn the keys. -
Page 44: Service Code Access Rules
User Manual SATEL 6.26.1 Service code access rules With the S function, the user can define the rules of access to the alarm ERVICE ACCESS system by persons using the service code. Permanent access – the service code has unlimited access to the alarm system. -
Page 45: Operating The Alarm System By Means Of Proximity Cards
SATEL VERSA 7. Operating the Alarm System by means of Proximity Cards The alarm system can be operated by means of proximity card, if a proximity card arm/disarm device is connected to the control panel. Using the proximity card you can: •... -
Page 46: Buzzer
User Manual SATEL All LEDs blinking steadily – no communication with control panel. 7.2 Buzzer 7.2.1 Beeps generated when operating If the S ) option is enabled, the device will generate a single short IGNALING CARD HARDWARE beep after the card has been read and – if the card is held up – after each successive LED comes on. -
Page 47: Disarming And Alarm Clearing
3 short beeps. 8. Operating the Alarm System by means of Keyfob If the INT-RX, INT-RX-S, VERSA-MCU, ACU-100 or ACU-250 module is connected to the control panel, the user can remotely control the system by means of a keyfob. Pressing a button or combination of buttons in the keyfob may result in: •... - Page 48 User Manual SATEL Fig. 5. APT-100 keyfob. A – numeration of LEDs. B – numeration of keyfob buttons. Fig. 6. T-4 keyfob (433 MHz keyfob). A – numeration of keyfob buttons. Fig. 7. MPT-300 keyfob (433 MHz keyfob). A – numeration of keyfob buttons.
-
Page 49: Denial Of Arming And Forced Arming By Means Of Keyfob
SATEL VERSA 8.1 Denial of arming and forced arming by means of keyfob Note: The information given below is not applicable, if the keyfob button controls arming zone. The installer can program the control panel so that arming by means of keyfob is not possible when: –... -
Page 50: Starting The Operating By Telephone
User Manual SATEL 9.1 Starting the operating by telephone 1. Dial the control panel phone number. The control panel will answer after a preset number of rings or after the second call (depending on the preprogrammed settings). Establishing connection will be signaled by three short beeps. -
Page 51: History Of Changes To The Manual Content
SATEL VERSA 11. History of Changes to the Manual Content IRMWARE NTRODUCED CHANGES VERSION • Section "Codes" has been added (p. 13). 2011-06 1.02 • List of user functions has been supplemented (p. 19). • Table presenting default user schedules has been supplemented by the new "INT-VG access"... -
Page 52: Brief Description Of Operating The System With A Keypad
User Manual SATEL 12. Brief Description of Operating the System with a Keypad lit – partition armed information on alarm or alarm memory acc. to repeating blinking – partition exit delay countdown scheme of 2-second duration: – fire alarm, – burglary alarm, –... - Page 53 Simple auto-arming deferment [94#] Manual Monitoring Station test [95#] Monitoring Station 1 test press twice the [96#] Monitoring Station 2 test [97#] VERSA firmware version [98#] Expander firmware version [99#] Supply voltage [90#] Outputs reset [0] Service [00#] Service mode...
- Page 54 SATEL sp. z o.o. ul. Schuberta 79 80-172 Gdańsk POLAND tel. + 48 58 320 94 00 info@satel.pl www.satel.eu...
Need help?
Do you have a question about the VERSA and is the answer not in the manual?
Questions and answers