Table of Contents
Advertisement
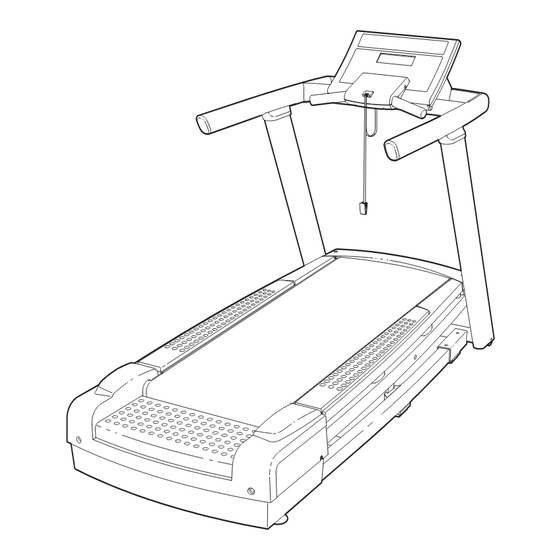
Model No. VMTL82907.0
Serial No.
Write the serial number in the space
above for future reference.
Serial
Number
Decal
Q
UESTIONS?
At FreeMotion Fitness, we are
committed to providing complete
customer satisfaction. If you have
questions, or if parts are damaged
or missing, PLEASE CONTACT
THE STORE WHERE YOU PUR-
CHASED THIS PRODUCT.
If you are unable to contact the
store, please see HOW TO
CONTACT CUSTOMER CARE on
page 2.
www.proform.com
new products, prizes,
fitness tips, and much more!
CAUTION
Read all precautions and in-
structions in this manual before
www.healthrider.com
using this equipment. Keep this
manual for future reference.
new products, prizes,
fitness tips, and much more!
Visit our website at
Visit our website at
USER'S MANUAL
Visit our website at
www.weslo.com
new products, prizes,
fitness tips, and much more!
Visit our website at
www.freemotionfitness.com
Advertisement
Table of Contents

Related Manuals for Freemotion VMTL82907.0


Summary of Contents for Freemotion VMTL82907.0
- Page 1 Write the serial number in the space above for future reference. Serial Number Decal UESTIONS? At FreeMotion Fitness, we are committed to providing complete customer satisfaction. If you have questions, or if parts are damaged or missing, PLEASE CONTACT THE STORE WHERE YOU PUR- CHASED THIS PRODUCT.
-
Page 2: Table Of Contents
Exploded Drawing ............. . .32 FREEMOTION is a registered trademark of ICON IP, Inc. -
Page 3: How To Contact Customer Care
PART LIST and the EXPLODED DRAWING near the end of this manual). Call Toll-free in the US: 1-866-799-8946, Mon.–Fri. 8 a.m.–5 p.m. MST Direct: 1-719-533-2900 International: +1-719-533-2911 Email US: fmfvmcustomerservice@freemotionfitness.com International: intlcustomercare@freemotionfitness.com Write FreeMotion Fitness 1096 Elkton Drive Suite 600 Colorado Springs, CO 80907... -
Page 4: Important Precautions
IMPORTANT PRECAUTIONS WARNING: To reduce the risk of serious injury, read all important precautions and in- structions in this manual and all warnings on your treadmill before using your treadmill. FREEMO- TION FITNESS assumes no responsibility for personal injury or property damage sustained by or through the use of this product. - Page 5 DANGER: 20. Never leave the treadmill unattended while it is Always unplug the power running. Always remove the key, unplug the cord immediately after use, before cleaning power cord, and move the reset/off circuit the treadmill, and before performing the breaker to the “off”...
-
Page 6: Warning Decal Placement
WARNING DECAL PLACEMENT The decal shown at the right has been applied in the indi- cated locations. If a decal is missing or illegible, please see the front cover of this manual and request a free replacement decal. Apply the decal in the location 259345 shown. -
Page 7: Before You Begin
BEFORE YOU BEGIN Congratulations for selecting the revolutionary ing this manual, please see the front cover of this man- FREEMOTION ® t7.3 treadmill. The t7.3 treadmill offers ual. To help us assist you, note the product model an impressive array of features designed to help you number and serial number before contacting us. -
Page 8: Assembly
3 1/2” Bolt (64)–2 ASSEMBLY Assembly requires two persons. Set the treadmill in a cleared area and remove all packing materials. Do not dispose of the packing materials until assembly is completed. Assembly can be completed using the included hex key and your own adjustable wrench 1/2”... - Page 9 1. Place the Uprights (96) near the front of the Base Frame (75) as shown. Connect the 55" Wire Harness (48) in the right Upright (96) to the 80" Wire Harness (46) in the Base Frame (75). See the inset drawing. The connectors should slide easily and snap into place.
-
Page 10: Upright (96). Attach The Left Upright Bracket With Two 3/8" X 2" Bolts (3) And Two 3/8" Star
3. Note: The Wheels (91) may be preattached. If they are not, complete this step. With the help of a second person, carefully raise the Uprights (96) and insert a Wheel (91) into the bottom of each Upright. Attach each Wheel (91) with a 3/8" x 2 1/2" Wheel Bolt (34), a 3/8"... -
Page 11: How To Move The Treadmill
5. Have a second person hold the Handrail (100) near the Upright Brackets (98, 99). Connect the 55" Wire Harness (48) in the Right Upright Bracket (98) to the 35" Wire Harness (47). See the inset drawing in step 1. The con- nectors should slide easily and snap into place. -
Page 12: Treadmill Operation
TREADMILL OPERATION THE PRE-LUBRICATED WALKING BELT resistance for electric current to reduce the risk of elec- tric shock. This product is equipped with a cord having Your treadmill features a walking belt coated with high- an equipment-grounding conductor and a grounding performance lubricant. - Page 13 CONSOLE DIAGRAM SPEED FEATURES OF THE CONSOLE The console also features the new iFIT Interactive Workout system. The iFIT system is compatible with The treadmill console offers an impressive array of iFIT Interactive Workout Cards containing workout pro- features designed to make your workouts more effec- grams designed to help you achieve specific fitness tive and enjoyable.
- Page 14 HOW TO TURN ON THE POWER HOW TO USE THE MANUAL MODE IMPORTANT: If the treadmill has been exposed to 1. Insert the key into the console. cold temperatures, allow it to warm to room tem- perature before turning on the power. If you do not See HOW TO TURN ON THE POWER to the left.
- Page 15 5. Select a display mode and monitor your • Your exercise intensity in mets. One met is the progress with the display. amount of energy you use while resting. When the manual • Your power output in watts. mode is selected, the console offers Regardless of which display mode you select, the seven display...
- Page 16 HOW TO USE A PERSONAL TRAINER WORKOUT During the workout, Current Segment the profile will show 1. Insert the key into the console. your progress. The flashing segment of See HOW TO TURN ON THE POWER on page the profile repre- sents the current segment of the workout.
- Page 17 HOW TO USE A MANUAL CONTROL WORKOUT 3. Press the Start/Stop button to start the workout. 1. Insert the key into the console. A moment after you press the Start/Stop button, the treadmill will begin moving. Hold the handrails See HOW TO TURN ON THE POWER on page and begin walking.
- Page 18 The FreeMotion Fitness Test measures your fitness level on a scale of 1 to 10. The FreeMotion Fitness Test ends after 28 minutes or when you reach a certain Note: If you press the Start/Stop button during the heart rate.
- Page 19 HOW TO USE A HEART RATE WORKOUT The heart rate workouts are divided into several one-minute segments. One target heart rate setting is programmed for each segment. The same target CAUTION: heart rate setting may be programmed for consec- If you have heart prob- lems, or if you are over 60 years of age and utive segments.
- Page 20 HOW TO USE AN IFIT WORKOUT At the end of each one-minute segment, the speed and incline settings for the next segment will appear 1. Insert the key into the console. in the display and a series of tones will sound to alert you.
- Page 21 HOW TO USE THE MAINTENANCE MODE Next, press the Display button to move the cursor to the pause timeout. Set the pause timeout, if de- The console has a maintenance mode that keeps track sired. The pause timeout begins when the walking of the total number of hours that the treadmill has been belt stops.
-
Page 22: Preventive Maintenance
PREVENTIVE MAINTENANCE Regular maintenance is necessary for optimal performance and long life of the treadmill. Please read and follow all instructions below. If the treadmill is not maintained as described, components may wear ex- cessively, the treadmill may be damaged, and the warranty will be voided. If you have questions about main- tenance, please see the front cover of this manual. - Page 23 REPLACING THE WALKING BELT When the walking belt becomes worn, it should be replaced. The walking belt will need to be replaced after every 10,000 to 15,000 miles (16,000 to 24,000 kilometers). See the Service Manual for replacement instructions. Please see the front cover of this manual to order a new walking belt. REPLACING THE WALKING PLATFORM When both sides of the walking platform become worn, the walking platform should be replaced.
- Page 24 3. Note: Be very careful to avoid chipping or damaging the phe- nolic coating on the Walking Platform (63). Lift the Walking Platform and the Walking Belt (64) to the position shown by the dot- ted lines. Slide the Walking Platform out of the Walking Belt, turn it, and then slide it back into the Walking Belt.
-
Page 25: Six-Month Preventive Maintenance Record
SIX-MONTH PREVENTIVE MAINTENANCE RECORD Photocopy this form and use it to record the preventive maintenance performed on the treadmill. Each copy of the form can be used for six months (26 weeks). When maintenance is performed, write the date in the appropriate spaces. -
Page 26: Troubleshooting
TROUBLESHOOTING Most treadmill problems can be solved by following the steps below. Find the symptom that applies, and follow the steps listed. If further assistance is needed, please see the front cover of this manual. PROBLEM: The power does not turn on SOLUTION: a. - Page 27 PROBLEM: The walking belt is off-center or slips when walked on SOLUTION: a. If the walking belt has shifted to the right: Remove the key and unplug the power cord. Using the included hex key, turn the 5/16" x 4 3/8"...
-
Page 28: Exercise Guidelines
EXERCISE GUIDELINES body uses carbohydrate calories for energy. Only after WARNING: the first few minutes of exercise does your body begin Before beginning any to use stored fat calories for energy. If your goal is to exercise program, consult your physician. burn fat, adjust the intensity of your exercise until your This is especially important for persons over heart rate is near the lowest number in your training... - Page 29 SUGGESTED STRETCHES The correct form for several basic stretches is shown at the right. Move slowly as you stretch—never bounce. 1. Toe Touch Stretch Stand with your knees bent slightly and slowly bend forward from your hips. Allow your back and shoulders to relax as you reach down toward your toes as far as possible.
-
Page 30: Limited Warranty
This product when used in a residential setting is war- product experiences a failure under the warranty terms ranted for the following periods: set forth, FreeMotion Fitness shall provide at their op- Frame: Lifetime tion repair, replacement, or refund of the purchase Motor: 10 years price. -
Page 31: Part List
PART LIST—Model No. VMTL82907.0 R1107A To locate the parts listed below, see the EXPLODED DRAWING near the end of this manual. Key No. Qty. Description Key No. Qty. Description 1/2" x 3 1/4" Bolt Key/Clip 1/4" x 1" Bolt Motor Washer 3/8"... - Page 32 Key No. Qty. Description Key No. Qty. Description Handrail Back 3/8" Platform Nut Speed Sensor #10 Star Washer 1/4" x 1/2" Bracket Bolt #8 x 3/4" Ground Screw Hand Grip Bracket #8 Lock Nut Console Cover 8" Cable Tie Caution Decal Wire Tie Cable Tie #10 x 3/4"...
-
Page 33: Exploded Drawing
EXPLODED DRAWING A—Model No. VMTL82907.0 R1107A... - Page 34 EXPLODED DRAWING B—Model No. VMTL82907.0 R1107A...
- Page 35 EXPLODED DRAWING C—Model No. VMTL82907.0 R1107A 116 116...
- Page 36 EXPLODED DRAWING D—Model No. VMTL82907.0 R1107A...
- Page 37 EXPLODED DRAWING E—Model No. VMTL82907.0 R1107A...
- Page 38 NOTES...
- Page 39 FreeMotion Fitness, Inc. • 1096 Elkton, Suite 600 • Colorado Springs, CO 80907 Part No. 251792 R1107A Printed in USA © 2007 ICON IP, Inc.
Need help?
Do you have a question about the VMTL82907.0 and is the answer not in the manual?
Questions and answers