VADDIO RoboSHOT 12 HDBT Installation Manual
High-performance ptz cameras
Hide thumbs
Also See for RoboSHOT 12 HDBT:
- Configuration and administration manual (43 pages) ,
- Complete manual (111 pages) ,
- Installation manual (34 pages)

Related Manuals for VADDIO RoboSHOT 12 HDBT


Summary of Contents for VADDIO RoboSHOT 12 HDBT
- Page 1 Installation Guide for RoboSHOT 12 HDBT and RoboSHOT 30 HDBT High-Performance PTZ Cameras Document 411-0003-31 Rev B February 2017...
-
Page 2: Table Of Contents
Contents Overview What's in this Guide Camera Features Unpacking the Camera A Quick Look at the Camera Front of the Camera Back of the Camera Switch Settings Video Resolution Camera Settings Installation Before You Install the Camera Don’t Void Your Warranty! Operation, Storage, and Care Cabling Notes Installing the Wall Mount... -
Page 3: Overview
Download manuals, dimensional drawings, and other information from www.vaddio.com/support. Camera Features RoboSHOT 12 HDBT: Exmor® 1/2.8 type, high-speed, low-noise image sensor; 12X optical zoom; 73° horizontal field of view in wide mode – perfect for small to medium rooms RoboSHOT 30 HDBT: Exmor R™ back-lit 1/2.8 type, high-speed, low-noise image sensor; 30X optical zoom;... -
Page 4: Unpacking The Camera
12 VDC, 3.0 Amp Switching Power Supply AC Cord Set for North America Quick-Start Guide (342-1219) RoboSHOT 12 HDBT, Europe and UK – 999-9960-001 RoboSHOT 12 HDBT Camera (998-9960-000) Thin Profile Wall Mount with Mounting Hardware (535-2000-240) Vaddio IR Remote Commander (998-2100-000) 12 VDC, 3.0 Amp Switching Power Supply... - Page 5 Installation Guide for RoboSHOT HDBT High-Performance PTZ Cameras RoboSHOT 12 HDBT, Australia and New Zealand – 999-9960-009 RoboSHOT 12 HDBT Camera (998-9960-000) Thin Profile Wall Mount with Mounting Hardware (535-2000-240) Vaddio IR Remote Commander (998-2100-000) 12 VDC, 3.0 Amp Switching Power Supply...
- Page 6 Thin Profile Wall Mount with Mounting Hardware, black or white depending on camera color (535-2000- 240 or 535-2000-240W) Vaddio IR Remote Commander (998-2100-000) 12 VDC, 3.0 Amp Switching Power Supply Power Cord for Australia and New Zealand Quick-Start Guide (342-1219) Download manuals, dimensional drawings, and other information from www.vaddio.com/support.
-
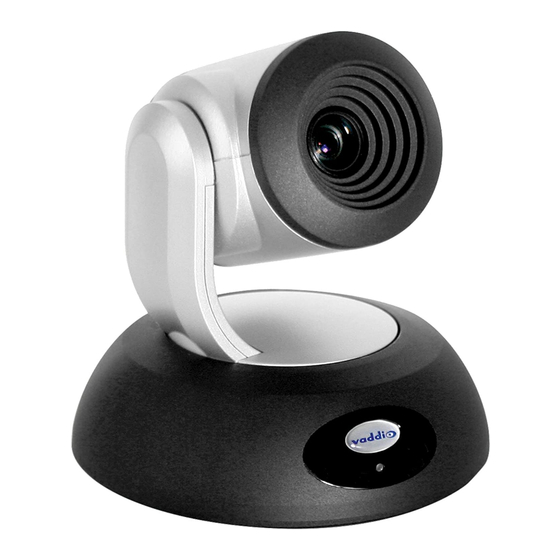
Page 7: A Quick Look At The Camera
Front of the Camera Camera and Zoom Lens: The 12 and 30 models use different optical components. RoboSHOT 12 HDBT: 12X optical zoom lens (12X in Super-Wide mode and 10X in normal mode), Exmor 1/2.8-type, high-speed, low noise image sensor RoboSHOT 30 HDBT: 30X optical zoom lens, Exmor-R 1/2.8 type, backlit, high-speed, low-noise, image sensor IR Sensors: Sensors in the front of the camera base receive signals from the remote. -
Page 8: Back Of The Camera
Installation Guide for RoboSHOT HDBT High-Performance PTZ Cameras Back of the Camera Rear panel connections are identical for both models. From left to right: Power connector: If not using a OneLINK HDMI extension module, use the 12 VDC, 3.0 A power supply shipped with the camera. -
Page 9: Camera Settings
Image Flip: If mounting the camera upside-down, set switch 4 to the DOWN position: IMAGE FLIP ON. Super Wide Mode (RoboSHOT 12 HDBT only): To use Super-wide mode, set switch 5 to the DOWN position. This gives 12X zoom with a 73º horizontal angle of view. Normal mode provides 10X zoom with a 67.2º... -
Page 10: Installation
Do not install or operate this product if it has been dropped, damaged, or exposed to liquids. If any of these things happen, return it to Vaddio for safety and functional testing. DomeVIEW enclosures are available to allow outdoor installation of RoboSHOT cameras. Learn more at www.vaddio.com/products. -
Page 11: Cabling Notes
Installation Guide for RoboSHOT HDBT High-Performance PTZ Cameras Cabling Notes Use Cat-5e or better cable and standard RJ-45 connectors (568B termination). We recommend using high- quality connectors and a high-quality crimping tool. Caution Check Cat-5 cables for continuity before using them. Using the wrong pin-out may damage the camera system and void the warranty. -
Page 12: Installing The Wall Mount
Installation Guide for RoboSHOT HDBT High-Performance PTZ Cameras Installing the Wall Mount All RoboSHOT cameras include a Thin Profile Wall Mount. Other mounting options are available as well. Contact us if you don't have the camera mount you need. You can install the camera wall mount to a 2-gang wall box or directly to the drywall. If you mount it to drywall, use the wall anchors provided with the wall mount. -
Page 13: Basic Connection Diagram
Installation Guide for RoboSHOT HDBT High-Performance PTZ Cameras Basic Connection Diagram The Quick-Start Guide for RoboSHOT HDBT Cameras provides additional information. Note The OneLINK™ HDMI extension module is not required; the camera can be connected directly to the network. Options for Power and Other Connections Connect the camera to a OneLINK HDMI camera extension module –... -
Page 14: Installing The Camera
Installation Guide for RoboSHOT HDBT High-Performance PTZ Cameras Installing the Camera Caution Before you start, be sure you can identify all cables correctly. Connecting a cable to the wrong port can result in equipment damage. Caution Check Cat-5 cables for continuity before using them. Using the wrong pin-out may damage the camera system and void the warranty. -
Page 15: Powering Up The Camera
Installation Guide for RoboSHOT HDBT High-Performance PTZ Cameras Powering Up the Camera Connect camera power. The camera will wake up and initialize. This will take a few seconds. When the camera is initialized and ready, its front indicator is blue. At this point, it is ready to accept control information. Note Wait until the camera finishes initializing before trying to control it using the IR remote or other command input. -
Page 16: Compliance Statements And Declarations Of Conformity
(2) This device must accept any interference including interference that may cause undesired operation of the device. Changes or modifications not expressly approved by Vaddio can affect emission compliance and could void the user’s authority to operate this equipment. -
Page 17: European Compliance
Installation Guide for RoboSHOT HDBT High-Performance PTZ Cameras European Compliance This product has been evaluated for electromagnetic compatibility under the EMC Directive for Emissions and Immunity and meets the requirements for a Class A digital device. In a domestic environment this product may cause radio interference in which case the user may be required to take adequate measures. ... -
Page 18: Warranty Information
Vaddio receives notice of such defects during the warranty. Vaddio, at its option, will repair or replace products that prove to be defective. Vaddio manufactures its hardware products from parts and components that are new or... -
Page 19: Index
power options 11 product returns and repairs 16 Index resolution 6 switch setting 6 anatomy of the camera 5 RJ-45 connectors 9 baud rate setting 7 shelf-mounted cameras 12 behavior on power-up 13 shelf, camera mount 10 status light, meanings of colors 5 storage environment 8 cable connectors 9 super-wide mode setting (DIP switch) 7... - Page 20 Vaddio, RoboSHOT, and OneLINK are trademarks or registered trademarks of Milestone AV Technologies. HDBaseT™ and the HDBaseT Alliance logo are trademarks of the HDBaseT Alliance. Exmor® is a trademark of Sony Corporation. All other brand names or marks are used for identification purposes and are trademarks of their respective owners.
Need help?
Do you have a question about the RoboSHOT 12 HDBT and is the answer not in the manual?
Questions and answers