Table of Contents
Advertisement
Quick Links
User's Manual
Thank you very much for purchasing this product.
To ensure correct and safe usage with a full understanding of this product's performance, please
be sure to read through this manual completely and store it in a safe location.
Unauthorized copying or transferral, in whole or in part, of this manual is prohibited.
The contents of this operation manual and the specifications of this product are subject to
change without notice.
The operation manual and the product have been prepared and tested as much as possible. If
you find any misprint or error, please inform us.
Roland DG Corp. assumes no responsibility for any direct or indirect loss or damage which
may occur through use of this product, regardless of any failure to perform on the part of this
product.
Roland DG Corp. assumes no responsibility for any direct or indirect loss or damage which may
occur with respect to any article made using this product.
Advertisement
Table of Contents

Related Manuals for Roland MDX-40A


Summary of Contents for Roland MDX-40A
- Page 1 Roland DG Corp. assumes no responsibility for any direct or indirect loss or damage which may occur with respect to any article made using this product.
- Page 3 This is a Class A product. In a domestic environment this product may cause radio interference in which case the user may be required to take adequate measures. Roland DG Corp. has licensed the MMP technology from the TPL Group.
- Page 4 Operating Instructions USE RECOMMENDED ACCESSORIES. Consult the owner's manual for recommended accessories. The use of KEEP GUARDS IN PLACE and in working order. improper accessories may cause risk of injury to persons. REMOVE ADJUSTING KEYS AND WRENCHES. Form NEVER STAND ON TOOL. Serious injury could occur habit of checking to see that keys and adjusting wrenches if the tool is tipped or if the cutting tool is unintentionally are removed from tool before turning it on.
-
Page 5: Table Of Contents
Contents To Ensure Safe Use ..................6 Pour utiliser en toute sécurité ..............13 Important Notes on Handling and Use.............20 About the Documentation for This Machine ...........21 Documentation Included with the Machine ..........21 Installing the NC Code Reference MANUAL ..........21 Viewing the NC Code Reference MANUAL ..........22 Chapter 1 Getting Started ................23 1-1 Machine Highlights ................24 Overview of the Unit ........................24... - Page 6 Contents 3-3 Selecting the Command Set ..............46 What is Command Set? ........................46 Selecting Command Set ......................46 3-4 Moving the Tool ..................48 Manual Feed .............................48 About the Displayed Tool Position ...................49 Moving to a Specific Position .....................51 Moving to the VIEW Position ......................51 3-5 Starting and Stopping Spindle Rotation ..........52 Starting or Stopping the Spindle ....................52 3-6 Pausing/Resuming/Quitting of Cutting ..........53...
- Page 7 External View ............................92 Dimensional Drawings of the Table Area ................93 Main Specifications ........................94 System Requirements for USB Connection ................95 Company names and product names are trademarks or registered trademarks of their respective holders. Copyright © 2009 Roland DG Corporation http://www.rolanddg.com/...
-
Page 8: To Ensure Safe Use
To Ensure Safe Use Improper handling or operation of this machine may result in injury or damage to prop- erty. Points which must be observed to prevent such injury or damage are described as follows. About WARNING and CAUTION Notices Used for instructions intended to alert the user to the risk of death WARNING or severe injury should the unit be used improperly. - Page 9 Doing so may result in injury or fire. Roland DG Corp. dealer. Never use a cutting tool that has become dull. Perform frequent main- tenance to keep and use the machine in good working order.
- Page 10 To Ensure Safe Use This machine weighs 65 kg (144 lb.) CAUTION Unloading and emplacement are op- erations that must be performed by 4 persons or more. Tasks that require undue effort when performed by a small number of persons may result in physical injury.
- Page 11 Inserting objects such as coins or matches or allowing beverages to be spilled into the ventilation ports may re- sult in fire or electrical shock. If anything gets inside, immediately disconnect the power cord and contact your authorized Roland DG Corp. dealer.
- Page 12 Continuing to use the machine may result in fire, electrical shock, or injury. voltage, frequency, and current). Use of multiple electrical loads on a Contact your authorized Roland DG single electrical outlet or of a lengthy Corp. dealer. extension cord may cause fire.
- Page 13 To Ensure Safe Use Important notes about the power cord, plug, and electrical outlet Never place any object on top or subject to Never allow to get wet. damage. Never bend or twist with undue force. Never make hot. Dust may cause fire. Never pull with undue force.
- Page 14 To Ensure Safe Use Warning Labels Warning labels are affixed to make areas of danger immediately clear. The meanings of these labels are as follows. Be sure to heed their warnings. Also, never remove the labels or allow them to become obscured. Caution: Pinching Hazard Be careful not to allow the fin- gers to become pinched when...
-
Page 15: Pour Utiliser En Toute Sécurité
Pour utiliser en toute sécurité La manipulation ou l'utilisation inadéquates de cet appareil peuvent causer des blessures ou des dommages matériels. Les précautions à prendre pour prévenir les blessures ou les dommages sont décrites ci-dessous. Avis sur les avertissements Utilisé pour avertir l'utilisateur d'un risque de décès ou de blessure ATTENTION grave en cas de mauvaise utilisation de l'appareil. - Page 16 Le non-respect de cette consigne peut Si le couvercle transparent à l'avant causer des blessures ou un incendie. ou sur lecôté de l'appareil est fissuré, communiquer avecle revendeur ou le centre de service autorisésde la société Roland DG.
- Page 17 Pour utiliser en toute sécurité Le poids de cet appareil est de 65 kg (144 lb.) PRUDENCE PRUDENCE Installer l’appareil à un endroit stable Le déchargement et la mise en place doivent être faits par au moins 4 et plat. personnes.
- Page 18 Pour utiliser en toute sécurité Certains éléments peuvent présenter un risque de pincement, d’emmêlement, de brûlure ou d’autres dangers. ATTENTION ATTENTION Ne jamais faire fonctionner l’appareil Faire preuve de prudence pour éviter l’écrasement ou le coincement. si on porte une cravate, un collier ou des vêtements amples.
- Page 19 Installer d’alimentation et communiquer avec le l’appareil près d’une prise électrique. représentant Roland DG autorisé. En outre, prévoir suffisamment d’espace Ne jamais placer d’objet inflam- pour que la prise électrique soit facile mable à...
- Page 20 Pour utiliser en toute sécurité Remarques importantes à propos du câble d'alimentation, de la fiche et de la prise électrique Ne jamais déposer aucun objet sur le câble, Ne jamais laisser l'eau toucher le câble, la sur la fiche ou sur la prise car cela risque de fiche ou la prise.
- Page 21 Pour utiliser en toute sécurité Vignettes d'avertissement Des vignettes d'avertissement sont apposées pour qu'il soit facile de repérer les zones dangereuses. La signification des vignettes est donnée ci-dessous. Respecter les aver- tissements. Ne jamais retirer les vignettes et ne pas les laisser s'encrasser. Attention : risque de pincement Avant Faites attention de ne pas coincer...
-
Page 22: Important Notes On Handling And Use
Important Notes on Handling and Use This machine is a precision device. To ensure the full performance of this machine, be sure to observe the following important points. Failure to observe these may not only result in loss of performance, but may also cause malfunction or breakdown. This machine is a precision device. -
Page 23: About The Documentation For This Machine
36, "Installing and Setting Up the Software." Log on to Windows as “Administrators.” Insert the Roland Software Package CD-ROM into the computer. (Windows Vista: When the automatic playback window appears, click [Run menu.exe].) The setup menu appears automatically. -
Page 24: Viewing The Nc Code Reference Manual
About the Documentation for This Machine Click [NC Code Manual Install]. Setup menu Follow the messages to install the program. (Windows Vista: The [User Account Control] appears, click [Allow]. Follow the messages to install the program.) Click of the install window to complete the installation. -
Page 25: Chapter 1 Getting Started
Chapter 1 Getting Started This section describes the features of the machine, the part names, and the functions. 1-1 Machine Highlights ............. 24 Overview of the Unit ............24 Operating the Machine ..........24 1-2 Part Names and Functions ......... 25 Front ................ -
Page 26: Machine Highlights
RML-1/NC code support This machine supports both RML-1 and NC code; therefore it is applicable for a wide-range of software. RML-1 is a control command exclusive to Roland D.G. modeling machine. When outputting from the included application to the machine. -
Page 27: Part Names And Functions
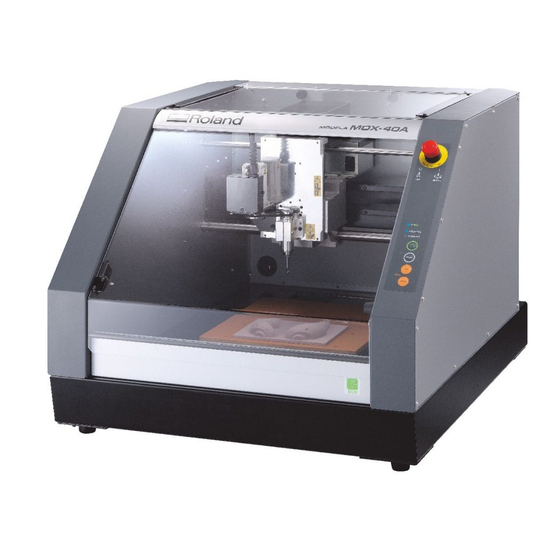
1-2 Part Names and Functions Front Emergency Stop but- Spindle head Pressing this stops opera- tion of the machine. P. 42, ”Types of Emer- gency Stops to Ensure Safety” Workpiece table The workpiece to be cut is mounted on this. Built-in panel You use this to switch the sub power on and... -
Page 28: Side
1-2 Part Names and Functions Side Right side Expansion port This is a connector for external equip- ment. P. 91, “Expansion Connector” USB connector This is for connecting a USB cable. P. 35, “Connecting to the Computer” Main power switch Power-cord connector Left side Sensor connector... -
Page 29: Vpanel
1-2 Part Names and Functions VPanel Operation of the machine is controlled from the screen of your computer. VPanel is a dedicated software for controlling the machine. Coordinates This displays the present tool loca- tion. P. 49, "About the Displayed Tool Posi- tion"... -
Page 30: Built-In Panel
1-2 Part Names and Functions Built-in Panel Power lamp Lights up when the machine is operating. MODELING lamp This lights up when the Sub power button is pressed. Sub power button Press this button to start the ma- SCANNING lamp (optional) chine when the main power switch This lights up while using the op- is on. -
Page 31: Chapter 2 Installation And Setup
Chapter 2 Installation and Setup This describes what you need to do before you use the machine, including checking and verifying the included items, how to install the machine, and how to install and set up the included softwares. 2-1 Checking the Included Items ........30 2-2 Installation .............. -
Page 32: Checking The Included Items
2-1 Checking the Included Items The following items are included with the machine. Make sure they are all present and accounted for. Power cord USB cable Collet Hexagonal wrench Roland Software Hexagonal screw Spanners Z0 Sensor drivers Package CD-ROM User’s Manual... -
Page 33: Installation
2-2 Installation Installation Environment WARNING Unloading and emplacement are operations that must be performed by 4 persons or more. Tasks that require undue effort when performed by a small number of persons may result in physical injury. Also, if dropped, such items may cause injury. - Page 34 2-2 Installation Installation Space Ensure that at least the following amount of space is available. Work space Installation space 1.0 m (3.3 ft.) 2.0 m (6.6 ft.) Height of Installation The height of installation should be 0.6 m (23.7 in.) or higher above the work floor. This machine is desktop type.
-
Page 35: Removing And Storing The Retainers
2-2 Installation Removing and Storing the Retainers Retaining materials are attached to protect the machine from vibration during shipment. When instal- lation is complete, remove these and store in the specified locations. Remove all Retaining materials. Any that remain may cause faulty operation or breakdown when the power is switched on. -
Page 36: Cable Connections
2-3 Cable Connections Connecting the Power Cord WARNING Do not use with any electrical power supply that does not meet the ratings displayed on the unit. Use with any other power supply may lead to fire or electrocution. WARNING Handle the power cord, plug, and electrical outlet correctly and with care. -
Page 37: Connecting To The Computer
2-3 Cable Connections Connecting to the Computer USB cable At this time, the connection to the computer must not be made yet. You make the connection to the computer when you install the Windows-based driver. Be sure to make the connection according to the instructions on page 38, "Installing the Windows- based Driver."... -
Page 38: Installing And Setting Up The Software
This table shows the minimum system requirements for using a variety of applications and the Windows- based driver (MDX-40A) included on the Roland Software Package CD-ROM. For the system requirements for SRP Player, refer to its user’s manuals. For the latest information, see the Roland DG Corp. website (http://www.rolanddg.com). -
Page 39: The Software You Can Install And Set Up
2-4 Installing and Setting Up the Software The Software You Can Install and Set Up This is a dedicated software for controlling this machine. You operate VPanel for MDX- this machine and make various settings using this software. This is a Windows-based driver required for sending data from a com- Windows driver puter to the machine. -
Page 40: Installing The Windows-Based Driver
Before you start installation and setup, make sure the USB cable is NOT con- nected. Log on to Windows as “Administrators.” Insert the Roland Software Package CD-ROM into the computer. (Windows Vista only: When the automatic playback window appears, click [Run menu.exe].) The setup menu appears automatically. ... -
Page 41: Installing Vpanel And Other Softwares
2-4 Installing and Setting Up the Software Installing VPanel and Other Softwares Procedure Display the window for the setup menu. Click [Install] of "VPanel for MDX- 40A" or the program you want to install. Follow the messages to install the softwares. (Windows Vista only: The [User Account Control] appears, click [Allow], and install the softwares.) ... -
Page 42: Viewing The Documentation For The Softwares
2-4 Installing and Setting Up the Software Viewing the Documentation for the Softwares The documentation for the softwares is in electronic format. Follow the procedure below to view it. From the [Start] ( ) menu, choose the software you’re using, then click [Help]. Chapter 2 Installation and Setup... -
Page 43: Chapter 3 Basic Operation
Chapter 3 Basic Operation This describes the basic operation methods. If you're using the ma- chine for the first time, then before you start operations, be sure to read this. 3-1 Types of Emergency Stops to Ensure Safety ..... 42 How to Perform an Emergency Stop. -
Page 44: Types Of Emergency Stops To Ensure Safety
3-1 Types of Emergency Stops to Ensure Safety How to Perform an Emergency Stop. Press the Emergency Stop but- ton. Operation stops immediately. To Cancel an Emergency Stop Turn the button in the direction of the arrows. Emergency Stop Due to Opening or Closing the Front Cover To ensure safety, opening a front cover during cutting or spindle rotation causes an emergency stop to occur. -
Page 45: Starting And Quitting
3-2 Starting and Quitting How to Start the Machine Follow the procedure below to start the machine. When startup is complete, the machine is ready for use. Procedure Close the front cover. S w i t c h o n t h e m a i n p o w e r switch. - Page 46 3-2 Starting and Quitting On the computer, start VPanel. From the [Start] menu, click [All Pro- grams] - [Roland VPanel for MDX 40A] - [VPanel]. The window shown in the figure appears. Startup of the machine is complete. Chapter 3 Basic Operation...
-
Page 47: Shutdown
3-2 Starting and Quitting Shutdown Procedure On the computer, quit VPanel. Switch off the main Dark power switch. The POWER and MODEL- ING lamp go dark and the power to the machine is switched off. Chapter 3 Basic Operation... -
Page 48: Selecting The Command Set
3-3 Selecting the Command Set What is Command Set? In this machine, the following command sets are available for selection. RML-1 Select when you want to use the software that is included with the machine. NC code Select when you want to use the NC code. For the details of NC code, refer to "NC Code Specifica- tion"... - Page 49 3-3 Selecting the Command Set Select a command set by using “Modeling Machine” tab. When "NC Code" or "Selected automati- cally (RML-1/NC Code)" is selected, the [NC Code setting…] becomes enabled, and the setting related to NC code becomes available. For the details of NC code setting, refer to the Help for VPanel.
-
Page 50: Moving The Tool
3-4 Moving the Tool Manual Feed Moving the tool manually is called "manual feed," and you can accomplish this using the feed buttons in VPanel. Note: Manual feed cannot be performed while a cutting operation is in progress. Feed buttons Clicking these performs manual feed for the tool and the rotary axis. -
Page 51: About The Displayed Tool Position
3-4 Moving the Tool About the Displayed Tool Position Coordinate View The main window in VPanel displays the present location of the tool as numerical values. Using these lets you perform manual feed accurately, which can be very convenient in tasks such as aligning the workpiece. - Page 52 3-4 Moving the Tool Selection of the Coordinate System Select the coordinate system that is used to display the tool location in VPanel. The selection made here only determines the displaying method of coordinates. With the actual origin point, you need to perform the setting individually for the coordinate system that is used with the cutting data.
-
Page 53: Moving To A Specific Position
3-4 Moving the Tool Moving to a Specific Position Selecting a destination from the list and clicking the [Move] button makes the tool move rapidly to the selected location. Clicking the [Stop] button stops movement. When "User Specify" Is Selected Clicking the [Move] button makes the window shown at left appear. -
Page 54: Starting And Stopping Spindle Rotation
3-5 Starting and Stopping Spindle Rotation Starting or Stopping the Spindle Close the front covers and click The spindle begins to rotate. Clicking a second time stops the spindle rotation. This displays the present rotating speed of the spindle. Settable range: 4,500 to 15,000 rpm You can adjust the spin- dle's speed of rotation. -
Page 55: Pausing/Resuming/Quitting Of Cutting
3-6 Pausing/Resuming/Quitting of Cutting Pausing and Resuming of Cutting by Operation of the Machine This operation pauses cutting. You perform it using the built-in panel. This also makes it possible to resume cutting at the paused position after an operation such as moving the tool to check the status of the workpiece. -
Page 56: Quitting Cutting By Operation Of The Machine
3-6 Pausing/Resuming/Quitting of Cutting Quitting Cutting by Operation of the Machine This stops cutting through operation using the built-in panel. Unlike pausing operation, cutting can- not be resumed. Procedure Press the VIEW button during cutting. Rotation of the spindle stops, and the Flashes tool moves to the VIEW position. -
Page 57: Quitting Cutting By Operating From The Vpanel
3-6 Pausing/Resuming/Quitting of Cutting Quitting Cutting by Operating from the VPanel This stops cutting through operation using VPanel. Procedure Click [Quit Cutting] during cut- ting. The tool movement is stopped on the spot, and the VIEW lamp comes on. Rotation of the spindle does not stop at this time. -
Page 59: Chapter 4 Getting Ready For And Performing Cutting
Chapter 4 Getting Ready for and Performing Cut- ting This section explains the preparations for cutting such as installing the tool and setting the reference position of the cutting, and the method for outputting the cutting data 4-1 Cutting Area ..............58 Workpiece Size and Location Where Secured in Place 58 Actual Size That Can Be Cut ......... -
Page 60: Cutting Area
4-1 Cutting Area Workpiece Size and Location Where Secured in Place Arrange the workpiece (the material cut), frames, and the like so that they fit within the determined range. Anything extending beyond may strike moving parts. Be sure to observe this requirement, as failure to do so may result in damage to the workpiece or frame or malfunction of the machine. -
Page 61: Installing A Tool
4-2 Installing a Tool Tool Selection Select a tool matched to the purpose. It's a good idea to use the tools selectively, according to the work process (such as rough cutting or finish cutting) and the design. Note: Tool is an optional part. Features of the Tools End mill Straight end mill: The end cutting edge is flat-shaped. - Page 62 4-2 Installing a Tool Loosely tighten the collet with tool. While supporting the tool to keep it from falling, twist and lightly secure the collet. Fully tighten the collet. While holding the tool with the fingers to keep it from falling, tightly secure the collet by using two spanners.
-
Page 63: Starting Cutting
4-3 Starting Cutting About Origin Point Before starting the cutting, you must set the origin point. When performing cutting with this machine, you need to set three origin points: the X, Y, and Z origins. Determine the X origin point and Y origin point based on the cutting data and workpiece location. - Page 64 4-3 Starting Cutting Stop the spindle rotation. P. 52, "Starting and Stopping Spindle Rotation" For the RML-1 cutting data When "Selected automatically (RMX-1/NC Code)" is selected with the command set selection, choose "User Coordinate Sys- tem" with Set Origin Point. If "RML-1"...
- Page 65 4-3 Starting Cutting Setting the XY origin. Move the tool to the location you want to make the XY origin point. P. 48, "Moving the Tool" With "Set Origin Point", select the [Set "XY Origin" here], then click [Apply].
-
Page 66: Start Cutting (Output To The Machine Directly Form The Application)
4-3 Starting Cutting Start Cutting (Output to the machine directly form the application) When the machine receives the cutting data from the computer, the spindle begins to rotate and cutting starts. The feed rate and the speed of spindle rotation are determined by the cutting data received. Important ! Before starting the cutting, make sure of the following items. -
Page 67: Start Cutting (Output Via Vpanel)
4-3 Starting Cutting Start Cutting (Output via VPanel) Overview of Operations Step 1: Save the output file. First, convert the program to a text file, then save it on the computer. This file is called the "output file." Step 2: Register and execute the output file. Add the saved output file to VPanel's output file list, then specify execution. You can register (add) multiple output files and execute them sequentially, one after another. - Page 68 4-3 Starting Cutting Click the [Cut] button on the VPanel. Click the [Add] button and open the output file. Alternatively, drag the output file to [Output File List]. Output File List This displays a list of registered output files.
-
Page 69: Recovery Of Operation From Emergency Stop Or Emergency Shutdown
4-3 Starting Cutting Recovery of Operation from Emergency Stop or Emergency Shutdown If an emergency stop or an emergency shutdown occurs during cutting, remove the tool and the workpiece from the machine. When the operation resumes, initialization is performed on the machine. At this time, the tool and the workpiece may collide depending on the position in which the tool and workpiece stopped, which can cause damage to the machine while restarting. -
Page 70: Override
4-4 Override What's an Override? Using Overrides An override is a feature for adjusting the feed rate or spindle speed while cutting is in progress. This is useful when you want to change the feed rate or speed as you monitor the status of cutting. An override value is specified as a percentage. -
Page 71: Chapter 5 Appendix
Chapter 5 Appendix This section explains how to use the engraving cutter as well as the maintenance method, countermeasures against the problems, and the specifications of the machine. 5-1 Using the Z0 Sensor ........... 70 What’s a Z0 Sensor ............70 Setting the Z Origin Using the Z0 Sensor ...... -
Page 72: Using The Z0 Sensor
5-1 Using the Z0 Sensor What’s a Z0 Sensor This sensor is used for setting up the Z origin on the upper surface or others of the workpiece. Important ! When using the machine, check that no cutting waste and the like is present on the tool and Z0 sen- sor. - Page 73 5-1 Using the Z0 Sensor Close the front cover. For the RML-1 cutting data When "Selected automatically (RMX-1/NC Code)" is selected with the command set selection, choose "User Coordinate Sys- tem" with Set Origin Point. If "RML-1" is selected with the command set selection, only "User Coordinate System"...
-
Page 74: Setting The Thickness Of The Z0 Sensor
5-1 Using the Z0 Sensor Setting the Thickness of the Z0 Sensor In order to improve the accuracy of the tool sensor, register the thickness of the tool sensor on the VPanel. Procedure In VPanel, click the [Setup] but- ton. -
Page 75: Using The Engraving Cutter
5-2 Using the Engraving Cutter Installing the Engraving Cutter and Setting the Origin Point The engraving cutter and collet come as the optional parts. Use a collet that matches the diameter of the cutter. Installing the engraving cutter. Detach the cutter holder from the Hexagonal screw cutter. - Page 76 5-2 Using the Engraving Cutter Using two Spanners, tighten the collet fully. Spanner (small) Spanner (large) Lower the spindle and bring the tip of the collet close to the sur- face of the workpiece. Insert the cutter. Cutter ...
- Page 77 5-2 Using the Engraving Cutter Make the settings for the Z, and XY origin point. Close the front cover. For the RML-1 cutting data When "Selected automatically (RMX-1/NC Code)" is selected with the command set selection, choose "User Coordinate Sys- tem"...
-
Page 78: Maintenance
5-3 Maintenance Cleaning WARNING Never use a pneumatic blower. This machine is not compatible with a pneumatic blower. Cutting waste may get inside the machine and cause fire or electrical shock. WARNING Never use a solvent such as gasoline, alcohol, or thinner to perform cleaning. -
Page 79: Maintenance Of The Spindle Unit
5-3 Maintenance Maintenance of the Spindle Unit The spindle unit and the belt are parts that wear out. The replacement cycle varies according to usage conditions, but as a general guide, you should replace them after every 2,000 hours of use. You can use VPanel to view the total working time of the spindle. -
Page 80: What To Do If
5-4 What to Do If... The Power Does Not Come On. Are two or more machines connected to a single computer? Has the Emergency Stop button been VPanel cannot control more than one machine at the pressed? same time. Never connect two or more instances of When the Emergency Stop button is pressed, the this machine to a single computer. -
Page 81: The Spindle Doesn't Rotate
5-4 What to Do If... The Origin is Misaligned. Are two or more machines connected to a single computer? Is the correct workpiece coordinate system VPanel cannot control more than one machine at the selected? same time. Never connect two or more instances of In the NC program, there are six coordinate systems. -
Page 82: What To Do If A Flashing Error Is Displayed
[OK]. Close the [Device Manager]. the machine may be malfunctioning. Contact your 8. Detach the USB cable connected to the printer, and authorized Roland DG Corp. dealer. the restart Windows. 9. Uninstall the driver. Carry out the steps from step The MODELING and VIEW lamps 3 in page 81 “Uninstall the Driver Windows Vista”... -
Page 83: Uninstalling The Driver
Windows Vista D:\Drivers\25D\WINVISTA 1. Before you start uninstallation of the driver, unplug If you're not using the CD-ROM, go to the Roland the USB cables from your computer. DG Corp. website (http://www.rolanddg.com/) and 2. Log on to Windows as “Administrators” right. - Page 84 (assuming your CD-ROM drive is the D drive). D:\Drivers\25D\WIN2KXP If you're not using the CD-ROM, go to the Roland DG Corp. web-site (http://www.rolanddg.com/) and download the driver for the machine you want to delete, then specify the folder where you want to expand the downloaded file.
-
Page 85: Responding To An Error Message
After checking, restart the machine. by mechanical failures such as a cable disconnection. In such cases, contact your authorized Roland DG P. 43, "Starting and Quitting" Corp. dealer. -
Page 86: Emergency Stop
If this message persists even after each of The MDX-40A has performed an emer- the countermeasures is implemented, turn the main gency stop. power OFF, and contact your authorized Roland DG -- Cover opened during operation. Corp. dealer. Operation cannot be continued. - Page 87 Also, allow the machine to rest for some time, because the motor may have overheated. If messages like these persist, contact your authorized Roland DG Corp. dealer or Roland DG Corp. P. 43, "Starting and Quitting" Chapter 5 Appendix...
-
Page 88: Power Rating And Serial Number Locations
5-6 Power Rating and Serial Number Locations Serial Number This is required when you seek maintenance, servicing, or sup- port. Never peel off the label or let it get dirty. Power Rating Use an electrical outlet that meets the requirements for volt- age, frequency, and amperage given here. -
Page 89: Nc Code Specifications
5-7 NC Code Specifications Settings for NC Codes Tool-diameter offset type (G41 and G42) This selects type A or type B. In VPanel, click [Setup] This section groups together the settings involving button, and click [NC Code setting], and display the the interpretation and execution of NC codes that [NC Code] tab, then make the settings. -
Page 90: Interpretation Of Omitted Nc Codes
5-7 NC Code Specifications Workpiece coordinate system (G54 through Effective range: 0 to 8 G59) When these are omitted, the interpretation is always Spindle speed (S) for workpiece coordinate system 1 (G54). When the standard spindle is installed, the parameter range for S is as follows. -
Page 91: Word List
5-7 NC Code Specifications Word List The words supported by this machine are listed in the following chart. Refer to “NC Code Reference Manual” to find the details of each word. Preparatory Functions (G Functions) Group name Word Function Continued functioning Positioning/ Positioning interpolation... - Page 92 5-7 NC Code Specifications Miscellaneous Functions (M Functions), Feed Function (F Function), and Spindle Speed Function (S Function) Word Function Function start Function continuation Simultaneously After ending Sustained un- Effective only with operation of operation til canceled or w i t h i n t h e specified in the specified in the changed...
-
Page 93: Specifications
5-8 Specifications Expansion Connector +24 V Adaptive plug 100Ω/ 2 W Pin 1 Connector Pin 2 If (max)=1 A Use a three-contact plug that meets the size requirements Ic (max)=150 mA above. This circuit works during spindle motor rotation. Expansion connector ... -
Page 94: External View
5-8 Specifications External View Unit: mm 4- Ø 32 Chapter 5 Appendix Chapter 5 Appendix... -
Page 95: Dimensional Drawings Of The Table Area
5-8 Specifications Dimensional Drawings of the Table Area Unit: mm 8-φ3.5、φ8 coutersunk surface 3.2 x 6 long hole φ3.2 44.5 X-axis travel Chapter 5 Appendix Chapter 5 Appendix... -
Page 96: Main Specifications
Ambient pollution degree: 2 (as specified by IEC 60664-1) Power cord, USB cable, collet , Z0 sensor, hexagonal screwdrivers, Included items hexagonal wrench, spanners, User’s Manual (this document), SRP Player Installation and Setup Guide, SRP Player CD-ROM, Roland Software Package CD-ROM Chapter 5 Appendix Chapter 5 Appendix... -
Page 97: System Requirements For Usb Connection
5-8 Specifications System Requirements for USB Connection Model preinstalled with Windows Vista (32 bit) or XP, or upgraded Computer computer originally preinstalled with Windows XP. Use the included USB cable. USB cable Chapter 5 Appendix Chapter 5 Appendix... - Page 100 R1-090609...
Need help?
Do you have a question about the MDX-40A and is the answer not in the manual?
Questions and answers