Table of Contents
Advertisement
Quick Links
Advertisement
Table of Contents

Subscribe to Our Youtube Channel
Related Manuals for FLORABEST FRP 350 B1


Summary of Contents for FLORABEST FRP 350 B1
- Page 1 FRP 350 B1 ® Rain Barrel Pump Translation of original operation manual...
- Page 2 Before reading, unfold the page containing the illustrations and familiarise yourself with all functions of the device. GB / IE Translation of original operation manual Page...
- Page 3 ¾“ 1“ “ ¾“...
- Page 4 13/14/15/19...
-
Page 5: Table Of Contents
Notes on Safety Before initial start-up, please read through these operating instruc- tions carefully prior to using the This section deals with the general safety machine. Keep the instructions regulations for working with the equip- safe and pass them on to any sub- ment. sequent user so that the informa- Symbols in the manual tion is always available. Warning symbols with informa- Contents tion on damage and injury pre- vention. Notes on Safety ........5 Symbols in the manual ....... 5 Instruction symbols (the instruction Safety Instructions on the Equipment . .. 5 is explained at the place of the ex- General notes on safety ..... 6 clamation mark) with information on Intended purpose ......... 7 preventing damage. -
Page 6: General Notes On Safety
General notes on safety Caution! To avoid damage to the Please note: equipment and any possible per- son injury resulting from this: • Never allow children or other persons unfamiliar with the user manual to use • Do not work with damaged or incom- the shredder. Local regulations or by- plete equipment, or with equipment laws may determine the minimum age that has been converted without the for using the device. approval of the manufacturer. Before • The device must not be used by peo- initial operation, have a specialist ple (including children) with limited check that the required electrical pro- physical, sensory or mental faculties tection measures are in place. or who lack the necessary experience • Monitor the equipment during opera- and/or knowledge - other than they are tion (particularly in residential spaces, supervised by a person responsible for in order to detect automatic switching safety or are being instructed to oper- off or dry running of the pumps in time. ate the appliance by such a person. Regularly check the function of the • Keep the equipment away from chil- float switch (see chapter “initial opera- dren and pets. -
Page 7: Intended Purpose
opening the equipment, are to be car- • Do not carry or fix the equipment by the ried out by an electrician. In the case cable. of repairs, always contact our service • Only use a rubber-sheathed cable des- centre. ignated H05 RNF for mains connection. The cable length must be 10 m. Electrical safety: • Protect cables and electrical connec- tions against moisture. Make sure that cables and electrical connections are Caution: to avoid accidents and injuries from electric shocks: located in areas safe from flooding. Intended purpose • After erection, the mains plug must be freely accessible when the equipment is in operation. The rain barrel pump is intended for • Ensure that the mains voltage matches pumping water from a rainwater butt or the specifications on the rating plate. rainwater collecting tank. It is particularly • The device must only be connected to suitable for watering plants in the garden. a mains socket via a residual-current Use of the pump for pumping aggressive, circuit breaker (RCD) with a rated leak- abrasive, corrosive, inflammable (e.g. motor age current of not more than 30 mA; fuels) or explosive liquids, salt water, clean- minimum fuse 10 amperes. -
Page 8: Functional Parts
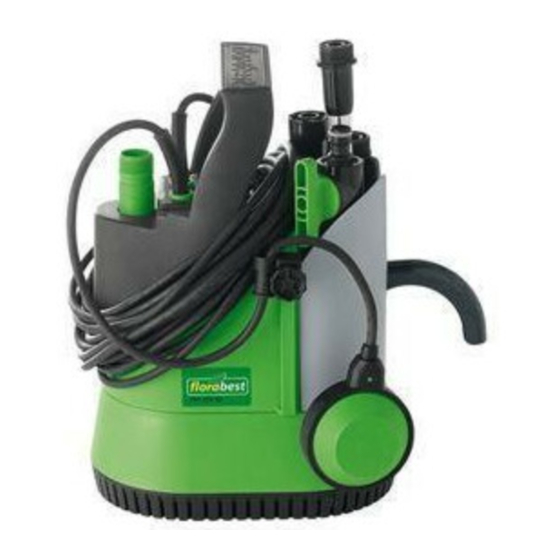
Explanation of the rating plate switch. When the motor has cooled down, it will restart again on its own. A height-adjustable plastic hook on the aluminium tube can be suspended in the rainwater butt, enabling water to be easily removed with the use of a hosepipe. The shut-off tap functions in the same way as a water tap. Illustration of the most important functional parts is to be found on the cover. Functional parts a Model 1 Carrying handle b Electrical appliances do not belong in 2 Float switch height-adjustment the domestic waste 3 Storage compartment for alu- c Max. discharge height minium tubes d Max. water temperature 4 Float switch cable e Protection type (watertight) 5 Floating switch f Address of the manufacturer 6 Float switch guide g Maximum permitted immersion depth... -
Page 9: Putting Into Service
Putting into service Securing the mains cable: 4. Secure the mains connection ca- Installing the aluminium tubes ble (12) to the cable clamp (20) on the plastic hook (21) and on Before installing the aluminium the middle aluminium tube (14). tubes and the flexible tube, check that a sealing ring has been in- Mounting the height adjust- ment for the float switch: serted in each screw socket. If not, insert the sealing ring in the follow- 5. Loosen the screw on the float ing manner: switch height adjustment (2) and push this over the float switch Inserting the sealing rings: guide (6). Then guide the float 1. Press: switch cable (4) upwards (see - One small sealing ring (22) into also “Adjusting the float switch”). each of the threaded sleeves in the three aluminium tubes. If you want to make use of the (13/14/15), maximum pumping capacity of the - One large sealing ring (23) pump rather than the maximum into the threaded sleeve on discharge height, we recommend... -
Page 10: Power Supply Connection
cord to the pump carrying handle ( 1). switch ( 5) can be continuously ad- Do not hang the equipment directly justed. by the curved tube or on the water hose. Loosen the screw on the float • You can adjust the height of the plastic switch height adjustment (2) and hook after loosening the height-adjust- bring it into the required position ment screw ( 16). (arrow has to show upwards). • When the water level is low, you can also place the pump in the butt. If you Check the float switch (5). It must do, the shut-off tap must be above the be positioned so that it can lift and level of the edge of the container. lower freely. The switching point heights “On” and “Off” must be Power supply connection easy to reach. The rain barrel pump you have acquired Manual mode: is already fitted with a home office The pump runs continuously in manual (safety) plug. The pump is intended to be mode. plugged in to a home office socket with a 230 V ~ 50 Hz supply. Position the float switch (5) as shown. -
Page 11: Cleaning The Filter
Storage housing and become stuck, by using a jet of water. • Clean any deposits adhering to the • Store the appliance in a dry, frost-free floating switch ( 5) with clean water. place, and where children cannot gain access to it. Cleaning the filter • When the pump is not to be used for a longer period, it must be thoroughly In the suction foot, the pump has a remov- cleaned after its last use, and before it able filter, designed to protect it from dirt. is next used. Otherwise there may be According to the level of dirt in the water, problems in starting the pump, caused this should from time to time be checked by deposits and residues. and cleaned when necessary. - Wind the mains cable (12) 1. Unplug the appliance from the around the cable storage area power supply. 10). 2. Remove the five screws on the un- - Insert the dismantled aluminium derneath of the pump housing (9). tube (13/14/15/19) into the stor- 3. Take the suction foot (8) off the age compartment (3). -
Page 12: Guarantee
Guarantee with an indication of the defect, to our service address. • This appliance has a 36-month guar- Devices sent in freight collect - by antee; a shorter 12-month guarantee bulk freight, express or with other special freight - are not accepted. applies if the appliance is to be used for commercial purposes or for replacement • Defective units returned to us will be dis- appliances according to statutory regula- posed of for free. tions. Technical data • Justified guarantee claims should be reported to our Service Centre (see page 17 for telephone & fax no.s, and Voltage ......230 V,~ 50 Hz email address). Our Service Team will Power consumption ......350 W tell you more about our complaints Protection class ........I handling procedure. Protection type......... IPX8 • Damage due to natural wear and tear, Weight (incl. accessories) .... 4,36 kg overload or incorrect use is excluded Max. capacity ......5200 l/h from the guarantee. Certain components Max. discharge height .....11 m are subject to normal wear and tear and... -
Page 13: Trouble-Shooting
Trouble-shooting Problem Possible cause(s) To correct the fault Check socket, cable lead and plug, if No power supply necessary have a repair carried out by an electrician Float switch ( 5) does not Check the position of the float switch operate Pump does not start Water level inadequate when Submerge the pump deeper starting Wait until motor cools down and Thermal protection switch switches on again. Unplug appliance has tripped and clean suction foot/impeller wheel. Suction foot ( 8) / Clean suction foot / filter filter ( 7) blocked Pump is running, Open the distributor shut-off tap, Pressure lead closed but not pumping other tap or jet, etc. water Pumping capacity affected by Withdraw the power plug and clean extreme dirt or abrasive sol- the pump, if necessary replacing ids mixed with the water worn parts. Pump does not Float switch ( 5) cannot Check position of the float switch... -
Page 14: Eu Declaration Of Conformity
EU declaration of conformity We hereby confirm that the FRP 350 B1 series Rain barrel pump (serial number 201101000001 - 201101048500) conforms with the following applicable relevant version of the EU guidelines 2006/42/EC • 2004/108/EC • 2000/14/EC In order to guarantee consistency, the following harmonised standards as well as national standards and stipulations have been applied: EN 60335-1:2002/A11:2004/A1:2004/A12:2006/A2:2006/A13:2008 EN 60335-2-41:2003/A1:2004 EN 62233:2008 • EN 55014-1:2006 • EN 55014-2:1997/A1:2001/A2:2008 EN 61000-3-2:2006 • EN 61000-3-3:2008 Grizzly Gartengeräte GmbH & Co. KG Am Gewerbepark 2 D-64823 Groß-Umstadt 16.02.2011 Andreas Gröschl (Technical Manager and Documentation Representative) -
Page 15: Exploded Drawings
Exploded Drawings informative... - Page 16 informative...
-
Page 17: Grizzly Service-Center
Grizzly Service-Center DES UK Ltd. Unit B7 Oxford Street Industrial Park Vulcan Road Bilston, West Midlands WV14 7LF Tel: 0870 787 6177 Tel from Ireland: 0044 870 787 6177 Fax: 0870 7876168 Fax from Ireland: 0044 870 787 6168 Email: grizzly@deslimited.com 2011-01-03_rev02_gs... - Page 18 IAN 61038 Grizzly Gartengeräte GmbH & Co. KG Am Gewerbepark 2 D-64823 Groß-Umstadt Last Information Update: 12 / 2010 Ident.-No.: 79300622122010 - 6...
Need help?
Do you have a question about the FRP 350 B1 and is the answer not in the manual?
Questions and answers