Leica AutoStainer XL Instructions For Use Manual
Automated slide stainer
Hide thumbs
Also See for AutoStainer XL:
- Instructions for use manual (56 pages) ,
- Instructions for use manual (52 pages)

Related Manuals for Leica AutoStainer XL


Summary of Contents for Leica AutoStainer XL
- Page 1 Leica AutoStainer XL Automated slide stainer Instructions for Use Leica AutoStainerXL, V2.3 English – 10/2012 Order-No.: 14 0456 80101 RevC Always keep this manual near the instrument! Read carefully prior to operating the instrument!
- Page 3 © Leica Biosystems Nussloch GmbH Published by: Leica Biosystems Nussloch GmbH Heidelberger Str. 17 - 19 D-69226 Nussloch Germany Phone: +49 (0)62 24 143-0 Fax: +49 (0)62 24 143-2 68 Internet: http://www.LeicaB iosystems.com Leica AutoStainer XL – Automated slide stainer...
-
Page 4: Table Of Contents
Table of contents Important information ....................6 Symbols occurring in the text and .................... 6 Designated use / improper use of the instrument ..............7 Qualification of personnel ......................7 Safety..........................8 Safety regulations ........................8 Instrument features ......................9 Overview –... - Page 5 Warranty and service ....................43 APPENDIX 1 ........................44 User-adjustable parameters ....................... 44 APPENDIX 2 ........................45 Consumables and accessories ......................45 APPENDIX 3 ........................46 Compatible staining programs ......................46 Glossary .......................... 48 Leica AutoStainer XL – Automated slide stainer...
-
Page 6: Important Information
Important information The Instructions for Use for the Leica Symbols occurring in the text and their meaning AutoStainer XL includes chapters dealing with the following subjects: Warnings and cautions appear in a grey box and are marked by a Chapter 1... -
Page 7: Designated Use / Improper Use Of The Instrument
Leica products. Designated use / improper use of the instrument - The AutoStainer XL has been designed for staining applications in medi- cine, biology and industry. - The instrument may be operated only according to the instructions con- tained in this manual. -
Page 8: Safety
Safety Safety regulations This instrument has been built and tested in accordance with the safety regulations for electrical measuring, control, regulating and laboratory de- vices. In order to maintain this condition and ensure safe operation, the operator must observe all the instructions and warnings contained in this Instructions for Use. -
Page 9: Instrument Features
The minimum-carryover design of the slide racks ensures that there are no drips and reagent life is extended. The AutoStainer XL is safe to use and has an integral fume control system. Rack loading and unloading is achieved by a unique two-drawer system which means virtually no exposure to fumes. -
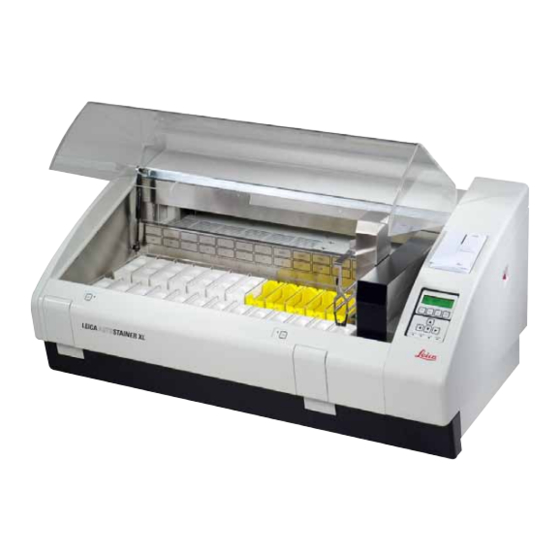
Page 10: Overview - Instrument
Instrument features Overview – instrument Abb. 1 Instructions for Use V 2.3 – 10/2012... - Page 11 34. Exhaust air duct 14. Load LED and key 35. Power supply outlet 15. Exit drawer 16. Slotted lid 17. Exit LED and key 18. Container map on fume filter cover 19. Lid support 20. Lid Leica AutoStainer XL – Automated slide stainer...
-
Page 12: Standard Delivery - Packing List
1 drain hose ..........................14 0475 35748 1 power cable USA-C-J ......................14 0411 13559 1 operating manual Leica Autostainer XL G/E (+ language CD) ......... 14 0456 80001 - 1 reference manual as appendix, English only (dye logs, etc.) To prevent damages to the instrument and specimens, only those accessories and spare parts which have been authorized by Leica may be installed or used with the instrument. -
Page 13: Technical Data
Dimensions (W x D x H): ..................... 109 cm x 67 cm x 51 cm Weight: ................................65 kg Voltages: ........................110 V - 120 V, 50 Hz - 60 Hz 230 V - 240 V, 50 Hz - 60 Hz Leica AutoStainer XL – Automated slide stainer... -
Page 14: Installation
Finally, the procedure for replacement of the fume filter is outlined. Site requirements The AutoStainer XL requires a solid bench of dimensions 1.090 mm long and 670 mm deep. The instrument must be located within 3 meters of a tap and drain. -
Page 15: Water Supply
Ensure that the water filter is present when fitting the water inlet hose. Failure to do so may result in leakage of water. Drain hose Connect the drain hose to the drain outlet on the rear of the unit. Leica AutoStainer XL – Automated slide stainer... -
Page 16: Battery Backup - Ups (Optional)
Installation Battery backup - UPS (optional) An uninterruptable power supply (UPS) can be used to permit staining of slides to continue during brief mains power failures. A small UPS can be connected using the power jumper lead, as shown in Figure 15. -
Page 17: Remote Alarm (Optional)
To remove a filter, lift out the plate covering the filter. Refer to Figure 2. Re- move the filter, using the tabs. Replace with a new filter and fit the cover into place. Oven Fit the wax tray into the bottom of the oven. Leica AutoStainer XL – Automated slide stainer... -
Page 18: Operation
LCD will inform you of the station to unload from. In this case, the lid will have to be opened to remove the rack. AutoStainer XL can accept racks whenever the Load LED is on and process up to 11 racks simultaneously. -
Page 19: The Control Panel
5. Operation Communication Communication with AutoStainer XL is via the control panel, load and un- load keys and associated indicators and audible signals. The control panel The control panel consists of an LCD display, the keypad and four LEDs. The display The display is a four-line LCD with backlighting. -
Page 20: The Main Menu
• continuous tone: indicates unit failure. The main menu When the AutoStainer XL is turned ON at the ON/STOP switch, the following Main Menu will be displayed and the instrument will give 3 beeps. AutoStainer XL V2.0 Main Menu... -
Page 21: Menu Map
5. Operation Menu map Fig. 21 Leica AutoStainer XL – Automated slide stainer... -
Page 22: Edit A Program
Operation Edit a program AutoStainer XL can store 15 programs numbered from 1 to 15 in permanent memory. Programming is performed using a simple, menu-driven system and all information is entered via the keypad. A program consists of 25 steps, some of which may be blank. A step con- sists of the following information: •... -
Page 23: Entering Steps
6. Repeat steps 4 and 5 until the program is complete. If you wish the rack to finish in the EXIT drawer, insert this as the last step. 7. To save the program, see page 24. Leica AutoStainer XL – Automated slide stainer... -
Page 24: Erasing Steps
Operation 5.4.2 Erasing steps Information contained in a step may be erased leaving a blank step. 1. To select the program, see steps 1 to 3, page 22, 2. To select the step to be deleted, see step 4, page 22, 3. -
Page 25: Removing Blank Steps In A Program
3. Press [F1] More. 4. Press [F1] More. 5. Press [F2] Delete. 6. If you wish to proceed, press [F1] Yes. 7. To save the program (which now contains no steps), see above. Leica AutoStainer XL – Automated slide stainer... -
Page 26: Copying A Program
Operation 5.4.7 Copying a program This function is used to copy a program into another program number. 1. Select the program to be copied (see steps 1 and 2, page 22) 2. Press [F1] Copy . If an empty program has been selected, an informative mes- sage will be given. -
Page 27: Viewing A Program
7. If the programs are not compatible, an explanation will be given. Press [F4] to continue. 8. Repeat Steps 5 and 6 to check compatibility with other programs. Leica AutoStainer XL – Automated slide stainer... - Page 28 Operation 9. Press [F4] to return to the program selected at step 1. Many of the program incompatibility situations arise from al- location of water wash stations. Therefore, these stations are user-selectable. Appendix 3 gives some examples of common staining protocols which are compatible.
-
Page 29: User-Adjustable Parameters
5. Operation User-adjustable parameters There are several user adjustable parameters on the AutoStainer XL, which apply to the instrument’s operation independently of the program selected. These are: oven temperature; amount of agitation on entry to a station, as the number of dips;... -
Page 30: Agitation (Dips)
Operation Agitation (Dips) You can set the number of times the slide rack is moved up and down (dips) on entry to a reagent station, in the range OFF/1-20/continuous. If continuous is selected, only one slide rack will be pro- cessed in the instrument at any one time. -
Page 31: Rack Movement Times
Staining This section provides a guide to staining slides. The AutoStainer XL can accept slide racks whenever the load station is empty and stain them according to the program selected for each rack. Different programs may be used simultaneously provided they are compatible. To check whether programs are compatible, refer page 26. -
Page 32: Reagent Containers
To use the wash system, slowly turn the laboratory tap on fully. The flow control valve in the AutoStainer XL will limit the total water flow in the wash stations to 8 liters/minute. -
Page 33: Water Saving
5. Operation 5.9.3 Water saving The AutoStainer XL is fitted with a water-saving feature which stops the flow of water when none of the wash stations is in use and the excess re- agent has been flushed from them. 5.9.4 Loading slide racks Slide racks are inserted into the instrument via the load drawer only, situ- ated at the front right hand side of the instrument. -
Page 34: Unloading Racks From The Exit Drawer
Operation 5.9.5 Unloading racks from the exit drawer When a rack is in the exit station, the (Exit) LED will be on and the beeper will sound every 30 seconds. To unload a rack from the exit drawer: 1. Open the exit drawer carefully and remove the rack. Alternatively, re- move the entire reagent container from the drawer and replace it with another. -
Page 35: Interrupting Staining
4. Press [F4] Main Menu to return to the Main Menu. You may now edit programs not currently in use or change the instru- ment SetUp parameters. To resume staining, press [F1] from the Main Menu. Leica AutoStainer XL – Automated slide stainer... -
Page 36: Aborting A Rack
Operation 5.9.8 Aborting a rack To abort staining of a rack: 1. Press [F4] Pause from the Staining screen. 2. Press [F2] Abort rack. 3. Using the keys, select the station containing the rack you wish to abort. 4. Press [F2] Abort. 5. -
Page 37: Cleaning And Maintenance
6.1.3 Slide racks Clean with detergent or laboratory cleaning agent as required. 6.1.4 Oven Periodically check the wax tray at the bottom of the oven and clean it if excessive wax dripping has occurred. Leica AutoStainer XL – Automated slide stainer... -
Page 38: Trouble Shooting
Trouble shooting Introduction AutoStainer XL continually monitors itself and will report any errors as they occur. If a minor error occurs during staining the instrument will attempt to correct the problem first. If it is unsuccessful then a message will be given and the instrument will wait for the user to rectify the problem. -
Page 39: Instrument Failures
Remove obstruction and The rack might have disengaged from the hook. Rectify the cause of the problem replace rack on hook (e.g. reagent container not properly seated) and replace rack on hook. Leica AutoStainer XL – Automated slide stainer... -
Page 40: Information And Warnings
Trouble shooting Information and warnings 7.2.1 During staining Program (x) cannot be Program (x) is either empty, or consists entirely of blank or zero time steps. used for staining Program (x) is not com- Program (x) is incompatible with a program assigned to a rack(s) currently being patible with programs stained. -
Page 41: During Editing Programs
Program (x) is in use for A program which is currently being used for staining cannot be altered. Copy the staining and cannot be program to another program number and then edit it. altered Leica AutoStainer XL – Automated slide stainer... -
Page 42: During Setup
Trouble shooting 7.2.3 During SetUp Programs and SetUp have been lost and must be entered again. SetUp lost. Default Set- Up used. The internal memory must be replaced. Contact your service agent. Battery backed RAM Failure! Service is re- quired. Increasing the amount of agitation while racks are currently being stained might Caution: increasing extend exact immersion times. -
Page 43: Warranty And Service
The instrument or parts of the instrument must be disposed of in compliance with the local laws. To prevent damages to the instrument and specimens, only those accessories and spare parts which have been authorized by Leica may be installed or used with the instrument. Leica AutoStainer XL – Automated slide stainer... -
Page 44: User-Adjustable Parameters
APPENDIX 1 User-adjustable parameters Item Factory setting Changeable Range Slide per rack 0-30 Racks in the instrument 0-11 Stations 18 reagent 0-18 5 wash 1 oven 1 load drawer 1 exit drawer Programs Steps per program (Note: some steps can be blank) Immersion time 0 sec - 59 min 99 sec (Note: 0 seconds means the... -
Page 45: Consumables And Accessories
APPENDIX 2 Consumables and accessories To prevent damages to the instrument and specimens, only those accessories and spare parts which have been authorized by Leica may be installed or used with the instrument. Consumables Activated carbon filter Accessories Slide rack adapter Sakura... -
Page 46: Compatible Staining Programs
APPENDIX 3 Compatible staining programs Program 1H&E Program 2 Papanicoleau Reagent Station Step Time Exact Step Time Exact Oven 10:00 Xylene 2:00 Xylene 2:00 100% Alcohol 2:00 100% Alcohol 2:00 70% Alcohol 1:00 1:30 Wash Wash 1 2:00 2:00 Hematoxylin 5:00 3:30 Wash... - Page 47 0:02 Wash Wash 3 3:00 3:00 Scott’s 3:00 3:00 Wash Wash 4 3:00 3:00 Eosin 2:00 95% Alcohol 0:30 100% Alkohol 2:00 2:00 100% Alkohol 2:00 2:00 100% Alkohol 2:00 2:00 Xylene Exit Leica AutoStainer XL – Automated slide stainer...
-
Page 48: Glossary
Glossary CARRYOVER The amount of REAGENT carried from one STATION to another by the SLIDE RACK. CURSOR Flashing bar on LCD beneath user-changeable data. DIP/DIPS/DIPPING The SLIDE RACK is moved up and down a programmable number of times on entry to a STATION. The process by which the HEAD detaches itself from the SLIDE RACK after DISENGAGE PUTDOWN or DIPPING. - Page 49 Glass microscope slide 25 mm x 75 mm x 1 mm. SLIDE RACK Holds SLIDES to ease handling by the instrument. SOLVENT Organic liquid e.g. Xylene, Ethanol. STAINING The process by which tissue sections are stained. Leica AutoStainer XL – Automated slide stainer...
- Page 50 Glossary STATION Location in the instrument where part of a STAINING sequence takes place. STEP Defined by the STATION, IMMERSION TIME and timing accuracy for one discrete event in the STAINING sequence. TRANSFER ARM See HEAD. UNLOAD The user removes a SLIDE RACK from the EXIT DRAWER or from the station in which it completes its programmed sequence.
Need help?
Do you have a question about the AutoStainer XL and is the answer not in the manual?
Questions and answers