Wallbox commander Installation Manual
Hide thumbs
Also See for commander:
- User manual ,
- Installation manual (13 pages) ,
- Quick installation manual (7 pages)
Table of Contents
Advertisement
Quick Links
Advertisement
Table of Contents

Related Manuals for Wallbox commander


Summary of Contents for Wallbox commander
- Page 1 & drive COMMANDER INSTALLATION GUIDE COMMANDER - installation guide...
- Page 2 GET MORE INFO AT: www. w allbox.com/en/support sales@wallbox.com COMMANDER - installation guide en 2...
- Page 3 Disregard of or actions contrary to the safety information and instructions contained in this manual and printed on the device may lead to electric shock, fire and/or severe injury and either damage to the vehicle’ s battery or to the Wallbox device.
-
Page 4: Table Of Contents
CONTENTS SAFETY INSTRUCTIONS PRODUCT DESCRIPTION UNBOXING & CHECK LIST INSTALLATION NOTES 4. 1 DIMENSIONS AND POSITIONING DRILL & MOUNT STARTUP TROUBLE SHOOTING MAINTENANCE WARRANTY COMMANDER - installation guide... -
Page 5: Safety Instructions 1/2
Do not operate in case of observing physical defects, such as cracks, breaks, corrosion or other damage. In this case please contact your distributor to get the Wallbox Commander replaced.. Only authorized specialist can open, disassemble, repair, manipulate or modify the Wallbox device. Unauthorized modification of the Wallbox equipment voids the manufacturer’ s warranty. - Page 6 If the connector emits smoke or starts melting, never touch the charging cable. If possible, stop the charging process. In any case, disconnetc the power supply of the Wallbox Commander. Make sure that the charging cable is out of reach of children. The charging cable may only be used by persons with a valid driver's license for motor vehicles.
-
Page 7: Product Description 1/3
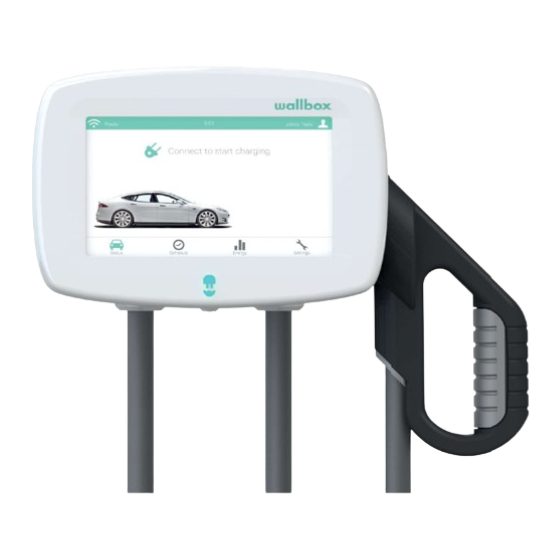
The Wallbox device is used exclusively for charging electric and plug-in hybrid vehicles. The Wallbox device is a smart charger provided with touch screen display and connectivity functionalities. Wallbox software allows our technical support service to solve any issue remotely, no wait times and no need to set appointments and almost instantaneously The Wallbox device is provided with a specific Electric Vehicle Connector (EVC). - Page 8 PRODUCT DESCRIPTION 2/3 SUMMARY INFORMATION GENERAL Model Name Commander Type 2 Commander Type 1 Mode Mode 3 Mode 3 Overall Dimensions (w/o connector) 220x150x135mm 220x150x135mm Weight 4-6Kg. depending on cable length 4-6Kg. depending on cable length Operating Temperature -25ºC to 45ºC 25ºC to 45ºC...
- Page 9 PRODUCT DESCRIPTION 3/3 IDENTIFY YOUR WALLBOX In your Wallbox device you will find the following identification plate. WB- COMM0101A 32A 230/400VAC 50Hz 3P+N+PE IP 54 DATE: 20/01/16 Made in EU 0 602938 062800 S/N: 000001 Network settings Disposal information Ingress Proteccion degree...
-
Page 10: Unboxing & Check List
Mounting components: DRILLING TEMPLATE FRONT VIEW 3x 6,3x40mm Screws 3x Ø8mm Wall Anchors 2x Sealing 2xRutaSeal® 3x Plugs 1x Torx ¹ If any of the items described is missing, please contact www.wallbox. c om/support or service@wallbox.com COMMANDER - installation guide... -
Page 11: Installation Notes
Please contact an electrical contractor or arrange installation at your premises with your local distributor PRECAUTIONS Take special care while selecting the mounting surface, it has to be constructed in order to withstand your Wallbox Commander weight and the mechanical forces associated with the charging process. -
Page 12: Dimensions And Positioning
DIMENSIONS & POSITIONING Before selecting the mounting situation of your Wallbox Commander, please read the following tips and references: According to the product standard, the charging station must be located at a height between 1.30 m and 1.70 m. We recommend mounting the charging station at a height of 1. 6 0 m. -
Page 13: Drill & Mount 1/3
Step 0: In the backside of the Wallbox charger you will find an insertion with a thinner wall; use a cutter, razor or a sharp tool and carefully make an incision into the cable opening. Please meticulously remove all sharp edges. Take a Rutaseal bushing and install it. - Page 14 Proceed to fix your charger to the wall. Insert the screws in the positions marked, starting with the top one, and continuing clockwise. A B C Verify that your Wallbox Commander is firmly attached and insert the plugs to complete this process. Step 2: Use the selector to choose the maximum operating current of the supply connection.
- Page 15 O-ring sealing remains in place. Cover communication cable O-ring sealing Cover close representation Step 7: Secure the Wallbox Commander cover by screwing the Torx provided as shown in the picture below. COMMANDER - installation guide en 15...
-
Page 16: Startup
STARTUP Once the DRILL & MOUNT process is completed your Wallbox Commander is ready to operate. But first let’ s take a moment to read and review some useful information before starting to use your Wallbox Commander: Do not use your Wallbox Commander for purposes not described in the Product description chapter Do not open in any case the Wallbox Commander front cover while the power supply is on. -
Page 17: Trouble Shooting Maintenance
Remember that before start cleaning ensure that the power supply is turned o . In case you want to clean up your Wallbox Commander, we recommend you to use a soft, or a dry damp cloth. Do not use a spray or direct water to clean your Wallbox Commander. -
Page 18: Warranty
WARRANTY The Wallbox Commander warranty is limited to the terms and conditions established in our Sales and Refunds policy and in this installation guide. Please in the uncommon case that you experience a problem or you need extra information, please contact us: You can contact us sending an e-mail: service@wallbox. - Page 19 All other trademarks contained in this document are the property of their respective owners and their use herein does not imply sponsors- hip or endorsement of their products or services. COMMANDER - installation guide en 19...
- Page 20 & drive Josep Ros i Ros, 21A Sant Andreu de la Barca 08740 Barcelona P: +34 93 018 1668 E: sales@wallbox.com www. w allbox. c om COMMANDER - installation guide...
Need help?
Do you have a question about the commander and is the answer not in the manual?
Questions and answers