Heatmiser DT Operating Instructions Manual
Hide thumbs
Also See for DT:
- Operating instructions manual (27 pages) ,
- User manual (13 pages) ,
- Operating instructions manual (33 pages)

Related Manuals for Heatmiser DT


Summary of Contents for Heatmiser DT
- Page 1 Operating Instructions DT, PRT, PRT/HW PRT-R, PRT-R2 Heatmiser UK Ltd Tel: +44(0)1254 776343 Primrose House www.heatmiser.co.uk Primrose Street Darwen Lancashire BB3 2DE...
-
Page 2: Table Of Contents
Carefully separate the front half of the thermostat from the back plate by placing a small flat head Wiring terminal driver in to the slots on the bottom face DT Wiring Diagrams 14-16 of the thermostat. PRT Wiring Diagrams 15-20... - Page 3 Step 3 Step 2 Re-connect the thermostat ribbon cable and clip Carefully unplug the ribbon connector which is the two halves together. plugged in to the front half of the thermostat. Place the thermostat front half somewhere safe. Terminate the thermostat as shown in the diagrams at the back of this booklet.
-
Page 4: Terminology
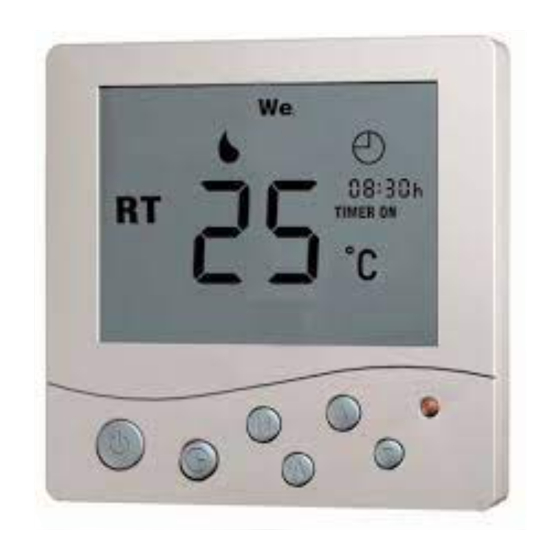
2.Terminology Temperature Calibrating When the thermostat is first installed it requires Set Temperature calibrating. This means taking an accurate This is the temperature the thermostat is currently reading from a thermometer and then adjusting controlling to. At any time, you can press the the thermostat to compensate for any difference. -
Page 5: Frost Protection (Stat Off)
3.Frost Protection (Thermostat Off) Comfort Levels The programmable thermostats have 4 comfort To enable this operation for the steps below. levels per weekday/weekend. Turn the thermostat off by pressing The new method of control is not to have on / off Press for 3 seconds. -
Page 6: Setting The Clock
To cancel the frost protection mode, press H again. The frost symbol will be removed. 5. Setting the Clock (All models, except DT) 7. Floor Sensor Limit (PRT-R2 Only) With the thermostat turned on, press twice The PRT-R2 allows you to program a floor limit will be displayed. - Page 7 8. Setting the Comfort Levels (Except DT) As described earlier, you should think of these temperatures as “wake, leave, return and sleep” To begin programming the comfort levels, press For any unused levels, set the time and is displayed as well as the number 1 and temperature to --.--...
- Page 8 Heatmiser DT Press H to accept the start time. STANDARD CHANGE OVER Enter the End time for switching time 1. You should repeat this for the other 3 switching FUSE AT 3 AMPS times for the weekday, and again for the weekend.
- Page 9 Heatmiser DT Heatmiser DT CHANGE OVER HIGH POWER VOLT FREE FUSE AT 3 AMPS FUSE AT 16 AMPS LOAD e.g. Electric Underfloor heating TO BOILER CONTROL CIRCUIT Set-point range: 5-35 °C (Room) Set-point range: 5-35 °C (Room) Switch Current Rating: <16A...
- Page 10 CHANGE OVER Heatmiser PRT Heatmiser PRT STANDARD VOLTFREE Standard Changeover FUSE AT 3 AMPS FUSE AT 3 AMPS Volt Free SWITCHED LIVE TO BOILER OUTPUT CONTROL CIRCUIT Set-point range: 5-35 °C (Room) Set-point range: 5-35 °C (Room) Switch Current Rating: <3A...
- Page 11 Heatmiser PRT Heatmiser PRT HIGH POWER Changeover High Power CHANGE OVER FUSE AT 16 AMPS Volt Free VOLTFREE FUSE AT 3 AMPS LOAD OMIT THIS CONNECTION FOR SPRING RETURN VALVES e.g. Underfloor heating pads VALVE NEUTRAL Set-point range: 5-35 °C (Room) Set-point range: 5-35 °C (Room)
- Page 12 Heatmiser PRT/HW Heatmiser PRT/HW Volt Free Switched Live PRT/HW PRT/HW FUSE AT 3 AMPS FUSE AT 3 AMPS A1 A2 B1 B2 A1 A2 Switched live Switched live to hot to boiler water pump or valve Set-point range: 5-35 °C (Room) Set-point range: 5-35 °C (Room)
- Page 13 Heatmiser PRT-R2 Heatmiser PRT-R Set-point range: 5-35 °C (Room) Set-point range: 20-45 °C (Floor) Set-point range: 5-70 °C Switch Current Rating: <16A Switch Current Rating: <16A...
Need help?
Do you have a question about the DT and is the answer not in the manual?
Questions and answers