Table of Contents
Advertisement
Advertisement
Table of Contents

Related Manuals for Heatmiser DT-W


Summary of Contents for Heatmiser DT-W
- Page 1 Model: DT-W Model: DT-W...
-
Page 2: Table Of Contents
Table of Contents Model: DT-W Product Image Table of Contents What is a Room Thermostat? Installation Procedure Installing the Batteries Replacing the Batteries Pairing with the RC1-W Receiver 10-11 Pairing with the UH1-W Wiring Centre 11-12 LCD Display 13-14 Temperature Display... -
Page 3: What Is A Room Thermostat
– say 18°C , and then turn it up by 1°C each day until you are comfortable with the temperature. You won’t have to adjust the thermostat further. Any adjustment above this setting will waste energy and cost you more money. Wireless Series Model: DT-W... -
Page 4: Installation Procedure
Drill at the marked positions and insert a wall plug into each hole. Step 3 Screw the thermostat back plate securely on the wall. Step 4 Clip the front of the thermostat back onto the thermostat back plate. Wireless Series Model: DT-W... -
Page 5: Installing The Batteries
Insert the batteries in the empty battery holder, ensuring that each battery is orientated for the correct polarity + / - . Push the battery holder back inside the thermostat until it is secured in its closed position. Wireless Series Model: DT-W... -
Page 6: Replacing The Batteries
• Press Clock again until you see feature 08 (Zone number) ........ • You are able to connect two DT-W thermostats to one RC1-W receiver. • Use the Up/Down keys to select the zone this thermostat controls (01 or 02) .................... -
Page 7: Pairing With The Uh1-W Wiring Centre
UH1-W will be activated ................• The small number 01 in the top right corner of the LCD is the feature number. This indicates pairing between the thermostat and the UH1-W is successful. Wireless Series Model: DT-W... -
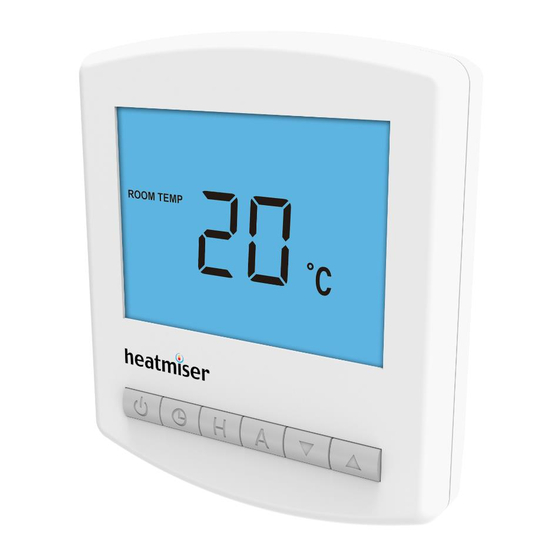
Page 8: Lcd Display
Set - Indicates when changes are being made to the temperature set point. Current Temp - Indicates the current sensor temperature. Battery Level - Indicates when the batteries require replacement. Keypad Lock Indicator - Displayed when the keypad is locked. Units of Temperature - Degrees Celsius or Fahrenheit. Wireless Series Model: DT-W... -
Page 9: Temperature Display
Use the Up/Down keys to adjust the SET value ..........This is the current room temperature. This is the temperature you are trying to Press A to confirm settings and return to main display ..........achieve in your home. Wireless Series Model: DT-W... -
Page 10: Re-Calibrating The Thermostat
All of the icons will be displayed on screen ............*See Feature 3 on page 19 • When the icons have disappeared from the screen, the thermostat has been successfully reset. • Press the Power button once to turn the thermostat back ON ......Wireless Series Model: DT-W... -
Page 11: Optional Features Explained
RC1-W 2 channel receiver. This setting determines which is being used. Feature 07 – Receiver Address: Within one building, up to 9 UH1-W’s or 32 RC1-W’s can be used. Each receiver must have a unique receiver address (01-32). Wireless Series Model: DT-W... - Page 12 00 = Disabled, 01 = Enabled (01 = Default) • Press A to confirm settings ....................Up/Down Limit - 10 C (00 C = Default) • Press the Power button once to turn the thermostat back ON ......Wireless Series Model: DT-W...
-
Page 13: Wireless Series
Heating Professionals: Request a copy of our product installation guide containing detailed technical specifications for our complete product range: www.heatmiser.com/guide Want More Information? Call our support team on: +44 (0)1254 669090 Or view technical specifications directly on our website: www.heatmiser.com...
Need help?
Do you have a question about the DT-W and is the answer not in the manual?
Questions and answers