Table of Contents
Advertisement
Quick Links
Download this manual
See also:
Installation Manual
Advertisement
Table of Contents

Related Manuals for Smart Technologies 2000i-DVX


Summary of Contents for Smart Technologies 2000i-DVX
- Page 1 Installation Guide Interactive Whiteboard...
-
Page 2: Technical Support
Trademark Notice SMART Board, DViT, X-Port, Notebook and the SMART logo are trademarks of SMART Technologies Inc. Windows is either a registered trademark or a trademark of Microsoft Corporation in the U.S. and/or other countries. All other third- party product and company names may be trademarks of their respective owners. -
Page 3: Important Information
Important Information Please read this manual carefully before setting up and using the Rear Projection SMART Board 2000i interactive whiteboard. With proper care, your 2000i should provide years of trouble-free service. The projector inside the unit is a high brightness light source. Do not look directly WARNING into the beam of light. - Page 4 To reduce the risk of fire or electric shock, do not expose this product to rain or WARNING moisture. Pour réduire le risque d'incendie ou de choc électrique, évitez d'exposer ce produit à la pluie ou à l'humidité. Para reducir el riesgo de incendio o de descarga, no exponga este producto a la lluvia o la humedad.
-
Page 5: Other Warnings And Safety Precautions
Das 2000i darf nur mit europäischen TN- und TT-Netzverteilern verwendet WARNUNG für werden. europäische Kunden Das 2000i eignet sich nicht für ältere Netzverteiler vom Typ IT, die in manchen europäischen Ländern zu finden sind. “Dieses System (IT-Typ) wird, von der Erdung isoliert, in einigen Installationen in Frankreich mit Impedanz zu Erde bei 230/400 V und in Norwegen mit Spannungsbegrenzer, neutral, nicht verteilt, bei 230 V Leitung zu Leitung verwendet.“... - Page 6 Do not modify the power cord. 13. If you require replacement parts, ensure the service technician uses replacement parts that are specified by SMART Technologies Inc., or parts with the same characteristics as the original. Important Information...
-
Page 7: Table Of Contents
Contents Important Information ..................i Other Warnings and Safety Precautions ..............iii About the 2000i-DVX ...................1 Features........................1 Getting to Know Your 2000i..................2 Pen Tray Features......................3 The NEC VT560 Projector.................... 4 Projector Settings ......................5 Using the Projector Remote Control................5 Control Panel ........................ -
Page 9: About The 2000I-Dvx
About the 2000i-DVX The Rear Projection SMART Board 2000i interactive whiteboard is a height adjustable, rear projection system with an integrated XGA LCD projector and a 67" (170.2 cm) diagonal interactive SMART Super Screen. To enable rear projection capability, a mirror system redirects the projected image from your computer, VCR, DVD player or guest laptop onto the back of the interactive whiteboard screen, eliminating the distracting shadows that sometimes occur with a front projection system. -
Page 10: Getting To Know Your 2000I
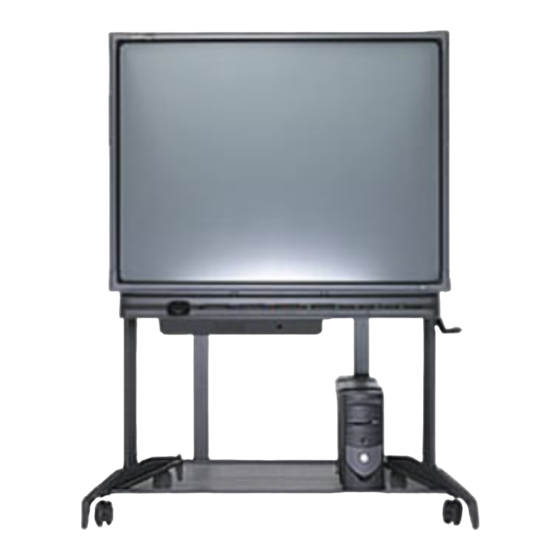
Getting to Know Your 2000i Removable View Port Projector SMART Pen Tray Lockable Casters (x 4) Control Panel Laptop Shelf Height Adjustment Handle Your Computer Storage Tray Projector Extendable Anti-Tip Feet (x 4) Major Components of the 2000i 2000i-DVX Installation Guide... -
Page 11: Pen Tray Features
If you need to use a To reconfigure the pen tray buttons, click the different stylus, choose one with a dark tip. SMART Board icon in the system tray select Control Panel, and click the Pen Tray tab. 2000i-DVX Installation Guide... -
Page 12: The Nec Vt560 Projector
Moving this ring may cause the lenses to separate. NOTE: For more information on adjusting the projected image, turn to page 13. Adjust the focus with this lever Bottom View (Upside-Down) Do not move this ring! Side View 2000i-DVX Installation Guide... -
Page 13: Projector Settings
Press the Menu button on the remote control to view the projector menu on the screen. Note, however, that you can’t select the projector menu options by touching the screen; you must use the remote control or the buttons on the projector itself. 2000i-DVX Installation Guide... -
Page 14: Control Panel
Lamp Status Flashing moderately quickly Lamp is powering up. During this 60-second period, the Lamp On and Off buttons are disabled. Solid Lamp is fully powered up. Flashing occasionally (short Lamp is off. flashes followed by long pauses) 2000i-DVX Installation Guide... - Page 15 Press this button and hold it down for four seconds to open the Floating Tools. For instructions on using the Floating Tools, see page 34. Guest laptop NOTE: You can only switch to a connected guest laptop if your system includes the optional X-Port 20 switch. 2000i-DVX Installation Guide...
-
Page 16: Installing Your 2000I
Locking Ball in the Locking Ball in the Inner Hole Outer Hole Extending an Anti-Tip Foot 2000i-DVX Installation Guide... - Page 17 Sichern Sie die Rollenbremsen und fahren Sie die Sicherheitsstützen aus, bevor Sie das Gerät verwenden. Andernfalls könnte das 2000i umkippen. ユニットをご使用になる前に、キャスターをロックして、脚を伸ばしてください。それ 以外の場合は、2000i がひっくり返る可能性があります。 4. Remove the bag that surrounds the projector. 5. Remove the locking pins from either side of the 2000i. Removing the Locking Pins 2000i-DVX Installation Guide...
-
Page 18: Installing A Computer
1. Connect the Computer AC power cable to an available power outlet or power bar (not supplied). 2. Connect the 2000i AC power cord to the country-specific AC cord in the accessory box. Then connect this AC cord to an available power outlet or power bar (not supplied). 2000i-DVX Installation Guide... -
Page 19: Powering Up The 2000I
If you do keep the computer on all the time, restart it occasionally. NOTE: You may prefer to shut the computer down at the end of the day. 2000i-DVX Installation Guide... - Page 20 NOTE: To immediately restore the input signal from the computer during this three-minute projector shutdown period, press any Control Panel button. This function is especially handy when you're a passive participant in a lengthy data conference. 2000i-DVX Installation Guide...
-
Page 21: Adjusting The Projected Image
1. Locate the focus lever, at the bottom of the upside-down projector. Use this lever rather than the blue focus ring to adjust the focus. Adjust the focus with this lever Bottom View (Upside-Down) Do not move this ring! Side View 2000i-DVX Installation Guide... - Page 22 1. Grasp the view port cover in the middle of each short edge, and pull it away from the unit. Lift from here Lift from here Removing the View Port Cover You can now access the top of the projector to perform the following image adjustment procedures. 2000i-DVX Installation Guide...
- Page 23 2. While carefully observing the bottom edge of the image at the right side, use the supplied 7/16" nut driver to loosen or tighten the nut that’s located on the right side of the projector plate, as required (see the following figure). Using the Nut Driver to Adjust Roll 2000i-DVX Installation Guide...
- Page 24 2. Using the supplied 7/16" nut driver, loosen the two nuts that are located on the left side of the projector plate. Using the Nut Driver to Adjust the Image Laterally 3. Slide the projector plate to the right or left, and then tighten the two nuts. 2000i-DVX Installation Guide...
- Page 25 To access the single screw at the front, you must reach through the view port to the front of the projector, and maneuver the security key through the center access hole in the projector cover (see the following figure). 2000i-DVX Installation Guide...
- Page 26 NOTE: As you maneuver the security key through the access hole, watch it from the back to see when it engages with the screw. 3. Slide the projector backward or forward to alter the image size. 4. When the image is a good size, tighten all three screws that you previously loosened. 2000i-DVX Installation Guide...
- Page 27 3. Remove the plastic cap that covers the access hole. If the cap seems tight, carefully pry it off with a screwdriver, inserting the screwdriver into the small opening at the top of the cap. 4. Loosen or tighten the bolt inside the access hole with the supplied 7/16" nut driver to adjust the image vertically. 2000i-DVX Installation Guide...
-
Page 28: Installing The Videoconferencing/Laptop Shelf
Videoconferencing Height Laptop Height Shelf Height Option To install the videoconferencing/laptop shelf 1. Remove the plastic hole covers at the location where you want to mount the shelf. Removing the Hole Covers 2000i-DVX Installation Guide... -
Page 29: Matching The Computer Resolution To The Projector Resolution
• This procedure may vary, depending on which version of the Windows operating system you’re running. 1. Click the Start button and then select Settings > Control Panel. The Control Panel window appears. 2. Double-click Display. 2000i-DVX Installation Guide... -
Page 30: Installing Smart Board Software
If you're running SMART Board driver version 6.0 (or later), the COM port configuration process is entirely automatic, unless: • the Windows operating system you're running does not perform plug and play (e.g., Windows NT 4.0 or ME) 2000i-DVX Installation Guide... - Page 31 5. Click the Apply button, and then OK (or Next for Mac OS 9.x computers or earlier). 6. Click the Orient button. 7. Follow the on-screen instructions. Press on each cross that appears with your finger or stylus at a 90° angle to the screen. 2000i-DVX Installation Guide...
-
Page 32: Calibrating The Cameras (Dvit Technology)
2000i. If a guest laptop requires a USB connection to the 2000i, purchase the optional USB-ADP cable from SMART Technologies to convert USB to serial. Complete instructions for installing the X-Port 20 switch and connecting a guest laptop are in the X-Port 20 Switch Installation Guide that comes with the X-Port 20 option kit. - Page 33 Audio In C om pu A ud A ux A ud i l i a r y i o I n A ud O ut Connect red and white RCA audio cables here Connecting the Audio Cables 2000i-DVX Installation Guide...
-
Page 34: Connecting An External Sound System
A u d i l i a r y i o I n A u d O u t Connect red and white RCA audio cables to external sound system here Connecting Audio Cables from an External Sound System 2000i-DVX Installation Guide... -
Page 35: Connecting An External Monitor Or Projector
To direct the RGB output from the host computer or guest laptop to an external projector or monitor Connect an HD DB15 video cable (not provided) from the external projector or monitor to the RGB OUT port on the back of the projector. This connection is for RGB output only. 2000i-DVX Installation Guide... -
Page 36: Basic Operations
If the screen turns from black to blue – and no logon screen appears – you may need to power up the computer or restore it from a standby setting by pressing the computer’s reset button. See the next page for possible startup scenarios. 2000i-DVX Installation Guide... -
Page 37: Startup Scenarios
Lamp On button to start the system • The Off and On The system can’t detect a projector. Check the NEC VT660K/VT560/VT465 User’s Manual to make sure the projector is connected properly. LEDs are both flashing constantly 2000i-DVX Installation Guide... -
Page 38: Putting The 2000I On Standby
Press and hold the Lamp Off button for three seconds. The lamp immediately powers down and enters a 60-second cooldown period. 3. When the cooling fan stops, flip the power switch on the back of the projector. 4. Disconnect the 2000i power cable from the wall power outlet. 2000i-DVX Installation Guide... -
Page 39: Adjusting The Height Of The Interactive Whiteboard
NOTE: If the computer on the storage tray is unusually tall, be careful not to lower the interactive whiteboard on top of it. To raise the screen Turn the height adjustment handle in a clockwise motion to raise the screen. The maximum height is 83" (210.8 cm). 2000i-DVX Installation Guide... -
Page 40: Adjusting The Volume
2000i retains the settings you made for the first input source (for when you switch back). Volume Up Volume Down To adjust the volume 1. Press and hold the Volume Up ( ) button on the Control Panel to increase the volume for the current source. 2000i-DVX Installation Guide... -
Page 41: Changing The Display Source For The Internal Projector
S-video cable. You must use the projector remote control to switch to an S-video source. To switch to the internal computer Press the Internal Computer button on the Control Panel. To switch to a guest computer (X-Port 20 switch option only) Press the Guest Laptop button on the Control Panel. 2000i-DVX Installation Guide... -
Page 42: Using The Smart Board Interactive Whiteboard
SMART Board tools running to use the pen tray styluses and eraser. In other words, if you want to write on your interactive whiteboard with a pen tray stylus, make sure the SMART Board icon appears in the system tray (Windows operating system) or menu bar (Macintosh computer). SMART Board Tools 2000i-DVX Installation Guide... - Page 43 Press the Notebook button on the Control Panel for about four seconds (just until the Floating Tools appear), and then press the Restore Annotations button. The last cleared annotation – in this case, the one you accidentally lost – reappears. 2000i-DVX Installation Guide...
-
Page 44: Enabling/Disabling Multipointer Mode
After you press the final target, a message appears, followed immediately by the orientation screen. 6. Complete the orientation procedure. NOTE: Unlike the calibration screen, you will not hear a beep after pressing each target on the orientation screen. 7. Press OK. 2000i-DVX Installation Guide... -
Page 45: Maintenance
Periodically clean the projector casing with a damp cloth. If it is heavily soiled you can use a mild detergent, but don't use strong detergent or a solvent, such as alcohol or thinner. Use a blower or lens paper to clean the lens, being careful not to scratch or mar the lens. 2000i-DVX Installation Guide... -
Page 46: Replacing The Projector Lamp And Filter
(qui sera très chaude). Stecken Sie den Projektor für mindestens eine Minute nach dem Abschalten nicht aus. Berühren oder ersetzen Sie die Projektorlampe (die sehr heiß sein wird) nicht vor Ablauf einer Stunde. プロジェクターの電源を切った後、最低でも 1 分間はプロジェクターのプラグを抜かないでください。プロジェクターのランプは非 常に熱くなりますので、最低でも 1 時間は触ったり交換したりしないでください。 2000i-DVX Installation Guide... - Page 47 Para evitar descargas eléctricas, no quite ningún tornillo excepto los de las dos lámparas. Um einen elektrischen Schlag zu vermeiden, dürfen Sie mit Ausnahme der beiden Lampengehäuseschrauben keine Schrauben entfernen. 感電の恐れがありますので、ランプ ケースの 2 つのねじ以外に、ねじは取り外さないようにしてください。 2000i-DVX Installation Guide...
-
Page 48: Customer Support
Main Switchboard: 1.888.42.SMART (toll-free in Canada/U.S.) or +1.403.245.0333 (all other countries) Fax: +1.403.228.2500 E-mail: info@smarttech.com Address: SMART Technologies Inc. Suite 300, 1207 – 11th Avenue SW Calgary, AB CANADA T3C 0M5 Returning Defective Merchandise All Rear Projection SMART Board 2000i interactive whiteboards are covered by a two-year limited equipment warranty. -
Page 49: Registration
Registration A User Registration card was included with your 2000i. To help us serve you, fill in and mail this card to SMART Technologies Inc. or register online at www.smarttech.com/registration. Sending Feedback You can help us improve our documentation by e-mailing your comments to TechnicalDocumentation@smarttech.com. -
Page 50: Index
Maintenance, 37 Matching the Computer Resolution to the Projector Enabling/Disabling Multipointer Mode, 36 Resolution, 21 Eraser pad replacement, 37 External Monitor or Projector Connecting an, 27 External Sound System, 26 Notebook Software, 1, 34 Connecting an, 26 2000i-DVX Installation Guide... - Page 51 Volume Control, 7 Selecting a COM Port for the Interactive Whiteboard, 23 Setting up the 2000i, 8 Shutting down the 2000i, 30 Warnings and Safety Precautions, iii SMART Board Cleaning, 37 Configuring, 22 X-Port 20 Switch Option, 24, 33 2000i-DVX Installation Guide...
- Page 52 Suite 300, 1207 – 11th Avenue SW Calgary, AB CANADA T3C 0M5 Main Switchboard: 1.888.42.SMART (Canada/U.S.) or +1.403.245.0333 (all other countries) Support Tel: 1.866.518.6791 (Canada/U.S.) or +1.403.228.5940 (all other countries) Support Fax: +1.403.806.1256 support@smarttech.com www.smarttech.com 99-00473-01 REV A0...
Need help?
Do you have a question about the 2000i-DVX and is the answer not in the manual?
Questions and answers