Smart Technologies SMART Board 2000i-DVX Installation Manual
Hide thumbs
Also See for SMART Board 2000i-DVX:
- Installation manual (69 pages) ,
- Installation manual (52 pages)
Table of Contents
Advertisement
Quick Links
Download this manual
See also:
Installation Manual
Advertisement
Table of Contents
Troubleshooting

Subscribe to Our Youtube Channel
Related Manuals for Smart Technologies SMART Board 2000i-DVX


Summary of Contents for Smart Technologies SMART Board 2000i-DVX
- Page 1 Installation Guide SMART Board 2000i 2000i - DVX 2000i - DVS Interactive Whiteboard...
-
Page 2: Technical Support
Trademark Notice SMART Board, Notebook, DViT, LinQ, X-Port and the SMART logo are trademarks of SMART Technologies Inc. Windows is either a registered trademark or a trademark of Microsoft Corporation in the U.S. and/or other countries. -
Page 3: Important Information
Important Information Please read this manual carefully before setting up and using the Rear Projection SMART Board™ 2000i interactive whiteboard. With proper care, your 2000i will provide years of trouble- free service. WARNING The projector inside the unit is a high brightness light source. Do not look directly into the beam of light. - Page 4 WARNING Make sure an AC socket outlet is near the 2000i and remains easily accessible during use. Assurez-vous qu’une prise secteur se trouve à proximité du 2000i et demeure facilement accessible durant l’utilisation. Asegúrese de que hay una toma de corriente alterna cerca del 2000i y que es fácilmente accesible para su uso.
- Page 5 ADVERTENCIAS La 2000i sólo se podrá utilizar con los sistemas eléctricos TN y TT europeos. PARA LOS Este modelo no está disponible para antiguos sistemas eléctricos de tipo IT CLIENTES que aún se utilizan en algunos países europeos. “Este sistema (IT) tiene una EUROPEOS utilización muy extendida como núcleo aislado de tierra;...
-
Page 6: Other Precautions
CAUTION The projector inside the 2000i has been designed for use under normal operating conditions only. Normal operating conditions are defined as product use that does not exceed 8 hours per day and 260 days per year. Exceeding these operating conditions could cause projector damage. - Page 7 • Avoid setting up and using the 2000i in an area with excessive levels of dust, humidity or smoke. • Lock the casters after you set up the cabinet so it remains stationary while in use. • Avoid exposing the 2000i to extreme heat or cold. The operating temperature range is from 41°F to 84°F (5°C to 29°C) with up to 80% humidity (non-condensing).
- Page 8 Important Information...
-
Page 9: Table Of Contents
Adjusting the Volume ......................37 Fine-Tuning the Projected Image ................... 37 Changing the Display Source for the Internal Projector ............38 Using the SMART Board Interactive Whiteboard ..............39 Enabling/Disabling Multiple Touch Mode ................41 Maintenance and Troubleshooting ..................43 Cleaning the Interactive Whiteboard and other Components .......... - Page 10 Replacing the Projector Lamp and Filter ................44 Troubleshooting ........................47 Calibrating the Cameras ......................49 Customer Support ........................ 51 Contacting SMART Technical Support .................. 51 General Inquiries ........................51 Returning Defective Merchandise ..................51 Registration ..........................52 Sending Feedback ......................... 52 Obtaining More Information on SMART Products ..............
-
Page 11: About The 2000I
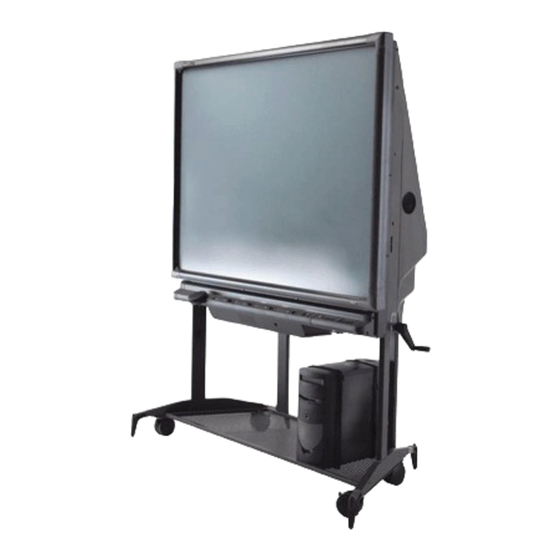
About the 2000i The Rear Projection SMART Board 2000i interactive whiteboard is a height adjustable, rear projection system with an integrated LCD projector and a 66" (167.6 cm) diagonal interactive screen. To enable rear projection capability, a mirror system reflects the projected image from your computer, VCR, DVD player or guest laptop onto the back of the interactive whiteboard screen, eliminating the distracting shadows that sometimes occur with a front projection system. -
Page 12: Getting To Know Your 2000I
Getting to Know Your 2000i Removable View Port Projector Laptop Shelf Height × Lockable Casters ( Adjustment Handle SMART Pen Tray Control Panel Your Computer Storage Tray Projector × Extendable Anti-Tip Feet ( About the 2000i... -
Page 13: Pen Tray Features
To write over the computer image with digital ink, just pick up a pen from the pen tray and write on the screen. You can use SMART Board software to change any of these pens to highlighters, assign a new color, or alter their width. You can also change the size of the area erased by the pen tray eraser. -
Page 14: The Nec Vt470 And Vt670 Projectors
The NEC VT470 and VT670 Projectors CAUTION Do not move the ring that surrounds the short-throw, customized projector lenses, even though the NEC VT470/570/670 User’s Manual states that you should use this ring to obtain the best focus. You must disregard this information. If you move the ring, you may cause the lenses to separate. -
Page 15: Projector Settings
Projector Settings We’ve configured your projector settings for optimal performance with the 2000i. However, if these settings are accidentally altered, follow the procedure below to restore them. To set or restore the optimal settings for the NEC VT470/670 projector 1. Press the Menu button on the projector remote control or on the projector. NOTE: The Menu button is on what is effectively the underside of the projector, which is suspended upside down from the projector mount). -
Page 16: Control Panel
3. Adjust the focus by moving the lever, and then tighten the slot-head screw you loosened in the previous step. CAUTION Do not over-tighten the screw. Control Panel Use the control panel to turn the projector lamp on and off, change the display source for the projector, open Notebook software, and adjust the volume of the internal sound system. - Page 17 CAUTION The projector inside the 2000i has been designed for use under normal operating conditions only. Normal operating conditions are defined as product use that does not exceed 8 hours per day and 260 days per year. Exceeding these operating conditions could cause projector damage.
- Page 18 Source Buttons Use the source buttons to switch the video and audio sources for the projector and cabinet audio amplifier. Please note that switching sources takes a few seconds, and all buttons on the control panel are disabled during that time. Button Source VCR/DVD player...
-
Page 19: Setting Up Your 2000I
Setting Up Your 2000i This section of the manual describes how to: • position the 2000i (this page) • install and connect the host computer (page 10) • install the videoconferencing/laptop shelf (page 13) • connect a guest laptop (page 14) •... -
Page 20: Installing A Computer
WARNING Lock the casters and extend the anti-tip feet before you use the unit. Otherwise, the 2000i could tip over. Bloquez les roulettes et étendez les pieds avant d’utiliser l’appareil. Autrement, le 2000i risque de basculer et de tomber. Bloquee las ruedas y extienda los pies ajustables antes de utilizar la unidad. De no hacerlo, la pantalla 2000i podría volcarse. - Page 21 The data connection for the internal computer is an RS-232 serial cable. If your computer has USB ports, use the SMART USB adapter in the accessory box. Connect the DB9 end of this adapter to the Computer 1 Serial cable and the USB end to your computer. To connect a computer 1.
-
Page 22: Turning On The 2000I
When an image displays, adjust the computer power settings and the image alignment on the interactive screen. Then install SMART Board software, configure the COM port, and perform a brief orientation procedure. All these procedures are described in Finalizing the Installation on page 21. -
Page 23: Installing The Videoconferencing/Laptop Shelf
Installing the Videoconferencing/Laptop Shelf You can position the videoconferencing/laptop shelf just above the height-adjustment handle (for laptop use), or higher up on the frame (for use with a videoconferencing camera). You can install the shelf on either side of the unit. Videoconferencing Height Laptop... -
Page 24: Connecting A Guest Laptop
2. Hook the shelf to the keyholes, and then push the shelf firmly down. Keyholes Captive Thumbscrew 3. Push the captive thumbscrew at the bottom of the shelf into the thumbscrew hole and tighten. Connecting a Guest Laptop You can connect and control a laptop presentation by touching the interactive screen only if you: •... - Page 25 NOTE: There is a three-second delay before the alternate display source appears. Also, when you switch to another source (such as the internal computer), and then press the VCR/DVD Player button, the last active video source will always appear. You’ll need the following cables to connect a VCR or DVD player to the 2000i: •...
- Page 26 4. Connect standard red and white RCA stereo audio cables (not provided) from the RCA Audio (or Audio OUT) outputs on the VCR to the two Auxiliary Audio IN jacks on the rear of the 2000i. Keep your right and left channel connections correct for stereo sound. Computer 2 Aux iliary Audio...
- Page 27 3. Plug the other end of the cable into the S-video IN connector on the projector. S-video IN S-video Cable from DVD Player 4. Connect standard red and white RCA stereo audio cables (not provided) from the RCA Audio (or Audio OUT) outputs on the DVD player to the two Auxiliary Audio IN jacks on the rear of the 2000i.
- Page 28 8. Turn on the DVD player, insert a DVD and press the Play button. To link VCR and DVD player audio connections NOTE: Make sure there is no tape in the VCR before you proceed. 1. Connect standard red and white RCA stereo audio cables (not provided) from the RCA Audio (or Audio OUT) outputs on the DVD player to the RCA Audio (or Audio IN) inputs on the VCR.
-
Page 29: Connecting An External Sound System
Connecting an External Sound System To deliver preamplified (or line level) sound to an external room sound system Connect standard red and white RCA audio cables (not provided) from the RCA Audio inputs on the external sound system to the two Audio OUT jacks on the rear of the 2000i. Keep your right and left channel connections correct for stereo sound. - Page 30 Setting Up Your 2000i...
-
Page 31: Finalizing The Installation
• adjusting the projected image (this page) • configuring the computer settings (page 27) • installing SMART Board software on any connected computer (page 29) • configuring the computer port (page 29) • orienting the interactive whiteboard (page 30) After you’ve made these adjustments and configurations, your 2000i is ready to use. - Page 32 To remove the view port cover Grasp the view port cover in the middle of each short edge, and then pull it away from the unit. Lift from here Lift from here You can now access the projector to perform the following image-adjustment procedures. To adjust the image roll 1.
- Page 33 2. While carefully observing the bottom edge of the image at the right side, use the supplied 7/16" nut driver to loosen or tighten the nut that’s located on the right side of the projector plate, as required (see the following figure). To adjust the image laterally 1.
- Page 34 2. Using the supplied 7/16" nut driver, loosen the two nuts located on the left side of the projector plate. 3. Slide the projector plate to the right or left, and then tighten the two nuts. To change the image size 1.
- Page 35 × NOTE: To access the two screws at the front of the projector, you must reach through the view port to the front of the projector, and maneuver the security key through the two access holes in the projector cover (see the following figure). NOTE: Screen removed for clarity NOTE: As you maneuver the security key through these two access holes, watch it from the back to see when it engages with the screws.
- Page 36 To move the image vertically 1. Move to the front of the unit and crouch down, facing the screen. Move Image Up or Down 2. Look underneath the pen tray and locate the electronics tray. You’ll see a large access hole covered with a plastic cap on the right side of the electronics tray.
-
Page 37: Configuring The Computer Settings
To further adjust the image up or down NOTE: Perform this procedure only if the preceding procedure failed to raise or lower the image sufficiently. This procedure will only raise or lower the image by about a 1/4" (0.6 cm). 1. -
Page 38: Recommended Settings
Recommended Settings You should keep the internal computer on all the time, but set it to turn off the monitor after 1 hour of inactivity, and to put the hard disk(s) into standby mode after 2 hours. This extended period avoids an unexpected computer shutdown during presentations, video-conferences or lengthy meetings with gaps in computer activity. -
Page 39: Installing Smart Board Software
Board tools automatically when you start your computer. This ensures that the interactive whiteboard is fully functional whenever you start your computer. The SMART Board tools are open if you can see the SMART Board icon in the system tray (Windows computers) or in the Dock (Macintosh computers). -
Page 40: Orienting The Interactive Whiteboard
To select a COM port for the interactive whiteboard 1. Click the SMART Board icon in the system tray (Windows computers) or in the Dock (Macintosh computers), and select Control Panel. 2. Select SMART Board Settings. The SMART Board Settings dialog box appears. - Page 41 To orient using the Fine (20-point) or Quick (4-point) orientation levels 1. Press the SMART Board icon in the system tray (Windows computers) or in the Dock (Macintosh computers), and select Control Panel. 2. Select SMART Board Settings. 3. Select Alignment/Orientation Precision from the list.
- Page 42 Finalizing the Installation...
-
Page 43: Basic Operations
Basic Operations This section shows you how to: • Start up the 2000i (this page) • Put the 2000i into standby (page 35) • Adjust the height of the interactive whiteboard (page 36) • Adjust the volume (page 37) • Change the projector display source (page 38) •... -
Page 44: Startup Scenarios
Startup Scenarios If more than one person uses the 2000i, you may occasionally find that another user has turned the unit off completely rather than placed it in standby mode. The following table describes what you may need to do to restore the 2000i to a fully operational state. What You See What You Should Do •... -
Page 45: Putting The 2000I Into Standby Mode
Putting the 2000i into Standby Mode For normal operation, you don’t need to turn off the computer or the projector at the end of a session or at the end of the day. Just log off the computer (for security) and then turn off the projector lamp (to conserve its life) by pressing the Lamp Off button on the control panel. -
Page 46: Adjusting The Height Of The Interactive Whiteboard
Perform this procedure at the end of a meeting or presentation and at the end of the day. If you prefer, you can also shut down the computer. However, for greater ease of use, we recommend simply logging off rather than turning off the computer. To power down the projector (if unused for an extended period) 1. -
Page 47: Adjusting The Volume
To adjust the height of the interactive whiteboard Turn the height adjustment handle clockwise to raise the screen. The maximum height is 83" (210.8 cm). Turn the height adjustment handle counterclockwise to lower the screen. The minimum height is 69" (175.3 cm) from the floor. Be careful not to lower the unit on top of your computer. Turn clockwise to raise the screen Height... -
Page 48: Changing The Display Source For The Internal Projector
To fine-tune the projected image To automatically optimize the image in RGB mode, press the Auto Adjust button on the projector remote control. This will eliminate vertical banding, flickering, video noise, dot interference and cross talk. Changing the Display Source for the Internal Projector You can change the video and audio input source for the internal projector and cabinet audio amplifier using the three source buttons on the control panel. -
Page 49: Using The Smart Board Interactive Whiteboard
Board software. However, to get the most from your 2000i, open the SMART Board tools. You’ll know that the tools are active if you can see the SMART Board icon in the system tray (Windows computers) or the Dock (Macintosh computers). With SMART Board software, you can also customize the pen tray tools. - Page 50 Note that the SMART Board tools must be running to use the pen tray pens and eraser. In other words, if you want to write on your interactive whiteboard with a pen tray pen, make sure the SMART Board icon appears in the system tray (Windows computers) or Dock (Macintosh computers).
-
Page 51: Enabling/Disabling Multiple Touch Mode
After the first person picks up a pen tray pen, the other person can use their finger to write in the same color. To enable/disable Multiple Touch Mode 1. Press the SMART Board icon in the system tray (Windows computers) or in the Dock (Macintosh computers), and select Control Panel. 2. Select SMART Board Settings. - Page 52 Basic Operations...
-
Page 53: Maintenance And Troubleshooting
Maintenance and Troubleshooting Cleaning the Interactive Whiteboard and other Components Clean the interactive whiteboard surface regularly. Otherwise, dust may build up, diminishing the performance of the 2000i. Do not spray glass cleaner directly onto the screen surface. Instead, spray the cleaner lightly on a cloth and then gently wipe the screen surface. -
Page 54: Replacing The Projector Lamp And Filter
1. Press the Menu button on the projector remote control. 2. Select Default > Clear Filter Usage. The meter returns to zero. You won’t receive a “Please Clean Filter” message for 100 hours. Replacing the Projector Lamp and Filter Even though the lamp may still be working, you should replace your projector lamp after 2,000 hours of normal mode operation or 3,000 hours of eco-mode operation to maintain optimal performance. - Page 55 3. Shut down the computer. Press and hold the Lamp Off button on the control panel for approximately three seconds. The screen will turn black. Release the button and the projector lamp powers off in 60 seconds. Lamp Off Button WARNING After you turn off the projector, allow at least one minute to elapse before you unplug it.
- Page 56 Use the following table to keep track of each cable’s port. • The first column lists the port’s label as it appears on the projector and the port type • The second column shows the label of the cable that was originally connected to that port at the factory •...
-
Page 57: Troubleshooting
NOTE: This letter and number combination, as determined at the factory, may already be noted as the “Hinged” value on a sticker near the projector’s control panel. Hinged Non-hinged Hinged Non-hinged Approximate location of installation sticker 10. While a second person supports the projector, remove the two thumbscrews and carefully allow the projector to swing down. - Page 58 Software Make sure SMART Board software is running. interactive screen problem Is there a SMART Board icon in the system tray (Windows computers) or in the Dock (Macintosh computers)? If not, you’ll need to start the software. If SMART Board software is running, click the...
-
Page 59: Calibrating The Cameras
Fortunately, this problem is easily fixed by performing a simple calibration procedure, as described below. To calibrate the cameras 1. Press the SMART Board icon in the system tray (Windows computers) or in the Dock (Macintosh computers), and select Control Panel. 2. Press SMART Board Settings. - Page 60 Maintenance and Troubleshooting...
-
Page 61: Customer Support
CANADA Returning Defective Merchandise Your Rear Projection SMART Board 2000i interactive whiteboard (including the integrated projector) is covered by a two-year limited equipment warranty. To return defective merchandise, call SMART Technical Support. You will receive the appropriate Return of Merchandise authorization and instructions for transporting your 2000i to an authorized service center. -
Page 62: Registration
NOTE: After the warranty period, you are responsible for transporting the product to and from the service center. Registration A User Registration card was included with your 2000i. To help us serve you, fill in and mail this card to SMART Technologies Inc. or register online at www.smarttech.com/registration. Sending Feedback You can help us improve our technical documentation by e-mailing your comments to TechnicalDocumentation@smarttech.com. -
Page 63: Index
Index Numerics Configuring Computer Settings Interactive Whiteboard 2000i Connecting About Computer Features DVD Player Getting to Know External Monitor Positioning External Projector Putting the 2000i on Standby External Sound System Setting Up Guest Laptop Starting Up Power Cables Turning On Contacting SMART Technical Support Control Panel Customer Support... - Page 64 Changing the Display Source Laptop Shelf Cleaning SMART Board Software Introduction Videoconferencing Shelf Optimal Projector Settings Interactive Whiteboard, see SMART Board Replacing the Filter Interactive Whiteboard Replacing the Projector Lamp Interlinking VCR and DVD Player Audio Restoring Optimal Projector Settings Connections...
- Page 65 Floating Tools 40, 41 Opening Floating Tools SMART Board Tools 29, 39 Troubleshooting Turning Off the Projector Turning On the 2000i Using the SMART Board Interactive Whiteboard Connecting Interlinking VCR and DVD Player Audio Connections Switching to Videoconferencing Shelf Installing Volume...
- Page 66 Index...
- Page 67 SMART Technologies Inc. 1207 11 Avenue SW, Suite 300 Calgary, AB T3C 0M5 CANADA Support +1.403.228.5940 or Toll Free 1.866.518.6791 (Canada/U.S.) Support Fax +1.403.806.1256 support@smarttech.com www.smarttech.com 99-00530-02 REV A0...
Need help?
Do you have a question about the SMART Board 2000i-DVX and is the answer not in the manual?
Questions and answers