
Subscribe to Our Youtube Channel
Related Manuals for Community Compact 600


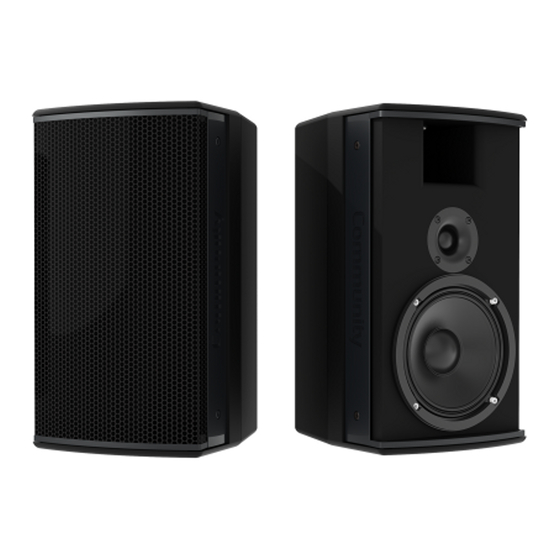
Summary of Contents for Community Compact 600
-
Page 1: Installation And Operation
I SERIES Installation and Operation Quick Start Guide Models Compact 600 IC6-1062/00, IC6-1082/26, IC6-1082/96, IC6-2082/26, IC6-2082/96 including T, WR, WT models communitypro.com... -
Page 2: Important Safety Instructions
If you have any questions or do not understand the meaning of It is always a good idea to retain the carton and these terms, do not proceed with installation. Contact your local dealer, distributor, or call Community packing materials, if possible, in the event that directly for assistance. - Page 3 P = Point Source Use 2 digits: IC6-1062/00B translates as: Horn Pattern C = Compact 08 = 8-inch S = Subwoofer I SERIES Compact 600 H x V Crossover Bands (Omit for S-type) Single 6-inch Two-way, 100° x 100°, Black 1-way Trim Level...
- Page 4 (B/W) - black or white finish IC6-2082WR26 Outdoor Low Impedance IC6-2082WR96 Outdoor Low Impedance WR/WT - grey finish standard IC6-2082WT26 Outdoor 70V/100V IC6-2082WT96 Outdoor 70V/100V Custom colors available as CTO IC6-2082C26 Configured-to-Order IC6-2082C96 Configured-to-Order Page 4 Quick Start Guide I SERIES Compact 600...
- Page 5 These 4 mounting points (on all IC6 models) are compatible with third party pan-tilt, wall and ceiling brackets Input panel cover with sealed gland nut and cable Rear Rear I SERIES Compact 600 Quick Start Guide Page 5...
- Page 6 The selection of appropriate electrical hardware to interface with the I SERIES loudspeaker lies solely with the installation professional. Community recommends that an appropriately licensed engineer, electrician, or other qualified professional identify and select the appropriate conduit, fittings, wire, etc.
- Page 7 Autoformer "T" Weather-Resistant WR Autoformer IC6-1062 16.0 (7.3) 20.0 (9.1) 12.6 (5.7) 16.6 (7.5) IC6-1082 25.0 (11.3) 29.0 (13.2) 19.2 (8.7) 23.2 (10.5) IC6-2082 31.0 (14.1) 35.0 (15.9) 23.9 (10.8) 27.9 (12.7) I SERIES Compact 600 Quick Start Guide Page 7...
- Page 8 IC6-1082/26. Socket Head Screw Remove the screws holding one Community grille retention bar to the cabinet. Remove the bar and loosen the grille. Then remove the other retention bar and pull the grille off and set aside. Keep the rubber extrusions protecting the top and bottom edges of the grille in place (Figures 3a, 3b).
- Page 9 Community supplied or third party fasteners, or they must be kept in place to seal the enclosure from air leaks. If manufactured mounting brackets.
- Page 10 Do not paint the cloth or rubber trim. Paint the front and edges of the grille retainers with the same paint used on the grille. Allow paint to fully cure before reassembling. Figure 6c. Remove trim strips and grille cloth Page 10 Quick Start Guide I SERIES Compact 600...
- Page 11 Figure 7e. Reinstall the grille one side cloth, open screw holes, and secure and secure ends and corners with glue at a time with correct orientation of the folded sides with glue grille retention bars I SERIES Compact 600 Quick Start Guide Page 11...
- Page 12 IUB1082WR: 6.0 lbs (2.7 kg) IUB1062WR, IUB1082WR, IUB2082WR IUB2082: 6.8 lbs (3.1 kg) (custom colors may be ordered as a IUB2082WR: 6.5 lbs (2.9 kg) CTO option) Note: Weather-resistant U-Bracket kits contain stainless steel hardware Page 12 Quick Start Guide I SERIES Compact 600...
- Page 13 Match your loudspeaker model and color Indoor - black IVY1082B, IVY2082B Indoor - white IVY1082W, IVY2082W (custom colors may be ordered as a Figure 2. Adjust angle and CTO option) fully tighten all connections I SERIES Compact 600 Quick Start Guide Page 13...
- Page 14 FOR MORE INFORMATION AND TRANSFERABLE WARRANTY “(LIMITED)” VALID IN THE USA ONLY APPLICATION ASSISTANCE The I SERIES loudspeakers are designed and backed by Community Professional Loudspeakers. For complete warranty information within the USA please refer For more information on installing and to www.communitypro.com/warranty.
- Page 15 11mm holes - use for third party speaker stand adapter brackets 13 mm hole for center bolt connection (4) 8.5mm holes can mount yoke to to BalancePoint™ IAF40/55 frame BalancePoint™ Fly Rails or other center suspension mounts I SERIES Compact 600 Quick Start Guide Page 15...
- Page 16 ©2016 Community Professional Loudspeakers # 114097 v:01JUL2016 Community Professional Loudspeakers 333 East Fifth Street, Chester, PA 19013-4511 USA Phone (610) 876-3400 • Fax (610) 874-0190 www.communitypro.com...
Need help?
Do you have a question about the Compact 600 and is the answer not in the manual?
Questions and answers