
Subscribe to Our Youtube Channel
Related Manuals for Community VERIS Series


Summary of Contents for Community VERIS Series
- Page 1 VERIS Series VERsatile Installation Systems Exquisite Performance… Exceptional Value Operation Manual...
- Page 2 EC STATEMENT OF CONFORMITY This document confirms that the range of products of Community Professional Loudspeakers bearing the CE label meet all of the requirements in the EMC directive 89/336/EEC laid down by the Member States Council for adjustment of legal requirements. Furthermore, the products comply with the rules and regulations referring to the electromagnetic compatibility of devices from 30-August-1995.
-
Page 3: Table Of Contents
26 ......................... 33 ERIS 28 ......................... 34 ERIS 12 ......................... 35 ERIS 15 ......................... 36 ERIS 32 ......................... 37 ERIS 35 ......................... 38 ERIS Community VERIS Series - Operation and Installation Manual - Page 3... -
Page 4: Table Of Figures
We call these C-TIPS (short for COMMUNITY-TIPS or COOL-TIPS…we’ll let you decide!). These tips originate from Community staff members as well as from installers and end users. We welcome any C-TIPS that you may want to share with us, and we’ll acknowledge you as the source if we print them in future user’s manuals. -
Page 5: Important Safety Information
If you have any questions or do not understand the meaning of these terms, do not proceed with installation. Contact your local dealer, distributor, or call Community directly for assistance. These terms are defined below: CAUTION: describes an operating condition or user action that may expose the equipment or user to potential damage or danger. -
Page 6: Precautions & Safety Considerations
Installation of loudspeakers should only be performed by trained and qualified personnel. It is strongly recommended that a licensed and certified professional structural engineer approve the mounting design. Community VERIS Series - Operation and Installation Manual - Page 6... -
Page 7: Introduction
VERIS SERIES OPERATION MANUAL INTRODUCTION Thank you for selecting Community’s VERIS Series. VERIS is a stunning collection of affordable loudspeakers designed for permanent installation in venues such as nightclubs, cafes, discotheques, houses of worship, auditoriums, lecture halls, restaurants, theatres, and most anywhere else that people gather to enjoy music and hear the spoken word. -
Page 8: Unpacking And Inspection
Your Community dealer and the factory will try to help in any way they can, but it is the responsibility of the party receiving the shipment to file the damage claim. -
Page 9: Veris Specifications
* VERIS models 6/8/26/28 include a yoke-style mounting bracket at no additional charge. These four models may be ordered with an optional 200W autoformer to accommodate 70V/100V system designs. Due to ongoing development, specifications are subject to change without notice. Community VERIS Series - Operation and Installation Manual - Page 9... - Page 10 52.5 lbs / 23.8 kg 58 lbs / 26.3 kg 55.5 lbs / 25.2 kg 67.5 lbs / 30.6 kg Due to ongoing development, specifications are subject to change without notice. Community VERIS Series - Operation and Installation Manual - Page 10...
-
Page 11: Getting Acquainted
For amplifier connection to the loudspeaker. NL4 and INPUT PANEL terminal strip are wired in parallel. Used for angling enclosure downward; not intended REAR PULL-BACK POINTS for primary rigging. Community VERIS Series - Operation and Installation Manual - Page 11... -
Page 12: Physical Features Of Veris Subwoofers
#6 x 5/8” sheet metal screws. Remove grille to SCREWS service drivers. Four synthetic rubber feet protect surfaces from FEET marring. For amplifier connection to the loudspeaker. NL4 and INPUT PANEL terminal strip are wired in parallel. Community VERIS Series - Operation and Installation Manual - Page 12... -
Page 13: General Description
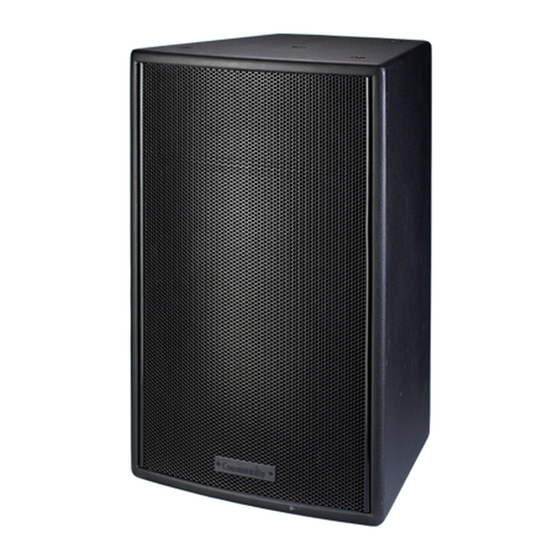
GENERAL DESCRIPTION VERIS Series loudspeakers are designed for demanding day-to-day use in a wide range of fixed installations. Their high quality driver components are housed in rugged, acoustically inert enclosures equipped with rigging fittings. VERIS systems are characterized by a high- power, low distortion linear response that provides exceptional musicality and speech intelligibility. -
Page 14: Cool-Coil™ Technology
The motion of the cone assembly will pump air in and out of the cavity under the dust cap. This air passing through the pole vent helps to cool the magnet structure. Community has improved on this common cooling method by introducing an airflow director (US patent 6,390,231) into the air path. -
Page 15: High-Pass Filters
VERIS12 Full-Range: 60 Hz, 24db/octave VERIS15 Full-Range: 60 Hz, 24db/octave VERIS32 Full-Range: 60 Hz, 24db/octave VERIS35 Full-Range: 60 Hz, 24db/octave VERIS210S Subwoofer: 40 Hz, 24db/octave VERIS212S Subwoofer: 40 Hz, 24db/octave Community VERIS Series - Operation and Installation Manual - Page 15... -
Page 16: Connecting The Amplifier To The Loudspeaker
CONNECTING THE AMPLIFIER TO THE LOUDSPEAKER All VERIS Series loudspeakers come with two methods of connecting the amplifier to the loudspeaker. One is an industry standard NL4 type locking connector, and the other is a terminal strip. These two connectors are wired in parallel with each other, on all models. -
Page 17: Using Power Taps
Just make sure to take your readings at an identical distance from each of the loudspeakers in the system, otherwise the results will be skewed. Community VERIS Series - Operation and Installation Manual - Page 17... -
Page 18: 70.7V And 100V Systems
Shocks from very low frequencies, such as kick drums, can cause the human heart to stop beating at relatively low power levels. Community VERIS Series - Operation and Installation Manual - Page 18... -
Page 19: Know Your Amplifier
Note that when specifying multiple twisted pairs of speaker cables intended to share the same conduit, the conduit will need to be sized much larger than with loose or bundled conductors. Community VERIS Series - Operation and Installation Manual - Page 19... -
Page 20: Conductors And Insulation
This approaches a 75% loss of total available power! As you can readily see, it’s very important to use the largest gauge wire that you possibly can, particularly when long lines are unavoidable. Note: NL4-compatible connectors easily accept #12 AWG. Community VERIS Series - Operation and Installation Manual - Page 20... -
Page 21: The Effect Of Wire Gauge On Damping Factor
420 to 600 WRMS at 8Ω VERIS210S Subwoofer 630 to 900 WRMS at 4Ω VERIS212S Subwoofer 600 to 900 WRMS at 4Ω Note: “WRMS” = “Watts RMS” = “Watts Root Mean Squared” Community VERIS Series - Operation and Installation Manual - Page 21... -
Page 22: Veris Applications
(particularly ceiling height), the location of the loudspeaker(s), the size and type of the amplifiers, and the stylistic demands of the music and speech that are to be reproduced. Community VERIS Series - Operation and Installation Manual - Page 22... -
Page 23: Positioning Subwoofers
We recommend reading, “Fundamentals of Sound” and “Psychoacoustics” by F. Alton Everest in the “Handbook for Sound Engineers” published by Howard Sams & Co. Community VERIS Series - Operation and Installation Manual - Page 23... -
Page 24: Polarity
(reversing both at the same time will not alter the phase relationship of the two systems). If there is one Community VERIS Series - Operation and Installation Manual - Page 24... - Page 25 All that cancelled energy uses power unnecessarily! Community VERIS Series - Operation and Installation Manual - Page 25...
-
Page 26: Choosing The Right Loudspeakers And Electronics
The three corrective methods referred to in the text, equalizing, high-passing, and increasing the slope of the crossover, are all various implementations of equalization. Community VERIS Series - Operation and Installation Manual - Page 26... -
Page 27: For More Information And Applications Assistance
Community’s installation guidelines contained herein. Beyond this, Community assumes no further or extended responsibility or liability, in any way or by any means whatsoever. It is the responsibility of the installer to insure that safe installation... -
Page 28: Veris Mounting Brackets And Accessories
VERIS MOUNTING BRACKETS AND ACCESSORIES Below are descriptions of mounting brackets, suspension kits and other accessories manufactured by Community for use with VERIS loudspeakers. In this section the terms “suspension” and “fly” mean the same thing: to elevate the loudspeaker enclosure above the ground surface. - Page 29 Model Nos. M10EYBLTKIT, M6EYBLTKIT Suspend your VERIS loudspeakers safely and easily. Use the 10mm M10EYBLTKIT with VERIS12/15/32/35; use the 6mm M6EYBLTKIT with the smaller VERIS6/8/26/28. Four eyebolts are included in each kit. Community VERIS Series - Operation and Installation Manual - Page 29...
-
Page 30: Troubleshooting Guide
Reduce the volume level to the loudspeaker, to restore full dynamic range. Community VERIS Series - Operation and Installation Manual - Page 30... -
Page 31: Technical Drawings
The rear mounting points also accept the V-HSS handle and stand socket accessory. A steel yoke bracket allowing 0°, 10° and 20° angles is included. For yoke mounting instructions, refer to the supplementary instruction sheet included with this model. Community VERIS Series - Operation and Installation Manual - Page 31... -
Page 32: Veris 8
The rear mounting points also accept the V-HSS handle and stand socket accessory. A steel yoke bracket allowing 0°, 10° and 20° angles is included. For yoke mounting instructions, refer to the supplementary instruction sheet included with this model. Community VERIS Series - Operation and Installation Manual - Page 32... -
Page 33: Veris 26
The rear mounting points also accept the V-HSS handle and stand socket accessory. A steel yoke bracket allowing 0°, 10° and 20° angles is included. For yoke mounting instructions, refer to the supplementary instruction sheet included with this model. Community VERIS Series - Operation and Installation Manual - Page 33... -
Page 34: Veris 28
4 x M8 rear mounting points for OmniMount™ 60 Series inserts. A steel yoke bracket allowing 0°, 10° and 20° angles is included. For yoke mounting instructions, refer to the supplementary instruction sheet included with this model. Community VERIS Series - Operation and Installation Manual - Page 34... -
Page 35: Veris 12
VERIS 12 VERIS 12 Notes: The VERIS 12 has a total of 13 x M10 hang points plus 4 x M8 rear mounting points for OmniMount™ 60 Series inserts. Community VERIS Series - Operation and Installation Manual - Page 35... -
Page 36: Veris 15
VERIS 15 VERIS 15 Notes: The VERIS 15 has a total of 13 x M10 hang points plus 4 x M8 rear mounting points for OmniMount™ 60 Series inserts. Community VERIS Series - Operation and Installation Manual - Page 36... -
Page 37: Veris 32
VERIS 32 VERIS 32 Notes: The VERIS 32 has a total of 13 x M10 hang points plus 4 x M8 rear mounting points for OmniMount™ 60 Series inserts. Community VERIS Series - Operation and Installation Manual - Page 37... -
Page 38: Veris 35
VERIS 35 VERIS 35 Notes: The VERIS 35 has a total of 13 x M10 hang points plus 4 x M8 rear mounting points for OmniMount™ 60 Series inserts. Community VERIS Series - Operation and Installation Manual - Page 38... -
Page 39: Veris 210S
VERIS 210S VERIS 210S Notes: The VERIS 210S subwoofer has a total of 8 x M10 hang points, 4 on each side. Community VERIS Series - Operation and Installation Manual - Page 39... -
Page 40: Veris 212S
VERIS 212S VERIS 212S Notes: The VERIS 212S subwoofer has a total of 8 x M10 hang points, 4 on each side. Community VERIS Series - Operation and Installation Manual - Page 40... -
Page 41: Servicing Veris Loudspeakers
Any driver service required is done from the front of the enclosure by removing the screws around the edge of the grille. Crossovers and connections may be accessed by removing the rear connector plate. For warranty repair, contact Community directly or ask us for the location of your nearest Authorized Service Center. -
Page 42: Warranty Information And Service For Countries Other Than The Usa
This Community warranty is not extended by the length of time which an owner is deprived of the use of the product. Repairs and replacement parts provided under the terms of this warranty shall carry only the remaining portion of the warranty. - Page 43 NOTES Community VERIS Series - Operation and Installation Manual - Page 43...
- Page 44 Community Professional Loudspeakers 333 East Fifth Street, Chester, PA 19013-4511 USA Tel: 1-(610) 876-3400 | Fax: 1-(610) 874-0190 www.communitypro.com © 2009 All Rights Reserved 20090804...
- Page 45 VERIS 6/8/26/28 Yoke Mounting Bracket The compact VERIS models VERIS 6, VERIS 8, VERIS 26 and VERIS 28 conveniently include a yoke-style mounting bracket for horizontal or vertical mounting, plus optional stand-offs to achieve a 10° or 20° downward vertical tilt. The yoke bracket is fitted with a series of mounting holes as shown in Figure 1 to allow the installer to vary the distance from the enclosure to the mounting surface in order to suit the requirements of the installation.
- Page 46 Each VERIS 6, VERIS 8, VERIS 26 and VERIS 28 loudspeaker includes an optional U-shaped 10° metal stand- off for vertical mounting of the enclosure at a 10° downward tilt and a 20° metal stand-off for vertical mounting of the enclosure at a 20° downward tilt. If your installation requires a downward vertical tilt, select the appropriate stand-off.
- Page 47 When placed on its side, the mounting yoke is asymmetrical. The yoke bracket has a discernable “long corner” (10°) and short corner (20°) as depicted in Figure 3 below. For installations where a 10 or 20 degree downward vertical tilt is desired using one of the metal stand-offs, pay special attention to the orientation of the yoke in relation to the “long corner”...
- Page 48 VERIS 6 Figure 4: VERIS 6 Mounting Yoke Dimensions 15.944" [404.98] 9.374" [238.11] 3.879" [98.53] 1.879” [47.73] 20° 10° 11.635" [295.54] 9.004" [228.69] 6.940" [176.29] (3) SLOTS .413" [10.5] WIDE (2 ) HOLES X 1.595" [40.5] LONG .413" [10.5] .591" [15] (TYP) 1.969"...
- Page 49 VERIS 6 Figure 5: VERIS 6 Yoke — Horizontal Mounting Assembly M6 x 30mm HEX BOLT 6mm LOCK WASHER 6mm FLAT WASHER 6mm FLAT WASHER 6mm LOCK WASHER BLACK RUBBER M6 x 30mm HEX BOLT WASHER BLACK RUBBER WASHER YOKE Figure 6: VERIS 6 Yoke —...
- Page 50 VERIS 6 Figure 7: VERIS 6 Yoke — Yoke Orientation for Downward Vertical Tilt Mounting 20° 10° NOTE ORIENTATION NOTE ORIENTATION OF YOKE OF YOKE 20° METAL STAND-OFF 10° METAL STAND-OFF Figure 8: VERIS 6 Yoke — 10° Downward Vertical Tilt Mounting Assembly M6 x 30mm HEX BOLT 6mm LOCK WASHER 6mm FLAT WASHER...
- Page 51 VERIS 6 Figure 9: VERIS 6 Yoke — 20° Downward Vertical Tilt Mounting Assembly M6 x 30mm HEX BOLT 6mm LOCK WASHER 6mm FLAT WASHER BLACK RUBBER WASHER M10 HEX NUT 10mm LOCK WASHER 10mm FLAT WASHER 20° METAL STAND-OFF BLACK 10mm FLAT WASHER RUBBER...
- Page 52 VERIS 8 Figure 10: VERIS 8 Mounting Yoke Dimensions 17.441" [443] 10.324" [262.24] 1.879" [47.73] 3.879" [98.53] 20° 10° 13.132" [333.56] 10.329" [262.36] 7.689" [195.3] (4) SLOTS .413" [10.5 ] WIDE .591" [15] (TYP) X 1.595" [40.5] LONG (2) SLOTS .413" [10.5] WIDE X .610"...
- Page 53 VERIS 8 Figure 11: VERIS 8 Yoke — Horizontal Mounting Assembly M6 x 30mm HEX BOLT 6mm LOCK WASHER 6mm FLAT WASHER BLACK BLACK RUBBER WASHER RUBBER 6mm FLAT WASHER WASHER 6mm FLAT WASHER M6 x 30mm HEX BOLT YOKE Figure 12: VERIS 8 Yoke —...
- Page 54 VERIS 8 Figure 13: VERIS 8 Yoke — Yoke Orientation for Downward Vertical Tilt Mounting 10° 20° NOTE ORIENTATION NOTE ORIENTATION OF YOKE OF YOKE 10° METAL STAND-OFF 20° METAL STAND-OFF Figure 14: VERIS 8 Yoke — 10° Downward Vertical Tilt Mounting Assembly M6 x 30mm HEX BOLT 6mm FLAT WASHER BLACK RUBBE R WASHER...
- Page 55 VERIS 8 Figure 15: VERIS 8 Yoke — 20° Downward Vertical Tilt Mounting Assembly M6 x 30mm HEX BOLT 6mm LOCK WASHER 6mm FLAT WASHER BLACK RUBBER WASHER M10 HEX NUT 10mm LOCK WASHER 10mm FLAT WASHER 10mm FLAT WASHER M10 x 30mm LONG HEX BOLT BLACK 20°...
- Page 56 VERIS 26 Figure 16: VERIS 26 Mounting Yoke Dimensions 23.031" [584.99] 9.400" [238.76] 3.915" [99.45] 1.912" [48.56] 20° 10° 18.706" [475.13] 15.854" [402.7] 11.516" [292.5] 7.360" [186.94] 2.934" [74.53] (7) SLOTS .413" [10.5] WIDE X 1.595" [40.5] LONG 1.969" [50] (2) SLOTS .413"...
- Page 57 VERIS 26 Figure 17: VERIS 26 Yoke — Horizontal Mounting Assembly M6 x 30mm HEX BOLT 6mm LOCK WASHER 6mm FLAT WASHER BLACK RUBBER WASHER BLACK RUBBER WASHER 6mm FLAT WASHER M6 x 30mm HEX BOLT YOKE 6mm LOCK WASHER Figure 18: VERIS 26 Yoke —...
- Page 58 VERIS 26 Figure 19: VERIS 26 Yoke — Yoke Orientation for Downward Vertical Tilt Mounting 10° 20° NOTE ORIENTATION NOTE ORIENTATION OF YOKE OF YOKE 10° METAL STAND-OFF 20° METAL STAND-OFF Figure 20: VERIS 26 Yoke — 10° Downward Vertical Tilt Mounting Assembly M6 x 30mm HEX BOLT 6mm LOCK WASHER 6mm FLAT WASHER...
- Page 59 VERIS 26 Figure 21: VERIS 26 Yoke — 20° Downward Vertical Tilt Mounting Assembly M6 x 30mm HEX BOLT 6mm LOCK WASHER 6mm FLAT WASHER BLACK RUBBER WASHER M10 HEX NUT 10mm LOCK WASHER 10mm FLAT WASHER 10mm FLAT WASHER M10 x 30mm HEX BOLT BLACK RUBBER...
- Page 60 VERIS 28 Figure 22: VERIS 28 Mounting Yoke Dimensions 26.023" [660.99] 10.364" [263.24] 3.925" [99.7] 1.912" [48.56] 10° 20° 21.084" [535.54] 19.060" [484.11] 15.010" [381.25] 12.283" [311.98] (8 ) SLOTS .413" [10.5] WIDE 9.577" [243.26] X 1.595" [40.5] LONG 5.152" [130.85] (2) SLOTS .413"...
- Page 61 VERIS 28 Figure 23: VERIS 28 Yoke — Horizontal Mounting Assembly M6 x 30mm HEX BOLT 6mm LOCK WASHER 6mm FLAT WASHER BLACK RUBBER WASHER BLACK 6mm FLAT WASHER RUBBER WASHER YOKE 6mm LOCK WASHER M6 x 30mm HEX BOLT Figure 24: VERIS 28 Yoke —...
- Page 62 VERIS 28 Figure 25: VERIS 28 Yoke — Yoke Orientation for Downward Vertical Tilt Mounting NOTE ORIENTATION OF YOKE NOTE ORIENTATION OF YOKE 10° 20° 10° METAL STAND-OFF 20° METAL STAND-OFF Figure 26: VERIS 28 Yoke — 10° Downward Vertical Tilt Mounting Assembly M6 x 30mm HEX BOLT 6mm LOCK WASHER 6mm FLAT WASHER...
- Page 63 VERIS 28 Figure 27: VERIS 28 Yoke — 20° Downward Vertical Tilt Mounting Assembly M6 x 30mm HEX BOLT 6mm LOCK WASHER 6mm FLAT WASHER BLACK RUBBER WASHER M10 HEX NUT 10mm LOCK WASHER 10mm FLAT WASHER 20° METAL STAND-OFF BLACK RUBBER 10mm FLAT WASHER...
- Page 64 It is strongly recommended that a licensed and certified professional structural engineer approve the mounting design. Community Professional Loudspeakers · 333 East Fifth Street, Chester, PA 19013 USA Phone (610) 876-3400 · Fax (610) 874-0190 · www.communitypro.com V6/8/26/28IG 20090727...
Need help?
Do you have a question about the VERIS Series and is the answer not in the manual?
Questions and answers