Table of Contents
Advertisement
Advertisement
Table of Contents

Related Manuals for Frama Matrix F12


Summary of Contents for Frama Matrix F12
- Page 2 Frama Matrix F12 Operating manual for Frama Matrix All rights reserved. Frama Group.
- Page 3 You can get quick competent support from our Help Line 01992 451125 The right to make changes in these instructions is reserved. Frama AG also reserves the right to change and/or modify parts of these instructions and/or the product at any time without notice. The postage rates indicated and other information with time-limited...
-
Page 4: Safety Information And Warnings
This franking system meets current safety requirements. Incorrect use can, however, lead to injury and damage. With this in mind, please read this guide before you start using your Frama Matrix F12 franking system. This will help you to avoid injury and prevent damage to your franking system. Keep this guide in a safe place and pass it on to the new user should you dispose of the machine. -
Page 5: Table Of Contents
1.2. USE AS INTENDED/NOTES ON PRINT QUALITY ....................8 1.3. REQUIREMENTS FOR THE NETWORK ENVIRONMENT/INFORMATION SECURITY ..........8 1.4. RECYCLING AND DISPOSAL ..........................9 1.5. THE FRAMA MATRIX MACHINE ........................10 1.6. BASIC SCREEN LAYOUT ........................... 11 2. INSTALLATION ........................11 ... - Page 6 10. TROUBLESHOOTING/ERROR MESSAGES ................42 10.1. FRAMAONLINE2 ............................42 10.2. SCALES MESSAGES (ONLY IF SCALES ARE CONNECTED) ................43 10.3. FRAMA MATRIX F12 , FRANKING VALUE/CREDIT ................... 44 10.4. PRINTER MESSAGES ............................45 11. TECHNICAL DATA ....................... 46 ...
-
Page 7: Safety Instructions/Notes On Use
In view of this, it is quite possible that some of these materials contain constituents which can attack or soften the plastic feet of our equipment. The feet of our equipment, if affected by foreign substances, can stain your furniture. Frama is unable to accept any liability in this respect for obvious Information reasons. -
Page 8: Use As Intended/Notes On Print Quality
1.2. Use as intended/Notes on print quality The following notes are intended to support you in achieving a sharp, professional print with your Frama Matrix F12 franking system, so as not to jeopardise the delivery of your franked mail. As the user, you are responsible for the legibility of your franking. -
Page 9: Recycling And Disposal
Frama Matrix F12 1.4. Recycling and disposal The WEEE Directive (Waste Electrical and Electronic Equipment; 2002/96/EC) was drawn up for the protec- tion of human health and the environment to ensure that waste products are disposed of utilising the best available reprocessing, recovery and technical recycling possibilities. -
Page 10: The Frama Matrix Machine
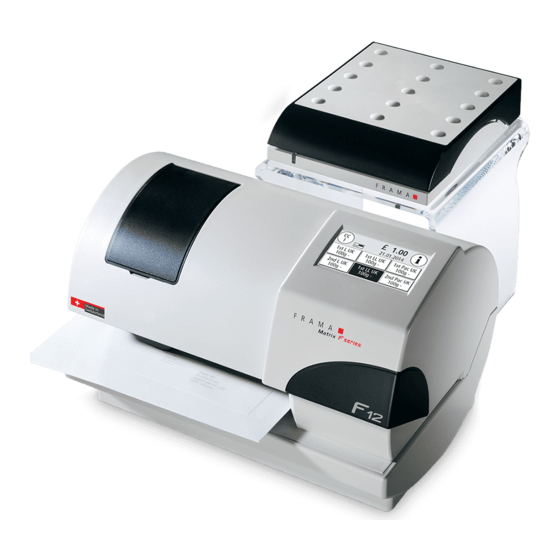
Frama Matrix F12 1.5. The Frama Matrix machine The illustrations below show the principal components of the Matrix F12 franking system. Please familiar- ise yourself with the location of the components. Fig. Matrix F12 , front view: Ink system Scales (optional) Touch screen Fig. -
Page 11: Basic Screen Layout
With this in mind, always use original Frama Matrix F12 franking labels for thick mail items and small parcels. Please make sure that no sharp objects, such as paper clips, are near the franking zone. -
Page 12: Installation
4. Loading postage credit 2.1. General notes and safety information Select a position near a mains socket and an Ethernet connection for your Frama Matrix F12 franking system. Avoid direct sunlight and severe vibration. Draughts can affect the accuracy of the scales. -
Page 13: Connecting To The Mains Electric Supply
Make sure that the plug clicks into place properly. This will be the case when the cable is flush against the housing. Make sure that you have closed the top flap on the Frama Matrix F12. Check whether the scales are free to move. -
Page 14: Framaonline2 Installation
Follow the instructions on page 25 to install the ink jet cassette correctly. 2.7. Loading credit from FramaOnline2 You must load postage credit into the franking system before you can frank mail with your Frama Matrix F12 franking system. Follow the instructions on page 15. This concludes the installation. -
Page 15: Framaonline2
Frama Matrix F12 3. FramaOnline2 3.1. General notes FramaOnline2 will deal with preparing the postage rates, sending use data to the Royal Mail and provides a simple way of loading new postage credit onto your franking system. Your franking system must set up a connection with the data centre to allow use of FramaOnline2. Refer to section 9.4. - Page 16 Please observe any provisions in your contract with the Royal Mail. Acknowledge this amount by pressing ENTER. Your Frama F12 franking system establishes a link with the FramaOnline2 data centre and keeps you informed as to the progress of the connection.
-
Page 17: Inspection/Autoconnect
Frama Matrix F12 3.3. Inspection/AutoConnect Your Matrix franking system has an autoconnect function as a convenience. This is used to transmit the counter readings, to check the postage rate tables and to synchronize data with the Royal Mail. You may see the AutoConnect message while you are changing the cost centre. -
Page 18: Operation
Frama Matrix F12 4. Operation 4.1. Switching on and off Always keep your machine connected to the mains. 4.1.1. Switching the machine on Touching the dark, empty screen switches the machine on. The machine can also be turned on automati- cally by plugging in the power supply unit. -
Page 19: Accounts
4.2. Accounts 4.2.1. General comments on cost centres Your Frama Matrix F12 franking system is equipped with various counters which allow you to monitor postage consumption and the number of mail items franked. Each cost centre can be given its own name. You have 16 characters at your disposal. The cost centre active at any time is shown in the top section of the display in the CC key. - Page 20 4.2.5. Changing the cost centre name Your Frama Matrix F12 franking system offers you the option of assigning an individual name to each cost centre. It is supplied by default to the Select Cost Centre screen and simplifies your work.
-
Page 21: Determining Postage Value
4.3.3. Tariff-guided Your Frama Matrix F12 has an integrated postal rate guide for you to ascertain the postage of all available postal products. You thus also have a clever access capability for mail items that are not used so often. - Page 22 Frama Matrix F12 Make sure that no mail items or anything similar is on the scales (zero setting of scales). Information Select the postal rate guide by pressing the postal rate three times. Select the type of mailing. Press the arrow to show other types of mailing.
- Page 23 Frama Matrix F12 4.3.4. Numeric keypad Postage rates can be entered independently of the mail prod- ucts using the integrated numeric keypad. The numeric keypad is included in the Tariff-guided start menu. You reach it by pressing three times to the franking value.
-
Page 24: Franking
4.4.2. Franking labels Use only original Frama Matrix F12 franking labels. Frank labels in the normal way, just like a letter. Frama Matrix F12 franking labels can be used twice. Turn the label through 180 degrees and frank it again. -
Page 25: Fitting The Ink Jet Cassette
4.5. Fitting the ink jet cassette 4.5.1. Fitting/changing ink jet cassette Your Frama Matrix F12 franking system uses a double ink jet cassette to frank your mail items. The ink jet cassette also contains the printing head. You must therefore handle the ink jet cassette very carefully. - Page 26 The ink jet cassette will now be tested and calibrated. This process might take a few seconds. If the ink jet cassette being used has already been fitted in your Frama Matrix F12 franking system, you can choose between recalibration and accepting the existing calibration data. Calibrate, are you sure? After calibration, you will be prompted to print a test frank- ing mark.
- Page 27 Frama Matrix F12 Example of a test print: Alignment X is shown on the left and Alignment Y on the right. Valid align- ments are indicated by an arrow. The arrows should point to where the lines appear straightest. If this is already the case, you only need to confirm the following displays X and Y by pressing the ENTER key.
-
Page 28: Main Menu
- Info Print (see page 32) - Printer Settings (see page 33) 5.2. Logo Your Frama Matrix F12 franking system already has prede- fined advertising messages and has been programmed with advertising imprints as you requested. You may also store text messages in the franking system. - Page 29 Frama Matrix F12 5.2.1. Advertising imprint text blocks Your Frama Matrix F12 franking system gives you the possibility of producing your own advertising im- print text blocks and thus of drawing attention to holidays, special campaigns and events with your mail.
-
Page 30: Devices
The Devices menu item is used to manage connected devices. 5.3.1. Scales (optional) Connecting the S2 or S5 scales automatically extends the functional scope of your Frama Matrix F12 franking system, i.e. you can use the scales functions described immediately. By using the electronic scales, you are able to calculate postage rates and weigh your letters, small parcels as well as other mail items accurately. -
Page 31: Print Date
5.4. Print date Sometimes, it might be necessary for your mail to be franked several days before the delivery date. To this end, you can set the date printed in the Frama Matrix F12 frank and print up to thirty days ahead. -
Page 32: Info Print
Frama Matrix F12 5.5. Info Print You can set various print modes for your Frama Matrix F12 franking system using the Info Prints. The reports are particularly important. These allow condensed information to be printed out. These reports help you by providing overviews when you are programming or, for example, they may be used as re- ceipts after loading postage via the FramaOnline2 data centre. -
Page 33: Printer Settings
The Printer Settings menu gives you access to the options and functions required for perfect printing. The functions in the Printer Settings menu are described in sequence below. 5.6.1. Nozzle test A franking mark test is incorporated in your Frama Matrix F12 franking system. This test activates each individual nozzle in the printing head. - Page 34 Frama Matrix F12 5.6.3. Changing the ink jet cassette Caution! Make sure that the ink jet cassette has been stored at room temperature for at least three hours before you fit it. Information Press the Change Ink Jet Cassette key in the Main Menu and confirm by pressing YES.
-
Page 35: Counter Readings
7.1. Setup 1 menu (CC and Admin) Proceed as follows to change the basic settings of your Frama Matrix F12 franking system : In mode selection, choose Admin. Enter your PIN. Then press the ENTER key to get access Admin mode. -
Page 36: Setup 2 Menu
Frama Matrix F12 Press the Tool key to obtain the basic settings. The basic settings are divided among four menus. These are desig- nated as Setup 1, Setup 2, Setup 3 and Setup 4. Pressing the arrow moves you forward, while pressing ESC returns you to where you started. -
Page 37: Setup 4 Menu
7.4.1. Restarting the system For your changes to become effective, you need to restart your Frama Matrix F12 franking system. To do so, use the Start up/Log off function in the Setup 1 menu. -
Page 38: Admin Mode
Frama Matrix F12 8. Admin mode Settings made in Admin mode always apply to all cost centres. In Admin mode you also have access to all cost centres and can thus conveniently make settings for these cost centres (counter readings, name and PIN). -
Page 39: Counter Readings
Frama Matrix F12 8.2. Counter Readings You can display the counter readings of each cost centre shown in Admin mode. You can call up one cost centre or a list of cost centres for this function. Select CC: Press this key to call up the Select CC menu. -
Page 40: Framaonline2
The procedure for loading credit (postage) has already been described in depth on page 15. 9.2. Inspection You can run inspection loadings with your Frama Matrix F12 franking system. You use them to transmit the counter readings, to check the postage rate tables and to balance data with the post office. -
Page 41: Last Report
A successful transmission is indicated in a summary. You may print out a receipt – while the summary is displayed – by feeding in an envelope or similar: You will be supplied and invoiced by your local Frama Sales and Service organisation. -
Page 42: Troubleshooting/Error Messages
10. Troubleshooting/Error messages In the event of a malfunction, a message will appear in the display of your Frama Matrix F12 franking system. If you are unable to eliminate the problem yourself, you can obtain support on your Frama hotline or from your local Frama dealer. -
Page 43: Scales Messages (Only If Scales Are Connected)
The weight put on the plat- Please remember: The maximum capacity form exceeds the capacity of of the Frama S2 scales is 2kg, 5kg for the the scales. Frama S5 scales and 30kg for the S30 scales. Do not use the scales platform as a storage place. -
Page 44: Frama Matrix F12 , Franking Value/Credit
Frama Matrix F12 10.3. Frama Matrix F12 , franking value/credit Display message Cause Remedy High value not confirmed. Security prompt. Touch the postage value shown inverse in the display. You can change the post- age limit that activates the message in the Setup 2 menu in Admin mode. -
Page 45: Printer Messages
Please use only suitable ink jet cassettes. Cassette not recognized. Please use only The cassette you are using is Insert a new ink jet cassette. Frama ink cartridges which suit your intended for use in a different system. country. Ink jet cassette is almost empty! Please The ink in the cassette is al- Please order a new colour cartridge. -
Page 46: Technical Data
Frama Matrix F12 11. Technical data 11.1. General Matrix F12 franking systemspeed: 1200 letters/hour Maximum letter thickness: 10 mm Display: graphical, touch-sensitive screen Default process: FramaOnline2 Number of fixed stored advertising messages: Number of customer-specific advertising messages: 5 Number of freely definable texts:... -
Page 47: Power Supply Rating
PSU: 100 – 240 V, 50&60 Hz, 1.5 A 11.4. Dimensions and weight Dimensions (L x H x W): 305 x 205 x 210 Weight: 6.8 kg 11.5. Accessories www.framashop.co.uk or speak to your local Frama Sales and Service organisation. -
Page 48: Storage And Operating Conditions
Frama Matrix F12 11.6. Storage and operating conditions Matrix F12 Operating conditions: Temperature range: 10°C – 40°C Relative air humidity: 10% – 80% (not condensing) Approved for indoor use only up to a maximum of 4000 metres above sea level... -
Page 49: Ec-Declaration Of Conformity
Manufacturer: Frama AG Dorfstrasse 6 CH-3438 Lauperswil Description of the electrical equipment: Product name: Matrix F12 Type: Franking system The agreement with further valid guidelines/regulations following for the product is explained: EMC Directive (2004/108/EG) of December 15, 2004 Reference to the harmonised standards:... -
Page 50: Index
Frama Matrix F12 13. Index Logo ..........28, 37, 38 A M Accessories ............. 47 Accounts ............19 Main Menu ..........28, 38 Admin mode ..........35, 38 Mains connection ........... 13 Advertising imprint ......... 32 Maximum letter thickness: ......46 Advertising imprint text blocks ...... - Page 51 Frama Matrix F12 Technical data ..........46 U Troubleshooting ..........42 Uninstall ............40...
- Page 52 Questions on the operation of the franking system For problems with the connection; online system Help line: 01992 451125 Ordering consumables: www.framashop.co.uk or your local Frama Sales and Service organisation. www.frama.co.uk Frama AG CH-3438 Lauperswil Switzerland...
Need help?
Do you have a question about the Matrix F12 and is the answer not in the manual?
Questions and answers