Table of Contents
Advertisement
Quick Links
Quick Start
ADSL X6 Modem,
Wireless-G Router, Firewall,
and 4-Port Switch
Model 5590
This Quick Start contains instructions for using a Windows
computer to set up a wired and/or wireless network. Macintosh
and Linux users should refer to the User's Guide on the CD.
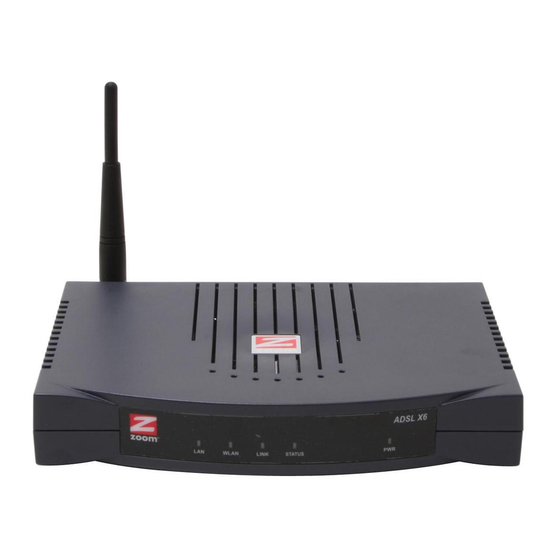
About the ADSL X6
The Zoom ADSL X6 supports up to 253 Internet connections.
You can connect a computer or network device (for example, a
router, hub, or switch) into any of the unit's four LAN ports, and
you can "connect" wireless devices via the unit's wireless access
point.
We recommend that you first configure the modem and establish
an Internet connection using a Windows computer that is directly
connected to one of the modem's LAN ports.
Then—once you are certain your connection is working—you
should set up your network.
Advertisement
Table of Contents

Related Manuals for Zoom 5590


Summary of Contents for Zoom 5590
-
Page 1: Quick Start
Linux users should refer to the User’s Guide on the CD. About the ADSL X6 The Zoom ADSL X6 supports up to 253 Internet connections. You can connect a computer or network device (for example, a router, hub, or switch) into any of the unit’s four LAN ports, and you can “connect”... -
Page 2: Package Contents
Customer Support information. The most complete and up-to-date information can normally be found at: http://www.zoom.com/techsupport/adsl/adsl_x6.shtml If anything is missing or damaged, please contact Zoom Customer Support or whoever sold you the modem. In addition, the package may include: •... -
Page 3: Before You Begin
Before You Begin Before you begin installing the X6 modem using this Quick Start, you must have the following available to you: • ADSL service enabled on your telephone line. To do this, you need to sign up with an ADSL service provider. Once this service is enabled, you should have an ADSL-enabled telephone wall jack to plug the X6 modem into. -
Page 4: Quick Start Instructions
Quick Start Instructions Installing the X6 involves four steps: Installing the Software, Installing the Hardware, Establishing Communication, and Setting Up Your Wired and/or Wireless Network. Step 1: Installing the Software Regardless of how many computers you plan to use with the X6, you only have to install the software on one of them. -
Page 5: Step 2: Installing The Hardware
4 4 4 4 Click Installation Wizard to start the software installation, then click Next when prompted. 5 5 5 5 When the installation is complete, click Finish, then click Exit. 6 6 6 6 Close any applications that may be open, then remove the CD from the CD-ROM drive. - Page 6 4 4 4 4 Plug the included power cube into a power strip or wall outlet and then plug its other end into the modem’s power (PWR) jack. Important! Only use the power cube shipped with the X6. Other power cubes may damage your hardware.
-
Page 7: Step 3: Establishing Communication
Step 3: Establishing Communication You must set up the X6 so that it can communicate with your Internet service provider. To do this, you must use the Zoom Configuration Manager. 1 1 1 1 Log in to the Zoom Configuration Manager from the... - Page 8 b b b b On the Enter Network Password dialog box, type the following user name and password in the appropriate boxes, then click OK. You must enter them using lowercase letters. User Name: admin Password: zoomadsl As you type your password, it will appear as bullets or asterisks (depending...
- Page 9 2 2 2 2 The Zoom Configuration Manager opens and displays its Basic Setup page. Use this Web page to configure the modem so it can connect with your Internet service provider. Do the following: a a a a Enter your Protocol, Encapsulation, VPI and VCI settings in the appropriate boxes.
- Page 10 @ sign in your email address. This is NOT the same login you that you used earlier to open the Zoom Configuration Manager.) If you selected 1483 Bridged or 1483 Routed, you have the option of using either dynamic or static IP addressing.
- Page 11 Tip! If you configured the X6 using a notebook computer, you can keep it plugged in or you can disconnect it from the unit’s LAN port. As long as it remains plugged into an ADSL wall jack and a power source, the X6 can function as a stand-alone device.
-
Page 12: To Connect Additional "Wired" Computers
To Connect Additional “Wired” Computers You can connect up to four computers with Ethernet ports directly to the X6. 1 1 1 1 Shut down the computer you want to add to the X6. (This is important because the computer must locate the correct IP address for the modem. - Page 13 3 3 3 3 Once your network is set up, reboot any computer that is part of the network. 4 4 4 4 Verify that your Internet connection is working. Open the Web browser (for example, Internet Explorer or Netscape Navigator) on each computer and try to connect to a familiar Web address.
- Page 14 By default, the X6 uses channel 10. If you need to change this channel, you must do so using the Wireless page of the Zoom Configuration Manager. See the User’s Guide on the CD or www.zoom.com/techsupport/adsl/adsl_x6.shtml...
-
Page 15: Wireless Network
On the Wireless Network Connection Properties dialog box, select the Wireless Networks tab. Windows XP will automatically scan for available wireless networks in your area. Its findings will appear in the Available networks list. It should find the wireless network of the X6—named zoom. - Page 16 5 5 5 5 Select zoom from the Available networks list, then click the Configure button to add it to the Preferred networks list. The notebook will try to connect to the Internet using the wireless networks listed here, in the order in which they appear.
-
Page 17: Setting Wireless Security
If they do not, skip down to “Setting Up Security Using WEP”. 2 2 2 2 Click the Wireless button in the Zoom Configuration Manager. This will open the Wireless Setup menu. Go to Encryption (which should say “None”) and select WPA from the drop-down menu. -
Page 18: Setting Up Security Using Wep
We recommend that most people configure their WEP for 64-bit security. 1 1 1 1 Click the Wireless button in the Zoom Configuration Manager. This will open the Wireless Setup menu. 2 2 2 2 Go to Encryption (which should say “None”) and select WEP-64 bit (or WEP-128 bit for more security but diminished network performance) from the drop-down menu. - Page 19 3 3 3 3 Check the box marked Passphrase and then choose and enter a Passphrase of at least eight characters in the box immediately to the right. You can enter a word, a phrase, or for greater security you can enter a combination of numbers and letters. The Passphrase is case-sensitive, so be sure to notice whether each letter is capitalized.
- Page 20 6 6 6 6 If any or all of the other wireless devices on the network (clients) are not Zoom devices, you will enter one of the “keys” shown below the Passphrase on each client. You must enter the same key on each one. The key that you must use is the key corresponding to the Default Key number shown.
- Page 21 software that came with the device, which should be running on the computer where the device is installed. Find the configuration menu for security, choose WEP (64-bit or 128- bit depending on what you selected), and enter the Default Key, exactly as it appears on the X6 Wireless Setup page. (With WEP 64-bit security, a device may require you to enter all four keys.
-
Page 22: Troubleshooting Tips
Troubleshooting Tips The following are some problems you may experience and some possible solutions to remedy the situation. Problem My X6’s LINK light is solidly lit, but I cannot connect to the Internet from any of my computers. Solution Before you try to solve the problem, you should first determine whether you can access the Internet from the computer or computers that are directly plugged into the X6 with Ethernet cables. - Page 23 ADSL Username and Password correctly. (Note that this is NOT the user name and password you used to log into the Zoom Configuration Manager on page 7.) Open the Basic Setup page, then enter the correct User Name and Password in the boxes provided.
- Page 24 Ensure that the DNS Server Search Order box contains 10.0.0.2. Note: If you need help accessing your computer’s TCP/IP settings, refer to the User’s Guide on the CD for more detailed instructions or go to www.zoom.com/techsupport/adsl/adsl_x6.shtml ADSL X6 Quick Start...
- Page 25 Computers Connected to a Network Device that is Plugged into the X6 Cannot Access the Web If the computers that are plugged directly into the X6 can access the Web, but those connected via a network device that is plugged into the X6 cannot, check the following: •...
- Page 26 • Verify that each wireless adapter is using the same SSID and Channel as the X6 modem. By default, the modem uses zoom as its SSID and is set to Channel 10. The SSID is case sensitive. See your particular wireless adapter’s documentation for information on how to access its SSID and Channel settings.
- Page 27 For more information about the Wireless page, see the User’s Guide on the CD or go to www.zoom.com/techsupport/adsl/adsl_x6.shtml) • Ensure that the security settings (if any) are the same for your X6 and all of the wireless devices you are using with it. For more information about security, see the User’s Guide on the...
-
Page 28: Universal Plug And Play
For example, this could be a gaming application, router, or stand-alone firewall. There is no setup for you to do. If You Need Help Zoom has many Technical Support services available to its customers. You can access these services in a variety of ways: •... -
Page 29: Front And Back Panel Descriptions
Front and Back Panel Descriptions The front panel of the X6 looks like this: The following table describes each light on the front panel. Light Description Lights when a LAN port of the X6 is plugged into the Ethernet port of a powered-up device. Blinks when data is sent. - Page 30 The following table describes the back panel. Port Description Port to connect the unit to the X6’s power cube. RESET Button to reset the modem to its system default settings (necessary if communication link is lost). To reset, you must insert a paper clip and press the button quickly three times.
-
Page 31: Adsl Internet Settings
We post updated tables on our Web site. If your country is not listed in the tables below, please consult www.zoom.com Note to USA customers If your ADSL service provider is not shown below, first use the settings for Service Provider Not Shown at the bottom of the table. - Page 32 Table B: Countries Other Than The USA Service Provider VPI VCI Protocol Encapsulation Australia-Telstra PPPoA Argentina-Telecom PPPoE Argentina-Telefonica PPPoE Belgium-ADSL Office 1483 Routed IP Belgium-Turboline PPPoA Bolivia 1483 Routed IP Brazil-Brasil Telcom PPPoE Brazil-Telefonica PPPoE Brazil-Telmar PPPoE Brazil-South Region PPPoE Colombia-EMCALI PPPoA VC-MUX...
- Page 33 Table B (Continued): Countries Other Than The USA Service Provider VPI VCI Protocol Encapsulation Spain-Albura, Tiscali PPPoA VC-MUX Spain-Colt Telecom, Ola PPPoA VC-MUX Internet Spain-EresMas, Retevision PPPoA VC-MUX Spain-Telefonica (1) PPPoE Spain-Telefonica (2), Terra 1483 Routed IP Spain-Wanadoo (1) PPPoA VC-MUX Spain-Wanadoo (2) PPPoE...
-
Page 34: Regulatory Information
Regulatory Information U.S. FCC Part 68 Statement This equipment complies with Part 68 of the FCC rules and the requirements adopted by the ACTA. The unit bears a label on the back which contains among other information a product identifier in the format US:AAAEQ##TXXXX. If requested, this number must be provided to the telephone company. -
Page 35: Fcc Radiation Exposure Statement
U.S. FCC Part 15 Emissions Statement This equipment has been tested and found to comply with the limits for a Class B digital device, pursuant to part 15 of the FCC Rules. These limits are designed to provide reasonable protection against harmful interference in a residential installation. This equipment generates, uses and can radiate radio frequency and, if not installed and used in accordance with the instructions, may cause harmful interference to radio communications. -
Page 36: Safety Notices
European Declaration of Conformity The manufacturer declares under sole responsibility that this equipment is compliant to Directive 1999/5/EC (R&TTE Directive) via the following. This product is CE Marked. Directive Standard Test Report 73/23/EEC-Low EN 60950-1 Electrical safety Voltage IEC 60950-1 89/336/EEC-EMC EN 55024 EMC-immunity...
Need help?
Do you have a question about the 5590 and is the answer not in the manual?
Questions and answers