Table of Contents
Advertisement
Quick Links
Advertisement
Table of Contents

Related Manuals for Planet WRE-1200


Summary of Contents for Planet WRE-1200
-
Page 2: Federal Communication Commission Interference Statement
Copyright Copyright 2016 by PLANET Technology Corp. All rights reserved. No part of this publication may be reproduced, transmitted, transcribed, stored in a retrieval system, or translated into any language or computer language, in any form or by any means, electronic, mechanical, magnetic, optical, chemical, manual or otherwise, without the prior written permission of PLANET. - Page 3 Federal Communication Commission (FCC) Radiation Exposure Statement This equipment complies with FCC radiation exposure set forth for an uncontrolled environment. In order to avoid the possibility of exceeding the FCC radio frequency exposure limits, human proximity to the antenna shall not be less than 20 cm (8 inches) during normal operation. R&TTE Compliance Statement This equipment complies with all the requirements of DIRECTIVE 1999/5/CE OF THE EUROPEAN PARLIAMENT AND THE COUNCIL OF 9 March 1999 on radio equipment and telecommunication terminal...
- Page 4 For operation within 5.15~5.25GHz frequency range, it is restricted to indoor environment. Revision User’s Manual of 1200Mbps 802.11ac Dual Band Wall Plug Wi-Fi Range Extender Model: WRE-1200 Rev: 1.0 (January, 2016) Part No. EM-WRE-1200...
-
Page 5: Table Of Contents
CONTENTS Chapter 1. Product Introduction ................1 Package Contents ....................... 1 Product Description......................2 Product Features......................... 6 Product Specifications ....................... 7 Chapter 2. Hardware Introduction..............10 Product Outlook ........................10 Front Panel and LED Status..................... 11 Bottom and DIP Switch description ................12 Chapter 3. - Page 6 Updating Firmware ....................60 6.5.3 Saving/Restoring Settings ..................61 6.5.4 Factory Default .......................62 6.5.5 Reboot ........................62 Chapter 7. Client Mode ..................63 Client Mode Configuration ....................63 Client Mode Advanced Settings ..................64 7.2.1 Scanning Wireless Signal ..................64 Appendix A: Planet Smart Discovery Utility ............67...
- Page 7 Figures 2-1 WRE-1200 ................10 IGURE WITH TYPE POWER PLUG 2-2 WRE-1200 P ....................11 IGURE ANEL AYOUT 2-3 WRE-1200 RJ45 LAN P ..............12 IGURE ORT AND SWITCH 3-1 WRE-1200 R ....................14 IGURE EPEATER 3-2 WRE-1200 AP M ......................15 IGURE 3-3 WRE-1200 C .....................16...
- Page 8 6-15 WPS ..........................53 IGURE 6-16 RADIUS S ......................54 IGURE ETTINGS 6-17 MAC F ........................55 IGURE ILTER 6-18 A ..........................57 IGURE DMIN 6-19 T ........................58 IGURE IME AND 6-20 LED S ........................59 IGURE ETTINGS 6-21 U ......................60 IGURE PDATING IRMWARE 6-22 S ....................61 IGURE AVING...
-
Page 9: Chapter 1. Product Introduction
User Manual of WRE-1200 Chapter 1. Product Introduction 1.1 Package Contents Thank you for choosing PLANET WRE-1200. Before installing the AP, please verify the contents inside the package box. WRE-1200 Quick Guide If there is any item missing or damaged, please contact the seller immediately. -
Page 10: Product Description
Eliminating Dead Zones and Doubling Wi-Fi Coverage With the WRE-1200, Wi-Fi coverage can be doubled to the point where dead zones can be eliminated. Plug the WRE-1200 directly into an electrical outlet and double the signal coverage of your Wi-Fi network for better Wi-Fi... - Page 11 Easy to Set Up with Compact Wall-Plug Design Designed in the shape of a wall plug, the WRE-1200 is easily plugged into a wall outlet for wireless access in any place. With its brick-sized, integral male plug (Type of power pin required), the WRE-1200 takes the modern...
- Page 12 The WRE-1200 is the characterization of wall-plug design and advanced 2T2R MIMO technology which reduces the effect of dead spot, so that it can get better coverage of the existing wireless network. The Repeater modes supported by the WRE-1200 help to minimize the effort of installation and cabling cost.
- Page 13 User Manual of WRE-1200...
-
Page 14: Product Features
User Manual of WRE-1200 1.3 Product Features IEEE Compliant Wireless LAN & Wired LAN Compliant with IEEE 802.11a/b/g/n/ac dual-band (2.4G & 5G) wireless technology capable of having a data rate of up to 300+867Mbps Equipped with 10/100/1000Mbps RJ45 port for LAN, auto MDI/MDI-X supported ... -
Page 15: Product Specifications
User Manual of WRE-1200 1.4 Product Specifications WRE-1200 Product 1200Mbps 802.11ac Dual Band Wall Plug Wi-Fi Range Extender Hardware Specifications Interface LAN/WAN: 1 x 10/100/1000 Mbps auto MDI/MDI-X RJ45 port 2.4GHz: 2 x 2dBi internal antenna Antenna Gain: 5GHz: 2 x 4dBi internal antenna... - Page 16 User Manual of WRE-1200 802.11n: 20/ 40MHz Channel Width 802.11ac: 20/ 40/ 80MHz 2.4GHz: 5GHz: 11b: 17±1.5dBm 11a: 14±1.5dBm RF Power/EIRP 11g: 15±1.5dBm 11n: 14±1.5dBm 11n: 14±1.5dBm 11ac: 12±1.5dBm 2.4GHz 5GHz 11b (11Mbps): -86±2dBm 11a: -73±2dBm Receive Sensitivity 11g (54Mbps): -72±2dBm 11n (20M) mode: -71±2dBm...
- Page 17 User Manual of WRE-1200 Standards Conformance Operating: 0 ~ 40 degrees C Temperature Storage: -20 ~ 60 degrees C Operating: 10 ~ 90% (non-condensing) Humidity Storage: 5 ~ 95% (non-condensing) Regulatory FCC, CE, RoHS, WEEE...
-
Page 18: Chapter 2. Hardware Introduction
User Manual of WRE-1200 Chapter 2. Hardware Introduction Please follow the instructions below to connect the WRE-1200 to the existing network devices and your computers. 2.1 Product Outlook Dimensions: (W x H x D) 59 x 91 x 40 mm ... -
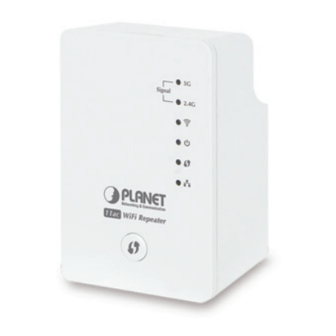
Page 19: Front Panel And Led Status
2.2 Front Panel and LED Status There are 6 LED indicators on the front panel. By observing their status, you can check whether the device runs normally. Figure 2-2 shows the hardware interface of the WRE-1200. LED description Figure 2-2 WRE-1200 Panel Layout LED definition The following table describes the status of LED indicators on the front panel. -
Page 20: Bottom And Dip Switch Description
LEDs. Press over 30 seconds to reset to factory default. 2.3 Bottom and DIP Switch description The following graphic describes interfaces and DIP switch on the bottom panel. Figure 2-3 WRE-1200 RJ45 LAN Port and DIP switch... -
Page 21: Chapter 3. Operation Mode Introduction
User Manual of WRE-1200 Chapter 3. Operation Mode Introduction The WRE-1200 can operate in various applications with the hardware mode DIP switch including AP, Repeater or Client, which helps to immediately set up a wireless network without software configuration. With various... -
Page 22: Repeater Mode
User Manual of WRE-1200 3.1 Repeater Mode In the repeater mode, the WRE-1200 can extend your wireless signal and coverage, and help you to solve wireless dead zone problem. Operation Mode Switch - Repeater Mode Typical Application For the first-time setup and easy installation, you can move this device close to the Wireless Broadband Router or Access Point you wish to connect to. -
Page 23: Ap Mode
User Manual of WRE-1200 3.2 AP Mode In the AP (Access Point) mode, the WRE-1200 works as a wireless router to achieve wireless connection for the wired LAN. Operation Mode Switch – AP Mode Typical Application In the AP mode, the NAT (Network Address Translation) function and DHCP server are both disabled, and all wireless clients obtain the IP address from the network device connected with LAN port of the WRE-1200. -
Page 24: Client Mode
User Manual of WRE-1200 3.3 Client Mode In the client mode, the WRE-1200 provides Internet access for a set-top box or a computer with a network adapter. Operation Mode Switch – Client Mode Typical Application In the client mode, the WRE-1200 can let your networking device have wireless capability; it will become your networking device’s wireless network card. -
Page 25: Chapter 4. Hardware Installation
Wi-Fi signal strength. For the first-time setup, you can move the WRE-1200 closer to the access point you wish to connect to. After the connection is established, you can move the WRE-1200 to the place... -
Page 26: Operation Range
User Manual of WRE-1200 After this installation is done and wireless connection is built, WRE-1200's "Signal" LED will be enabled. You can check signal LED on the device to understand signal reception level. Steady light: Excellent Flash: Good ... -
Page 27: System Requirements
User Manual of WRE-1200 4.3 System Requirements Before installing the device, please ensure that the following items are ready. System requirement Operation mode Wireless Connection Wired Connection Repeater mode One wireless router with WPS (WPS) button One wireless router ... -
Page 28: Configuring The Network Properties
User Manual of WRE-1200 4.4 Configuring the Network Properties Configuring PC in Windows 7 and Windows 10 1. Go to Start, Control Panel, Network and Internet, and Network and Sharing Center. Click Change adapter settings on the left banner. 2. Double-click Local Area Connection. -
Page 29: Figure 4-4 Obtain An Ip Address Automatically
User Manual of WRE-1200 Figure 4-3 TCP/IP Setting 5. Select the Obtain an IP address automatically and the Obtain DNS server address automatically button. 6. Click OK to finish the configuration. Figure 4-4 Obtain an IP address automatically... -
Page 30: Figure 4-5 Successful Result Of Ping Command
User Manual of WRE-1200 If the result displayed is similar to Figure 4-9, it means the connection between your PC and the AP has been established well. Figure 4-5 Successful Result of Ping Command If the result displayed is similar to... -
Page 31: Chapter 5. Repeater Mode
Method A - Press the WPS Push Button to connect to the WRE-1200. If your existing wireless router does not support WPS, follow the Method B - Manual Connection by Web browser to connect to the WRE-1200 and run the Setup Wizard. -
Page 32: Method A - Press The Wps Push Button For Automatic Connection
Make sure the operation mode by hardware switch is Repeater Mode (Default Setting). Figure 5-1 WRE-1200 default mode Step 2. Plug the WRE-1200 into the wall outlet, and wait for the WRE-1200 to boot up. Step 3. How to establish connection with AP:... - Page 33 User Manual of WRE-1200 For the first-time setup, you can move the WRE-1200 closer to the access point you wish to connect to. After the connection is established, you can move the WRE-1200 to the place you wish to use.
-
Page 34: Method B - Manual Connection By Web Browser
It is easy to configure and manage the Range Extender with the web browser. Step 1. Plug the WRE-1200 into the wall outlet, then please use your laptop or PC to site-survey the wireless signal of the WRE-1200, and connect your PC with it wirelessly. -
Page 35: Figure 5-5 Login Window
User Manual of WRE-1200 After a moment, a login window will appear. Enter for the User Name and Password, both in lower case admin letters. Then click the OK button or press the Enter key. Figure 5-5 Login Window Default IP Address: http://planetext.setup... -
Page 36: Figure 5-6 Quick Setup Web Page
User Manual of WRE-1200 Figure 5-6 Quick Setup web page Step 4. Press “Scan” and it will display all available 2.4GHz and 5GHz Wi-Fi networks. Figure 5-7 Scan the Wireless Signal... -
Page 37: Figure 5-8 Selecting Ssid
User Manual of WRE-1200 Step 5. All wireless access points nearby will be displayed on the list. The WRE-1200 will use the uplink router/AP SSID. Select the SSID you want to continue. Figure 5-8 Selecting SSID Step 6. You’ll be prompted to input uplink wireless router’s/AP’s wireless security key in the ‘Pre-shared Key’... -
Page 38: Figure 5-10 Connection Successful
You can enter the SSID which you want and press “Apply” to make the changes take effect. Figure 5-11 Saving settings The connection is established successfully. You can press “Home” to enter Web UI of the WRE-1200. You can refer to Chapter 6 for more information about the web settings. -
Page 39: Repeater Mode Advanced Settings
User Manual of WRE-1200 5.2 Repeater Mode Advanced Settings .2 Repeater Mode Advanced Settings 5.2.1 Setting Up Repeater Manually 5.2.1 Setting Up Repeater Manually In the Quick Setup web page, if your existed wireless access point is using hidden SSID, you can press “Next”... -
Page 40: Figure 5-15 Connection Successful
You can enter the SSID which you want and press “Apply” to make the changes take effect. Figure 5-16 Saving settings The connection is established successfully. You can press “Home” to enter Web UI of the WRE-1200. You can refer to Chapter 6 for more information about the web settings. -
Page 41: Figure 5-17 Ap Connected
User Manual of WRE-1200 Figure 5-17 AP connected... -
Page 42: Chapter 6. Ap Mode
IP address from the network device connected with LAN port of the WRE-1200. They can certainly assign the IP address to themselves as well in the Control Panel of Windows. The WRE-1200 is supposed to bridge to the Ethernet directly via UTP cable. -
Page 43: Information
User Manual of WRE-1200 6.1 Information 6.1.1 System Information Figure 6-1 AP mode The page includes the following information: Object Description Model Displays the model number of the range extender. Product Name Displays the product name for reference, which consists of “AP” plus the MAC address. - Page 44 User Manual of WRE-1200 IP Address Displays the IP address of this device. Click “Refresh” to update this value. Default Gateway Displays the IP address of the default gateway. IP address of DNS (Domain Name Server) DHCP Server IP address of DHCP Server.
-
Page 45: Wireless Clients
User Manual of WRE-1200 6.1.2 Wireless Clients The “Wireless Clients” page displays information about all wireless clients connected to the range extender on the 2.4GHz or 5GHz frequency. Figure 6-2 Information -- Wireless Clients The page includes the following information:... -
Page 46: Log
User Manual of WRE-1200 6.1.3 Log The system log displays system operation information such as uptime and connection processes. This information is useful for network administrators. Figure 6-3 Information -- Log The page includes the following fields: Object Description Save Click to save the log as a file on your local computer. -
Page 47: Networking Settings
User Manual of WRE-1200 6.2 Networking Settings 6.2.1 LAN-side IP Address The “LAN-side IP Address” page allows you to configure your range extender on your Local Area Network (LAN). You can enable the range extender to dynamically receive an IP address from your router’s DHCP server or you can specify a static IP address for your access point, as well as configure DNS servers. - Page 48 User Manual of WRE-1200 the default value is blank. Object Description DHCP users can select “From DHCP” to get primary DNS server’s IP Primary Address address from DHCP or “User-Defined” to manually enter a value. For static IP users, the default value is blank.
-
Page 49: Wireless Settings
User Manual of WRE-1200 6.3 Wireless Settings .3 Wireless Settings 6.3.1 2.4GHz 11bgn Basic Settings 6.3.1 2.4GHz 11bgn Basic Settings The “2.4GHz 11bgn” menu allows you to view and configure information for your range extender’s 2.4GHz The “2.4GHz 11bgn” menu allows you to view and configure information for your range extender’s 2.4GHz wireless network across three categories: Basic, Advanced and Security. - Page 50 User Manual of WRE-1200 Auto channel selection will automatically set the wireless channel for the access point’s 2.4GHz frequency based on availability and potential interference. When disabled, select a channel manually as shown in the next table. Auto Channel Select a range from which the auto channel setting (above) will choose a Range channel.
-
Page 51: Advanced
User Manual of WRE-1200 6.3.2 Advanced These settings are for experienced users only. Please do not change any of the values on this page unless you are already familiar with these functions. Figure 6-6 2.4GHz Wireless Settings -- Advanced The page includes the following fields:... -
Page 52: Security
User Manual of WRE-1200 RTS Threshold Set the RTS threshold of the wireless radio. The default value is 2347. Fragment Set the fragment threshold of the wireless radio. Threshold The default value is 2346. Multicast Rate Set the transfer rate for multicast packets or use the “Auto” setting. -
Page 53: Figure 6-8 2.4Gh Z Wireless Settings -- Wep
User Manual of WRE-1200 When disabled, the SSID will not be visible as an available Wi-Fi network to clients – clients must manually enter the SSID in order to connect. A hidden (disabled) SSID is typically more secure than a visible (enabled) SSID. -
Page 54: Figure 6-9 2.4Gh Z Wireless Settings -- Wpa-Psk
User Manual of WRE-1200 The page includes the following fields: Object Description Select 64-bit or 128-bit. Key Length 128-bit is more secure than 64-bit and is recommended. Choose from “ASCII” (any alphanumerical character 0-9, a-z and A-Z) or Key Type “Hex”... -
Page 55: 5Ghz 11Ac 11An Basic Settings
User Manual of WRE-1200 6.3.4 5GHz 11ac 11an Basic Settings The “5GHz 11ac 11an” menu allows you to view and configure information for your range extender’s 5GHz wireless network across four categories: Basic, Advanced and Security. The “Basic” screen displays basic settings for your range extender’s 5GHz Wi-Fi network(s). -
Page 56: Advanced
User Manual of WRE-1200 Channel Set the channel bandwidth: Bandwidth 20MHz (lower performance but less interference) Auto 40/20MHz Auto 80/40/20MHz (automatically select based on interference level). BSS Rate Set Set a Basic Service Set (BSS) rate: This is the transmission rate for controlling communication frames for wireless clients. - Page 57 User Manual of WRE-1200 The page includes the following fields: Object Description Guard Interval Set the guard interval. 802.11n Protection Enable/disable 802.11n protection, which increases reliability but reduces bandwidth (clients will send Request to Send (RTS) to range extender, and range extender will broadcast Clear to Send (CTS), before a packet is sent from client.)
-
Page 58: Security
User Manual of WRE-1200 6.3.6 Security The range extender provides various security options (wireless data encryption). When data is encrypted, information transmitted wirelessly cannot be read by anyone who does not know the correct encryption key. Figure 6-12 5GHz Wireless Settings -- Security... - Page 59 User Manual of WRE-1200 No Authentication Authentication is disabled and no password/key is required to connect to the access point. Disabling wireless authentication is NOT recommended. When disabled, anybody within range can connect to your device’s SSID. WEP (Wired Equivalent Privacy) is a basic encryption type. For a higher level of security consider using WPA encryption.
- Page 60 User Manual of WRE-1200 WPA-PSK Figure 6-14 5GHz Wireless Settings - WPA-PSK The page includes the following fields: Object Description WPA Type Select from WPA/WPA2 Mixed Mode-PSK, WPA2 or WPA only. WPA2 is safer than WPA only, but not supported by all wireless clients.
-
Page 61: Wps
User Manual of WRE-1200 6.3.7 Wi-Fi Protected Setup (WPS) is a simple way to establish connections between WPS compatible devices. WPS can be activated on compatible devices by pushing a WPS button on the device or from within the device’s firmware/configuration interface (known as PBC or “Push Button Configuration”). -
Page 62: Radius Settings
User Manual of WRE-1200 6.3.8 RADIUS Settings The RADIUS sub menu allows you to configure the range extender’s RADIUS server settings, categorized into three submenus: RADIUS settings. A RADIUS server provides user-based authentication to improve security and offer wireless client control –... -
Page 63: Mac Filter
User Manual of WRE-1200 6.3.9 MAC Filter Mac filtering is a security feature that can help to prevent unauthorized users from connecting to your range extender. This function allows you to define a list of network devices permitted to connect to the access point. Devices are each identified by their unique MAC address. - Page 64 User Manual of WRE-1200 MAC address entries will be listed in the “MAC Address Filtering Table”. Select an entry using the “Select” checkbox. Object Description Select Delete selected or all entries from the table. MAC Address The MAC Address is listed here.
-
Page 65: Management
User Manual of WRE-1200 6.4 Management 6.4.1 Admin You can change the password used to login to the browser-based configuration interface here. It is advised to do so for security purposes. Figure 6-18 Admin The page includes the following fields:... -
Page 66: Date And Time
User Manual of WRE-1200 6.4.2 Date and Time You can configure the time zone settings of your range extender here. The date and time of the device can be configured manually or can be synchronized with a time server. Figure 6-19 Time and Date... -
Page 67: Advanced
User Manual of WRE-1200 6.5 Advanced 6.5.1 LED Settings The range extender’s LEDs can be manually enabled or disabled according to your preference. Figure 6-20 LED Settings The page includes the following fields: Object Description Power LED Select on or off. -
Page 68: Updating Firmware
User Manual of WRE-1200 6.5.2 Updating Firmware The “Firmware” page allows you to update the system firmware to a more recent version. Updated firmware versions often offer increased performance and security, as well as bug fixes. You can download the latest firmware from the PLANET website. -
Page 69: Saving/Restoring Settings
User Manual of WRE-1200 6.5.3 Saving/Restoring Settings The range extender’s “Save/Restore Settings” page enables you to save/backup the range extender’s current settings as a file to your local computer and restore the range extender to previously saved settings. Figure 6-22 Saving/Restoring Settings... -
Page 70: Factory Default
User Manual of WRE-1200 6.5.4 Factory Default If the range extender malfunctions or is not responding, then it is recommended that you reboot the device or reset the device back to its factory default settings. You can reset the range extender back to its default settings using this feature if the location of the range extender is not convenient to access the reset button. -
Page 71: Chapter 7. Client Mode
UI page under client mode. In the client mode, the WRE-1200 can let your networking device have wireless capability; it will become your networking device’s wireless network card. You can connect this device to Ethernet port of your existing internet TV or DVD player or game console device via Ethernet cable. -
Page 72: Client Mode Advanced Settings
User Manual of WRE-1200 7.2 Client Mode Advanced Settings After logging in to the WRE-1200 by browser, you could see the configuration below. Figure 7-1 Quick Setup 7.2.1 Scanning Wireless Signal Press “Scan” and it will display all available 2.4GHz and 5GHz Wi-Fi networks. Select the SSID you want to... -
Page 73: Figure 7-2 Selecting Ssid
User Manual of WRE-1200 Figure 7-2 Selecting SSID To select the SSID, you might need to enter the encryption of root AP. Press “Save” after entering the key. Figure 7-3 Entering Pre-shared Key The connection will be established if the key is correct. You can click “Apply” to finish the setting. -
Page 74: Figure 7-5 Ap Connected
User Manual of WRE-1200 The connection is established successfully. You can press “Home” to enter Web UI of the WRE-1200. You can refer to the Chapter 6 for more information about the web settings. Figure 7-5 AP connected... -
Page 75: Appendix A: Planet Smart Discovery Utility
User Manual of WRE-1200 Appendix A: Planet Smart Discovery Utility To easily list the WRE-1200 in your Ethernet environment, the Planet Smart Discovery Utility can be downloaded from the PLANET website below. http://www.planet.com.tw/en/product/images/48590/Planet_Utility.zip The following installation instructions guide you to running the Planet Smart Discovery Utility. - Page 76 APΣΥΜΜΟΡΦΩΝΕΤΑΙ ΠΡΟΣ ΤΙΣ ΟΥΣΙΩΔΕΙΣ essenciais e outras disposições da Directiva ΑΠΑΙΤΗΣΕΙΣ ΚΑΙ ΤΙΣ ΛΟΙΠΕΣ 1999/5/CE. ΣΧΕΤΙΚΕΣ ΔΙΑΤΑΞΕΙΣ ΤΗΣ ΟΔΗΓΙΑΣ 1999/5/ΕΚ Por medio de la presente, PLANET Technology Español Slovensky Corporation, declara que 11ac Wireless AP Výrobca PLANET Technology Corporation, týmto cumple con los requisitos esenciales y deklaruje, že táto 11ac Wireless AP je v súlade so...
Need help?
Do you have a question about the WRE-1200 and is the answer not in the manual?
Questions and answers