Table of Contents
Advertisement
Advertisement
Table of Contents

Related Manuals for Aastra 6757


Summary of Contents for Aastra 6757
- Page 1 Aastra 6757 Aastra 5000 Communications Systems Terminal User’s Guide...
-
Page 2: Table Of Contents
Contents Description of the phone ......7 Overview ..........7 The navigation keys . - Page 3 Contents During the call ........24 Using the mute function .
- Page 4 Contents Directories of abbreviated numbers ....40 Programming a personal abbreviated number ....40 Modifying or deleting a personal abbreviated number .
- Page 5 Contents The call forwarding function ......58 Forwarding a call .........58 Cancelling a forwarding .
- Page 6 Contents Login/Logout function ......85 Restoring your subscriber rights on a general-purpose phone ..85 Restoring your subscriber rights on your own phone .
- Page 7 Mounting the phone ........107 Installation of the M670 module on the Aastra 6757 terminal ..109 Programmable key equivalence .
-
Page 8: Description Of The Phone
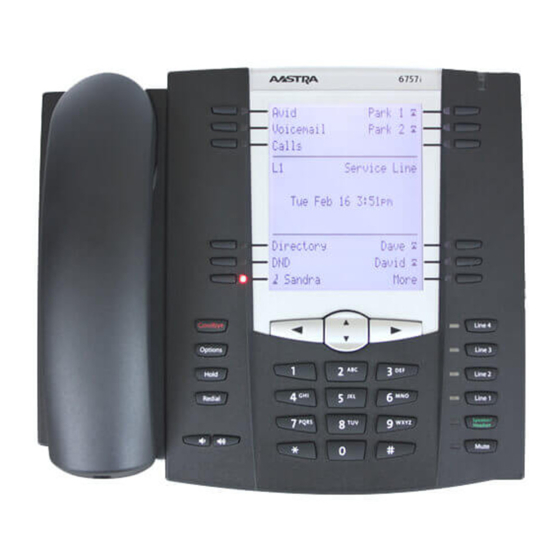
Description of the phone Description of the phone Overview Message indicator Signalling of incoming calls and message notification 5 programmable keys with LED indicators whose identifiers must be entered via the alphanumeric keypad: Each of these keys enables you to: •... - Page 9 Description of the phone Navigation keys: • The keys can be used to display sections or records, • The keys can be used to display additional information or to define a setting. The green key can be used to: • Answer an incoming call in hands-free mode, •...
-
Page 10: The Navigation Keys
Description of the phone Speaker key, can be used for the following: • Activate and deactivate the intercom function in standby, • Answer an incoming call in hands-free mode, • Activate the group listening and the hands-free mode during an ongoing call. The associated indicator lights up or flashes as appropriate. -
Page 11: Alphanumeric Keypad
Description of the phone Alphanumeric keypad The alphanumeric keypad is used to enter letters and digits. The entry is based on the equivalence of the keys with letters or signs. To enter a text: • Select the required character by successively pressing the corresponding key. -
Page 12: Accessories
Description of the phone Accessories Headset This phone can be equipped with a headset microphone. After microphone: connection and programming (see para. Phone settings), the headset mode substitutes the hands free mode. Extension module: The extension module is used to equip the phone with 36 additional programmable keys;... -
Page 13: Calling Modes
Calling modes Calling modes Your phone proposes various call modes to suit your activities. These options are available in addition to the classic handset mode (discrete mode): Picking up the handset to answer or make a call, and hanging up the handset again to finish a call. -
Page 14: Using The Headset Mode
Calling modes To switch from handset to hands-free mode: You are talking in handset mode: • Press the key and then hang up the handset within 6 seconds (while the indicator of the key is flashing. -> The call is continued in hands-free mode. The indicator light of key lights up steady. -
Page 15: Using The Group Listening Mode
Calling modes To call a party: • Dial the number of the party directly on the keypad. -> The dialled number appears in the display as you enter it. As soon as the party called answers, you can talk in headset mode. -
Page 16: Using The Pre-Dialling Mode
Calling modes To deactivate the intercom mode: Phone in standby mode: Press the speaker key. -> The indicator associated with the key goes off. To end the communication in intercom mode: If the party you have called has the initiative for hanging up, you do not have to do anything;... -
Page 17: Making A Call
Making a call Making a call Several options exist to call a party, depending on whether the party’s number is new or has already been stored by the phone. The procedures to call parties stored in the directories or logs are explained in the chapters that are dedicated to these functions. -
Page 18: Use Of The Lnr Function (Last Number Redial)
Making a call Use of the LNR function (last number redial) The LNR function (last number redial) allows you to redial automatically the last number called. • Press the green key twice. -> The phone automatically calls the party. The display shows the number called. -
Page 19: To Call A Party From A Directory By Name
Making a call To call a party from a directory by name: If you do not know the number of your party, you can access it by entering the party’s name on the alphanumeric keypad. The search will be run in the directory chosen by you - See "Associating a directory to the call by name function (ABC key)"... -
Page 20: Using The Automatic Redial Function
Making a call Using the automatic redial function You are calling an internal party who is busy or does not answer. You can request the party to call you back automatically. To activate the automatic redial function: Press the interactive Redial key (before hanging up). -
Page 21: Using The Store And Redial Function
Making a call 3 - Press the interactive Enter key to confirm the sending of the Enter message. -> The display suggests you to resume the call. 4 - Press the interactive key (example), depending on what you want to do. Note: The predefined messages are directly displayed on the phone of the alerted party. -
Page 22: Receiving A Call
Receiving a call Receiving a call During an inbound call, the phone rings and the message indicator flashes. When the caller is stored in one of the directories, the display indicates the associated name. The parties stored in the private directory are announced by a specific ring tone (see "Selecting and adjusting the phone ringer", Page 99). -
Page 23: Answering A Call
Receiving a call Answering a call • Pick up the handset. -> The conversation with the party takes place in discreet mode. • Press the speaker key or the green key. -> Without picking up the handset, you can talk directly in hands free mode. - Page 24 Receiving a call To pick up a call meant for any phone: You can intercept the call on a phone when its designated user is absent: 1 - Press the interactive Pick-up key. Pick-up 2 - Press the interactive Extens. key.
-
Page 25: During The Call
During the call During the call Using the mute function The call is set up with a party and you want to have a confidential conversation without the party being able to hear it: To activate the function: Press the Secret key. ->... -
Page 26: Placing The Party On Hold And Resuming The Call On The Same Phone
During the call Placing the party on hold and resuming the call on the same phone The call is set up with a party and you want to put it on hold to resume it later on the same phone: 1 - Press the key. -
Page 27: Transferring A Call
During the call Transferring a call To transfer the current call to another phone: 1 - Press the interactive Comm key. Comm 2 - Dial the extension number. Note: You can also access a stored number or perform a search by name. -
Page 28: Answering A Second Call
During the call 2 - Dial the extension number. 3 - Press the Call key. Call -> Only now is your party put on hold and hears an audible signal. Answering a second call While talking with one party, you hear an audible signal: another party is trying to reach you. -
Page 29: Setting Up A Conference Call
During the call Setting up a conference call You want to talk to both parties at the same time (function granted if you made the last call). • Press the Conf. key. Conf -> A three-way conference call is set up between you and your two parties. - Page 30 During the call Storing the number of the called party: Regardless of whether you are the calling or the called party, you can store the number of the other party on a programmable key. 1 - Press successively the interactive -->...
-
Page 31: Viewing The Stored Numbers
During the call Viewing the stored numbers You want to view the stored numbers in the store and redial, LNR or automatic callback function. • Press successively the interactive keys Funct., Feature, --> Funct. Memory. -> The display offers you to access the various stored numbers. Feature -->... -
Page 32: Outbound Call Log (Lnr)
Outbound call log (LNR) Outbound call log (LNR) The outbound call log can store the records of the last 10 numbers called (internal or ex- ternal numbers). When consulting the log, you can automatically call back one of the stored numbers. When the log is full, a new call will erase the oldest. -
Page 33: Storing The Name And/Or Number In The Private Directory
Outbound call log (LNR) Storing the name and/or number in the private directory During the consultation (display of the name or number), you can enter in the private direc- tory the coordinates of the party whose record is presented to you. 1 - Press the interactive Create key. -
Page 34: Deleting All Records From The Outbound Call Log
Outbound call log (LNR) Deleting all records from the outbound call log You can delete all the numbers stored in the outbound call log. 1 - Press the Tools key. PROGRAMMING -> The display shows " ". 2 - Press CLEAR LOGS ->... -
Page 35: Private Directory
Private directory Private directory You can record the internal or external numbers that you use most frequently (up to 100) in your private directory. When a party stored in the private directory calls you, the screen displays the name fol- lowed by the number. -
Page 36: Creating A Record In The Private Directory
Private directory Creating a record in the private directory You can create a new record while consulting the directory. 1 - Press the interactive Create key. Create -> The display prompts you to enter the name of the new record. When the directory is already full, the display shows PRIVATE DIRECTORY IS FULL "... -
Page 37: Modifying And Deleting A Record In The Personal Directory
Private directory Modifying and deleting a record in the personal directory When a record has been stored, you can modify or delete it. To modify a record: While viewing the record: 1 - Press the interactive Modify key. Modify -> The display prompts you to modify the name, the number or the classification list. -
Page 38: Personalising The Titles Of The Lists In The Private Directory
Private directory Personalising the titles of the lists in the private directory You can access the personalisation of the titles of the 4 lists in the private directory; by de- fault, the titles are: List 1 - List 2 - List 3 - List 4. 1 - Press the Tools key. -
Page 39: Searching By Name In The Private Directory
Private directory Searching by name in the private directory While consulting the directory, you can search for a name in all records stored in the private directory. 1 - Press successively the key of the alphanumeric keypad which contains the first letter of the name you are searching, until the display shows the first letter of this name. -
Page 40: Deleting The Lists Of The Private Directory
Private directory Deleting the lists of the private directory You can delete a record or all the records stored in the private directory. Caution: You must have personalised your secret code before activating this function (see para. Phone settings - Personalising the phone’s secret code). 1 - Press the Tools key. -
Page 41: Directories Of Abbreviated Numbers
Directories of abbreviated numbers Directories of abbreviated numbers These are directories stored at the system level. • The personal directory is used to record your most frequently used numbers (up to 10, numbered from 0 to 9). • The group directory of abbreviated numbers can be accessed by all the phones (even those for which outside access is forbidden). -
Page 42: Modifying Or Deleting A Personal Abbreviated Number
Directories of abbreviated numbers Modifying or deleting a personal abbreviated number When a personal abbreviated number has been programmed, you can modify or delete it. To modify an abbreviated number: When the abbreviated number you want to modify is displayed. 1 - Press Modify. -
Page 43: Dialling A Common Abbreviated Number
Directories of abbreviated numbers Dialling a common abbreviated number You will gain time using common abbreviated numbers; consult your system operator to find out the list. You can call a common abbreviated number in standby or during a call. 1 - Press the asterisk key ( 2 - Enter an abbreviated number (3xxx). -
Page 44: Inbound Call Log
Inbound call log Inbound call log The inbound call log can store the records (i.e. all information relating to a call) of the last 50 inbound calls, regardless of whether or not they were answered. If the calling party is stored in your private directory, the name will be displayed in priority instead of the number. -
Page 45: Calling A Party From The Inbound Call Log
Inbound call log Notes: • If the calling party has protected his identity, the screen displays a series of asterisks instead of the name and number. • If the calling party is not identified, the screen displays UNKNOWN " " instead of the name and number. •... -
Page 46: Deleting A Record From The Inbound Call Log
Inbound call log • If the name is not available in the inbound call log, the display prompts you to enter the name. -> Enter the name to be associated with the number using the alphanumeric keypad (up to 14 characters), then press finish. - Page 47 Inbound call log 5 - Press the Delete key. Delete -> The screen prompts you to enter your secret code. 6 - Enter you secret code. -> The phone beeps twice. The screen confirms that the complete call log has been cleared.
-
Page 48: Information Directory
Information directory Information directory The information directory is used to access the display of the usual various information about the phone and the owner of the phone concerned. Checking the information directory You can call up the information directory when phone is in standby as well as during an ongoing call. - Page 49 Information directory 1 - Press the key. -> The display prompts you to enter the number. 2 - Enter the number you want to store (23 characters maximum). -> In case of an error, press the keys to select the character you want to replace (place the cursor under the character), then enter the new character.
-
Page 50: Internal Names Directory
Internal names directory Internal names directory This is the directory of the names of internal parties which is common to all subscribers. It is programmed by the system operator. Checking the internal names directory You can call up the external names directory when the phone is in standby as well as during an ongoing call. -
Page 51: Calling An Internal Party
Internal names directory Calling an internal party While consulting, you can call the party whose name is displayed. Press the Call key. Call -> When the called party answers, you can talk. -
Page 52: External Names Directory
External names directory External names directory This is the directory of the names of external parties which is common to all subscribers. It is programmed by the system operator. Checking the external names directory You can call up the external names directory when the phone is in standby as well as during an ongoing call. -
Page 53: Calling An External Party
External names directory Calling an external party While consulting, you can call the party whose name is displayed. Press the Call key. Call -> When the called party answers, you can talk. -
Page 54: Programmable Keys
Programmable keys Programmable keys You call some parties or colleagues several times a day. You regularly use some telephone functions such as forwarding, supervision, filtering, call pick-up, etc. The programmable keys on your phone can be used to store these numbers or functions and easily access the services offered (See "Description of the phone"... - Page 55 Programmable keys To program a number: You can program the number to call an internal or external party. After selecting the key to be programmed (the associated indicator flashes): 1 - Press the interactive Number key. Number -> The display prompts you to enter the number. 2 - Dial the party's number without forgetting the network access code if it is an external party (0).
- Page 56 Programmable keys To program supervision: You can program the supervision function of another phone or of your own phone. After selecting the key to be programmed (the associated indicator flashes): 1 - Press the interactive Superv. key. Superv. -> The display prompts you to choose a type of supervision (voice mailbox, phone or external line).
-
Page 57: Deleting, Modifying And Exiting The Programming
Programmable keys 4 - Dial the number of the phone, then press the interactive Enter key. -> The display shows the programming of the key. Enter You can now activate one of the features (message, forward, agenda, lock, …) by simply pressing the programmed key. To program a filter: You want to program the filter function for the phone calls of one of your colleagues. -
Page 58: Identifying The Programmed Keys
Programmable keys 4 - Press the interactive key to exit the programming. Reminder: During the programming, • you can press the red key once to cancel the setting you are making, • you can press the red key twice to terminate a programming sequence. -
Page 59: The Call Forwarding Function
The call forwarding function The call forwarding function If absent or busy, you can forward your calls to another phone, to an external number (e.g. a GSM number) or to your voice mailbox. Forwarding a call You want to access the call forwarding function. 1 - Press the interactive Funct. - Page 60 The call forwarding function • To forward calls coming from internal lines, press the interactive Intern. Intern. key. -> The display shows the forwarding status. To select the forward destination: You now want to choose the forward destination. • To forward calls to an internal phone: 1 - Press the interactive Extens.
-
Page 61: Cancelling A Forwarding
The call forwarding function Cancelling a forwarding With the phone in standby, proceed as follows to view the state of you forwarding settings: 1 - Press the interactive More key. More -> The display shows the status of the forwarding setting. 2 - Press the interactive Cancel key. -
Page 62: Overriding The Call Forwarding Function
The call forwarding function Then repeat the sequence described in this chapter, i.e.: • You have to choose the type of forwarding, and then enter the number of the extension to which the calls will be forwarded. Note: If desired, you can simply store the sequence without the extension number. - Page 63 The call forwarding function You can also, if you are authorised for assistant forwarding (this function is subject to a right), force this forwarding and ring the desired phone in the following way: * 2 8 * 2 8 1 - Press successively the following keys: 2 - Enter the desired extension number.
-
Page 64: Voicemail Function
Voicemail function Voicemail function The voicemail function helps you to manage your calls when you are absent or simply when you do not want to be disturbed. For the voicemail system to be able to record your messages, you must configure and per- sonalise your voice mailbox, then forward your calls. -
Page 65: Activating The Forwarding Of Calls To The Voice Mailbox
Voicemail function Activating the forwarding of calls to the voice mailbox To forward your calls to the voice mailbox: 1 - Press successively the interactive keys Funct., Feature, Funct. Forward. Feature Forward 2 - Select the type of forwarding (example: Delayed). Delayed 3 - Select the origin of the calls to be forwarded (example: calls of any origin). -
Page 66: Programming The Access Codes On A Programmable Key
Voicemail function -> A voice prompt welcomes you to the voicemail and gives you the different commands to access your voice mailbox. Simply follow the instructions. 2 - Enter the voice mailbox number followed by # and/or the secret code followed by # (*). Note: we recommend storing this sequence on a programmable <No. - Page 67 Voicemail function To use the programmed key: Therefore, after calling the mail system, when the voice prompt asks you to enter the box n° and or your secret code, Simply press the programmed key. Access VMbox -> You are taken directly to the main menu of your voice mailbox. Note: We strongly recommend you to personalise the identifier of the key in order to avoid that a third person can consult your voice...
-
Page 68: Multi-Key Function
Multi-key function Multi-key function A multi-key programmed set has only one directory number, but has personalised keys to enable it to process several calls at the same time. Therefore, you can answer your parties as the calls arrive and display the calls on hold. Note: You have to program one personalised key for each call that you want to make at the same time. -
Page 69: Communicating With The Multi-Key Function
Multi-key function 9 - Press the interactive key to validate the new programming. -> The display shows how many keys are already programmed for this purpose. 10 - Press the interactive <-Start key, and then program the multi- <-Start key function on at least one other programmable key. Reminder: Use the red key to cancel a setting or return to... - Page 70 Multi-key function If, after having displayed the identity of the second caller, you do not want to answer, you can divert the call. • Press the interactive Divert key, then dial the number of the Divert phone to which you want to divert the call. ->...
-
Page 71: Multi-Line Function
Multi-line function Multi-line function A multi-line phone has several directory numbers . Each directory number is stored on a programmable key. This function is mainly used to program on the same phone: • a standard number that you give to everyone. •... - Page 72 Multi-line function 7 - Press the interactive Extens. key. Extens. -> The display suggests to supervise your phone or another phone. 8 - Press the interactive key to supervise your phone. -> The display shows how many keys are already programmed in supervision mode for this directory number.
- Page 73 Multi-line function bers that you have, as you require. Each directory number can also be programmed in mul- ti-key (managing double calls). A list of 10 personal abbreviated numbers is assigned to each directory number. Example: You have 20 personal abbreviated numbers for two directory numbers. You have a voice mailbox associated to each directory number.
-
Page 74: Communicating With The Multi-Line Function
Multi-line function Communicating with the multi-line function The multi-line function has been stored on at least two programmable keys on your phone. To answer a call: When a call arrives on your phone that is multi-line programmed, the indicator associated to the personalized key flashes. •... - Page 75 Multi-line function To switch between parties: You are in communication with one party with another party on hold. • Successively press the programmed key with the rapidly flashing Multi-line1 indicator to switch from one party to the other. -> The indicator associated to the key of the party you are talking to Multi-line2 stays permanently on and the display gives his identity.
-
Page 76: Supervision Function
Supervision function Supervision function When the supervision of a group of phones is programmed on your telephone, you can: • see the state of supervised phones (free, called, busy), • quickly pick up calls on these phones, • call these phones directly. Note: The supervision of an external line or network line can also be programmed. -
Page 77: Communicating With The Supervision Function
Supervision function 8 - Press the interactive Other key to supervise another phone. Other -> The display prompts you to enter the number of the phone that you want to supervise. 9 - Dial the number of the phone, then press the interactive Enter key. -
Page 78: Folder Function
Folder function Folder function The Folder function of a phone allows the user to: • Always have at one's disposal a conversation circuit with a privileged party, • Visualize calls coming from that privileged party, • Call that privileged party by pressing one single key. Important note: The two phones –... -
Page 79: Communication With Your Privileged Parties
Folder function 5 - Press the interactive Modify key. Modify -> The display shows: WHAT DO YOU WANT TO PROGRAM? 6 - Press the interactive Superv. key. Superv. -> The display shows: WHAT DO YOU WANT TO SUPERVISE? 7 - Press the interactive Extens. - Page 80 Folder function • When the supervised phone is put on hold, the indicator associated with the key flashes quickly. To call the privileged phone: You want to call the privileged party: Note: You have a privileged access to the programmed phone at any time, regardless of whether your phone is in standby or in multi-communication mode (all keys programmed in multi-key mode are busy).
-
Page 81: Communication With Your Non-Privileged Parties
Folder function Communication with your non-privileged parties A multi-key programmed phone has only one directory number, but has personalised keys to activate it to process several calls at the same time. Therefore, you can answer your – non-privileged – parties as the calls arrive and display the calls on hold. You have pro- grammed the multi-key function on at least two keys. -
Page 82: Filter Function
Filter function Filter function This function is used to filter the calls for another person (example: Assistant/Manager). Two programmable keys must be used on the "Assistant" phone (filtering phone) and two more keys on the "Manager" phone (filtered phone), one to activate or deactivate filtering, the other to supervise the calls on the filtered phone. - Page 83 Filter function To program the supervision function: You now have to program the supervision of the filtered phone. 10 - Press a second programmable key. Note: In order to identify a call arriving on that key, we recommend to use one of the keys of the first page (#1) or of the extension module, if you have one.
-
Page 84: Communicating With The Filter Function
Filter function Communicating with the filter function You have programmed the keys for use of the filtering function. To activate the filter function: The key programmed with the filter function is used to activate filtering from the filtered phone or the filtering phone. •... - Page 85 Filter function To pick up a call that is meant for you: A call that was meant for you arrives on the filtering phone. The indicator associated with the key programmed for filter supervision on your phone flashes rapidly and if programmed, it emits an audible signal*.
-
Page 86: Login/Logout Function
Login/Logout function Login/Logout function You are using for the moment an office with a general-purpose phone (not assigned to a subscriber). The Login function allows you to identify and to restore your calls and the char- acteristics associated to your subscriber number. After returning to your office, you will use the same procedure to restore the calls on your own phone, as well as the phone configuration (forwarding, programmable keys, settings, etc.). -
Page 87: Restoring Your Subscriber Rights On Your Own Phone
Login/Logout function Restoring your subscriber rights on your own phone After returning to your office, you use the same procedure. 1 - Press the interactive Funct. key. Funct. 2 - Press the interactive Subscr. key. Subscr. 3 - Press the interactive Enter key. -
Page 88: Showing The Identity Of The Subscriber Of A Phone
Login/Logout function Showing the identity of the subscriber of a phone You want the phone to display the number of the subscriber (or user). 1 - Press the interactive Funct. key. Funct. 2 - Press the interactive Subscr. key. Subscr. 3 - Press the interactive Display key. -
Page 89: Agenda Function
Agenda function Agenda function This function is used to program on your phone or more appointments. Your phone will re- mind you of your appointment at the desired time. Programming the agenda function 1 - Press the interactive Funct. key. Funct. -
Page 90: Consulting Your Appointments To Modify Or Cancel One Of Them
Agenda function Consulting your appointments to modify or cancel one of them To consult the programmed appointments: 1 - Press successively the interactive keys Funct., Feature, Funct. Alarm. -> The display shows the status of appointment no. 1. Feature Alarm •... -
Page 91: Do Not Disturb" Function
"Do not disturb" function "Do not disturb" function You may wish not to be disturbed for a certain time and not receive any calls. Using the "Do not disturb" function To activate the function: Phone in standby mode: 1 - Press the interactive Funct. -
Page 92: Overriding The "Do Not Disturb" Function
"Do not disturb" function Overriding the "Do not disturb" function You are trying to reach a party who has programmed the "Do not disturb" function on his phone. You can force this forwarding and ring the desired phone. * 2 9 1 - Press successively the keys before dialling the number * 2 9... - Page 93 "Do not disturb" function To deactivate the function: You want to deactivate the "Do not disturb" function: • Press the programmed key. -> An audible message and the display indicate that the action has been validated. The indicator associated with the programmed key goes off. You want to receive calls again.
-
Page 94: Other Functions
Other functions Other functions Replace function This function is used to temporarily recover the features and programming on your phone to use them on another phone. Caution: You have to personalise your secret code before you activate this function (See "Activating the phone lock" on page 97.) On the phone used temporarily: 1 - Press the interactive Funct. -
Page 95: The Identity Presentation Function
Other functions The identity presentation function You can choose the identity which you want to be shown to the party you are calling. You have the choice between the number of your company, the number of your phone or no number at all. -
Page 96: Out-Of-Office Function
Other functions • If you need to correct an entry, press the interactive Erase key. Erase 4 - Press the interactive Enter key to confirm the sending of the Enter message. -> The sending of the message is confirmed on the screen. Out-of-office function You want to leave your office while the call forwarding function is active on your phone. -
Page 97: The Line Protection Function During Data Transmission
Other functions The line protection function during data transmission You want to send data via your telephone line (using a modem or Minitel on the line) and therefore do not want to be disturbed by a call (i.e., non-presentation of waiting calls). You can temporarily activate this function during a call (See "Other features available dur- ing a call"... -
Page 98: Locking The Phone
Locking the phone Locking the phone This function is used, for example, to prohibit in your absence outgoing calls from your phone and access to the logs (outbound and inbound call log) as well as to your private directory. Important: Before locking your phone, you must have personalised the secret code on your phone (See "Personalising the phone’s secret code"... -
Page 99: Calling An Emergency Number From The Locked Phone
Locking the phone Calling an emergency number from the locked phone The phone is locked, but you can call an emergency number: • Dial the emergency number. Note: The phone accepts a number that is part of a list of emergency numbers (ambulance service, fire department...), programmed by the system operator. -
Page 100: Phone Settings
Phone settings Phone settings Selecting and adjusting the phone ringer You can choose the tune (16 different tunes) and adjust the volume level (8 levels) of the cur- rent ring tone. The calls of parties stored in the private directory of your phone are signalled by a specific ring tone . -
Page 101: Adjusting The Screen Contrast
Phone settings To select and play the tune associated with the private directory*: PRIVILEGE RING MELODY: xx When the display shows • Press successively the keys to choose the tune that will be played when one of the parties stored in the private directory calls you. -
Page 102: Adjusting The Volume Of The Beeps Heard When A Key Is Pressed
Phone settings Adjusting the volume of the beeps heard when a key is pressed Each time a key is pressed, a beep is emitted. The volume level of this beep can be ad- justed over 8 levels; the lowest level corresponds to no beep. Phone in standby mode: •... -
Page 103: Associating A Directory To The Call By Name Function (Abc Key)
Phone settings 7 - Enter the new code and then press the Enter key. Enter 8 - Enter the new code once again and then press the Enter key. -> An audible signal and the display indicate that the action has xxxx(twice) been validated. -
Page 104: Choosing The Phone Language
Phone settings Choosing the phone language You can choose the language in which all messages will appear on the display. Phone in standby 1 - Press the interactive Lang. key. Lang. 2 - Press the interactive key that corresponds to the desired English language (English... - Page 105 Phone settings 5 - Select the desired mode (example Auto). Auto -> Your choice is confirmed on the screen. After programming, • press the red key to return to standby.
-
Page 106: Installation Of The Terminals In The Range
The Aastra 6755 and Aastra 6757 terminals allow the use of a headset microphone. Extension module (only Aastra 6757) On the Aastra 6757 terminal, the M670 extension module can be used to expand the phone’s capacity by 36 additional programmable keys. -
Page 107: Connections
To the extension module (detach cover) Headset connection (optional for Aastra 6755 and 6757) Turn the phone upside down and look for the marked headset socket . Insert the con- nector of the headset cable into the socket until it snaps in place. Then insert the cable into the slot, as shown in the figure above. -
Page 108: Mounting The Phone
Installation of the terminals in the range The standard connection of the terminals is as follows: A pair is required to connect the phones. We recommend using a shielded cable that is grounded on the splitter side. The line is always wired to the 2 middle contacts of the phone's RJ11 connector. If your configuration is different, cords are available to connect the phones to the telephone network: - Standard wall socket (French type): HK1040B (kit of 10 cords) - Page 109 Installation of the terminals in the range 3 locations on the base to customise the tilt of the phone Wall-mounted phone Installing the handset cradle On a wall-mounted phone, the handset is held by a stud that has to be pulled out of the housing: 1 - Use a pointed and rigid instrument to pull the stud fully out of its slot, which is located on the side where the earpiece of the handset is placed.
-
Page 110: Installation Of The M670 Module On The Aastra 6757 Terminal
Installation of the terminals in the range Installation of the M670 module on the Aastra 6757 terminal The extension module can be used to expand the phone’s capacity by 36 additional pro- grammable keys. To install the extension module: 1 - Turn the phone upside down and look for the marked extension module socket 2 - Remove the cover on the socket. -
Page 111: Programmable Key Equivalence
Installation of the terminals in the range Programmable key equivalence This section details the correspondence of the programmable keys on substitution of a phone from the previous M7xx range by an Aastra 675x or on replacement of one phone by another. Aastra 6753 terminal... -
Page 112: Tips And Safety
This equipment cannot be connected to the public network. This telephone is designed to be installed with a private connection: switching system from the Aastra ranges. The voltages present on this network are classified TRT1 (Telephone Network Voltage) according to the EN 60-950 standard. -
Page 113: Miscellaneous Tools
Miscellaneous tools Miscellaneous tools Glossary (terms you should know) Folder function The folder function of a phone allows the user to: • Always have at one's disposal a conversation circuit with a privileged party, • Visualize calls coming from that privileged party, •... -
Page 114: Troubleshooting Check
Miscellaneous tools General ring Ringer on an unidentified phone. Squat Function used to recover the features granted on an original phone on another phone. Troubleshooting Check Fault detected Possible causes No display Check that the phone is connected to the line (dial tone in the earpiece). - Page 115 AMT/PUD/TR/0041/1/3/EN 01/2009 AASTRA France 1 rue Arnold Schoenberg Aastra 5000 is a registered trademark of Aastra. Rond-point des Saules Copyright © Aastra 78286 Guyancourt Cedex - France Phone: + 33 (0)1 30 96 42 00 This document is not contractually binding. The...
Need help?
Do you have a question about the 6757 and is the answer not in the manual?
Questions and answers