Table of Contents
Advertisement
Available languages
Available languages
Quick Links
Advertisement
Chapters
Table of Contents

Subscribe to Our Youtube Channel
Related Manuals for Viking MT 5112 Z


Summary of Contents for Viking MT 5112 Z
- Page 1 MT 5097, MT 5097 C, MT 5097 Z, MT 5112 Z MT 6112 C, MT 6112 ZL, MT 6127 ZL Instruction manual Manual de instrucciones Manual de utilização Οδηγίες χρήσης MT 5097.1 MT 5097.1 C MT 5097.1 Z MT 5112.1 Z MT 6112.1 C...
- Page 2 0478 192 9807 C. I16. Eco. DS-2016-03 © 2016 VIKING GmbH, A-6336 Langkampfen / Kufstein...
- Page 3 0478 192 9807 C...
- Page 4 0478 192 9807 C...
-
Page 5: Table Of Contents
Dear Customer, Mowing deck switch (MT 5097, MT 5097 C, MT 5097 Z, Thank you for choosing a VIKING quality 1. Table of contents MT 5112 Z) product. Mowing deck button (MT 6112 C, This product has been produced using... -
Page 6: Notes On The Instruction Manual
Combustion engine the sense of EC Directive 2006/42/EC. Emptying the grass catcher box Gearbox VIKING is continually striving to further Removing and attaching the grass Storage develop its range of products; we therefore catcher box Extended periods of inoperation... - Page 7 Section reference: Illustrations with text passages: References to relevant sections and Operating steps relating directly to the subsections for further descriptions are illustration can be found immediately after made using arrows. The following example the illustration, with a corresponding shows a reference to a section: ( 2.1) reference to the item numbers.
-
Page 8: Machine Overview
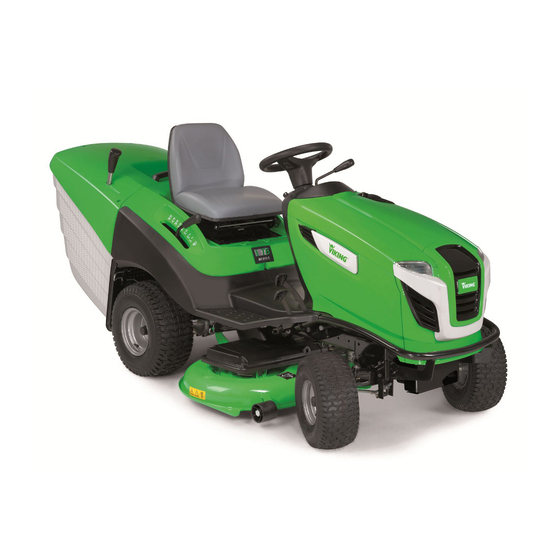
3. Machine overview 3.1 Ride-on mower 0478 192 9807 C - EN... - Page 9 Bumper Headlamp Engine hood Tank cap Steering wheel Driver's seat Grass catcher box handle with grass catcher box release lever Grass catcher box emptying lever Grass catcher box Gearbox freewheel lever Cutting height adjustment lever Rear wheel Brake pedal Drive pedal (driving speed) Mowing deck Gauge wheels Front wheel...
-
Page 10: Dashboard
(MT 5097, MT 5097 C, MT 6112 C) 8.2) Mowing deck button (MT 6112 C, MT 6112 ZL, Throttle lever MT 6127 ZL) (MT 5097 Z, MT 5112 Z, 8.6) MT 6112 ZL, MT6127 ZL) 8.3) Cruise control button (MT 6112 ZL, MT 6127 ZL) Choke knob 8.7) -
Page 11: For Your Safety
VIKING specialist accessories or attachments approved by exhaustive. Always use the machine in a dealer. VIKING, is forbidden and results in voiding reasonable and responsible manner and of the warranty cover. Information Due to the physical danger to the user or... -
Page 12: Training - Learning To Use The Machine
been caused by vibrational loads. – inappropriate braking, Symptoms of this kind principally affect the 4.4 Refilling the tank – handling petrol – incorrect use (sport events, etc.), fingers, hands or wrists and include Danger to life! – inadequate knowledge of the effects (incomplete list): Petrol is poisonous and extremely associated with ground conditions,... -
Page 13: Clothing And Equipment
Your VIKING specialist has a (headscarf, cap, etc.) when checked regularly for damage, ageing supply of replacement stickers and all the performing maintenance and (brittleness), firm seating and leaks. -
Page 14: Working With Your Machine
If necessary, consult a specialist dealer. the steering wheel can be made to turn garages. VIKING recommends VIKING specialist due to holes, mounds, impacts, etc. dealers. Risk of injury to hands and fingers! Before starting the engine, disengage the... - Page 15 When working together in a group, always position of the mowing blades on the inform the others in advance of what you models MT 5112 Z, MT 6112 C, – If visibility is poor (e.g. due to fog, heavy rain or at night).
-
Page 16: Maintenance And Repairs
Do not change speed or direction abruptly. topping up engine oil or performing engine The weight of the grass catcher box oil changes to a VIKING specialist dealer. increases the danger of the ride-on mower tipping over, particularly when it is full. - Page 17 Ensure that all nuts, pins and screws, optimally adapted to the machine and the VIKING does not recommend the use of especially the blade fastening screws, are user's requirements. Genuine VIKING high pressure cleaners. ( 15.2)
-
Page 18: Storage For Prolonged Periods Without Operation
When charging the battery using another specialist dealer for information on the charging system, observe the instructions If the tank has to be emptied proper disposal of waste products. VIKING in section "Charging the battery". (e.g. immobilisation before the winter recommends VIKING specialist dealers. -
Page 19: Description Of Symbols
5. Description of symbols Risk of injury: Do not drive or mow on slopes with an inclination greater than 10° (17%). Danger of tipping over! Caution: Read and follow the instruction manual and the safety instructions before initial use. Risk of injury: Keep other persons out of the danger area. -
Page 20: Standard Equipment
6. Standard equipment Item Designation Qty. Basic unit Grass catcher box Ignition key − Instruction manual − Engine instruction manual − Supplementary sheet - battery 0478 192 9807 C - EN... -
Page 21: Operations Prior To Initial Use
position, the engine starts. 7. Operations prior to initial On releasing the ignition key, it returns automatically to the "engine running" position. Warning! Note Prior to all operations on the ride-on When the engine is stopped, a mower, carefully read and observe signal tone is activated after 20 the section "For your safety". -
Page 22: Throttle Lever (Mt 5097 Z, Mt 5112 Z, Mt 6112 Zl, Mt 6127 Zl)
8.3 Throttle lever (MT 5097 Z, 8.4 Choke knob (MT 5097 Z, MT 5112 Z, MT 5112 Z, MT 6112 ZL, MT 6127 ZL) MT 6112 ZL, MT 6127 ZL) Setting the engine speed:... -
Page 23: Mowing Deck Switch (Mt 5097, Mt 5097 C, Mt 5097 Z, Mt 5112 Z)
Disengaging the mowing deck: ● Press in the choke knob to the stop. 8.5 Mowing deck switch (MT 5097, MT 5097 C, MT 5097 Z, MT 5112 Z) The mowing deck switch can be used to engage the mowing deck when the engine... -
Page 24: Cruise Control Button (Mt 6112 Zl, Mt 6127 Zl)
drive pedal is locked in place and the For reverse mowing, briefly press the If necessary, the electronics can be current driving speed is maintained. The reverse mowing safety switch (1) once programmed so that the mowing foot can be removed from the drive pedal. with the left foot within a defined time deck is automatically disengaged window. -
Page 25: Driving Direction Selector Lever
8.9 Driving direction selector lever 8.10 Steering wheel The driving direction is selected Warning: using the driving direction Always hold the steering wheel selector lever. firmly in both hands when driving. The ride-on mower drives in the selected direction after the drive pedal is actuated –... -
Page 26: Brake Pedal
Press down drive pedal (1). position. dealer. The "parking brake engaged" symbol VIKING recommends VIKING appears on the display of the models specialist dealers. MT 6112 C, MT 6112 ZL und 8.13 Brake pedal... -
Page 27: Cutting Height Adjustment Lever
Releasing the parking brake: Releasing the cutting height adjustment Locking the cutting height adjustment lever: lever: Briefly press on brake pedal (1) with the With the mowing deck installed Pull the Guide the cutting height adjustment foot. cutting height adjustment lever (1) inwards lever (1) outwards until it engages in the ●... -
Page 28: Grass Catcher Box Release Lever
● Slowly move the grass catcher box Locking the grass catcher box: emptying lever towards the rear and allow the grass catcher box to re- engage with the rear panel. ● Press the grass catcher box emptying lever downwards and move to the initial position. -
Page 29: Level Sensor (Grass Catcher Box)
Disengaging the gearbox: ● Attach the grass catcher box. ( 13.10) Disengaging the mowing deck stops the continuous tone. The time for the filled grass catcher box 9. Electronics signal is adjusted by modifying the length of the (grass catcher box) level sensor. In order to ensure safe operation, the ride- on mower is equipped with electronics This allows you to adapt filling of the grass... -
Page 30: Ride-On Mower Faults During Operation
If the fault cannot be rectified, connections and connect the wiring detailed diagnosis is necessary. correctly if necessary. ( 15.19) Consult a specialist dealer; VIKING recommends VIKING specialist ● Repeat self-diagnosis. dealers. If the continuous beep continues to sound even after the battery is correctly connected, an electronic fault is 9.3 Electronics faults... -
Page 31: 5-Digit Segmental Display
(e.g. 281 h). The engine will be stopped within 3 Consult your specialist dealer. The hour meter cannot be reset. seconds. VIKING recommends VIKING The correct times for maintenance or specialist dealers. service operations are determined based Avoid damage to the machine. -
Page 32: Display Of Active Functions
The driver's seat is unoccupied. Consult your specialist dealer. The seat switch is one of the ride-on Grass catcher box full symbol: VIKING recommends VIKING mower's safety devices ( 12.). specialist dealers. The grass catcher box is full, a If the "driver's seat unoccupied"... -
Page 33: Safety Devices
– Mowing at high speed (throttle lever in (Further information is available from your full; use a mulching kit (special MAX position) and a slow driving VIKING specialist dealer.) accessory) if necessary. speed. Ground-conserving working The mowing deck, particularly the –... -
Page 34: Operating The Machine
MT 5097, MT 5097 C, MT 5097 Z, the maintenance schedule and carry MT 5112 Z, MT 6112 C, MT 6112 ZL: out all relevant maintenance Tank cap: Following disengagement, the mowing operations. -
Page 35: Starting The Engine
Set the throttle lever to the choke ● Remove the ignition key and store position. ( 8.2) safely. MT 5097 Z, MT 5112 Z, MT 6112 ZL, 13.2 Starting the engine MT 6127 ZL: Avoid damage to the machine. Set the throttle lever to the MAX 13.4 Driving... -
Page 36: Braking
With the mowing deck removed, press press the cruise control button for 1 the V-belt tensioner lever forwards and second. ( 8.7) MT 5112 Z, MT 6112 C, lock in place. ( 14.1) Cruise control is activated when the MT 6112 ZL, MT 6127 ZL: "cruise control active"... -
Page 37: Programming Automatic Disengagement Of The Mowing Deck
● Drive the ride-on mower onto the lawn. ● Continue mowing. Deactivating automatic Do not engage the mowing deck in tall disengagement: Disengage the mowing deck in the grass or when set to the lowest cutting following sequence: ● Press the reverse mowing safety switch level. -
Page 38: Emptying The Grass Catcher Box
● Pull out the grass catcher box emptying Removing the grass catcher box: lever and push it forwards. ( 8.16) 13.9 Emptying the grass catcher box The grass catcher box swings upwards Risk of injury! and the clippings fall out. Only empty the grass catcher box ●... -
Page 39: Pulling Loads
Attaching the grass catcher box: Raise the grass catcher box (1) to the Maximum trailer weight on a level surface stop. = 250 kg Maximum trailer weight on a maximum 10° ● Release the grass catcher box release inclination = 100 kg lever and ensure that the grass catcher box engages. -
Page 40: Mowing Deck
Pull tension spring (1) forwards, detach mowing deck, carefully read and and set down. observe the section "For your Slackening the V-belt (MT 5112 Z, safety". ( MT 6112 C, MT 6112 ZL, MT 6127 ZL): Danger of pinching when removing the mowing deck due to its inherent weight. - Page 41 Pull out cotter pin (1) upwards. Releasing the V-belt from the tension Lift up the mowing deck slightly and hold. roller (MT 5112 Z, MT 6112 C, Push mounting (2) outwards and remove MT 6112 ZL, MT 6127 ZL): retaining pin (3) from the mounting.
-
Page 42: Installing The Mowing Deck
Detaching the mowing deck at the front (MT 5112 Z, MT 6112 C, MT 6112 ZL, MT 6127 ZL): Pull the mowing deck (1) out from under the ride-on mower either to the left or right. - Page 43 MT 5097, MT 5097 C, MT 5097 Z, Fitting the V-belt onto the tension roller MT 5112 Z, MT 6112 C, MT 6112 ZL, MT 5112 Z, MT 6112 C, MT 6112 ZL, MT 6127 ZL: MT 6127 ZL: Pull the front mowing deck mounting (1) downwards and hold.
- Page 44 Tensioning the V-belt (MT 5112 Z, Installing the V-belt cover: MT 6112 C, MT 6112 ZL, MT 6127 ZL): Guide retaining pins (1) into the bores in mounting (2). Insert cotter pin (3) into the retaining pin bores from above and allow Press V-belt tensioner lever (1) forwards to engage.
-
Page 45: Maintenance
15.16) Due to heavy-duty use, especially VIKING recommends in professional operation, shorter – Wear and damage to tyres. VIKING specialist dealers. maintenance intervals than those – Leaks in fuel carrying lines. specified here may be required. General maintenance instructions: Moreover, extreme external –... -
Page 46: Cleaning The Machine
– An inspection by your specialist dealer impairing the safe operation of your ● Remove the grass catcher box and is recommended. VIKING machine. If you are unable clean using running water and a brush VIKING recommends to remove the dirt with water using well away from the machine. -
Page 47: Closing The Engine Hood
15.4 Closing the engine hood Unscrew the retaining nuts (1), remove the Push the discharge chute (1) in to the stop. discharge chute (2). When pushing in, ensure that the discharge chute fits over the discharge Close the engine hood (1) carefully and The "discharge chute removed"... -
Page 48: Checking The Engine Oil Filling Level
● Check the filling level as per the engine instruction manual – top up the engine oil if necessary. ( 15.10) 15.9 Changing the engine oil Risk of injury! Allow the engine to cool down before topping up the engine oil or before changing the oil. -
Page 49: Topping Up Engine Oil
The engine cannot be started when the ● Press the brake pedal to the stop and brake switch is functioning correctly. hold. ( 8.13) 15.10 Topping up engine oil ● Turn the ignition key to the "start Avoid damage to the machine. Checking the seat switch: engine"... -
Page 50: Maintaining Mowing Blades
MT 5112 Z, Maintenance operations: MT 6112 C, MT 6112 ZL, MT 6127 ZL: – Check the mowing blade wear limits. – MT 5112 Z, MT 6112 C, MT 6112 ZL, MT 6127 ZL: Check the installation position of the mowing blades. - Page 51 Checking the installation position of VIKING recommends removing the the mowing blades (MT 5112 Z, mowing deck if the wear limits need MT 6112 C, MT 6112 ZL, MT 6127 ZL): to be checked. If a suitable lifting platform is...
- Page 52 Turn the mowing blades as shown and ● Observe a cutting angle of 30°. Installing mowing blades: check the angle A (approx. 90°) of the ● Observe the wear limits when Risk of injury! blades relative to each other. sharpening. Before installing, check the mowing Removing the mowing blades: blades for damage (notches or...
-
Page 53: Checking The Installation Position Of The Mowing Deck
Only lift the machine at suitable screw. components (e.g. frame, rims, axle). Never lift or support the ● MT 5112 Z, MT 6112 C, MT 6112 ZL, machine at plastic parts. MT 6127 ZL: Check the installation position of the ●... -
Page 54: Tyre Pressure
Avoid damage to the machine. When removing the rear wheels, ensure that the couplers (feather keys) are not lost. Installing the wheel: Avoid damage to the machine. Before installing the rear wheels, ensure that the couplers (feather keys) are correctly positioned in the groove of the wheel axle. -
Page 55: Lubrication
● Remove the ignition key and keep it in a Opening the battery compartment: safe place. ● Engage the parking brake. ( 8.14) ● Unload the front axle by supporting (lifting) it. ( 15.15) Remove the cap from the valve (1). Inflate Unscrew the retaining nut (1) and remove the tyres to the following tyre pressures the battery compartment cover (2) -
Page 56: Removing And Installing The Battery
Installation position: 15.19 Removing and installing the battery Risk of injury! Always remove the black negative (–) cable first and only then, the red positive (+) cable. When connecting the battery, always connect the red positive (+) cable first. The battery is maintenance free and must only be replaced if it is damaged and must be removed in the case of prolonged... -
Page 57: Fuses
10 A 10 A differs from the specified rating MT 5097 Z 15 A 10 A (ampere). MT 5112 Z 15 A 10 A If a new fuse blows within a short MT 6112 C 10 A 10 A time, an electrical fault (e.g. short... -
Page 58: Charging The Battery Using The Charger Plug
● Remove the battery. ( 15.19) 15.21 Charging the battery using the charger plug The VIKING ACB 010 battery float charger or the VIKING ADL 012 diagnostic charger (both not included in standard equipment) can be connected to the charger plug. -
Page 59: Combustion Engine
Turn the socket (1) through approx. 90° ● Thoroughly lubricate/grease all moving and it pull out. parts. 15.23 Combustion engine ● Remove the fuel from the fuel tank and Observe the operating and maintenance carburettor (e.g. by running empty). instructions contained in the attached engine instruction manual. -
Page 60: Transport
6160 702 0100 in an environmentally friendly manner, machine. MT 5112 Z, MT 6112 C, MT 6112 ZL: valuable resources can be re-used. For ● Use a suitable lifter or suitable and Mowing blade, right:... -
Page 61: Minimising Wear And Preventing Damage
Please always observe the following important information for the prevention of – Use of the product for sporting or VIKING GmbH damage or excessive wear to your VIKING competitive events. Hans Peter Stihl-Strasse 5 machine: A-6336 Langkampfen/Kufstein –... -
Page 62: Technical Specifications
Applicable conformity assessment VIKING GmbH MT 5097.1: procedure: Displacement 344 ccm Appendix VIII (2000/14/EC) Nominal output at 6.5 - 2750 Name and address of relevant, named nominal speed kW - rpm location: Output speed 2750 rpm TÜV Rheinland LGA Products GmbH... - Page 63 MT 5097.1 C: MT 5097.1 Z: MT 5097.1 C: Specified vibration characteristic in Vibration at steering Serial number 6160 accordance with EN 12096 wheel a 2.20 m/s Engine type B&S Uncertainty K 1.10 m/s Series 4155 MT 5097.1 Z: Specified vibration characteristic in Displacement 500 ccm Serial number...
- Page 64 MT 5112.1 Z: MT 6112.1 C: MT 6112.1 ZL: Uncertainty K 0.49 m/s In accordance with EN ISO 5395-1/-3, Sound pressure level EN 1032: at workplace L 86 dB(A) In accordance with EN ISO 5395-1/-3, EN 20643: Vibration at seat Uncertainty K 2 dB(A) (whole-body acceler-...
- Page 65 MT 6127.1 ZL: Guaranteed sound power level L 105 dB(A) In accordance with Directive 2006/42/EC: Sound pressure level at workplace L 88 dB(A) Uncertainty K 2 dB(A) In accordance with EN ISO 5395-1/-3, EN 1032: Vibration at seat (whole-body acceler- ation) a 0.50 m/s Uncertainty K...
-
Page 66: Dimensions
22.1 Dimensions MT 5097.1, MT 5097.1 C, MT 5097.1 Z, MT 5097.1, MT 5097.1 C, MT 5097.1 Z: MT 5112.1 Z, MT 6112.1 C: E=241.6 cm A=96.8 cm MT 5112.1 Z, MT 6112.1 C, MT 6112.1 ZL, MT 6127.1 ZL: MT 6112.1 ZL, MT 6127.1 ZL: A=98.7 cm E=260.3 cm... -
Page 67: Troubleshooting
(@) If necessary, contact a specialist line and carburettor. ( ) – Clean the air filter. (@) dealer; VIKING recommends VIKING – Clean fuel tank. ( ) – Check the charge state of the battery specialist dealers. - Page 68 – Check the mowing deck adjustment – Air holes in grass catcher box blocked and re-adjust the mowing deck if (no air flow in grass catcher box). Fault: necessary. ( 15.14) – Discharge chute or mowing deck Excessive vibration during operation. –...
-
Page 69: Service Schedule
Fault: Fault: Fault: Mowing blades do not switch on / do not Mowing deck disengaged when mowing in Continuous tone sounding. rotate. reverse driving direction. Possible cause: Possible cause: Possible cause: – Grass catcher box full. – The safety devices are preventing –... -
Page 70: Service Confirmation
24.2 Service confirmation Please hand this instruction manual to your VIKING specialist dealer in the case of maintenance work. He will confirm the service operations performed in the pre-printed boxes. Service performed on Next service date 0478 192 9807 C - EN... - Page 71 Estimada cliente, estimado cliente: Botón del estárter (MT 5097 Z, MT 5112 Z, MT 6112 ZL, Muchas gracias por haber adquirido uno 1. Índice MT 6127 ZL) de los equipos de calidad de la marca VIKING. Conmutador del equipo de corte...
- Page 72 Tecla Set Cambiar el aceite del motor Plan de mantenimiento Tecla Mode Rellenar aceite del motor Confirmación de entrega Indicación de anomalías Verificar los dispositivos de Confirmación de servicio técnico seguridad Indicación de la información de funcionamiento Limpiar el sensor de nivel de llenado (recogedor de hierba) Indicación de las funciones activas 100 Mantenimiento de la cuchilla...
-
Page 73: Acerca De Este Manual De Instrucciones
2006/42/EC. mismas junto con las correspondientes identificarse como en los siguientes cifras de posición de los componentes. VIKING desarrolla continuamente su ejemplos. gama de productos, por lo que nos Ejemplo: Pasos de manejo del equipo que reservamos el derecho de modificar los requieren la intervención del usuario:... -
Page 74: Descripción Del Equipo
3. Descripción del equipo 3.1 Tractores cortacésped 0478 192 9807 C - ES... - Page 75 Parachoques Faros Capó del motor Tapón del depósito Volante Asiento del conductor Asa de sujeción del recogedor de hierba con palanca de desbloqueo del recogedor de hierba Palanca de vaciado del recogedor de hierba Recogedor de hierba Palanca de (des)acoplamiento de la caja de cambios Palanca de ajuste de la altura de corte...
-
Page 76: Salpicadero
8.2) Tecla del equipo de corte (MT 6112 C, MT 6112 ZL, Acelerador MT 6127 ZL) (MT 5097 Z, MT 5112 Z, 8.6) MT 6112 ZL, MT6127 ZL) 8.3) Tecla de control de velocidad (MT 6112 ZL, MT 6127 ZL) Botón del estárter... -
Page 77: Para Su Seguridad
No obstante, El equipo puede equiparse con accesorios forestales. esta enumeración no es concluyente. originales VIKING. Con ellos son posibles Utilice el equipo siempre con sentido El equipo no puede utilizarse para eventos otras aplicaciones. Su Distribuidor común y de forma responsable y tenga en... -
Page 78: Formación: Aprender El Uso Del Equipo
El equipo dispone de un sistema debe preocuparse de recibir indicaciones descargar el tractor cortacésped para su electrónico que no debe ser modificado ni técnicas y prácticas por personas transporte en un vehículo o remolque desmontado. especializadas. El vendedor u otro experto debe procederse con especial precaución. -
Page 79: Ropa Y Equipamiento De Trabajo
Esperar a la sustitución de los componentes a un debe recogerse y protegerse el pelo largo compensación de presión y sólo entonces establecimiento especializado; VIKING (pañuelo, gorro, etc.). retirar completamente el tapón del recomienda los Distribuidores depósito. -
Page 80: Durante El Trabajo
El motor de combustión nunca dañadas deben ser sustituidas. Su trabajos de mantenimiento que están debe ponerse en marcha en recintos Distribuidor especializado VIKING tiene a indicados en el plan de mantenimiento cerrados o mal ventilados. su disposición adhesivos de repuesto y en el apartado “Antes de cada puesta... - Page 81 Atención: ¡Peligro de lesiones! contactarse un establecimiento Cuando trabaje formando parte de un Tenga en cuenta la zona especializado. VIKING recomienda los grupo, siempre debe comunicar de trabajo de las Distribuidores especializados VIKING. puntualmente a los demás participantes cuchillas.
- Page 82 En los modelos – en situaciones que no permiten adicionalmente las indicaciones del MT 5112 Z, MT 6112 C, MT 6112 ZL, desplazarse a velocidad constante (por manual de instrucciones del motor MT 6127 ZL, compruebe también la ejemplo, en condiciones desfavorables suministrado.
-
Page 83: Mantenimiento Y Reparaciones
Sólo debe apagarse el motor del equipo en las pendientes cuando sea autorizados por VIKING. El transporte en cuando el tractor cortacésped se absolutamente necesario; si es posible el tractor cortacésped o en el recogedor de circule despacio y describiendo un amplio encuentre en una superficie llana. - Page 84 Para trabajos de limpieza (p. ej., en el reconocen mediante la referencia de especializado. VIKING recomienda los chasis del tractor cortacésped) nunca recambio VIKING, el logotipo VIKING y en Distribuidores especializados VIKING. conduzca cerca de un borde o zanja. tal caso por el identificativo de recambio...
-
Page 85: Almacenamiento Durante Largos Periodos De Inactividad
Distribuidores Tenga en cuenta las indicaciones especializados VIKING. Estos disponen correspondientes con el fin de evitar de un foso de trabajo o de una plataforma 4.9 Almacenamiento durante largos daños en el tractor cortacésped (de de trabajo hidráulica. -
Page 86: Eliminación
¡Atención! ambiente. cables de la batería. VIKING recomienda Tener en cuenta la posibilidad de que desmontar la batería y guardarla salgan disparados objetos; con el motor 5. Descripción de los completamente cargada en un lugar seco de combustión en marcha debe trabajarse... - Page 87 ¡Atención! No introducir nunca la mano en la zona de trabajo de las cuchillas con el motor de combustión en marcha. ¡Peligro de lesiones! No entrar en el radio de acción del equipo de corte. ¡Peligro de quemaduras! No tocar las superficies calientes. Los componentes del motor de combustión, especialmente el silenciador, se calientan extremadamente.
-
Page 88: Contenido Del Suministro
6. Contenido del suministro Pos. Denominación Unid. Equipo base Recogedor de hierba Llave de contacto − Manual de instrucciones − Manual de instrucciones del motor de combustión − Hoja adicional de la batería 0478 192 9807 C - ES... -
Page 89: Tareas A Realizar Antes De La Primera Puesta En Servicio
Arrancar motor de 7. Tareas a realizar antes de combustión: la primera puesta en servicio Cuando se cumplan todos los puntos relevantes de seguridad ¡Advertencia! para el arranque y se gire la llave de ¡Antes de realizar trabajos en el contacto a esta posición, el motor de tractor cortacésped debe leerse combustión arrancará. -
Page 90: Acelerador (Mt 5097 Z, Mt 5112 Z, Mt 6112 Zl, Mt 6127 Zl)
8.3 Acelerador (MT 5097 Z, MT 5112 Z, 8.4 Botón del estárter (MT 5097 Z, MT 6112 ZL, MT 6127 ZL) MT 5112 Z, MT 6112 ZL, MT 6127 ZL) Ajustar el régimen del motor Para arrancar un motor de combustión en de combustión:... -
Page 91: Conmutador Del Equipo De Corte (Mt 5097, Mt 5097 C, Mt 5097 Z, Mt 5112 Z)
● Meter el botón del estárter hasta el tope. 8.5 Conmutador del equipo de corte (MT 5097, MT 5097 C, MT 5097 Z, MT 5112 Z) Con el conmutador del equipo de corte puede acoplarse el equipo de corte con el motor de combustión en marcha y... -
Page 92: Tecla De Control De Velocidad (Mt 6112 Zl, Mt 6127 Zl)
Pulsar la tecla Equipo de corte (1) al Activar el control de velocidad: menos durante 1 segundo. Se activa el 8.8 Interruptor de seguridad para corte equipo de corte en cuanto aparece en el en marcha atrás display el símbolo "Equipo de corte Con el interruptor de seguridad de activado"... -
Page 93: Palanca Selectora De La Dirección De Marcha
● Acoplar el equipo de corte e iniciar el la palanca selectora de la dirección de segado marcha atrás en un plazo de marcha el equipo no se pone en 5 segundos. ( 8.5), ( 8.6) movimiento. También es posible una liberación Por motivos de seguridad, con el hasta 1 segundo después del pedal de tracción pisado, la... -
Page 94: Pedal De Tracción
Reduzca la presión sobre el VIKING recomienda los 2 Colocar el asiento del conductor (2) en pedal de tracción (1). Distribuidores especializados la posición deseada. Soltar seguidamente Aumentar la velocidad de VIKING. -
Page 95: Palanca De Ajuste De La Altura De Corte
Soltar el freno de estacionamiento: Nota El proceso de desbloqueo de la Antes de accionar el freno de palanca de ajuste de la altura de estacionamiento debe corte depende del hecho de que el comprobarse siempre el equipo de corte esté montado o funcionamiento del freno. -
Page 96: Palanca De Vaciado Del Recogedor
8.16 Palanca de vaciado del recogedor de hierba Con ayuda de la palanca de vaciado del recogedor de hierba puede vaciarse el recogedor de hierba sin que el conductor deba abandonar el asiento del conductor. ● Desacople el equipo de corte. 8.5), ( 8.6) ●... -
Page 97: Palanca De Desbloqueo Del Recogedor De Hierba
Bloquear el recogedor de hierba: Advertencia: 8.17 Palanca de desbloqueo del ¡Peligro de lesiones por recogedor de hierba aplastamiento! Se debería sacar la palanca de ¡Advertencia! (des)acoplamiento de la caja de Al accionar la palanca de cambios sólo en terrenos llanos, ya desbloqueo del recogedor de que en caso contrario el equipo se hierba hay que prestar atención a... -
Page 98: Sensor De Nivel De Llenado (Recogedor De Hierba)
Acoplar la caja de cambios: El sensor de nivel de llenado del de cada arranque y durante el servicio con recogedor de hierba puede regularse en 6 el fin de garantizar un funcionamiento posiciones de enclavamiento. seguro. En el momento del suministro el sensor de El sistema electrónico de los nivel de llenado (recogedor de hierba) está... -
Page 99: Anomalía En El Tractor Cortacésped Durante El Servicio
Se activa una señal ● Un Distribuidor especializado debe acústica continua y el motor de realizar un diagnóstico detallado. combustión se detiene. VIKING recomienda los Distribuidores especializados VIKING. Comportamiento: ● Girar la llave de contacto a la posición de "Motor de combustión apagado". -
Page 100: Pantalla De 5 Dígitos
no se puede resetear. Pantalla de 5 dígitos ( 10.1) El contador es la mejor referencia para 10.4 Indicación de anomalías Tecla Set ( 10.2) determinar el momento correcto en que se Símbolo Presión del aceite del Tecla Mode ( 10.3) deben llevar a cabo los trabajos de motor demasiado baja:... -
Page 101: Indicación De La Información De Funcionamiento
Póngase en contacto con hierba, se activa un tono acústico. su Distribuidor especializado. – si el usuario está sentado en el asiento 8.19) VIKING recomienda los del conductor. El tono acústico se desactiva tras el Distribuidores especializados desacoplamiento del equipo de corte. -
Page 102: Indicación De Las Funciones Activas
Póngase en contacto con especiales. una sobrecarga puede hacer que la su Distribuidor especializado. correa trapezoidal patine de forma Nota VIKING recomienda los continua y provoque como Antes del trabajo, compruebe la Distribuidores especializados consecuencia un peligro de correcta posición de montaje del VIKING. -
Page 103: Dispositivos De Seguridad
MT 5097, MT 5097 C, MT 5097 Z, desgastadas. Sustituir la cuchilla. MT 5112 Z, MT 6112 C, MT 6112 ZL: 15.13) 12. Dispositivos de Después del desacoplamiento, las seguridad A su vez, limpiar el equipo de corte, el cuchillas se detienen después de 5... -
Page 104: Repostar Combustible
● Tenga en cuenta antes de la puesta en Cuanto más combustible se haya llenado, Colocar y enroscar el tapón del servicio el plan de mantenimiento y tanto más pequeñas deberían ser las depósito (1) (observar la dirección de la lleve a cabo los trabajos que sean cantidades de llenado por fase. -
Page 105: Apagar El Motor De Combustión
( 8.2) ● No arranque el equipo si se encuentran corta. MT 5097 Z, MT 5112 Z, MT 6112 ZL, personas, especialmente niños, o Antes de cada cambio de dirección MT 6127 ZL: animales en las cercanías. -
Page 106: Frenar
Marcha atrás: ● Puede levantar el pie del pedal de MT 5112 Z, MT 6112 C, tracción. MT 6112 ZL, MT 6127 ZL: ● Seleccionar la dirección de marcha VIKING recomienda montar ambas atrás. ( 8.9) ● Desactivar el control de velocidad: ruedas palpadoras en la posición... -
Page 107: Programación Del Desacoplamiento Automático Del Equipo De Corte
● Conducir el tractor cortacésped sobre Cambio de la dirección de marcha con ● Apagar el motor de la superficie de hierba a cortar. el equipo de corte acoplado: combustión. ( 13.3) No acoplar el equipo de corte en hierba ●... -
Page 108: Vaciar El Recogedor De Hierba
Comprobar la programación (sólo en Si el recogedor de hierba no se llena ● Vuelva a soltar la palanca de vaciado los modelos MT 6112 C, MT 6112 ZL, completamente, tenga en cuenta los del recogedor de hierba y presiónela MT 6127 ZL): siguientes puntos: hacia abajo hasta que vuelva a... -
Page 109: Remolcar Cargas
Retirar el recogedor de hierba: Enganchar el recogedor de hierba: Cerrar el recogedor de hierba (1) hasta el tope. Tirar de la palanca de desbloqueo del recogedor de hierba (1) hacia arriba y ● Soltar la palanca de desbloqueo del mantenerla en esta posición. -
Page 110: Servicio En Pendientes
● Girar las ruedas delanteras hasta el ¡Evitar causar daños en el Una carga de tracción de 40 kg en tope a la izquierda o la derecha. equipo! el enganche de remolque se En las pendientes se reduce la alcanza sobre una superficie plana ●... - Page 111 Destensar la correa trapezoidal Desenganchar el equipo de corte por la (MT 5112 Z, MT 6112 C, MT 6112 ZL, parte trasera: MT 6127 ZL): ¡Peligro de lesiones! Después de desenganchar el equipo de corte, la palanca de ajuste de la altura de corte se encuentra bajo tensión.
- Page 112 Desenganchar la correa trapezoidal: Descolgar el equipo de corte por la Una vez desenganchada la correa parte delantera (MT 5112 Z, MT 6112 C, trapezoidal, presionar el pasador MT 6112 ZL, MT 6127 ZL): de seguridad nuevamente hacia abajo hasta que haga tope y encaje en la cubierta.
-
Page 113: Montar El Equipo De Corte
"Para su seguridad". ( Colgar el equipo de corte por la parte delantera (MT 5112 Z, MT 6112 C, Durante el montaje del equipo MT 6112 ZL, MT 6127 ZL): existe el peligro de aplastamiento debido a su propio peso. - Page 114 MT 6112 ZL, MT 6127 ZL: seguridad. MT 5097, MT 5097 C, MT 5097 Z, MT 5112 Z, MT 6112 C, MT 6112 ZL, MT 6127 ZL: Colocar el perno de fijación (1) en el orificio de la barra de fijación (2). Introducir el pasador de seguridad (3) desde arriba por los orificios de los pernos de fijación y...
-
Page 115: Mantenimiento
Tensar la correa trapezoidal Montar la cubierta de la correa Apretar la chapa soporte con el tornillo (1). (MT 5112 Z, MT 6112 C, MT 6112 ZL, trapezoidal: ● Montar el canal de expulsión. ( 15.6) MT 6127 ZL): 15. Mantenimiento ¡Peligro de lesiones! -
Page 116: Plan De Mantenimiento
Consultar los siguientes trabajos de combustión). a cabo una inspección del equipo. mantenimiento y reparación en el VIKING recomienda los – Nivel de combustible. "Manual de instrucciones del motor de Distribuidores – Control visual general del aparato y del combustión":... -
Page 117: Limpiar El Equipo
– Comprobar el montaje de las cuchillas del motor de combustión y la caja de lo que podría afectar al (MT 5112 Z, MT 6112 C, MT 6112 ZL, cambios y limpiarlos. funcionamiento seguro de su MT 6127 ZL). -
Page 118: Cerrar El Capó Del Motor
15.5 Desmontar el canal de expulsión 15.6 Montar el canal de expulsión Para poder limpiar el canal de expulsión En cada limpieza o montaje del con más facilidad es posible desmontarlo canal de expulsión, compruebe sin necesidad de herramientas. El motor también el sensor de nivel de de combustión no se puede arrancar con llenado (recogedor de hierba) y... -
Page 119: Llave De Paso De Combustible
● Dejar que el motor de combustión se ¡Advertencia! enfríe. El canal de expulsión forma parte de las cubiertas protectoras. El ● Abrir el capó del motor. ( 15.3) tractor cortacésped no debe ● Comprobar el nivel de llenado según el ponerse en servicio si el canal de Manual de instrucciones del motor de expulsión está... -
Page 120: Rellenar Aceite Del Motor
● Deje que el motor de combustión se Desenrosque y retire el tapón de vaciado enfríe (tibio al tacto). de aceite (1) con la ayuda de dos llaves de 15.11 Verificar los dispositivos de boca (entrecaras 19 y 15). Deseche el seguridad ●... -
Page 121: Limpiar El Sensor De Nivel De Llenado (Recogedor De Hierba)
● Arrancar el motor de combustión ● Pise el pedal de freno a fondo y ● Retirar la llave de contacto y guardarla 13.2) y dejarlo funcionar a un manténgalo pisado. ( 8.13) en un lugar seguro. régimen máximo. ( 8.2), ( 8.3) ●... -
Page 122: Mantenimiento De La Cuchilla
La correa trapezoidal siempre gira ¡Atención! 180° según la doble desviación en – MT 5112 Z, MT 6112 C, MT 6112 ZL, Al sustituir la cuchilla hay que las posiciones A. MT 6127 ZL: renovar siempre también el Comprobar la posición de montaje de la... - Page 123 Sustituir la cuchilla si dejan de alcanzarse los valores descritos en un punto. Comprobar el montaje de las cuchillas (MT 5112 Z, MT 6112 C, MT 6112 ZL, MT 6127 ZL): ¡Peligro de lesiones! Girar el equipo de corte (1), elevarlo con...
-
Page 124: Verificar La Posición De Montaje Del Equipo De Corte
(apuntando al 65 - 70 Nm. Al apretar el tornillo de equipo de corte). cuchilla, sujetar la cuchilla. ● MT 5112 Z, MT 6112 C, MT 6112 ZL, MT 6127 ZL: Comprobar la posición de montaje de la cuchilla: 15.14 Verificar la posición de montaje... -
Page 125: Cambiar Las Ruedas
Diferencia de altura A = 10 mm. ● Retirar la llave de contacto y guardarla La presión uniforme de los en un lugar seguro. neumáticos es un requisito para comprobar que el montaje es correcto. Por tanto, antes de 15.15 Cambiar las ruedas controlar la posición de montaje del En caso de daños (agujeros, fisuras, equipo de corte hay que comprobar... -
Page 126: Presión De Los Neumáticos
Desmontar la rueda: 15.16 Presión de los neumáticos La correcta presión de los neumáticos es un requisito esencial para la orientación del equipo de corte y, en consecuencia, para obtener una perfecta calidad de corte. Además, con una presión demasiado alta de los neumáticos se estropea el césped por los tacos. -
Page 127: Abrir Y Cerrar El Compartimento Para La Batería
racores de lubricación (1), hasta que la Cerrar el compartimento para la Nota grasa salga ligeramente por las batería: Antes de proceder al engrase debe manguetas del eje. descargarse el eje delantero mediante un apoyo correcto. ● Quitar la grasa lubricante que haya Se debe limpiar el racor de salido. - Page 128 ● Apagar el motor de combustión. Desembornar la batería: ● Colocar los tornillos, las arandelas y las 13.3) tuercas para proteger los polos de la batería. ● Accionar el freno de estacionamiento. 8.14) ● En caso necesario, guardar los cables de conexión en el compartimento para ●...
-
Page 129: Fusibles
10 A 10 A 13.3) MT 5097 Z 15 A 10 A ● Accione el freno de estacionamiento. MT 5112 Z 15 A 10 A 8.14) MT 6112 C 10 A 10 A ● Retire la llave de contacto y guárdela... -
Page 130: Carga De La Batería Mediante El Conector De Carga
VIKING ACB 010 o el cargador de Conectar el cargador de diagnóstico VIKING-ADL 012. mantenimiento (1) VIKING ACB 010 o el Otros cargadores, especialmente cargador de diagnóstico aquellos con una corriente de carga VIKING-ADL 012. -
Page 131: Motor De Combustión
15.25 Almacenamiento ● Mantenga el equipo en un lugar seco y sin polvo y fuera del alcance de los niños y personas no autorizadas. ● Las posibles averías del equipo deben repararse siempre antes de almacenarlo, para que se encuentre en todo momento en condiciones de funcionamiento seguras. -
Page 132: Tras Largos Periodos De Inactividad (P. Ej. En Invierno)
6160 702 0100 cortacésped. ( 22.1) ● Compruebe la presión de los MT 5112 Z, MT 6112 C, MT 6112 ZL: neumáticos. ( 15.16) ● Prestar atención a una distribución Cuchilla derecha: uniforme de la carga en el remolque. -
Page 133: Protección Del Medio Ambiente
1. Piezas de desgaste parte de la basura normal, sino que debe utilizarse para – La utilización del producto en eventos Algunas piezas del equipo VIKING están preparar compost. deportivos o en campeonatos. sometidas a un desgaste normal, incluso Los embalajes, el equipo y los utilizando el equipo de manera adecuada, –... -
Page 134: Declaración De Conformidad Ce Del Fabricante
Langkampfen, utilización de piezas de recambio de 2016-01-02 (AAAA-MM-DD) una calidad inferior. 97/68/EC, 2000/14/EC, 2014/30/EU, VIKING GmbH 2006/42/EC, 2006/66/EC – Daños por no realizar un mantenimiento periódico o por realizar El producto ha sido desarrollado de un mantenimiento insuficiente, o bien... - Page 135 MT 5097.1: MT 5097.1 C: MT 5097.1: Factor K 1,30 m/s Factor K 0,49 m/s Identificación de 6160 serie Valores característicos de vibración Según EN ISO 5395-1/-3, EN 20643: declarados según EN 12096 Tipo de motor B&S Vibraciones en el Serie 3130 volante a 2,60 m/s...
- Page 136 MT 5097.1 Z: MT 5112.1 Z: MT 6112.1 C: Según EN ISO 5395-1/-3, EN 1032: Según la Directiva 2006/42/EC: Peso con equipo de corte y recogedor de Vibraciones en el Nivel sonoro en el hierba vacío 247 kg asiento (aceleración lugar de trabajo L 86 dB(A) de todo el cuerpo) a...
- Page 137 MT 6112.1 ZL: MT 6127.1 ZL: Ruedas traseras, 20x10.00-8, Altura de corte 8 niveles presión de aire 0,6 - 0,8 bar 30 - 110 mm Capacidad del Ruedas delanteras, 16x7.50-8, recogedor de hierba 350 l presión de aire 0,8 - 1,0 bar Peso con equipo de Ruedas traseras, 20x10.00-8,...
-
Page 138: Dimensiones
22.1 Dimensiones MT 5097.1, MT 5097.1 C, MT 5097.1 Z, MT 5097.1, MT 5097.1 C, MT 5097.1 Z: MT 5112.1 Z, MT 6112.1 C: E=241,6 cm A=96,8 cm MT 5112.1 Z, MT 6112.1 C, MT 6112.1 ZL, MT 6127.1 ZL: MT 6112.1 ZL, MT 6127.1 ZL: A=98,7 cm E=260,3 cm... -
Page 139: Localización De Anomalías
– Conectar la pipa de bujía; comprobar la tacto con un establecimiento – Agua en el depósito de combustible y conexión entre el cable de encendido y especializado: VIKING recomienda los en el carburador; carburador obstruido. el conector. ( ) Distribuidores Autorizados VIKING. - Page 140 – La velocidad de desplazamiento es demasiado alta en relación con la altura Anomalía: Anomalía: de corte fijada. El aparato no marcha. Corte no limpio, el césped amarillea – No se ha fijado el régimen máximo del después del proceso de corte. Posible causa: motor (acelerador no en posición MAX).
- Page 141 – El canal de expulsión o el equipo de corte (lado interior) están sucios debido Anomalía: Anomalía: a los restos de hierba (del último Las cuchillas no se activan o no giran. El equipo de corte se desacopla durante el segado).
-
Page 142: Plan De Mantenimiento
Entregue este Manual de Posible causa: – El recogedor de hierba está lleno. instrucciones a su Distribuidor – Anomalía en el sistema electrónico. especializado VIKING al realizarse – Batería incorrectamente conectada. trabajos de mantenimiento. Él le confirmará la ejecución de los Solución: trabajos de servicio técnico en los campos... - Page 143 Estimado(a) cliente, Botão "choke" (MT 5097 Z, MT 5112 Z, MT 6112 ZL, Muito obrigado por ter optado por um 1. Índice MT 6127 ZL) produto de alta qualidade da empresa VIKING. Interrutor do mecanismo de corte Sobre este manual de utilização...
- Page 144 Tecla Set Verificar o nível de enchimento do Dimensões óleo do motor Tecla Modo Localização de falhas Mudança de óleo do motor Indicação de avarias Plano de manutenção Reabastecer com óleo do motor Indicação de informações de Confirmação de entrega funcionamento Controlar os dispositivos de Confirmação de assistência...
-
Page 145: Sobre Este Manual De Utilização
2006/42/EC. Exemplo: Passos de operação que necessitam da A VIKING trabalha continuamente no intervenção do utilizador: desenvolvimento da sua gama de ● Solte o parafuso (1) com uma chave de produtos, pelo que nos reservamos o fendas, acione a alavanca (2)... -
Page 146: Descrição Do Aparelho
3. Descrição do aparelho 3.1 Trator corta-relva 0478 192 9807 C - PT... - Page 147 Pára-choques Farol Capot Tampão do depósito Volante Assento do condutor Pega da cesta de recolha de relva com arco de bloqueio da cesta de recolha de relva Alavanca de esvaziamento da cesta de recolha de relva Cesta de recolha de relva Arco de roda livre da transmissão Alavanca do ajuste da altura de corte...
-
Page 148: Painel De Instrumentos
8.2) Tecla do mecanismo de corte (MT 6112 C, MT 6112 ZL, Alavanca do acelerador MT 6127 ZL) (MT 5097 Z, MT 5112 Z, 8.6) MT 6112 ZL, MT6127 ZL) 8.3) Tecla do controlo de velocidade (MT 6112 ZL, MT 6127 ZL) Botão choke... -
Page 149: Para Sua Segurança
VIKING autorizados entanto, a listagem não é definitiva. Utilize de reação, não é permitido trabalhar com (acessórios). É necessário respeitar os o aparelho sempre com cuidado e com o aparelho. -
Page 150: Formação - Aprender A Utilizar O Aparelho
Em particular, é proibida qualquer O aparelho apenas pode ser utilizado por alteração ao aparelho que altere a pessoas que tenham lido o manual de 4.3 Transporte do trator corta-relva potência, a rotação do motor de utilização e estejam familiarizadas com o O trator corta-relva pode provocar combustão ou a velocidade de marcha. -
Page 151: Vestuário E Equipamento
(procure um distribuidor oficial; a VIKING prenda o cabelo comprido (elástico, gorro, Abra o bujão de fecho do depósito de recomenda o distribuidor oficial VIKING). -
Page 152: Durante O Trabalho
VIKING tem disponíveis avisos Caso necessário, dirija-se ao seu O aparelho apenas pode ser ligado a partir autocolantes de reposição e todas as distribuidor oficial. A VIKING recomenda o do assento do condutor. restantes peças de reposição. distribuidor oficial VIKING. - Page 153 Observe a distância de explosão! seguida, dirija-se a um distribuidor oficial. segurança! Utilização no trabalho: A VIKING recomenda o distribuidor oficial Antes de cada mudança de sentido, é VIKING. necessário reduzir a velocidade de Aviso - Perigo de ferimentos! Preste atenção a depressões (orifícios) no...
- Page 154 MT 5112 Z, de velocidade deve ser desligado. MT 6112 C, MT 6112 ZL, MT 6127 ZL Caso o aparelho seja utilizado em O controlo de velocidade não pode ser...
-
Page 155: Manutenção E Reparações
Para transportar objetos, utilize apenas Certifique-se de que o trator corta-relva Devem evitar-se mudanças de sentido em acessórios autorizados pela VIKING. O está totalmente parado antes de descer. encostas. Vire em encostas apenas se for transporte no trator corta-relva, dentro ou inevitável;... - Page 156 é necessário desligar o origina danos. VIKING para este aparelho ou peças cabo negativo (–) da bateria. A VIKING recomenda que não se utilize tecnicamente idênticas. Caso contrário, O aparelho está equipado com vários um aparelho de limpeza de alta pressão.
-
Page 157: Armazenamento No Caso De Períodos De Paragem Mais Longos
Deixe o motor de combustão arrefecer VIKING recomenda o distribuidor oficial particular, acione o motor de arranque antes de colocar o aparelho num VIKING. Este possui um fosso de trabalho durante, no máximo, 10 segundos). compartimento fechado. ou uma plataforma de trabalho hidráulica. -
Page 158: Eliminação
(acessórios durante um período mais longo, é especiais). necessário desligar os cabos da bateria. A 5. Descrição de símbolos VIKING recomenda que se desmonte a bateria e que se armazene a bateria carregada num compartimento seco e fechado. ( 15.19) Certifique-se de que as baterias estão... - Page 159 Perigo de queimaduras! Não toque nas superfícies quentes. As peças do motor de combustão, em particular o silenciador, atingem temperaturas extremamente altas. 0478 192 9807 C - PT...
-
Page 160: Fornecimento
6. Fornecimento Item Designação Unids. Aparelho base Cesta de recolha de relva Chave de ignição − Manual de utilização − Manual de utilização do motor de combustão − Folha suplementar da bateria 0478 192 9807 C - PT... -
Page 161: Trabalhos A Realizar Antes Da Primeira Colocação Em Funcionamento
Ligar o motor de combustão: 7. Trabalhos a realizar antes O motor de combustão da primeira colocação em arrancará quando todos os funcionamento pontos relevantes em termos de segurança para o arranque forem Aviso! cumpridos e a chave de ignição for rodada Antes de todos os trabalhos no para esta posição. -
Page 162: Alavanca Do Acelerador
Posição choke: 8.3 Alavanca do acelerador (MT 5097 Z, MT 5112 Z, MT 6112 ZL, MT 6127 ZL) Ajustar a rotação do motor de combustão: Em trabalhos de corte e no arranque do motor de combustão, coloque a alavanca do acelerador na posição MAX. -
Page 163: Mt 6112 Zl, Mt 6127 Zl)
8.4 Botão "choke" (MT 5097 Z, observando todos os dispositivos de MT 5112 Z, MT 6112 ZL, MT 6127 ZL) segurança ( 12.). Os modelos MT 5097 Z, MT 5112 Z, Evite danos no aparelho! MT 6112 ZL, MT 6127 ZL estão... -
Page 164: Tecla Do Controlo De Velocidade (Mt 6112 Zl, Mt 6127 Zl)
Acoplar o mecanismo de corte: Em marcha-atrás, ao premir a tecla Perigo de ferimentos! do controlo de velocidade, é Antes da desativação do controlo apresentado o símbolo "Controlo de velocidade, coloque o pé no de velocidade ativado" no visor, no pedal de acionamento para evitar entanto, o controlo de velocidade que o pedal de acionamento salte... -
Page 165: Alavanca Da Seleção Do Sentido De Marcha
Para o corte em marcha-atrás, pressione uma vez brevemente o interrutor de 8.9 Alavanca da seleção do sentido de 8.10 Volante segurança do corte em marcha-atrás com marcha Aviso! o pé esquerdo (1) durante o intervalo de O sentido de marcha é Durante a marcha, segure sempre tempo definido. -
Page 166: Pedal De Acionamento
2 Coloque o assento do condutor (2) na Diminua a pressão sobre o pedal A VIKING recomenda o distribuidor posição pretendida. Em seguida, solte a de acionamento (1). oficial VIKING. alavanca de ajuste do assento do Aumentar a velocidade de Nunca tente efetuar por si próprio a... -
Page 167: Alavanca Do Ajuste Da Altura De Corte
Acionar o travão de estacionamento: Soltar o travão de estacionamento: O desbloqueio da alavanca do ajuste da altura de corte varia consoante o mecanismo de corte esteja montado ou desmontado. Carregue no pedal do travão (1) para Com o pé, carregue brevemente no pedal baixo até... -
Page 168: Alavanca De Esvaziamento Da Cesta De Recolha De Relva
8.16 Alavanca de esvaziamento da cesta de recolha de relva Com auxílio da alavanca do esvaziamento da cesta de recolha de relva, é possível esvaziar a cesta de recolha de relva sem que o utilizador tenha de abandonar o assento do condutor. ●... -
Page 169: Arco De Desbloqueio Da Cesta De Recolha De Relva
Bloquear a cesta de recolha de relva: Desacoplar a transmissão: 8.17 Arco de desbloqueio da cesta de recolha de relva Aviso! Ao acionar o arco de desbloqueio da cesta de recolha de relva, tenha cuidado para não entalar nenhum dedo. O arco de desbloqueio da cesta de recolha de relva encontra-se por baixo da pega da cesta de recolha de relva. -
Page 170: Sensor Do Nível De Enchimento (Cesta De Recolha De Relva)
8.19 Sensor do nível de enchimento 9.1 Diagnóstico próprio durante o (cesta de recolha de relva) processo de arranque Se a cesta de recolha de relva estiver Antes do arranque do motor de cheia, é ativado um sinal sonoro combustão, o sistema eletrónico realiza prolongado. -
Page 171: Avaria No Trator Corta-Relva Durante O Funcionamento
Três sinais sonoros consecutivos diagnóstico detalhado. Dirija-se ao poucos minutos. assinalam uma avaria no sistema seu distribuidor oficial, a VIKING eletrónico (curto-circuito) ou no interrutor recomenda os distribuidores de contacto do assento. Não é possível oficiais VIKING. -
Page 172: Indicação De Segmentos Com
Evite danos no aparelho! Informações de 10.2 Tecla Set A advertência da pressão do óleo funcionamento ( 10.5) não é uma indicação do nível do Cesta de recolha de relva cheia Se premir a tecla Set durante a óleo. Por essa razão, o nível do indicação de horas de Travão de estacionamento óleo deve ser controlado... -
Page 173: Indicação De Informações De Funcionamento
é a possível causa. O sinal sonoro prolongado é desativado mecanismo de corte não pode ser Dirija-se ao seu revendedor depois do desacoplamento do mecanismo acoplado. especializado. A VIKING de corte. ( 13.8) A indicação apaga-se: recomenda o distribuidor oficial A indicação apaga-se: VIKING. -
Page 174: Indicação Das Funções Ativas
Dirija-se ao seu revendedor treinar. A relva deve ser sempre Ruídos de marcha invulgares, especializado. A VIKING cortada quando está seca. como, por exemplo, o "chiar" (ruído recomenda o distribuidor oficial de arrastamento) da correia Obtém-se um relvado bonito e denso VIKING. -
Page 175: Dispositivos De Segurança
MT 5097, MT 5097 C, MT 5097 Z, ● Antes da colocação em funcionamento, maus resultados de corte, pois as rodas MT 5112 Z, MT 6112 C, MT 6112 ZL: verifique os dispositivos de segurança. afundam-se na relva macia. Depois de desacoplar, as lâminas de corte 12.) -
Page 176: Encher Com Combustível
Bujão de fecho do depósito: ● Seque com um pano qualquer combustível derramado e deixe-o 13.1 Encher com combustível evaporar durante algum tempo antes Volume máximo do depósito: de ligar o motor de combustão. 9 litros Recomendação: Combustíveis novos de marca, 13.2 Ligar o motor de combustão consulte as indicações sobre a qualidade Evite danos no aparelho! -
Page 177: Desligar O Motor De Combustão
● Ligue o motor de combustão. ( 13.2) posição "choke". ( 8.2) desligado. Marcha-à-frente: MT 5097 Z, MT 5112 Z, MT 6112 ZL, ● Acione o travão de estacionamento. MT 6127 ZL: ● Selecione o sentido de marcha-à- 8.14) Coloque a alavanca do acelerador na frente. -
Page 178: Travar
Não acople o mecanismo de corte com se for apresentado o símbolo "Controlo a relva alta ou no nível de corte mais MT 5112 Z, MT 6112 C, de velocidade ativado" no visor e o reduzido. Acople o mecanismo de corte MT 6112 ZL, MT 6127 ZL: pedal de acionamento estiver fixado. -
Page 179: Programar O Desacoplamento Automático Do Mecanismo De Corte
● Adapte sempre a velocidade de marcha Programar o desacoplamento à altura da relva ou ao nível de corte. automático com a tecla Modo (apenas 13.8 Programar o desacoplamento Em caso de relva alta ou de um nível de em MT 6112 C, MT 6112 ZL, automático do mecanismo de corte corte reduzido, selecione uma MT 6127 ZL):... -
Page 180: Remover E Engatar A Cesta De Recolha Da Relva
● Retire a alavanca do esvaziamento da Um sinal sonoro prolongado Ao remover e engatar a cesta de cesta de recolha de relva e pressione-a durante o processo de corte da recolha de relva, o arco do para a frente. ( 8.16) relva indica que a cesta de recolha desbloqueio da cesta de recolha de... -
Page 181: Puxar Cargas
Engatar a cesta de recolha de relva: Evite danos no aparelho! Em subidas, a carga máxima de tração diminui. ● Antes de engatar cargas, verifique o funcionamento do travão. ( 13.5) Vire a cesta de recolha de relva (1) para cima até... -
Page 182: Utilização Em Encostas
● Desligue o motor de combustão. 13.3) 13.12 Utilização em encostas ● Retire a chave de ignição. ● Antes de cada utilização numa encosta, verifique o funcionamento do travão. ● Acione o travão de estacionamento. 13.5) 8.14) ● Percorra as encostas no sentido ●... - Page 183 Aliviar a tensão da correia trapezoidal Desengatar o mecanismo de corte Desengatar a correia trapezoidal: (MT 5112 Z, MT 6112 C, MT 6112 ZL, traseiro: MT 6127 ZL): Perigo de ferimentos! Após o desengate do mecanismo de corte, a alavanca do ajuste da altura de corte está...
-
Page 184: Montar O Mecanismo De Corte
Desengatar o mecanismo de corte Opcionalmente, puxe o mecanismo de Após o engate da correia dianteiro (MT 5112 Z, MT 6112 C, corte (1) a partir da esquerda ou da direita trapezoidal, prima novamente o MT 6112 ZL, MT 6127 ZL): para baixo do trator corta-relva. - Page 185 Puxe a suspensão dianteira do Engatar a correia trapezoidal no rolo mecanismo de corte (1) para baixo e tensor MT 5112 Z, MT 6112 C, mantenha-a nessa posição. Levante MT 6112 ZL, MT 6127 ZL: ligeiramente o mecanismo de corte com uma mão e introduza as cavilhas da...
- Page 186 MT 5097, MT 5097 C, MT 5097 Z, Tensionar a correia trapezoidal MT 5112 Z, MT 6112 C, MT 6112 ZL, (MT 5112 Z, MT 6112 C, MT 6112 ZL, MT 6127 ZL: MT 6127 ZL): Enfie as cavilhas de fixação (1) nos furos de suspensão (2).
-
Page 187: Manutenção
A não observância do plano de afinação e de manutenção apenas manutenção poderá originar danos a um distribuidor oficial. significativos no aparelho. A VIKING recomenda os distribuidores oficiais VIKING. Indicações gerais sobre manutenção: ● Respeite escrupulosamente o plano e os intervalos de manutenção. - Page 188 – Verifique a posição de montagem das por um distribuidor oficial a cada – Nível do óleo do motor (ver manual de lâminas de corte (MT 5112 Z, 100 horas de funcionamento ou utilização do motor de combustão). MT 6112 C, MT 6112 ZL, MT 6127 ZL).
-
Page 189: Limpar O Aparelho
(p. ex. água, uma escova ou um pano, a com um martelo). VIKING recomenda a utilização de ● Remova a cesta de recolha de relva e, um produto especial de limpeza fora do aparelho, limpe com água (por exemplo, produto especial de abundante e uma escova. -
Page 190: Montar O Canal De Expulsão
● Remova a cesta de recolha de relva. ● Acione o travão de 13.10) estacionamento. ( 8.14) Insira o canal de expulsão (1) até ao encosto. Ao inserir, certifique-se de que o canal de expulsão é virado em todos os Desenrosque as porcas de fecho (1), lados por cima da abertura de expulsão do retire o canal de expulsão (2). -
Page 191: Mudança De Óleo Do Motor
● Acione o travão de estacionamento. ● Retire a chave de ignição e guarde-a Desenrosque o tampão de escoamento do 8.14) em lugar seguro. óleo (1) e remova-o com o auxílio de duas chaves de bocas (SW19/SW15). Elimine o ● Deixe arrefecer o motor de combustão. ●... -
Page 192: Controlar Os Dispositivos De Segurança
● Ligue o motor de combustão ( 13.2) e ● Rode a chave de ignição para a deixe-o trabalhar na máxima rotação. posição "Ligar o motor de combustão". 15.11 Controlar os dispositivos de 8.2), ( 8.3) 8.1) segurança ● Acople o mecanismo de corte. Com o interrutor de contacto do canal Perigo de ferimentos! 8.5), (... -
Page 193: Manutenção Da Lâmina De Corte
"clique" do interrutor. A correia trapezoidal é rodada – MT 5112 Z, MT 6112 C, MT 6112 ZL, Depois de soltar, o sensor do nível de devido ao desvio duplo na posição... - Page 194 Perigo de ferimentos! MT 5112 Z, MT 6112 C, MT 6112 ZL, Uma lâmina de corte gasta pode MT 6127 ZL: partir e causar ferimentos graves.
- Page 195 Verificar a posição de montagem das ● Afie a lâmina de corte uniformemente, lâminas de corte (MT 5112 Z, Rode as lâminas de corte conforme de modo a evitar vibrações causadas MT 6112 C, MT 6112 ZL, MT 6127 ZL): ilustrado e verifique o ângulo A (cerca de...
-
Page 196: Verificar A Posição De Montagem Do Mecanismo De Corte
(apontadas para o mecanismo de corte). ● MT 5112 Z, MT 6112 C, MT 6112 ZL, MT 6127 ZL: Verifique a posição de montagem da lâmina de corte. 15.14 Verificar a posição de montagem do mecanismo de corte Intervalo de manutenção:... -
Page 197: Substituir As Rodas
Desmontar a roda: 15.15 Substituir as rodas Em caso de danos (furo, fissuras, cortes, etc.) nos pneus, desmonte a roda danificada e dirija-se a um distribuidor oficial. Elevar e apoiar o aparelho: Perigo de ferimentos! Ao levantar, tenha em conta o peso elevado do aparelho (ver o capítulo "Dados técnicos"). -
Page 198: Pressão Dos Pneus
Nota 15.16 Pressão dos pneus Antes do processo de lubrificação, é necessário aliviar o eixo dianteiro A correta pressão dos pneus é uma através do apoio correto. condição fundamental para o O bocal de lubrificação tem de ser alinhamento do mecanismo de limpo antes de cada processo de corte e, por conseguinte, para uma lubrificação, para que não entre... -
Page 199: Abrir E Fechar O Compartimento Da Bateria
em ambos os lados através dos bocais de Fechar o compartimento da bateria: ● Desligue o motor de combustão. lubrificação (1) até a massa sair 13.3) facilmente pelas mangas do eixo. ● Acione o travão de estacionamento. ● Retire a massa lubrificante derramada. 8.14) ●... - Page 200 Separar a bateria: ● Enrosque novamente os parafusos, as anilhas e as porcas nos pólos da bateria para os manter guardados. ● Se necessário, arrume corretamente os dois cabos de ligação no compartimento da bateria e feche-a. 15.18) Ligar a bateria: Antes da montagem, verifique o estado de carga da bateria.
-
Page 201: Fusíveis
(3) está danificado (fundido). Se necessário, solicite a Verificar o fusível principal: substituição do fusível (3) junto de um distribuidor oficial. A VIKING recomenda O fusível principal (150 Amperes) os distribuidores oficiais VIKING. encontra-se por trás da bateria. -
Page 202: Carregamento Da Bateria Através Da Ficha De Carga
● Abra o capot. ( 15.3) O carregador de conservação de carga VIKING ACB 010 ou o carregador de diagnóstico VIKING 012 (ambos não incluídos no fornecimento) podem ser encaixados na ficha de carga. Com o carregador de conservação de carga VIKING ACB 010, apenas pode ser efetuada uma carga de conservação. -
Page 203: Motor De Combustão
● Efetue a mudança de óleo do motor (manual de utilização do motor de 15.25 Arrumação combustão). ( 15.9) ● Armazene o aparelho num ● Desmonte a bateria. ( 15.19) compartimento fresco e seco fora do alcance de crianças e pessoas não ●... -
Page 204: Transporte
6160 702 0100 ser eliminados como tal. largura suficiente. MT 5112 Z, MT 6112 C, MT 6112 ZL: A eliminação de resíduos de materiais de ● Posicione e fixe as rampas de carga de Lâmina de corte direita: forma separada e adequada à... -
Page 205: Minimização Do Desgaste E Prevenção De Danos
2. Cumprimento das instruções deste A VIKING recomenda a realização de Desmonte a bateria antes de eliminar o manual de utilização trabalhos de manutenção e de reparação aparelho. apenas pelo distribuidor oficial VIKING. A utilização, manutenção e arrumação do Não deve eliminar a bateria no lixo... -
Page 206: Dados Técnicos
Acionamento das marcha-à-frente 2016-01-02 (AAAA-MM-DD) O produto foi desenvolvido em rodas traseiras progressiva/ concordância com as seguintes normas: marcha-atrás VIKING GmbH EN ISO 5395-1, EN ISO 5395-3 progressiva Método de avaliação de conformidade MT 5097.1: aplicado: Identificação de série 6160... - Page 207 MT 5097.1: MT 5097.1 C: MT 5097.1 Z: Peso com meca- altura de corte 8 vezes Cilindrada 656 cm nismo de corte e 30 - 100 mm Potência nominal à 8,7 - 2750 cesta de recolha de Rodas dianteiras, 15 x 6,00-6, rotação nominal kW - rpm relva vazia...
- Page 208 MT 5097.1 Z: MT 5112.1 Z: MT 6112.1 C: Valores caraterísticos de vibração especi- Vibrações no Segundo a diretiva 2006/42/EC: ficados de acordo com a EN 12096 assento (aceleração Nível de pressão de corpo inteiro) a 0,98 m/s acústica no local de MT 5112.1 Z: Incerteza K 0,49 m/s...
- Page 209 MT 6112.1 ZL: MT 6127.1 ZL: Peso com meca- altura de corte 8 vezes nismo de corte e 30 - 110 mm cesta de recolha de Rodas dianteiras, 16 x 7,50-8, relva vazia 263 kg pressão de ar 0,8 - 1,0 bar Segundo a diretiva 2000/14/EC: Rodas traseiras, 20 x 10,00-8,...
-
Page 210: Dimensões
22.1 Dimensões MT 5097.1, MT 5097.1 C, MT 5097.1 Z, MT 5097.1, MT 5097.1 C, MT 5097.1 Z: MT 5112.1 Z, MT 6112.1 C: E=241,6 cm A=96,8 cm MT 5112.1 Z, MT 6112.1 C, MT 6112.1 ZL, MT 6127.1 ZL: MT 6112.1 ZL, MT 6127.1 ZL: A=98,7 cm E=260,3 cm... -
Page 211: Localização De Falhas
Se necessário, procurar um distribui- Possível causa: ignição e a ficha. ( ) dor oficial. A VIKING recomenda o – Há água no depósito de combustível e – Desaperte e seque a vela de ignição; distribuidor oficial VIKING. - Page 212 – Substitua a correia trapezoidal ou a correia dentada. ( ) Avaria: Avaria: O aparelho não se desloca. O canal de expulsão está entupido. Possível causa: Avaria: Possível causa: – Transmissão desacoplada. Corte de má qualidade, a relva fica – Pás da lâmina de corte gastas ou –...
- Page 213 – A relva está demasiado húmida e, – Velocidade de marcha demasiado – O interrutor de contacto do assento ou como tal, é demasiado pesada para ser elevada. os respetivos cabos estão defeituosos. transportada pela corrente de ar em Solução: Solução: direção à...
-
Page 214: Plano De Manutenção
– Rode a chave de ignição para a manutenção, forneça este manual posição "Motor de combustão de utilização ao seu distribuidor oficial desligado", efetue o diagnóstico VIKING. próprio. ( 9.1) A realização dos trabalhos de assistência – Controle a polaridade das ligações da é... - Page 215 Αγαπητή πελάτισσα, αγαπητέ πελάτη, Μοχλός γκαζιού (MT 5097 Z, MT 5112 Z, MT 6112 ZL, Σας ευχαριστούµε θερµά για την απόφασή 1. Περιεχόµενα MT 6127 ZL) σας να αγοράσετε ένα προϊόν ποιότητας της VIKING. Πλήκτρο τσοκ (MT 5097 Z, Σχετικά µε αυτές τις οδηγίες...
- Page 216 Πλήκτρο Set Έλεγχος στάθµης πλήρωσης του ∆ιαστάσεις λιπαντικού κινητήρα Πλήκτρο Mode Εντοπισµός βλαβών Αλλαγή λιπαντικού κινητήρα Ένδειξη βλαβών Πρόγραµµα συντήρησης Πλήρωση λιπαντικού κινητήρα Ένδειξη πληροφοριών λειτουργίας 244 Βεβαίωση παράδοσης Έλεγχος διατάξεων ασφαλείας Ένδειξη ενεργών λειτουργιών Βεβαίωση συντήρησης Καθαρισµός αισθητήρα στάθµης Υποδείξεις...
-
Page 217: Σχετικά Με Αυτές Τις Οδηγίες Χρήσης
σύµφωνα µε την Οδηγία της ΕΕ κεφάλαιο: ( 2.1) 2006/42/ΕC. Εικόνες µε αποσπάσµατα κειµένου: Χαρακτηρισµός των αποσπασµάτων Η VIKING εργάζεται συνεχώς για τη των κειµένων: Τα βήµατα χειρισµού µε άµεσο βελτίωση και εξέλιξη του προγράµµατος συσχετισµό στην εικόνα θα τα βρείτε Οι υποδείξεις που περιγράφονται... - Page 218 Το σύµβολο κάµερας χρησιµεύει στο συσχετισµό των εικόνων στις σελίδες εικόνων µε το αντίστοιχο τµήµα κειµένου των οδηγιών χρήσης. 0478 192 9807 C - EL...
-
Page 219: Περιγραφή Εργαλείου
3. Περιγραφή εργαλείου 3.1 Χλοοκοπτικό τρακτέρ 0478 192 9807 C - EL... - Page 220 Προφυλακτήρας Προβολέας Κάλυµµα κινητήρα Τάπα ρεζερβουάρ Τιµόνι Κάθισµα οδηγού Χειρολαβή χορτοσυλλέκτη µε µπάρα απασφάλισης χορτοσυλλέκτη Μοχλός εκκένωσης χορτοσυλλέκτη Χορτοσυλλέκτης Μπάρα ελεύθερης λειτουργίας κιβωτίου µετάδοσης Μοχλός ρύθµισης ύψους κοπής Πίσω τροχός Πεντάλ φρένων Πεντάλ επιτάχυνσης (ταχύτητα κίνησης) Σύστηµα κοπής Βοηθητικοί τροχοί Εµπρός...
-
Page 221: Πίνακας Οργάνων
(MT 5097, MT 5097 C, MT 6112 C) Πλήκτρο συστήµατος κοπής 8.2) (MT 6112 C, MT 6112 ZL, MT 6127 ZL) Μοχλός γκαζιού 8.6) (MT 5097 Z, MT 5112 Z, MT 6112 ZL, MT6127 ZL) Πλήκτρο Tempomat 8.3) (MT 6112 ZL, MT 6127 ZL) 8.7) Κουµπί-τσοκ... -
Page 222: Για Τη Δική Σας Ασφάλεια
Κίνδυνος ασφυξίας! Το εργαλείο µπορεί να εξοπλιστεί µε Στη χρήση σε δηµόσιους χώρους, σε Κίνδυνος ασφυξίας για τα παιδιά γνήσια πρόσθετα εξαρτήµατα της VIKING. πάρκα, σε χώρους άθλησης, σε δρόµους, όταν παίζουν µε τα υλικά Αυτά παρέχουν στο εργαλείο σε αγροτικές και γεωργικές επιχειρήσεις... -
Page 223: Εκπαίδευση - Τρόπος Χρήσης Του Εργαλείου
έχουν εγκριθεί από τη VIKING. Επιπλέον, – ελλιπής γνώση των επιδράσεων που η µη τήρηση αυτής της σύστασης οδηγεί σχετίζονται µε τις συνθήκες του 4.2 Εκπαίδευση – Τρόπος χρήσης του σε ακύρωση της εγγύησης. Πληροφορίες εδάφους, κυρίως σε πλαγιές (ανατρέξτε... -
Page 224: Ανεφοδιασµός - Χειρισµός Καυσίµων
Για τον ανεφοδιασµό του εργαλείου µε ξερά υπολείµµατα χόρτου. αναγκαίο (αναζητήστε έναν εµπορικό καύσιµο χρησιµοποιείτε κατάλληλη χοάνη αντιπρόσωπο, η VIKING προτείνει τον ή σωλήνα πλήρωσης, ώστε να µην χυθεί εµπορικό αντιπρόσωπο VIKING). το καύσιµο στον κινητήρα εσωτερικής 4.4 Ανεφοδιασµός - χειρισµός... -
Page 225: Πριν Την Εργασία
15.1) τροχίζετε το µαχαίρι κοπής. δυσανάγνωστες ή οι φθαρµένες πινακίδες Εάν χρειαστεί, επικοινωνήστε µε τον υποδείξεων και προειδοποιήσεων θα εµπορικό αντιπρόσωπο. Η VIKING πρέπει να αντικαθίστανται άµεσα. Ο προτείνει τον εµπορικό αντιπρόσωπο 4.6 Πριν την εργασία αντιπρόσωπος της VIKING διαθέτει... - Page 226 καύσης δεν πρέπει ποτέ να τίθεται σε Προσέχετε την περιοχή απευθυνθείτε σε εµπορικό αντιπρόσωπο. λειτουργία σε κλειστούς χώρους ή σε εργασίας του µαχαιριού Η VIKING προτείνει τον εµπορικό χώρους που δεν αερίζονται καλά. κοπής. Μην πλησιάζετε αντιπρόσωπο VIKING. ποτέ τα χέρια ή τα πόδια...
- Page 227 Ιδιαίτερη προσοχή απαιτείται κατά την από την επανεκκίνηση. Ελέγξτε στα το Tempomat. κοπή χόρτου κοντά σε δρόµους, µοντέλα MT 5112 Z, MT 6112 C, ποδηλατόδροµους και πεζοδρόµια. Τα Λόγω αυξηµένου κινδύνου ατυχήµατος MT 6112 ZL, MT 6127 ZL επιπλέον τη...
- Page 228 χρησιµοποιήστε µόνο τον πρόσθετο αναπόφευκτο. Εάν είναι δυνατό, οδηγείτε εξοπλισµό που έχει εγκριθεί από τη αργά διατηρώντας µεγάλη ακτίνα ως προς VIKING. ∆εν επιτρέπεται η µεταφορά στο την κατεύθυνση καθόδου. χλοοκοπτικό τρακτέρ, στο χορτοσυλλέκτη Μην κόβετε βρεγµένο χόρτο, ιδιαίτερα σε...
-
Page 229: Συντήρηση Και Επισκευές
ενεργοποιήστε το φρένο στάθµευσης, ώστε να εξασφαλίζεται ο ασφαλής προκαλεί βλάβες µακροπρόθεσµα. σβήστε τον κινητήρα εσωτερικής καύσης χειρισµός του χλοοκοπτικού τρακτέρ Η VIKING συνιστά να µην χρησιµοποιείτε και αφαιρέστε το κλειδί µίζας. (π.χ. φρένα, αλλαγή κατεύθυνσης, µηχανήµατα καθαρισµού υψηλής πίεσης. εκκίνηση). - Page 230 διαρροές και να αντικαθιστώνται εάν κάτι µηχανήµατα που έχουν εγκριθεί από την εµπρός και πίσω τροχών. τέτοιο κρίνεται αναγκαίο από τον εµπορικό VIKING για αυτό το εργαλείο ή αλλά ∆ιατηρείτε το χλοοκοπτικό τρακτέρ και τα αντιπρόσωπο VIKING. τεχνικά ίδια εξαρτήµατα, διαφορετικά...
-
Page 231: Αποθήκευση Σε Μεγαλύτερα Διαστήµατα Παύσης Της Λειτουργίας
να κρυώσει πριν αποθηκεύσετε το ακολουθήστε τις υποδείξεις που θα πρέπει να αποσυνδέσετε τα καλώδια εργαλείο σε έναν κλειστό χώρο. αναφέρονται στο κεφάλαιο «Φόρτιση της µπαταρίας. Η VIKING συνιστά να Φυλάσσετε το χλοοκοπτικό τρακτέρ, µε µπαταρίας». ( 15.21) αφαιρέσετε την µπαταρία και να την... -
Page 232: Περιγραφή Συµβόλων
αχρηστευµένο. Βεβαιωθείτε ότι το εργαλείο και ιδιαίτερα τα µαχαίρια κοπής φυλάσσονται µακριά από παιδιά. Η µπαταρία θα πρέπει να απορρίπτεται χωριστά από το εργαλείο. Οι µπαταρίες πρέπει να απορρίπτονται µε τρόπο φιλικό Προσοχή! Κίνδυνος εγκαυµάτων! προς το περιβάλλον. Προσέξτε για εκσφενδονιζόµενα Μην... -
Page 233: Περιεχόµενα Συσκευασίας
6. Περιεχόµενα συσκευασίας Αρ. Περιγραφή Τεµ. Βασικό εργαλείο Χορτοσυλλέκτης Κλειδί µίζας − Οδηγίες χρήσης − Οδηγίες χρήσης του κινητήρα εσωτερικής καύσης − Συνοδευτικό φυλλάδιο µπαταρίας 0478 192 9807 C - EL... -
Page 234: Εργασίες Πριν Από Την Έναρξη Λειτουργίας Για Πρώτη Φορά
Η ανάφλεξη ενεργοποιείται, τα φώτα 7. Εργασίες πριν από την απενεργοποιούνται. έναρξη λειτουργίας για Μετά την εκκίνηση, το κλειδί µίζας πρώτη φορά επανέρχεται αυτοµάτως σε αυτή τη θέση και ο κινητήρας εσωτερικής καύσης τίθεται Προειδοποίηση! σε λειτουργία. Πριν από κάθε εργασία στο Θέση... -
Page 235: Μοχλός Γκαζιού (Mt 5097 Z, Mt 5112 Z, Mt 6112 Zl, Mt 6127 Zl)
Ξεκινήστε τον ζεστό κινητήρα 8.3 Μοχλός γκαζιού (MT 5097 Z, εσωτερικής καύσης χωρίς τσοκ (µοχλός γκαζιού στη θέση MAX). MT 5112 Z, MT 6112 ZL, MT 6127 ZL) Όταν ο κινητήρας εσωτερικής Ρύθµιση στροφών κινητήρα καύσης πάρει µπρος, εσωτερικής καύσης: απενεργοποιήστε... -
Page 236: Πλήκτρο Τσοκ (Mt 5097 Z, Mt 5112 Z, Mt 6112 Zl, Mt 6127 Zl)
(MT 5097, MT 5097 C, MT 5097 Z, MT 5112 Z) 8.4 Πλήκτρο τσοκ (MT 5097 Z, MT 5112 Z, MT 6112 ZL, MT 6127 ZL) Με το διακόπτη του συστήµατος κοπής και όταν ο κινητήρας εσωτερικής καύσης είναι Για την εκκίνηση του κρύου κινητήρα... -
Page 237: Πλήκτρο Tempomat (Mt 6112 Zl, Mt 6127 Zl)
Απενεργοποίηση Tempomat: Αποφύγετε τις ζηµιές στο 8.7 Πλήκτρο Tempomat (MT 6112 ZL, εργαλείο! Κίνδυνος τραυµατισµών! Μην συµπλέκετε τα µαχαίρια κοπής MT 6127 ZL) Πριν από την απενεργοποίηση του όταν το χόρτο είναι πολύ ψηλό ή Tempomat θα πρέπει να φέρετε το Με... -
Page 238: Μοχλός Επιλογής Κατεύθυνσης Κίνησης
Για την κοπή του χόρτου µε οπισθοπορεία Επιλογή κατεύθυνσης κίνησης: Εάν ο διακόπτης ασφαλείας για την πιέστε µία φορά στιγµιαία τον διακόπτη κοπή χόρτου µε οπισθοπορεία ασφαλείας για την κοπή χόρτου µε κρατηθεί πιεσµένος, θα πρέπει να οπισθοπορεία (1) µε το αριστερό πόδι απελευθερώσετε... -
Page 239: Ρύθµιση Καθίσµατος Οδηγού
επισκευάζονται ή να ρυθµίζονται πάντοτε από εµπορικό Ακινητοποίηση: αντιπρόσωπο. 1 Με το αριστερό χέρι ανασηκώστε τον Η VIKING προτείνει τον εµπορικό Αποµακρύνετε το πόδι σας από το πεντάλ µοχλό ρύθµισης του καθίσµατος αντιπρόσωπο VIKING. επιτάχυνσης (µετάδοση κίνησης) (1). οδηγού (1) και κρατήστε τον σε αυτήν τη... -
Page 240: Φρένο Στάθµευσης
Στα µοντέλα MT 6112 C, MT 6112 ZL Ανύψωση και χαµήλωµα του και MT 6127 ZL εµφανίζεται στην συστήµατος κοπής: 8.14 Φρένο στάθµευσης οθόνη το σύµβολο "Φρένο στάθµευσης Με την ενεργοποίηση του φρένου Κίνδυνος τραυµατισµών! ενεργοποιηµένο" όταν ενεργοποιηθεί το στάθµευσης µπλοκάρονται οι Κατά... -
Page 241: Μοχλός Εκκένωσης Χορτοσυλλέκτη
8.16 Μοχλός εκκένωσης χορτοσυλλέκτη Με τη βοήθεια του µοχλού εκκένωσης χορτοσυλλέκτη, ο χρήστης µπορεί να αδειάσει άνετα το χορτοσυλλέκτη χωρίς να σηκωθεί από το κάθισµα οδηγού. ● Αποσυµπλέξτε το σύστηµα κοπής. 8.5), ( 8.6) ● Φρενάρετε το εργαλείο µέχρι να ακινητοποιηθεί... -
Page 242: Μπάρα Απασφάλισης Χορτοσυλλέκτη
Ασφάλιση χορτοσυλλέκτη: Προειδοποίηση! 8.17 Μπάρα απασφάλισης Πιθανότητα τραυµατισµών από χορτοσυλλέκτη σύνθλιψη! Τραβάτε προς τα έξω την µπάρα Προειδοποίηση! ελεύθερης λειτουργίας του κιβωτίου Κατά το χειρισµό της µπάρας µετάδοσης µόνο όταν το εργαλείο απασφάλισης του χορτοσυλλέκτη, βρίσκεται σε επίπεδη επιφάνεια, προσέξτε ώστε να µην πιαστούν τα καθώς... -
Page 243: Αισθητήρας Στάθµης Πλήρωσης (Χορτοσυλλέκτης)
Σύµπλεξη κιβωτίου µετάδοσης: Κατά κανόνα, ένας κοντύτερος αισθητήρας επιφέρει καθυστερηµένη ενεργοποίηση 9. Ηλεκτρονικό σύστηµα του σήµατος (ο χορτοσυλλέκτης γεµίζει περισσότερο, το οποίο είναι ιδανικό για Το χλοοκοπτικό τρακτέρ είναι εξοπλισµένο πολύ ξερό υλικό κοπής). µε ηλεκτρονικό σύστηµα, το οποίο ελέγχει Ο... -
Page 244: Βλάβη Στο Χλοοκοπτικό Τρακτέρ Κατά Τη Διάρκεια Λειτουργίας
µεγάλες διακυµάνσεις της ● Ενεργοποιήστε την αυτοδιάγνωση. σύστηµα. Απευθυνθείτε σε εµπορικό θερµοκρασίας και σε υψηλή 9.1) αντιπρόσωπο. Η VIKING προτείνει τον ατµοσφαιρική υγρασία ενδέχεται να εµπορικό αντιπρόσωπο VIKING. θαµπώσει από τα συµπυκνώµατα. Εάν η βλάβη δεν µπορεί να Η υγρασία που έχει εισχωρήσει, αποκατασταθεί, απαιτείται... -
Page 245: Ένδειξη 5 Ψηφίων
10.1 Ένδειξη 5 ψηφίων 10.3 Πλήκτρο Mode Η ένδειξη 5 ψηφίων ενηµερώνει για τις Πιέζοντας το πλήκτρο Mode η ώρες λειτουργίας και την τάση µπαταρίας. ένδειξη πραγµατοποιείται Επιπλέον, σηµατοδοτεί τις βλάβες µε την εναλλαγή µεταξύ των ενδείξεων: ένδειξη ERROR. 1 Ώρες λειτουργίας [h] Κατά... -
Page 246: Ένδειξη Πληροφοριών Λειτουργίας
Ο χορτοσυλλέκτης έχει γεµίσει, να τεθεί σε λειτουργία και το σύστηµα ακούγεται ένας συνεχόµενος ήχος. εµπορικό σας αντιπρόσωπο. Η κοπής δεν µπορεί να συµπλεχθεί εάν δεν VIKING προτείνει τον εµπορικό 8.19) έχει ενεργοποιηθεί το φρένο στάθµευσης. αντιπρόσωπο VIKING. Η ένδειξη σβήνει:... -
Page 247: Ένδειξη Ενεργών Λειτουργιών
διακόπτη, στους ακροδέκτες ή στα εξοικειωθείτε µε τη χρήση του. Το καλώδια. Απευθυνθείτε στον χόρτο θα πρέπει να κόβεται εµπορικό σας αντιπρόσωπο. Η πάντοτε στεγνό. VIKING προτείνει τον εµπορικό αντιπρόσωπο VIKING. Σύµβολο Ενεργοποίηση Tempomat: 0478 192 9807 C - EL... -
Page 248: Συστήµατα Ασφαλείας
αποφεύγεται ο κίνδυνος πυρκαγιάς. – να έχει πατηθεί το πεντάλ φρένων ή να παράδοσης. (Ο εµπορικός αντιπρόσωπος έχει ενεργοποιηθεί το φρένο Αποφυγή απόφραξης του αγωγού VIKING θα σας δώσει περισσότερες στάθµευσης. εξαγωγής πληροφορίες). Ο κινητήρας εσωτερικής καύσης τίθεται Σε περίπτωση απόφραξης του αγωγού... -
Page 249: Θέση Του Εργαλείου Σε Λειτουργία
MT 5097, MT 5097 C, MT 5097 Z, εργασίες συντήρησης. ( 15.1) Γεµίστε αργά και προσεκτικά το καύσιµο. MT 5112 Z, MT 6112 C, MT 6112 ZL: Για να αποφύγετε την υπερχείλιση θα Μετά την αποσύµπλεξη, τα µαχαίρια ● Πριν από κάθε έναρξη λειτουργίας... -
Page 250: Θέση Του Κινητήρα Εσωτερικής Καύσης Σε Λειτουργία
Φέρτε το µοχλό γκαζιού στη θέση τσοκ. αγωγός εξαγωγής. ( 15.6) πλήρωσης). 8.2) Πριν την εκκίνηση: MT 5097 Z, MT 5112 Z, MT 6112 ZL, MT 6127 ZL: ● Ελέγξτε τη στάθµη λιπαντικού του Φέρτε το µοχλό γκαζιού στη θέση MAX κινητήρα. ( 15.8) και... -
Page 251: Οδήγηση
● Αποσυµπλέξτε το σύστηµα κοπής. ● MT 5112 C, MT 6112 C, MT 6112 ZL, ● Λύστε το φρένο στάθµευσης, εάν είναι 8.5), ( 8.6) MT 6127 ZL: ενεργοποιηµένο. ( 8.14) Με αποσυναρµολογηµένο σύστηµα ● Τοποθετήστε το µοχλό γκαζιού στη ●... -
Page 252: Ρύθµιση Ύψους Κοπής
Σκάλα 8 µεγαλύτερο ύψος κοπής κοπής. ( 8.5), ( 8.6) παρακάτω σειρά: MT 5112 Z, MT 6112 C, Κατά τη διαδικασία κοπής: ● Θέστε τον κινητήρα εσωτερικής καύσης MT 6112 ZL, MT 6127 ZL: σε λειτουργία. ( 13.2) ● Τοποθετήστε το µοχλό γκαζιού στη... -
Page 253: Προγραµµατισµός Αυτόµατης Αποσύµπλεξης Του Συστήµατος Κοπής
● Συνεχίστε τη διαδικασία κοπής. Ενεργοποίηση αυτόµατης Έλεγχος προγραµµατισµού (µόνον αποσύµπλεξης του συστήµατος στα MT 6112 C, MT 6112 ZL, Η αποσύµπλεξη του συστήµατος κοπής: MT 6127 ZL): κοπής πρέπει να πραγµατοποιηθεί µε την παρακάτω σειρά: ● Κρατήστε πιεσµένα για 5 δευτερόλεπτα ●... -
Page 254: Αφαίρεση Και Τοποθέτηση Χορτοσυλλέκτη
● Κατά την εκκένωση του χορτοσυλλέκτη, ελέγξτε τον αγωγό εξαγωγής για τυχόν 13.10 Αφαίρεση και τοποθέτηση απόφραξη και αν χρειαστεί καθαρίστε χορτοσυλλέκτη τον. Πριν από την αφαίρεση θα πρέπει να ● Ελέγξτε τα πτερύγια των µαχαιριών προσέξετε τα παρακάτω σηµεία: κοπής... -
Page 255: Ρυµούλκηση Φορτίων
Τοποθετήστε το χορτοσυλλέκτη: Αποφύγετε τις ζηµιές στο εργαλείο! Στις ανωφέρειες µειώνεται αντίστοιχα το µέγιστο επιτρεπόµενο φορτίο έλξης. ● Πριν από την ανάρτηση φορτίων, θα πρέπει να ελέγχετε πάντα τη λειτουργία του φρένου. ( 13.5) Ανασηκώστε µέχρι τέρµα το χορτοσυλλέκτη (1). ●... -
Page 256: Λειτουργία Σε Πλαγιές
● Τοποθετήστε το εργαλείο σε ένα Ένα φορτίο έλξης της τάξης των επίπεδο και σταθερό υπόστρωµα. 40 kg στον κοτσαδόρο επιτυγχάνεται σε επίπεδη επιφάνεια ● Στρίψτε τους µπροστινούς τροχούς κατά την έλξη ενός προς τα αριστερά ή προς τα δεξιά. ρυµουλκούµενου... - Page 257 θέση. Τραβήξτε τον ιµάντα (2) προς τα ιµάντα. µπροστά και ξεκρεµάστε τον. Αφαίρεση ιµάντα από την τροχαλία τάνυσης (MT 5112 Z, MT 6112 C, MT 6112 ZL, MT 6127 ZL): Τραβήξτε την περόνη ασφαλείας (1) προς τα επάνω. Ανασηκώστε ελαφρά το σύστηµα κοπής...
-
Page 258: Τοποθέτηση Συστήµατος Κοπής
Αφαίρεση συστήµατος κοπής από την Τραβήξτε το σύστηµα κοπής (1) έξω από Μετά το ξεκρέµασµα του ιµάντα µπροστινή πλευρά (MT 5112 Z, το χλοοκοπτικό τρακτέρ, προς τα αριστερά πιέστε πάλι τον πείρο ασφάλισης MT 6112 C, MT 6112 ZL, MT 6127 ZL): ή... - Page 259 την περόνη ασφάλισης (2) µέσα από την Τοποθέτηση ιµάντα στην τροχαλία Κίνδυνος τραυµατισµών! οπή στον πείρο στερέωσης. τάνυσης MT 5112 Z, MT 6112 C, Στη χαµηλότερη σκάλα κοπής ο µοχλός ρύθµισης του ύψους κοπής ● Επαναλάβετε τη διαδικασία στη MT 6112 ZL, MT 6127 ZL: είναι...
- Page 260 Ελέγξτε την ασφαλή και σταθερή θέση του πείρου ασφάλισης. MT 5097, MT 5097 C, MT 5097 Z, MT 5112 Z, MT 6112 C, MT 6112 ZL, MT 6127 ZL: Περάστε τους πείρους στερέωσης (1) στην Πιέστε τον µοχλό διάταξης τάνυσης...
-
Page 261: Συντήρηση
συντήρησης στο φρένο. Όλες οι εργασίες ρύθµισης και συντήρησης θα πρέπει να πραγµατοποιούνται αποκλειστικά από εµπορικό αντιπρόσωπο. Η VIKING προτείνει τον εµπορικό αντιπρόσωπο VIKING. Γενικές υποδείξεις σχετικά µε τη συντήρηση: ● Τηρείτε πιστά το πρόγραµµα και τα προβλεπόµενα χρονικά διαστήµατα... -
Page 262: Πρόγραµµα Συντήρησης
φορά το χρόνο απαιτείται χρήσης του κινητήρα εσωτερικής καυσίµου. επιθεώρηση από εµπορικό καύσης: – Στάθµη λιπαντικού κινητήρα (ανατρέξτε αντιπρόσωπο. Η VIKING προτείνει – Αντικαταστήστε το φίλτρο αέρα. στις οδηγίες χρήσης του κινητήρα τον εµπορικό εσωτερικής καύσης). αντιπρόσωπο VIKING. – Στοιχεία σχετικά µε το λιπαντικό... -
Page 263: Καθαρισµός Εργαλείου
● Καθαρίστε τα µαχαίρια κοπής µε αφαιρεθούν µε νερό, µε βούρτσα ή 50 ώρες λειτουργίας: βούρτσα και νερό – σε καµία µε ένα πανί, η VIKING προτείνει τη περίπτωση δεν πρέπει να χτυπήσετε χρήση ενός ειδικού καθαριστικού – Έλεγχος της θέσης τοποθέτησης του... -
Page 264: Κλείσιµο Καλύµµατος Κινητήρα
Στα µοντέλα MT 6112 C, 15.5 Αποσύνδεση αγωγού εξαγωγής MT 6112 ZL και MT 6127 ZL εµφανίζεται στην οθόνη το σύµβολο Ο αγωγός εξαγωγής µπορεί να αφαιρεθεί "Ο αγωγός εξαγωγής έχει χωρίς επιπρόσθετα εργαλεία για τον αφαιρεθεί", όταν το κλειδί µίζας καθαρισµό... -
Page 265: Βάνα Καυσίµου
περασµένος επάνω από το άνοιγµα ● Ανοίξτε το κάλυµµα κινητήρα. ( 15.3) εξαγωγής του συστήµατος κοπής σε όλες ● Ελέγξτε τη στάθµη λιπαντικού του τις πλευρές. κινητήρα σύµφωνα µε τις οδηγίες Βιδώστε τα παξιµάδια (2) και σφίξτε τα. χρήσης του κινητήρα εσωτερικής καύσης... -
Page 266: Πλήρωση Λιπαντικού Κινητήρα
● Αφαιρέστε το κλειδί µίζας και φυλάξτε ● Κλείστε το κάλυµµα κινητήρα. ( 15.4) το σε ασφαλές µέρος. ● Αφήστε τον κινητήρα εσωτερικής 15.11 Έλεγχος διατάξεων ασφαλείας καύσης να κρυώσει (θερµοκρασία περιβάλλοντος). Κίνδυνος τραυµατισµού! Ο έλεγχος των διατάξεων ● Ανοίξτε το κάλυµµα κινητήρα. ( 15.3) ασφαλείας... -
Page 267: Καθαρισµός Αισθητήρα Στάθµης
Εάν λειτουργεί ο διακόπτης επαφής Όταν ο διακόπτης επαφής Εάν ο διακόπτης ασφαλείας για την φρένων ο κινητήρας εσωτερικής χορτοσυλλέκτη λειτουργεί, ο κινητήρας κοπή χόρτου µε οπισθοπορεία καύσης δεν µπορεί να τεθεί σε εσωτερικής καύσης τίθεται εκτός λειτουργεί σωστά, το σύστηµα κοπής λειτουργία. -
Page 268: Συντήρηση Μαχαιριών Κοπής
Πιέστε ελαφρά τον αισθητήρα στάθµης – MT 5112 Z, MT 6112 C, MT 6112 ZL, Κατεύθυνση τοποθέτησης του ιµάντα ή πλήρωσης (χορτοσυλλέκτης) (1) προς τα MT 6127 ZL: αντίστοιχα του οδοντωτού ιµάντα και κάτω. Ο αισθητήρας στάθµης πλήρωσης Ελέγξτε τη θέση τοποθέτησης των... - Page 269 αµµώδες έδαφος ή συχνά υπό Έλεγχος θέσης τοποθέτησης των συνθήκες ξηρασίας, τα µαχαίρια Γυρίστε το σύστηµα κοπής (1) και µαχαιριών κοπής (MT 5112 Z, καταπονούνται περισσότερο και αποθέστε το, µε τα µαχαίρια γυρισµένα MT 6112 C, MT 6112 ZL, MT 6127 ZL): φθείρονται...
- Page 270 λύνετε τη βίδα µαχαιριού. Περάστε το κατσαβίδι (1) µέσα από την Αφαιρέστε τη βίδα µαχαιριού (1) µε τη κεντρική οπή. ροδέλα ασφάλισης (2) και αφαιρέστε το Όταν το µαχαίρι κοπής (2) είναι µαχαίρι κοπής (3). ζυγοσταθµισµένο, θα πρέπει να ισορροπεί στη...
-
Page 271: Έλεγχος Θέσης Τοποθέτησης Του Συστήµατος Κοπής
Κρατήστε κόντρα το µαχαίρι κοπής ενώ Κατά τη στήριξη, φροντίστε το σφίγγετε τη βίδα µαχαιριού. εργαλείο να στηρίζεται κάτω µόνο ● MT 5112 Z, MT 6112 C, MT 6112 ZL, στον άξονα ή στον κοτσαδόρο. MT 6127 ZL: Ανασηκώστε το εργαλείο πιάνοντάς... - Page 272 ● Ενεργοποιήστε το φρένο στάθµευσης. Αφαίρεση τροχού: 8.14) ● Αφαιρέστε το κλειδί µίζας και φυλάξτε το σε ασφαλές µέρος. Τοποθετήστε τη σφήνα (6) στον πίσω άξονα τροχών. Περάστε τον τροχό (5 – Αφαιρέστε το κάλυµµα (1). Αφαιρέστε το βαλβίδα προς τα έξω) µε τον µικρό δακτύλιο...
-
Page 273: Πίεση Ελαστικών
Με τη βοήθεια ενός γρασαδόρου (δεν Υπόδειξη περιλαµβάνεται στο πλαίσιο παράδοσης), 15.16 Πίεση ελαστικών Πριν από τη λίπανση θα πρέπει να προσθέστε και στις δύο πλευρές µέσω των στηριχθεί σωστά ο µπροστινός Η σωστή πίεση ελαστικών αποτελεί θηλών λίπανσης (1) το γράσο, µέχρι αυτό άξονας. -
Page 274: Αφαίρεση Και Τοποθέτηση Μπαταρίας
Κλείσιµο θήκης µπαταρίας: ● Θέστε τον κινητήρα εσωτερικής καύσης Αποσύνδεση µπαταρίας: εκτός λειτουργίας. ( 13.3) ● Ενεργοποιήστε το φρένο στάθµευσης. 8.14) ● Αφαιρέστε το κλειδί µίζας και φυλάξτε το σε ασφαλές µέρος. ● Ανοίξτε τη θήκη µπαταρίας. ( 15.18) Θέση τοποθέτησης: Τοποθετήστε... -
Page 275: Ασφάλειες
να φορτίσετε την µπαταρία µε έναν Συνιστάται να απευθυνθείτε σε κατάλληλο φορτιστή πριν από την Στερεώστε το µαύρο καλώδιο (1) στον εµπορικό αντιπρόσωπο. Η VIKING τοποθέτηση. αρνητικό πόλο (-) της µπαταρίας µε τη προτείνει τον εµπορικό βίδα (2), τη ροδέλα (3) και το παξιµάδι (4). -
Page 276: Φόρτιση Της Μπαταρίας Από Την Υποδοχή Φορτιστή
15.21 Φόρτιση της µπαταρίας από την υποδοχή φορτιστή Στην υποδοχή φόρτισης µπορείτε να συνδέσετε τον φορτιστή VIKING ACB 010 ή το φορτιστή διάγνωσης VIKING ADL 012 (και τα δύο δεν περιλαµβάνονται στο πλαίσιο παράδοσης. Με το φορτιστή διατήρησης της VIKING ACB 010 µπορεί... -
Page 277: Αλλαγή Λαµπτήρα Προβολέα
λειτουργίας και συντήρησης που αναφέρονται στις συνηµµένες οδηγίες Συνδέστε στην υποδοχή φόρτισης (1) τον χρήσης του κινητήρα εσωτερικής καύσης. φορτιστή διατήρησης VIKING ACB 010 ή Ιδιαίτερη σηµασία για µεγάλη διάρκεια τον φορτιστή διάγνωσης VIKING ADL 012. ζωής έχει η σωστή στάθµη λιπαντικού, καθώς... -
Page 278: Φύλαξη
● Πραγµατοποιήστε την αλλαγή λιπαντικού κινητήρα (οδηγίες χρήσης 15.25 Φύλαξη 16. Μεταφορά κινητήρα εσωτερικής καύσης). ( 15.9) ● Αποθηκεύστε το εργαλείο σε ξηρό και ● Αφαιρέστε την µπαταρία. ( 15.19) καθαρό από σκόνες χώρο, µακριά από Κίνδυνος τραυµατισµών! παιδιά και άλλα άτοµα που δεν έχουν Πριν... -
Page 279: Συνηθισµένα Ανταλλακτικά
και µετά από προβλεπόµενη χρήση, Οι συσκευασίες, το εργαλείο και παρουσιάζουν φυσιολογική φθορά και θα τα πρόσθετα εξαρτήµατα MT 5112 Z, MT 6112 C, MT 6112 ZL: πρέπει να αντικατασταθούν εγκαίρως, κατασκευάζονται από ανακυκλώσιµα Μαχαίρι κοπής δεξιά: ανάλογα µε τον τρόπο και τη διάρκεια... -
Page 280: Πιστοποιητικό Συµβατότητας Ce Του Κατασκευαστή
– Μη προβλεπόµενη χρήση του µόνο ο χρήστης. MT 6112.1 ZL προϊόντος. MT 6127.1 ZL Εδώ συµπεριλαµβάνονται µεταξύ άλλων – Χρήση µη εγκεκριµένων από τη VIKING τα εξής: Αναγνώριση σειράς 6170 µέσων λειτουργίας (µέσα λίπανσης, εναρµονίζεται µε τις παρακάτω – ∆ιαβρώσεις και άλλες επακόλουθες... -
Page 281: Τεχνικά Στοιχεία
MT 5097.1: εγγράφων: Ύψος κοπής 8πλό 22. Τεχνικά στοιχεία Sven Zimmermann 30 - 100 mm VIKING GmbH Τροχοί µπροστά, 15x6.00-6, MT 5097.1, MT 5097.1 C, MT 5097.1 Z, Το έτος κατασκευής και ο αριθµός σειράς πίεση ελαστικών 0,8 - 1,0 bar MT 5112.1 Z, MT 6112.1 C,... - Page 282 MT 5097.1 C: MT 5097.1 C: MT 5097.1 Z: Ονοµαστική ισχύς 8,2 - 2750 Αναφερόµενες χαρακτηριστικές τιµές Κραδασµοί στο στον ονοµαστικό kW - στροφές/ ταλαντώσεων κατά EN 12096 κάθισµα (επιτάχυνση αριθµό στροφών λεπτό σε όλα το σώµα) a 0,98 m/s MT 5097.1 Z: Στροφές...
- Page 283 MT 5112.1 Z: MT 6112.1 C: MT 6112.1 ZL: Σύµφωνα µε την Οδηγία 2006/42/EC: Χωρητικότητα Κίνηση µπάρας χορτοσυλλέκτη 350 l µαχαιριού σύγχρονη Στάθµη ηχοπίεσης στη θέση εργασίας Βάρος µε σύστηµα Ύψος κοπής 8πλό 86 dB(A) κοπής και άδειο 30 - 110 mm χορτοσυλλέκτη...
- Page 284 MT 6127.1 ZL: MT 6127.1 ZL: Κυβισµός 725 ccm Αναφερόµενες χαρακτηριστικές τιµές ταλαντώσεων κατά EN 12096 Ονοµαστική ισχύς 14,7 - 3000 στον ονοµαστικό kW - στροφές/ αριθµό στροφών λεπτό Στροφές εξόδου 3000 στροφές/λεπτό Πλάτος κοπής 125 cm Κίνηση µπάρας µαχαιριού σύγχρονη...
-
Page 285: Ιαστάσεις
22.1 ∆ιαστάσεις MT 5097.1, MT 5097.1 C, MT 5097.1 Z, MT 5097.1, MT 5097.1 C, MT 5097.1 Z: MT 5112.1 Z, MT 6112.1 C: E=241,6 cm A=96,8 cm MT 5112.1 Z, MT 6112.1 C, MT 6112.1 ZL, MT 6127.1 ZL: MT 6112.1 ZL, MT 6127.1 ZL: A=98,7 cm E=260,3 cm... -
Page 286: Εντοπισµός Βλαβών
λειτουργία ή µειωµένη απόδοση κινητήρα – Τοποθετήστε το κάλυµµα µπουζί και Αναζητήστε ενδεχοµένως έναν εσωτερικής καύσης. ελέγξτε τη σύνδεση του καλωδίου µε το εµπορικό αντιπρόσωπο, η VIKING Πιθανή αιτία: µπουζί. ( ) προτείνει τον εµπορικό αντιπρόσωπο – Ύπαρξη νερού στο ρεζερβουάρ... - Page 287 – Σφίξτε τη στερέωση του κινητήρα εσωτερικής καύσης. ( ) Βλάβη: Βλάβη: – Αντικαταστήστε τον ιµάντα ή τον Το εργαλείο δεν κινείται. Ο αγωγός εξαγωγής έχει βουλώσει. οδοντωτό ιµάντα. ( ) Πιθανή αιτία: Πιθανή αιτία: – Έγινε αποσύµπλεξη του κιβωτίου –...
- Page 288 – Φθαρµένα ή στοµωµένα µαχαίρια – Πολύ µεγάλη ταχύτητα κίνησης. – Βλάβη στο διακόπτη επαφής του κοπής. καθίσµατος ή στο αντίστοιχο καλώδιο. Αντιµετώπιση: – Το χόρτο είναι πολύ ψηλό. – Καθαρίστε τον αισθητήρα στάθµης Αντιµετώπιση: – Τα ανοίγµατα εξαερισµού στο πλήρωσης...
-
Page 289: Πρόγραµµα Συντήρησης
Πιθανή αιτία: συντήρησης παραδώστε αυτές τις – Ο χορτοσυλλέκτης έχει γεµίσει. οδηγίες χρήσης στον εµπορικό – Βλάβη στο ηλεκτρονικό σύστηµα. αντιπρόσωπο VIKING. – Λανθασµένη σύνδεση των πόλων της Αυτός θα επιβεβαιώσει στα προ- µπαταρίας. τυπωµένα πεδία την εκτέλεση των Αντιµετώπιση: εργασιών... - Page 290 MT 5097, MT 5097 C, MT 5097 Z, MT 5112 Z MT 6112 C, MT 6112 ZL, MT 6127 ZL 0478 192 9807 C...
Need help?
Do you have a question about the MT 5112 Z and is the answer not in the manual?
Questions and answers
Hi do I have to remove the grass box to replace battery in on my t5viking
@Robert Wight Not really. There is a panel to the left of the seat, that you can prise up from the rear edge. The battery is inside. If it won't lift up, there is a bolt that holds a clip that grasps the panel, and that bolt is accessed from the grass box side. You would need to take the box off in that case.
Anular pare de motor al levantarse del asiento.
The purpose of the engine stop ring on the Viking MT 5112 Z is to stop the engine when the driver leaves the seat. If the seat contact switch is working, the combustion engine will shut off when the seat is raised.
This answer is automatically generated
Where is the starter, mower won’t start
Diagram of blade belt
what is the spark plug gap dimension
Viking t66112. Showing error message Won't start.
Error message on t66122 ride on Wot turn over