Table of Contents
Advertisement
Advertisement
Table of Contents

Subscribe to Our Youtube Channel
Related Manuals for Blackmagicdesign Universal Videohub 288


Summary of Contents for Blackmagicdesign Universal Videohub 288
- Page 1 Installation and Operation Manual Videohub Mac OS X ™ Windows ™ April 2014...
- Page 2 Videohub is easy to install, however there are a few slightly technical preferences you will need to set after you install it. Please check our web site at www.blackmagicdesign.com and click the support page to download the latest updates to this manual and Videohub software.
-
Page 3: Table Of Contents
Videohub Server Computer Settings Power Supply Integrated Videohub Server Settings Building Universal Videohub 288 Smart Videohub 20x20 and 12x12 Installing a Universal Videohub 288 Crosspoint Card Customizing Labels Installing Interface cards Router Input, Output and Monitoring Installing a Universal Videohub Power Supply... - Page 4 Contents Videohub Operation Manual Controlling Videohub with Hardware Universal Videohub Interface Cards Broadcast Videohub About Routing Levels Studio Videohub How to Select Sources and Destinations Compact Videohub Using Videohub Smart Control as a Cut-Bus Controller Smart Videohub 20x20 Using Videohub Smart Control as an XY Controller Micro Videohub Configuring GPIs Smart Videohub...
-
Page 5: Getting Started With Videohub Routers
These routers are for larger facilities and ship as empty rack frames into which you can install whichever interface cards you need, depending on how many devices you want to connect. Universal Videohub 288 can route video over SDI and Optical interface cards to up to 288 destinations as well as control up to 72 devices remotely. -
Page 6: Choosing A Videohub Router
Maximum Optical RS-422 Deck Videohub Router Rack Units Inputs Outputs IN/OUT Control Ports Ethernet RS-422 Universal Videohub 72 Required Universal Videohub 288 √ √ √ Universal Videohub 72 √ √ √ Broadcast Videohub √ Studio Videohub √ Compact Videohub √... -
Page 7: Connect To A Videohub Server With Usb
Step 2. Connect your Videohub router to the network switch with a standard RJ45 Ethernet cable. If you have a Universal Videohub 288 populated with two Crosspoint Cards, connect Ethernet cables to both for network failover redundancy. Your Universal Videohub 288 will have a single IP address, despite having two Ethernet connections to the network switch. -
Page 8: Plugging In Video
Getting Started with Videohub Routers Plugging in Video All SDI connections support auto detection of SD, HD or 3G-SDI, and reclocking on all SDI outputs. Additionally, both the Smart Videohub 20x20 and Smart Videohub 12x12 also support 6G-SDI for UltraHD 4K video. - Page 9 Getting Started with Videohub Routers Installing the Videohub Software on iPad The Videohub app for iPad can be downloaded using your iTunes Store account. To download on your computer: Step 1. Launch iTunes on your Mac OS X or Windows computer and click on iTunes Store button. Step 2.
-
Page 10: Configuring Your Videohub
Getting Started with Videohub Routers 10 10 Configuring your Videohub Videohub Server Computer Settings A Videohub Server will need a static IP address so that the other Videohub clients on the network can always find it. Your network administrator will probably want to configure this for you. When using a Videohub Server computer, note its static IP address as you will need to enter this into the Videohub Server Preferences on each of the client computers running Videohub software. -
Page 11: Integrated Videohub Server Settings
Getting Started with Videohub Routers 11 11 The Videohub Server connection settings are used to specify the address of the Videohub Server. This can be accessed through the Connection Settings window in Mac OS X and Windows. If you are configuring these settings on a Videohub Server computer, enable the option to Use Locally Connected Videohub. -
Page 12: Customizing Labels
Getting Started with Videohub Routers 12 12 Customizing Labels Router Input, Output and Monitoring Customize Labels is where you enter labels for each device you connect to the Videohub. These labels are saved on the Videohub server and will be seen by all clients. Launch the Blackmagic Videohub application and select "Customize Labels..."... -
Page 13: Getting Started With Videohub Controllers
Getting Started with Videohub Controllers Getting Started with Videohub Controllers 13 13 Introducing Videohub Controllers Videohub Master Control Videohub Master Control is a rack-mountable control panel with 30 backlit pushbuttons, LCD, scroll wheel Videohub Master Control and Ethernet connectivity designed to perform Videohub crosspoint switching without using a computer. Videohub Master Control can control all sources and destinations for any size of Videohub router, as well as RS-422 deck control. -
Page 14: Choosing A Videohub Controller
Getting Started with Videohub Controllers 14 14 Choosing a Videohub Controller Check this table for an overview of each Videohub controller's capabilities to help you decide which model you will need. You can plan how to set it up so there are no nasty surprises. Videohub Power Source Configuration... -
Page 15: Plugging In Usb
Getting Started with Videohub Controllers 15 15 Plugging in USB A USB 2.0 connection to a computer is used to configure the network settings of the Videohub Controller. Be aware that the USB port of the Videohub Smart Control is inaccessible once it is installed in a rack. If you are likely to reconfigure Videohub Smart Control network settings periodically, then it may be convenient to permanently connect a USB cable to the unit before installing Videohub Smart Control in a rack. -
Page 16: Control Panel Button Diagnostics
Getting Started with Videohub Controllers 16 16 Control Panel Button Diagnostics When power is first connected to a Videohub control panel, all the buttons will display their test lights in the following sequence: red, green, blue and white. The top left button of a Videohub control panel indicates its network status, using the following diagnostic Videohub control panel is attempting to acquire an IP address display: Pink flashing light - unit is attempting to acquire an IP address. -
Page 17: Installing The Videohub Control Utility Software
Getting Started with Videohub Controllers 17 17 Installing the Videohub Control Utility Software The Blackmagic Videohub Control Utility software is used to configure settings in Videohub Master Control, Videohub Smart Control and the GPI and Tally Interface. Videohub Control Utility runs on the latest Lion and Mountain Lion versions of Mac OS X, 32 and 64-bit versions of Windows 7 and Windows 8. -
Page 18: Setting Up Your Videohub Controller
Getting Started with Videohub Controllers 18 18 Setting up your Videohub Controller Configuring the Videohub Control Utility When you launch Blackmagic Videohub Control Utility, any Videohub control panels discovered on the network will be listed in the Videohub Control Panels pane next to an Ethernet network icon. If several Videohub control panels are listed, but you don't know which one is which, select one of them and then press Identify. -
Page 19: Configuring Videohub Master Control
Getting Started with Videohub Controllers 19 19 Add Videohub Control If you already know the IP address of a Videohub control panel but it hasn't automatically appeared in the Videohub Control Panels pane, you can add the unit manually. Step 1. Press the + (add device) button at the bottom of the Videohub Control Panels pane. Step 2. -
Page 20: Configuring Videohub Smart Control
Getting Started with Videohub Controllers 20 20 You are now ready to label the Videohub Master Control buttons. Step 1. Launch the Videohub Control Utility and select your Videohub Master Control from the Panels pane. Step 2. Click one of the 15 buttons in the picture of the panel. Enter a text label so it partially matches the labels of SDI and deck control ports that you previously entered for your router. - Page 21 Getting Started with Videohub Controllers 21 21 XY Controller Configuration Step 1. Drag the Number of Destinations slider to the desired number. Step 2. You can now configure the destination buttons by clicking on each gold button in the software interface.
-
Page 22: Setting Up The Gpi And Tally Interface
Getting Started with Videohub Controllers 22 22 Setting up the GPI and Tally Interface The GPI and Tally Interface is configured using the Videohub Control Utility software. Before you can use the GPI and Tally Interface, you may need to install the latest version of the Videohub Control Utility. Step 1. -
Page 23: Labeling Pushbuttons
Getting Started with Videohub Controllers 23 23 Labeling Pushbuttons Videohub Master Control and Videohub Smart Control have removable face plates, which provide access to the pushbuttons for labeling. Included with the software installer is a Videohub Control Labels folder containing both PDF and Adobe Illustrator template files. -
Page 24: Using Videohub Routers
The Videohub firmware update utility runs on Mac OS X and Windows computers and uses a USB 2.0 USB DIAGNOSTIC USB DIAGNOSTIC connection to Universal Videohub 288. You will need to provide a USB 2.0 type A to mini B male cable. ETHERNET ETHERNET... -
Page 25: Universal Videohub 288 Crosspoint Card
A Power Overload light will illuminate on the card if inadequate power is being supplied to the unit for the number of cards installed. You will need a number 01 size Pozidriv screwdriver to install the Universal Videohub 288 Crosspoint card. Router Control Cable Remote router control is performed via 10/100Base-T Ethernet or serial. -
Page 26: Building Universal Videohub
Installing a Universal Videohub 288 Crosspoint Card Now that your Universal Videohub 288 has been mounted in a rack, it needs to be fitted with a crosspoint card. The crosspoint card is the brains of Universal Videohub and performs video route and deck control switching. -
Page 27: Installing Interface Cards
Step 5: Connect an IEC cord from each power supply to a mains wall socket and turn on the power. Congratulations! Your Universal Videohub 288 is now ready to start routing video! The Universal Videohub Power Supply consists of a power... -
Page 28: Installing A Universal Videohub 450W Power Card
Videohub 450W Power Card. You will need to connect 3 power supplies for each Universal Videohub 450W Power Card you install in a Universal Videohub 288. You will need to provide a standard IEC cord with a C13 connector for each power supply. - Page 29 Step 6. Connect an IEC cord from the new power supply to the wall socket and turn on the power. Removing a Power Supply while Universal Videohub 288 is running If you need to remove a faulty power supply while Universal Videohub 288 is running from another power supply, please carry out the removal procedure in the following order: Step 1.
-
Page 30: Installing A Universal Videohub 72 Crosspoint Card
Universal Videohub 288. When using a Universal Videohub 72 Crosspoint card, only the bottom row of 18 interface cards can be used. A Universal Videohub 288 Crosspoint card must be used if you want to install more than 18 interface cards. - Page 31 The silver catches shown at "B" should not be removed. They will be required if installing a Universal Videohub 288 Crosspoint card in the right crosspoint card slot in the future.
-
Page 32: Universal Videohub 72
Using Videohub Routers 32 32 Universal Videohub 72 MAIN POWER +12V ALARM What you need to get started POWER OVERLOAD REF IN Universal Videohub 72 is a medium-sized modular router ideal for growing facilities. It features an 18 card RS-422 CONTROL rack frame that can be filled with any combination of BNC SDI or optical fiber SDI interface cards. -
Page 33: Universal Videohub 72 Crosspoint Card
The high power supply designed for Universal Videohub 288 is ill-suited to Universal Videohub 72 because it doesn't provide power redundancy to Universal Videohub 72, is more expensive and requires an additional 1 RU of space below Universal Videohub 72. -
Page 34: Building Videohub 72
Using Videohub Routers 34 34 Building Videohub 72 9 rack units of space should be reserved for the installation of Universal Videohub 72 including access space for the drop-down fan tray as well as free space for heat dissipation. Only 7 RU is required if Universal Videohub 72 is mounted at the top of an open rack. -
Page 35: Installing A Universal Videohub 450W Power Card
Using Videohub Routers 35 35 Installing a Universal Videohub 450W Power Card The Universal Videohub 450W Power Card features three power connectors, which can be connected to 150W power supply bricks for up to 450W of power. This power card is suitable for powering a fully populated Universal Videohub 72 with two power supplies connected. -
Page 36: Sdi Interface Card
Using Videohub Routers 36 36 SDI Interface Card SDI interface cards feature 4 SDI inputs, 4 SDI outputs and a connector for a Universal Videohub Deck Control Cable. All SDI connections support auto detection of SD, HD or 3G-SDI, and reclocking on all SDI outputs. -
Page 37: Universal Videohub Interface Cards
Using Videohub Routers 37 37 Universal Videohub Interface Cards Universal Videohub Universal Videohub SDI Interface Optical Interface Activity light Activity light MAIN POWER MAIN POWER MAIN POWER +12V 800W +12V +12V 800W Output 1 Output 1 Input 1 Output 2 ALARM POWER OVERLOAD Output 3... -
Page 38: Broadcast Videohub
Using Videohub Routers 38 38 Broadcast Videohub Broadcast Videohub is perfect for large facilities. It features 72 SDI inputs, 144 SDI outputs, 72 bidirectional RS-422 deck control ports, reference input, redundant power supplies and powerful Videohub routing control software for Mac OS X and Windows. All SDI connections support auto detection of SD, HD or 3G-SDI, and reclocking on all SDI inputs. -
Page 39: Studio Videohub
Using Videohub Routers 39 39 Studio Videohub Studio Videohub is perfect for smaller workgroups. It features 16 SDI inputs, 32 SDI outputs, 16 bidirectional RS-422 deck control ports, reference input, a universal power supply and powerful Videohub routing control software for Mac OS X and Windows. All SDI connections support auto detection of SD, HD or 3G-SDI, and reclocking on all SDI inputs. -
Page 40: Compact Videohub
Using Videohub Routers 40 40 Compact Videohub Compact Videohub is a small router and is perfect when you need a bigger router in a small size, such as in creative post facilities and broadcast trucks. It features 40 SDI inputs, 40 SDI outputs, reference input, redundant power supply connections and powerful Videohub routing control software. -
Page 41: Smart Videohub 20X20
Using Videohub Routers 41 41 Smart Videohub 20x20 MENU Smart Videohub 20 x 20 DEST VIDEO CLEAR TAKE Smart Videohub 20x20 is a tiny router with a built in control panel and LCD and is perfect for locations where minimal space is available, such as outside broadcast trucks. It features 20 SDI inputs, 20 SDI outputs, RS-422 REF IN CNTRL... - Page 42 Using Videohub Routers 42 42 Using Smart Videohub 20x20 Control Panel and LCD MENU Smart Videohub 20x20 features a built in control panel and LCD. Routing changes can be made without needing a computer by simply using the numbered pushbuttons. Remote router control can also be used. DEST VIDEO Menu Buttons Explained...
-
Page 43: Micro Videohub
Using Videohub Routers 43 43 Micro Videohub Micro Videohub is a tiny router and is perfect for locations where minimal space is available, such as outside broadcast trucks. It features 16 SDI inputs, 16 SDI outputs, reference input, a universal power supply and powerful Videohub routing control software for Mac OS X and Windows. -
Page 44: Smart Videohub
Using Videohub Routers 44 44 Smart Videohub Smart Videohub is a tiny router with a built in control panel for changing routes and is perfect for locations where minimal space is available, such as outside broadcast trucks. It features 16 SDI inputs, 16 SDI outputs, reference input, a universal power supply and powerful Videohub routing control software. - Page 45 Using Videohub Routers 45 45 Using Smart Videohub's Control Panel Smart Videohub features a built in 32 pushbutton control panel on the front of the router. Routing changes can be made without needing a computer as there is a pushbutton for each SDI input and output on Smart Videohub.
-
Page 46: Smart Videohub 12X12
Using Videohub Routers 46 46 Smart Videohub 12x12 MENU Smart Videohub 12 x 12 DEST VIDEO CLEAR TAKE Smart Videohub 12x12 is a tiny router with a built in control panel and LCD and is perfect for locations where minimal space is available, such as outside broadcast trucks. It features 12 SDI inputs, 12 SDI outputs, RS-422 REF IN CNTRL... - Page 47 Using Videohub Routers 47 47 Using Smart Videohub 12x12 Control Panel and LCD MENU Smart Videohub 12x12 features a built in control panel and LCD. Routing changes can be made without needing a computer by simply using the numbered pushbuttons. Remote router control can also be used. DEST VIDEO Menu Buttons Explained...
-
Page 48: Controlling Videohub With Software
Controlling Videohub with Software Controlling Videohub with Software 48 48 Main Router Control Monitoring SDI outputs After launching the Videohub application, the Main Router Control window will be displayed. The window is split into three distinct areas: 1. Main Output Connections Controls routing for the Destination SDI outputs. - Page 49 On the Broadcast Videohub, one input could be sent to as many as 72 outputs, while on the Universal Videohub 288, one input could be sent to as many as 288 outputs! RS-422 deck control can be routed on some Videohub models that feature RS-422 remote ports.
-
Page 50: Using Software Control Panels
Using Software Control Panels Using Software Control Panels Pushbutton views The Main Router Control view is the best place for a system administrator to configure and label all the connections on any Videohub. However most users do not need or want to see all connections all of the time. - Page 51 Using Software Control Panels Pushbutton View at a Glance Simple and easy to understand icons Title Bar shows Arrow buttons allow which type of you to move through Videohub you your Source screens are using This button is reserved by Videohub for when a destination is connected to a source which does not appear...
- Page 52 Using Software Control Panels There are several Pushbutton views available for displays of different resolutions: ‚ Full Screen 24” Pushbutton - requires a 1920 x 1200, or 1920 x 1080 widescreen display such as a typical 24” computer display or a large high definition display. This view can display up to 55 sources and 11 destinations in a single screen, or any number of sources and destinations by using the left and right arrow buttons to move through screens.
- Page 53 Using Software Control Panels After installing Videohub software, launch the Blackmagic Videohub application and choose a Pushbutton view, to match the size of your computer display. This page of the Videohub manual shows the Full Screen 24” Pushbutton view being used with a Broadcast Videohub. All pushbuttons initially show the generic icon of a BNC connector which you can then replace from a selection of icons.
- Page 54 Using Software Control Panels If the Input, Output and Remote connections have not yet been labeled in Main Router Control view, then the source pushbuttons will appear as Input 1 to Input 55 and the destination pushbuttons will appear as Output 1 to Output 11.
- Page 55 Using Software Control Panels Configuring Pushbuttons is easy. Move the mouse to the top-right corner of any Videohub pushbutton to reveal an i icon. Clicking the i icon will open the Videohub Button Setup window which allows one to set the SDI input or output connection, RS-422 deck control and the icon for the pushbutton.
- Page 56 Using Software Control Panels The smaller Pushbutton views show the top-left portion of the largest Pushbutton view to ensure that button layouts will not change when switched between Pushbutton views. Users who regularly switch between Full Screen and Personal Pushbutton views should group the most commonly used video sources in the top left of the Full Screen Pushbutton view so they will be visible in Personal Pushbutton view.
- Page 57 Using Software Control Panels When using a Full Screen Pushbutton view, you may choose to show multiple instances of a source or destination pushbutton. The example pictured on this page shows a Studio Videohub with all of its inputs configured in the first rows of the Pushbutton view. Some of the same inputs have been duplicated and then grouped together, with devices of the same type, enabling them to be quickly located, e.g.
- Page 58 Using Software Control Panels In order to see which video source has been routed to a video destination, such as a video monitor, press the video monitor button in the destinations panel to make the button illuminate. Simultaneously the associated video source button will illuminate in the sources panel, making it immediately obvious which video source is connected to the video monitor, e.g.
- Page 59 Using Software Control Panels Locking and Unlocking Routes Locking a destination will avoid accidentally changing the video source which is routed to that destination. To lock a route between an input and an output, double-click the destination pushbutton. A yellow padlock icon will appear in the top-left corner of the destination pushbutton and will prevent anyone else from using the destination device until it is unlocked from your computer.
-
Page 60: Touchscreen Computers
Using Software Control Panels Touchscreen Computers The Pushbutton views are designed to be easy to use and look beautiful on a large, touchscreen display. Dedicating a touchscreen computer to the Videohub Pushbutton interface makes it incredibly easy for users to switch connections between multiple SDI devices without having to see every connected device all of the time. -
Page 61: Apple Ipad
Using Software Control Panels Apple iPad The Videohub Pushbutton controller interface looks stunning on the high resolution Apple iPad display. Aside from looking great, it also provides the convenience of portable router control anywhere in your facility or even over the Internet via a wireless or cellular connection! If you are already familiar with the Videohub Pushbutton interface on a computer, then there is almost nothing new you need to learn and you’ll only notice slight differences between computer mouse control and touchscreen control on the iPad. - Page 62 Using Software Control Panels You may choose to show a particular source or destination pushbutton several times within the one Pushbutton screen or on multiple Pushbutton screens. If a destination pushbutton is routed from a source that appears multiple times in the Sources panel, selecting the destination pushbutton will illuminate all instances of the source pushbutton, regardless of how deck control has been configured for each source pushbutton.
-
Page 63: Controlling Videohub With Hardware
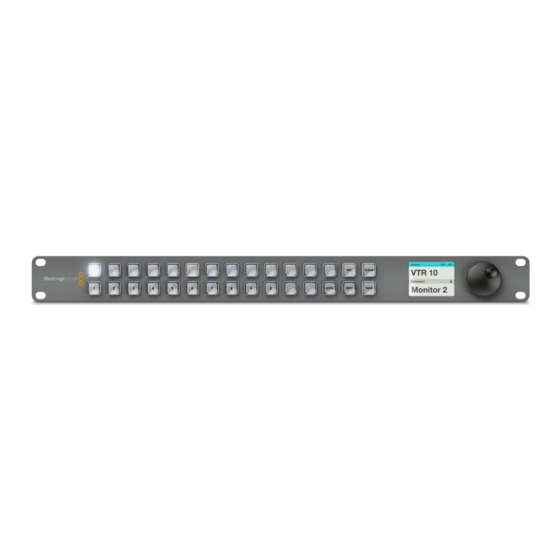
Controlling Videohub with Hardware Controlling Videohub with Hardware 63 63 About Routing Levels Source SDI 422 CLEAR VTR 10 Destination Monitor 2 LEVEL DEST TAKE If your Videohub does not feature RS-422 remote deck control, Videohub Master Control will always show Front panel showing a new source has been selected. - Page 64 Controlling Videohub with Hardware 64 64 How to select devices by typing the Videohub port numbers Source If you've chosen to keep the default labels for all Videohub SDI and remote ports, you can simply type the Input 52 CLEAR port numbers to make a routing change.
- Page 65 Controlling Videohub with Hardware 65 65 How to select devices using the customizable buttons and scroll wheel If you have customized the Videohub port labels, you can use the customizable buttons and scroll wheel together to find a short list of sources and destinations. This method is fast and intuitive because you only have to scroll through a short list of equipment and you don't have to remember any port numbers.
- Page 66 Controlling Videohub with Hardware 66 66 How to select devices using the numeric buttons and scroll wheel If you have customized the Videohub port labels with numbers, you can use the numeric buttons and scroll wheel together to find a short list of sources and destinations. This method is fast and intuitive because you only have to scroll through a short list of equipment and you don't have to remember any port numbers.
- Page 67 Controlling Videohub with Hardware 67 67 How to select devices using the customizable and numeric buttons together Source If you have customized the Videohub port labels with names and numbers, you can use the customizable Edit 3 CLEAR buttons and numeric buttons together to directly select sources and destinations. This method is very fast Destination and intuitive because you don't have to scroll through a list of equipment and you only have to remember VTR 1...
- Page 68 Controlling Videohub with Hardware 68 68 Locking and Unlocking Routes Source SDI 422 Videohub Master Control can lock and unlock any route on your Videohub. In contrast to Videohub Smart Edit 1 CLEAR Control, Videohub Master Control can also unlock any destinations locked by other people using their Destination computer, iPad or Videohub Smart Control.
-
Page 69: Using Videohub Smart Control As A Cut-Bus Controller
Controlling Videohub with Hardware 69 69 Using Videohub Smart Control as a Cut-Bus Controller If Videohub Smart Control has been configured as a Cut-Bus controller, the destination device has already been chosen and you only need to choose a video source. Step 1. -
Page 70: Configuring Gpis
Controlling Videohub with Hardware 70 70 Configuring GPIs The GPI and Tally Interface has 8 GPIs that provide crosspoint switching. In the example on the left, if GPI 1 detects a contact closure it will switch Input 12 on your Videohub to Output 1. This means when you switch the joystick control on your CCU, video going to Input 12 of your Videohub will be previewed on your monitor. - Page 71 Controlling Videohub with Hardware 71 71 Daisy Chaining Multiple GPI and Tally Interfaces The GPI and Tally Interface supports 8 GPIs and 8 GPOs at a time, which should be enough for most live television situations. However, if you have more than 8 cameras then you may want to daisy chain a second GPI OUT GPI IN 1 GPI OUT...
-
Page 72: Help
After checking the version of your Videohub Software Control on your computer, please visit the Blackmagic Support Center at www.blackmagicdesign.com/support to check for the latest updates. While it is usually a good idea to run the latest updates, it is a wise practice to avoid updating any software if you are in the... - Page 73 Help Replacing a fan in Universal Videohub Each fan is designed to be replaced without needing to switch off power to Videohub. Step 1. Locate the fan tray at the base of the unit. Step 2. Using a number 01 Phillips head screwdriver, remove the left and right screws from the fan tray. Step 3.
- Page 74 Help Replacing the fan in Broadcast Videohub or Enterprise Videohub The Broadcast Videohub and Enterprise Videohub packages include a spare fan in case the pre-installed fan stops working or becomes noisy. Videohub will continue to work even if the fan stops running. However, a working fan will help to extend the life of the Videohub for many years and we recommend the fan be replaced if it should ever stop running.
-
Page 75: Developer Information
Developer Information Developer Information Blackmagic Videohub Ethernet Protocol v2.3 Summary The Blackmagic Videohub Ethernet Protocol is a text based protocol that is accessed by connecting to TCP port 9990 on a Videohub Server. Integrated Videohub Servers and Videohub Server computers are supported by the protocol. - Page 76 Developer Information If the Videohub Server has no device connected, the block will simply be: VIDEOHUB DEVICE:↵ Device present: false↵ ↵ If a device is present, but has an incompatible firmware, the status reported will be: VIDEOHUB DEVICE:↵ Device present: needs_update↵ ↵...
- Page 77 Developer Information The next three blocks describe the routing of the output, monitoring and serial ports. VIDEO OUTPUT ROUTING:↵ 0 5↵ 1 3↵ … ↵ VIDEO MONITORING OUTPUT ROUTING:↵ 0 7↵ 1 8↵ … ↵ SERIAL PORT ROUTING:↵ 0 12↵ 1 11↵...
- Page 78 Developer Information The next three blocks describe the locking status of the output, monitoring and serial ports. Each port has a lock status of “O” for ports that are owned by the current client (i.e., locked from the same IP address), “L” for ports that are locked from a different client, or “U”...
- Page 79 Developer Information Videohubs with serial ports next send a block which describes the direction of each serial port. Each port has a direction of either "control" for the "In (Workstation)" setting, "slave" for "Out (Deck)", or "auto" for "Automatic". SERIAL PORT DIRECTIONS:↵ 0 control↵...
- Page 80 Developer Information Status Updates When any route, label, or lock is changed on the Videohub Server by any client, the Videohub Server resends the applicable status block, containing only the items that have changed. For example, if serial port 6 has been unlocked, the following block will be sent: SERIAL PORT LOCKS:↵...
- Page 81 Developer Information In the absence of simultaneous updates, the dialog expected for a simple label change is as follows: OUTPUT LABELS:↵ 6 new output label seven↵ ↵ ACK↵ ↵ OUTPUT LABELS:↵ 6 new output label seven↵ ↵ The asynchronous nature of the responses means that a client should never rely on the desired update actually occurring and must simply watch for status updates from the Videohub Server and use only these to update its local representation of the server state.
- Page 82 Developer Information Requesting a Status Dump The client may request that the Videohub Server resend the complete state of any status block by sending the header of the block, followed by a blank line. In the following example, the client requests the Videohub Server resend the output labels: OUTPUT LABELS:↵...
-
Page 83: Using Telnet To Save And Load Labels
Developer Information Using Telnet to Save and Load Labels To enable Telnet command line utilities on Windows 7 and 8, click Start > Control Panel > Programs and Features and check the Telnet Client check box. When you click OK the system will install the appropriate files. -
Page 84: Videohub Rs-422 Protocol
Developer Information Videohub RS-422 Protocol General The RS-422 protocol can be used to control many Videohub models as RS-422 slave devices, for router crosspoint switching. This feature is available on any Videohub model with an "RS-422 Control" port. In "server" mode, these Videohub models implement the router (server) side of the Leitch Serial Pass-Through Protocol as specified in section 4 of Leitch document SPR-MAN revision D. - Page 85 Developer Information Notifications Once connected, if status reporting is enabled, the client will receive a notification message when a route changes on the Videohub Server. The notifications take one of two forms: Routing change S:0destination,source This message indicates that the specified source port is now routed to the specified destination. Preset routing notification V:0destination,source This message indicates that the current preset includes a route from the specified source to the specified...
- Page 86 Developer Information Salvo Commands queue route change P:0/destination,source … queue multiple route changes P:0/destination,source/destination-2,source-2 The specified routing changes are added to the current salvo for later execution. request individual port status in salvo P?0destination If a routing change for the specified destination port is queued, the route will be returned as a notification.
-
Page 87: Warranty
Warranty Warranty Limited Warranty Blackmagic Design warrants that Videohub routers will be free from defects in materials and workmanship for a period of 36 months from the date of purchase excluding connectors, cables, cooling fans, fiber optic modules, fuses, keyboards and batteries which will be free from defects in materials and workmanship for a period of 12 months from the date of purchase.
Need help?
Do you have a question about the Universal Videohub 288 and is the answer not in the manual?
Questions and answers