Sign In
Upload
Download
Table of Contents
Contents
Add to my manuals
Delete from my manuals
Share
URL of this page:
HTML Link:
Bookmark this page
Add
Manual will be automatically added to "My Manuals"
Print this page
×
Bookmark added
×
Added to my manuals
Manuals
Brands
Blackmagicdesign Manuals
Switch
Universal Videohub 288
Installation and operation manual
Blackmagicdesign Videohub 288 Installation And Operation Manual
Hide thumbs
Also See for Videohub 288
:
Installation and operation manual
(87 pages)
1
2
Table Of Contents
3
4
5
6
7
8
9
10
11
12
13
14
15
16
17
18
19
20
21
22
23
24
25
26
27
28
29
30
31
32
33
34
35
36
37
38
39
40
41
42
43
44
45
46
47
48
49
50
51
52
53
54
55
56
57
58
59
60
61
62
63
64
65
66
67
68
69
70
71
72
73
74
75
76
77
78
79
80
81
82
83
84
85
86
87
88
89
90
91
92
93
94
95
96
97
98
99
100
101
102
103
104
105
106
107
page
of
107
Go
/
107
Contents
Table of Contents
Bookmarks
Table of Contents
Table of Contents
Planning Your Videohub Installation
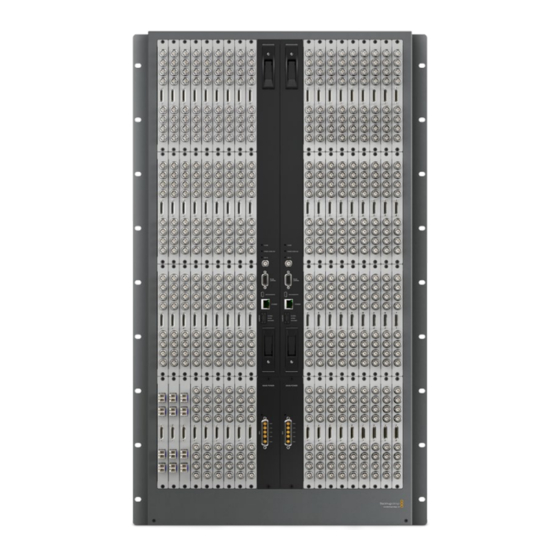
Universal Videohub 288
Universal Videohub 72
Broadcast Videohub
Studio Videohub
Compact Videohub
Micro Videohub
Smart Videohub
Videohub Smart Control
Hardware Installation
Building a Universal Videohub 288
Building a Universal Videohub 72
Networking Videohub with Ethernet
Networking Videohub with USB
Networking Videohub Smart Control with Ethernet
Connecting Videohub Smart Control Via USB
Labelling Control Panels
Tips for Connecting SDI Cables
Software Installation
Installing the Videohub Software
Configuring the Videohub Software
Installing the Videohub Smart Control Software
Configuring the Videohub Smart Control Software
Installing the Videohub App on an Apple Ipad
Configuring the Videohub App on an Ipad
Using Hardware Control Panels
Using Smart Videohub's Control Panel
Using Videohub Smart Control
Using Software Control Panels
Router Control Views
Pushbutton Views
Touchscreen Computers
Apple Ipad
Help
Workflows
Videohub Workflows
Videohub and Sync
Developer Information
Blackmagic 2K Format
Videohub Ethernet Protocol V2.2
Videohub RS-422 Protocol
Universal Videohub 288 SDI Connection Chart
Universal Videohub 72 SDI Connection Chart
Advertisement
Quick Links
1
Universal Videohub 288
2
Universal Videohub 72
3
Building a Universal Videohub 288
Download this manual
Installation and Operation Manual
Videohub
Mac OS X
™
Windows
™
October 2011
Table of
Contents
Previous
Page
Next
Page
1
2
3
4
5
Advertisement
Table of Contents
Need help?
Do you have a question about the Videohub 288 and is the answer not in the manual?
Ask a question
Questions and answers
Related Manuals for Blackmagicdesign Videohub 288
Switch Blackmagicdesign Universal Videohub 288 Installation And Operation Manual
Broadcasting device (87 pages)
Switch Blackmagicdesign Videohub Installation And Operation Manual
(119 pages)
Switch Blackmagicdesign Videohub Installation And Operation Manual
(89 pages)
Switch Blackmagicdesign Videohub 72 Installation And Operation Manual
(107 pages)
Switch Blackmagicdesign ATEM Production Studio 4K Installation And Operation Manual
Atem series (1673 pages)
Switch Blackmagicdesign ATEM Television Studio Installation And Operation Manual
Production switchers (95 pages)
Switch Blackmagicdesign ATEM Live Installation And Operation Manual
Production switchers (2267 pages)
Switch Blackmagicdesign ATEM Installation And Operation Manual
Television studio switchers (225 pages)
Switch Blackmagicdesign Ethernet Switch 360P Operation Manual
(391 pages)
This manual is also suitable for:
Videohub 72
Table of Contents
Print
Rename the bookmark
Delete bookmark?
Delete from my manuals?
Login
Sign In
OR
Sign in with Facebook
Sign in with Google
Upload manual
Upload from disk
Upload from URL


Need help?
Do you have a question about the Videohub 288 and is the answer not in the manual?
Questions and answers