Table of Contents
Advertisement
Quick Links
Download this manual
See also:
Owner's Manual
Advertisement
Table of Contents

Related Manuals for LG LVW900


Summary of Contents for LG LVW900
-
Page 1: User Manual
Network Dome Camera User Manual MODEL: LVW900 LVW901 Before connecting, operating or adjusting this product, please read this user manual carefully and completely. AB28... - Page 2 REGULATORY INFORMATION: FCC Part 15 CAUTION This equipment has been tested and found to comply with the lim- its for a Class A digital device, pursuant to Part 15 of the FCC Rules. RISK OF ELECTRIC SHOCK These limits are designed to provide reasonable protection against DO NOT OPEN harmful interference when the equipment is operated in a commer- cial environment.
- Page 3 Warning: This is a class A product. In a domestic environment this European representative : product may cause radio interference in which case the user may be LG Electronics Service Europe B.V. required to take adequate measures. Veluwezoom 15, 1327 AE Almere,...
-
Page 4: Important Safety Instructions
IMPORTANT SAFETY INSTRUCTIONS 1. Read these instructions. 12. Use only with the cart, stand, tripod, bracket, or table specified by the manufacturer, or sold with the apparatus. When a cart is 2. Keep these instructions. used, use caution when moving the cart/apparatus combination 3. - Page 5 Cautions for Safe Operation Handling of the unit Operating and storage location Be careful not to spill water or other liquids on the unit. Be cautions Avoid viewing a very bright object (such as light fittings) during an not to get combustible or metallic material inside the body. If used extended period.
-
Page 6: Table Of Contents
Mounting the camera ...............15 Operation and settings ............... 22 Before using the system ..............22 Recommended PC Requirements ..........22 Accessing the LG IP device..............22 LG Smart Web Viewer Overview ...........24 Confi guring the LG IP camera ............25 OSD Menu Setup ................41 Contents... -
Page 7: Introduction
Introduction The LG Network Dome Camera is designed to use on an Ethernet Features Chart network and must be assigned an IP address to make it accessible. This table shows the differences between the models. This manual contains instructions on how to install and manage the Use LVW901 is used for the description, operations and details pro- LG Network Dome Camera in your networking environment. -
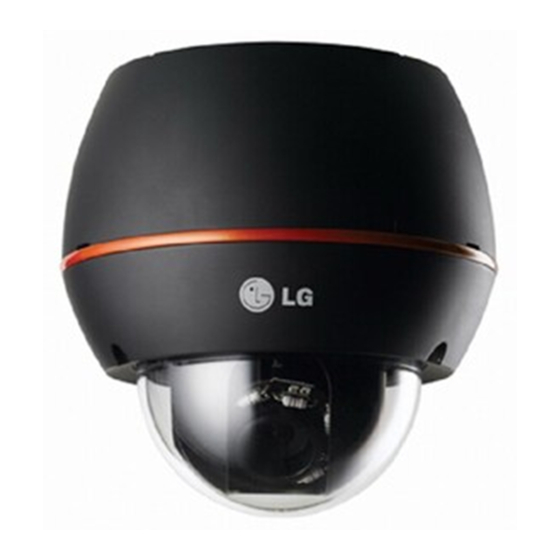
Page 8: Part Names And Functions
Part names and Functions Pan lock screw Fixes the panning position after adjusting. Zoom lock lever Fixes the zoom position after adjusting. Focus lock lever Fixes the focus position after adjusting. Heater Heater is thermostatically controlled to activated at <15 ºC (Dome inside) Fall Prevention rubber band Fixes the rubber band into the dome cover. - Page 9 ETHERNET/POE Port Connects to a PC or a network via a hub with a 10BASE- T/100BASE-TX cable attached RJ-45 connector. Note: Power over Ethernet (PoE) is a technology that integrates power into a standard LAN infrastructure. It enables power to be provided to the network device, such as a network camera, using the same cable as that used for network connection.
-
Page 10: Connections
Connections Precautions • Be sure to switch off the unit before installation and connection. • The installation should be made by qualified service personnel or system installers. • Do not expose the power and connection cables to moisture, which may cause damage to the unit. Connection Overview PoE Device PoE Device... -
Page 11: Connecting Network
Connecting Network You can control and monitor the system via network. With the remote control (monitoring), you can change the system configuration or monitor the image via network. After the installation, check the network settings for the remote control and monitoring work. Connect the IP camera to your network using a standard RJ-45 network cable as shown below. -
Page 12: Connecting Power Source
Connecting Power Source Connect power, using one of the methods listed below: To use the power adapter Connect a DC 12 V / AC 24 V power source to the power input terminal as shown below. (Connect to the DC 12 V / AC 24 V UL Listed, Class 2 Power Supply only on the unit. ) To use the PoE (Power over Ethernet) device Connect the PoE cable to the LAN port on the unit. -
Page 13: Connecting Alarm Device
Connecting Alarm Device Alarm terminals are used to connect the alarm (relay) devices such as sensors, door switches, etc. ALARM IN / ALARM IN RETURN (Sensor Input) Connect the sensor device to the sensor input terminal. GREEN BLACK Sensor Device ALARM OUT / ALARM OUT RETURN (Relay Output) Connect the alarm (relay) device to the relay output terminal. -
Page 14: Connecting Microphone And Speaker Device
Connecting Microphone and Speaker Device Optionally connect an active speaker and/or external microphone with a built-in amplifier. AUDIO OUT AUDIO IN Note: Keep the microphone away from the speaker to avoid howling. Connections... -
Page 15: Mounting The Camera
Mounting the camera 3. Fasten the camera assembly bracket to the ceiling. You can mount the camera on a ceiling or wall. Surface mount Follow the instructions below to surface mount the camera. 1. Use the installation guide template to check the mounting loca- tion. - Page 16 4. Connect the cables to the cable jacks of the camera body. 5. Fasten the camera body to the camera assembly bracket. Connections...
- Page 17 6. Assemble the camera cover and camera body. You should fasten Wall mount (Optional) the screws using the hexagonal wrench as shown below. Follow the instructions below to install the camera with a wall mount. 1. Drill holes in the wall where you want to install the wall mount. 2.
- Page 18 3. Install the camera installation bracket as shown below. 4. Connect the cables to the camera jack and attach the camera to the installation bracket. “A” Note: Pipe threads should be clean and rust-free. Use a sealer such as Teflon tape and silicone sealer on the threads “A”.
- Page 19 5. Attach the camera cover to the camera. Pendant mount (Optional) Follow the instructions below to install the camera with a pendant mount. 1. Install the pipe and camera installation bracket as shown below. Connections...
- Page 20 “A” Connections...
- Page 21 “A”. 2. Connect the cables to the camera jack and attach the camera to the installation bracket. Note: Specifications of LG Standard pipe. • Add thread ceiling tape to end of pipe. •...
-
Page 22: Operation And Settings
LG IP device. The LG Smart Station and the LG Smart Web Viewer program DirectX DirectX 9.0 or above are the network program of the LG Video Server and the LG IP cameras. Memory 2GB or above RAM •... - Page 23 3.1 Start your Web browser. The IP Utility shows the MAC address, IP address, Model name and so on. 3.2 Enter the IP address of the LG IP device in the address Note: bar of the browse. The computer running the IP Utility must be on the same 3.3 Enter the user name and password set by the admin-...
-
Page 24: Lg Smart Web Viewer Overview
LG Smart Web Viewer Overview Click to save the current image in JPEG format on your computer. 1. Click the [Snapshot] button and then the Snapshot window is displayed. 2. Click the [Save] button in the Snapshot window. 3. Enter the file name (JPEG format) and select the folder to save it. -
Page 25: Confi Guring The Lg Ip Camera
Confi guring the LG IP camera Provides all the necessary tools for set- ting up the device to your requirements. The features and options of the LG IP camera are configured The user will need administrator level to through the Configuration menu. - Page 26 Date & Time Main Menu Sub Menu Basic RTP stream Network TCP/IP DDNS IP filtering User Basic Recording schedule Schedule Recording server Time zone Event schedule Set the time difference from GMT in the area where the IP Event server device is installed.
- Page 27 Server time tion. The System settings will be restored to the uploaded configuration and reboot the system. > Server time: Displays the current date and time of the IP device. Notes: • Save: Click this button to confirm the settings. •...
- Page 28 Log & Report status Language list The System log provides a summary of the status of the IP Select a language for the LG Smart Web Viewer configuration device. The unit records the data of the software activity in menu and information display.
- Page 29 Audio & Video settings Stream Camera Master/Slave > Enable: Click to activate the stream function. > Deinterlacing: Click to enable the use of deinterlac- ing function. > Video codec: Select the video mode (Codec) from Preview the drop-down list. The viewer can choose between You can preview the camera image on the preview window.
- Page 30 > GOP size: It means “Group of Pictures”. The higher Note: the GOP, the better is the video quality of the camera. The Clients connected to the IP device remains unaf- Edit the value of GOP from 1 ~ 30. This setting is valid fected with additional changes made in the setting.
- Page 31 Network settings ARP Ping > Enable ARP Ping to configure IP address: Check to Basic enable ARP ping. • Save: Click this button to confirm the settings. RTP stream RTP (Real-time Transport Protocol) is an internet protocol that allows programs to manage the real-time transmission of multi- media data, via unicast or multicast.
- Page 32 Save: Click this button to confirm the settings. DDNS This free service is very useful when combined with the LG DDNS Server. It allows the user to connect the IP device using the URL, rather than an IP Address. This also solves the problem of having a dynamic IP address.
- Page 33 DDNS status IP list > Don’t use DDNS server: Disable the DDNS function. > Basic policy: Select the basic policy type. > Use DDNS server: Enable the DDNS function. Allow all: Allow all the IP address basically, but Provider: Displays the DDNS provider. the IP addresses in the list are denied.
- Page 34 3. Click the [Save] button. User settings 4. Repeat the steps 1-3 to add additional IP address. Basic • Remove: Click this button to delete the IP address. The IP device is shipped with the login rights of administrator 1. Select the alias from the list. only.
- Page 35 4. Select the authority drop down list to provide Anonymous the access rights to each user and then click the > Enable anonymous login [Save] to confirm your selection. Check the box to enable anonymous user login Administrator: Allows you to operate setup - allows the user access for only viewing the live menus and to view live images.
- Page 36 Schedule settings 4. Set the [Custom day] option. This option is available if the repeat option is None. Here a calendar is pro- Recording schedule vided to mark the event detection activity. This IP device provides video monitoring, recording and event 5.
- Page 37 Recording server 2. Click the [Edit] button. You can check or edit the recording schedule These options can be set by using the LG Smart Station pro- options. gram. (Display only in this LG Smart Web Viewer program.) To activate the Recording Schedule Disk full notification of recording server.
- Page 38 Event settings • Stream: Selects the stream of the connected camera. Event schedule • Default: Sets to default setting value. When an event (VA/Sensor Event) occurs, this unit records the 3. Click the [Save] button to confirm the settings. live images and routes as configured. Note: You should register the SMTP and FTP server on the Event server setting to set this function.
- Page 39 Alias: Type the FTP Server name to upload the User ID: Enter the user ID of the SMTP server. image files. This would be the one who owns the mail account. Address: Enter the FTP server’s IP address. Password: Enter the password. This password Port: Enter the port number.
- Page 40 Sensor & Relay Sensor Fan fail notification > Enable: Marks up when you want to activate the sen- > Control relay: Marks up when you want to activate sor. the selected relay. > Alias: Displays the sensor name. > SMTP server: Selects the SMTP server. By selecting this option an e-mail notification is sent to the user >...
-
Page 41: Osd Menu Setup
OSD Menu Setup Main Menu Sub Menu Contents The following table shows the list of menu items and options. LOW/ MIDDLE/ LEVEL You can adapt the camera to your requirements by setting up the HIGH respective items in these menus. AUTO 5, 10, 15, 30, 60 DWELL TIME... -
Page 42: General Operation
Used to increment the value selected in the menu. General Operation • button: Used to decrement the value selected in the menu. 1. Click the [OSD control] button in the LG Smart Web Viewer. • button: Executes selections and displays a submenu for an 2. Click button on the OSD control window. - Page 43 Exposure settings • HSBLC: Use for masking brightness of the specific area to view the subject more clearly. The HSBLC mode is auto- matically activated only in low luminance scene. > AREA SETTING: Use button to select a area then use button to select a ON or OFF.
- Page 44 SHUTTER (Shutter Speed) White Balance settings Select the desired shutter speed for camera exposure. You can Select the method by which the camera shifts its output colors to change the shutter speed to higher speed to capture fast-moving compensate for the color of a light source. subjects, though the image becomes darker.
- Page 45 INDOOR: The color temperature range for the proper > DWELL TIME: Use button to select a dwell time. white balance is approximately 3,200°K. (5, 10, 15, 30 or 60 SEC) OUTDOOR: The color temperature range for the • DAY: Color mode enabled. proper white balance is approximately 5,100°K.
- Page 46 Privacy Mask setting • MOVE Y: Moves vertical position of the mask zone box. • MOVE X: Moves horizontal position of the mask zone box. This function is aiming at the protection of personal privacy, select- Note: ing a screen part black not to be displayed in the screen. Up to 8 zones can be registered.
- Page 47 • PAN: Use button to move the screen. (left or COLOR right) You can switch the displayed picture to gray scale or color. • TILT: Use button to move the screen. (up or 1. Select [COLOR] option on the [SPECIAL] menu. down) 2.
- Page 48 • (Blank): Insert a space at the cursor position. • : Moves cursor to left or right. LANGUAGE Select the viewer language for the camera setup menu and OSD information display. Reset setting 1. Select [RESET] option. 2. Click button and the RESET menu appears. 3.
-
Page 49: Reference
• IP Conflicts: If the LG network device is set with a static IP address and if the DHCP option is set then there may be IP’s same as the net- work device and other network partner. Hence set the static IP address to 0.0.0.0 to resolve this conflict. - Page 50 Accessing camera external to the local network • Firewall Protection: Check for the internet firewall with the system administrator, either he has to do port forwarding or modify the DMZ function on the router. • Default router needed: Check if you need configure the router settings. Sporadic network performance •...
- Page 51 number of applications running on the client computer. • If the client PC’s are unable to access the multicast stream, check with the system administrator for the use of a valid multicast address or check if the router is supporting multicasting. •...
-
Page 52: Open Source Software Notice
Glibc, libelf, libesmtp, live.media LG Electronics offers to provide source code to you on CD-ROM for a charge covering the cost of performing such distribution, such as the cost of media, shipping and handling upon e-mail request to LG Electronics at: opensource@lge.com... - Page 53 This product includes • dhcp client : Copyright © 2004-2008 by Internet Systems Consortium, Inc. (“ISC”) Copyright © 1995-2003 by Internet Software Consortium • expat library : copyright © 2006 expat maintainers. • libcap • libjpeg : Independent JPEG Group Copyright © 1991 1998, Thomas G. Lane. •...
- Page 54 • Zlib : Copyright © 1995-2002 Jean-loup Gailly and Mark Adler. All rights reserved. Permission is hereby granted, free of charge, to any person obtaining a copy of this software and associated documentation files (the “Software”), to deal in the Software without restriction, including without limitation the rights to use, copy, modify, merge, publish, distrib- ute, sublicense, and/or sell copies of the Software, and to permit persons to whom the Software is furnished to do so, subject to the follow- ing conditions: THE SOFTWARE IS PROVIDED “AS IS”, WITHOUT WARRANTY OF ANY KIND, EXPRESS OR IMPLIED, INCLUDING BUT NOT LIMITED TO THE...
-
Page 55: Specifi Cations
Specifi cations Item LVW900 LVW901 Image Device 1/3 inch Vertical Double Interline CCD Lens Type Varifocal Lens (2.8~11mm) Video Out 1.0Vp-p Composite Signal (75ohm) Auto Gain Control OFF/ LOW/ MIDDLE/ HIGH Exposure ALC/ELC Electric Shutter 1/50 ~ 1/90,000(PAL), 1/60~1/90,000(NTSC) Day/Night... - Page 56 Encryption HTTPS (SSL,TLS) Physical Layer 10/100base TX Ethernet Protocol TCP/IP(IPv4), HTTP, HTTPS, RTP, RTSP, UDP, DHCP, FTP, SMTP, NTP, ARP, ICMP, DDNS(LG) IP support Dynamic, Static, Private IP Users Unicast 10 Streams / 50 user registration Operation Temp. / Humidity -30 ºC ~ 50 ºC / 0%RH ~ 80%RH...
Need help?
Do you have a question about the LVW900 and is the answer not in the manual?
Questions and answers