Chapters
Table of Contents

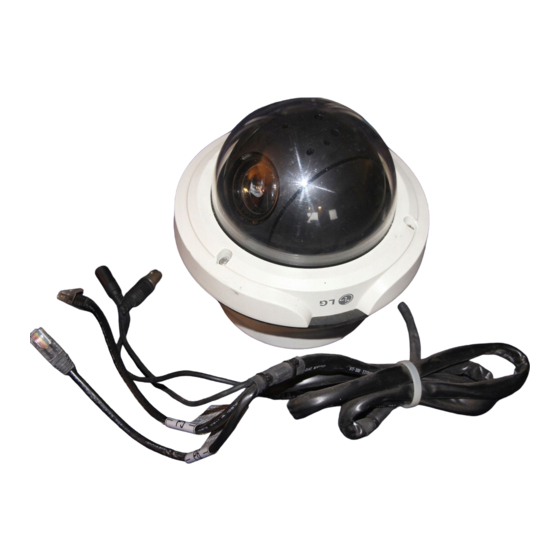
Related Manuals for LG LPT-OI553HQ


Summary of Contents for LG LPT-OI553HQ
- Page 1 LPT-OI553HQ_ENG_0196 7/19/07 2:01 PM Page 1 Dome Camera Owner’s Manual MODEL: LPT-OI551HQ LPT-OI553HQ Before installing and using the camera, please read this owner's manual carefully and retain for future reference.
- Page 2 LPT-OI553HQ_ENG_0196 7/19/07 2:01 PM Page 2 • Caution: Danger of explosion if battery is incor- CAUTION rectly replaced. Replaced only with the same or RISK OF ELECTRIC SHOCK equivalent type recommended by the manufactur- DO NOT OPEN er. Dispose of used batteries according to the manufacturer ’s instructions.
-
Page 3: Important Safety Instructions
LPT-OI553HQ_ENG_0196 7/19/07 2:01 PM Page 3 IMPORTANT SAFETY INSTRUCTIONS CAUTION: PLEASE READ AND OBSERVE ALL WARNINGS AND INSTRUCTIONS IN THIS OWNER’S MANUAL. AND THOSE MARKED ON THE PRODUCT. RETAIN THIS BOOKLET FOR FUTURE REFERENCE. This product has been designed and manufactured to assure personal safety. Improper use can result in electric shock or fire hazard. -
Page 4: Table Of Contents
LPT-OI553HQ_ENG_0196 7/19/07 2:01 PM Page 4 Introduction Contents About Dome Camera The dome cameras are designed for installation in an Introduction ......4-7 indoor/outdoor video surveillance system. - Page 5 LPT-OI553HQ_ENG_0196 7/19/07 2:01 PM Page 5 Pattern Function Alarm In function A routine of manual operations can be stored for 5 Alarm input signals are supplied from external minutes at the maximum and reproduced repeti- devices through the ALARM IN connector to turn tively.
-
Page 6: Safety Precautions
LPT-OI553HQ_ENG_0196 7/19/07 2:01 PM Page 6 Do not use the camera in such places as Safety Precautions shown below. The lens may become cloudy due to condensation Do not attempt to disassemble the camera if the camera is used under the following condi- To prevent electric shock,do not remove screws or tions. -
Page 7: Identification Of Camera
LPT-OI553HQ_ENG_0196 7/19/07 2:01 PM Page 7 Identification of Camera “A” 1 Camera mounting bracket The bracket is optional for surface installation. 2 Dome camera body 3 Dome cover 4 Power cable (DC 12V) 5 Video output cable with BNC connector Connects with the video connector of the monitor. -
Page 8: Installation
LPT-OI553HQ_ENG_0196 7/19/07 2:01 PM Page 8 Installation Precautions Ceiling mount • The following steps of installation and connection work should be done by qualified service person- nel or system installers and should conform to all local codes. • Be sure to switch the camera off before installation The Ceiling The Ceiling and connection. -
Page 9: Pendant Mount
Use a sealer (such as Teflon™ tape or silicone sealer) on the threads. Add thread sealing tape Reference: Specifications of LG Standard pipe. Note: Do not remove the block (A) to keep the gap (B) between the camera body and... -
Page 10: Setting The Switch
Reserved 11 OFF ON OFF OFF Reserved 12 ON OFF OFF OFF Reserved 13 SW104 OFF OFF OFF OFF Reserved 14 Note: If you are not using the controller with LG protocol, there may be some limitation of function control. -
Page 11: Camera Id Setting
LPT-OI553HQ_ENG_0196 7/19/07 2:01 PM Page 11 The table for the camera ID setting Switch position (SW104) BAUD RATE SW1 SW2 SW3 SW4 SW5 SW7 SW8 (OFF OFF OFF OFF) 9,600 BPS OFF OFF OFF OFF OFF OFF OFF (OFF OFF OFF ON) 1,200 BPS OFF OFF OFF OFF... - Page 12 LPT-OI553HQ_ENG_0196 7/19/07 2:01 PM Page 12 SW1 SW2 SW3 SW4 SW5 SW7 SW8 SW1 SW2 SW3 SW4 SW5 SW7 SW8 106 OFF 108 OFF OFF OFF OFF OFF OFF OFF 110 OFF 112 OFF OFF OFF OFF OFF OFF OFF OFF OFF 114 OFF OFF OFF OFF OFF...
- Page 13 LPT-OI553HQ_ENG_0196 7/19/07 2:01 PM Page 13 SW1 SW2 SW3 SW4 SW5 SW7 SW8 SW1 SW2 SW3 SW4 SW5 SW7 SW8 212 OFF OFF 160 OFF OFF OFF OFF OFF OFF OFF 214 OFF 162 OFF OFF OFF OFF OFF 216 OFF OFF OFF 164 OFF OFF OFF OFF 218 OFF...
-
Page 14: Connections
LPT-OI553HQ_ENG_0196 7/19/07 2:01 PM Page 14 Connections Connection Preview DC 12V DC 12V cable for Camera Video output BNC plug data port Ethernet cable Ethernet cable data port Precautions RS-485 Connection • The connections should be made by qualified Use the cable that is described below for RS-485 site service personnel or system installers in accor- communication. -
Page 15: Alarm In Connections
LPT-OI553HQ_ENG_0196 7/19/07 2:01 PM Page 15 • Auto mode: Change the observe position to a sen- ALARM IN Connections sor that senses a touch or shock then return to the position that previously observed. . (Set the An 8-pin harness are supplied with the camera as Duration Time of Alarm Input function to “1 to 255”.) standard accessories. - Page 16 LPT-OI553HQ_ENG_0196 7/19/07 2:01 PM Page 16 Alarm Input function Listed below are the camera actions of alarm input function by different function status in each mode Function status Manual mode Auto mode While observe a specific Change the observe position to the Change the observe position to the position.
-
Page 17: System Connection
LPT-OI553HQ_ENG_0196 7/19/07 2:01 PM Page 17 System Connection Note: When any peripheral is turned off and turned on again, the camera is also turned off and turned back on. Caution: Connect the supplied termination adapter to the final camera’s data port to prevent the Alarm In #2 RS-485 communication error. -
Page 18: Setup Menu
LPT-OI553HQ_ENG_0196 7/19/07 2:01 PM Page 18 Setup Menu Setup Menu Overview Setup menus are shown in the table below. You can adapt the camera to your requirements by setting up the respective items in these menus. These menus are described on the following pages for reference. Switches and keys on the controller are used in the setup operations. -
Page 19: Setting Camera Menu
LPT-OI553HQ_ENG_0196 7/19/07 2:01 PM Page 19 Setting Camera Menu FOCUS The buttons on the connected controller are used for FOCUS MODE PUSH AUTO setup. FOCUS DIST 50CM ZOOM START LCC-K1000 Controller (Optional) ZOOM END ZOOM SPEED QUICK OSD button ZTRK MODE AUTO INITIAL SET RETURN... -
Page 20: Camera Identification Setting
LPT-OI553HQ_ENG_0196 7/19/07 2:01 PM Page 20 Focus Mode setting Camera Identification Setting Select [FOCUS MODE] option on the [FOCUS] Only displays the camera’s ID. Use the internal menu, then select the following mode. 8 bit-DIP switch if you want to set ID. •... -
Page 21: Zoom Start
LPT-OI553HQ_ENG_0196 7/19/07 2:01 PM Page 21 Zoom Start setting Zoom Speed setting Selects a zoom start position. Selects a zoom speed. Select [ZOOM START] option on the [FOCUS] menu, Select [ZOOM SPEED] option on the [FOCUS] then select a zoom’s start position. (x1 - x26) menu, then select a zoom speed. -
Page 22: White Balance Control Settings
LPT-OI553HQ_ENG_0196 7/19/07 2:01 PM Page 22 Setting the WBC (White Balance White Balance Control Settings Control) Mode You can set the white balance options using the You can select one of four modes for white balance [AWB] menu. adjustment. General Operation Select [WBC MODE] option on the [AWB] menu, then 1. -
Page 23: Exposure Settings
LPT-OI553HQ_ENG_0196 7/19/07 2:01 PM Page 23 AE Mode setting Exposure Settings Selects an Automatic Exposure mode. You can set the exposure options using the [AE] Select [AE MODE] option on the [AE] menu, then menu. select an Automatic Exposure mode. General Operation •... -
Page 24: Agc Adjust
LPT-OI553HQ_ENG_0196 7/19/07 2:01 PM Page 24 Automatic Gain Control (AGC) setting Backlight Setting Improves an image that is darkened because of If the images are too dark, change the maximum backlighting. [AGC] value to make the images lighter. This option is available only when [AE MODE] is set to [SLOW Select [BACKLIGHT] option on the [AE] menu, then MAN] or [SHUT MAN]. -
Page 25: E Sensitive
LPT-OI553HQ_ENG_0196 7/19/07 2:01 PM Page 25 Electronic Sensitive setting Shutter Speed Setting The electronic sensitivity enhancement function You can select a shutter speed from among AUTO, varies the shutter speed to increase the sensitivity in 1/120, 1/250, 1/500, 1/1000, 1/2000, 1/4000, low light conditions. -
Page 26: Auto Exposure Level Settings
LPT-OI553HQ_ENG_0196 7/19/07 2:01 PM Page 26 BLC (Back Light Compensation) Level Auto Exposure Level Settings Setting You can set the auto exposure options using the Selects a level for the BLC (back light compensa- [AE LEVEL] menu. tion). General Operation Select [BLC LEVEL] option on the [AE LEVEL] menu, 1. -
Page 27: Special Settings
LPT-OI553HQ_ENG_0196 7/19/07 2:01 PM Page 27 User Title Setting Special Settings You can name the camera independently. You can set the special options using the [SPECIAL] 1. Move the cursor to [USER TITLE] on the menu. [SPECIAL] menu. Arrow mark appears. General Operation 2. -
Page 28: Color
LPT-OI553HQ_ENG_0196 7/19/07 2:01 PM Page 28 Color Setting Digital Effect Setting You can switch the displayed picture to grayscale or You cannot set a Digital Effect option. color. Select [COLOR] option on the [SPECIAL] menu, then SPECIAL select an option (ON or OFF). Set to [ON] to display ■... -
Page 29: Motion Detection Setting
LPT-OI553HQ_ENG_0196 7/19/07 2:01 PM Page 29 Motion Detection Setting Function On-Screen Display Setting The motion detection detects the moving objects in the scene by monitoring changes in brightness level. You can set the Function On-Screen Display options You can select the level of sensitivity for motion using the [F OSD] menu. -
Page 30: Privacy Masking Settings
LPT-OI553HQ_ENG_0196 7/19/07 2:01 PM Page 30 5. Adjust the pan, tilt, and zoom position so that the Privacy Masking Settings desired position comes into the zone frame with Using the LCC-K1000 or controller with Multix the joystick. protocol for Privacy Zone Setting. You can’t move privacy mask zone and you can’t change the size of privacy mask zone. -
Page 31: Reference
LPT-OI553HQ_ENG_0196 7/19/07 2:01 PM Page 31 Reference Specifications Signal System NTSC (High Resolution) PAL (High Resolution) Pick-Up Device 1/4” EX-view HAD CCD Total Pixels No. 410K 470K S/N Ratio More Than 50 dB Horizontal Resolution More Than 520 TV Lines Lens X 27 Zoom (F 1.5(W), F 3.8(T) f=3.25-88.0 mm) Shooting Distance... - Page 32 LPT-OI553HQ_ENG_0196 7/19/07 2:01 PM Page 32 P/NO :MFL30580196...
Need help?
Do you have a question about the LPT-OI553HQ and is the answer not in the manual?
Questions and answers