Table of Contents
Advertisement
Quick Links
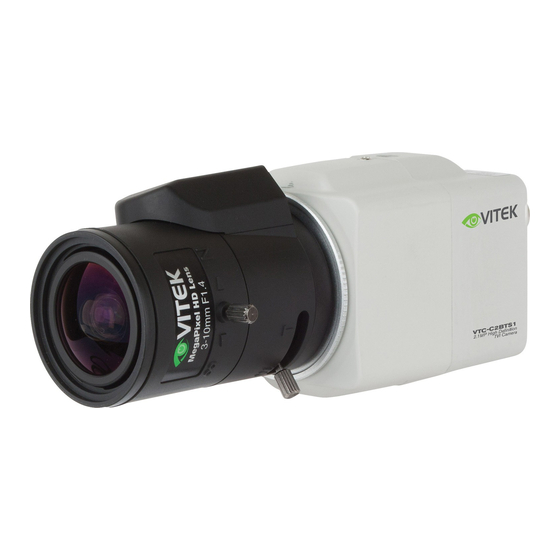
VTC-C2BTS1
2.1MP Premium TVI Compact
Box Camera
FEATURES:
• 1/2.7" Progressive Scan CMOS Sensor
• 2.1 MegaPixel with Full 1080p TVI Output
• Small scale design to fit in 5" dome enclosures such as the Pelco® DF5
Housing
• Sensitivity of 0.08 Lux
• 2D-DNR Digital Noise Reduction
• True Day/Night by ICR (Infrared Cut Removal)
• Built-in Motion Detection with a 24x16 Grid
• Privacy Mask function with programmable mask areas
• 12VDC / 24VAC Dual Voltage Operation
• Lenses Sold Separately
Advertisement
Table of Contents

Related Manuals for Vitek VTC-C2BTS1


Summary of Contents for Vitek VTC-C2BTS1
-
Page 1: Box Camera
VTC-C2BTS1 2.1MP Premium TVI Compact Box Camera FEATURES: • 1/2.7” Progressive Scan CMOS Sensor • 2.1 MegaPixel with Full 1080p TVI Output • Small scale design to fit in 5” dome enclosures such as the Pelco® DF5 Housing • Sensitivity of 0.08 Lux •... -
Page 2: Safety Precaution
Safety Precaution To prevent fire or shock hazard, do not expose the unit to rain or moisture. To prevent electric shocks and risk of fire hazards, do NOT use other than specific power source. CAUTION: TO REDUCE THE RISK OF ELECTRIC SHOCK, DO NOT REMOVE COVER (OR BACK). - Page 3 Safety Precaution NOTICE The image used in this instruction manual are processed to help comprehension and may differ from actual video of the camera. Avoid installing areas where has shock or vibration which results in the problems. Pay attention to safety when laying the connection cable and observe that the cable is not subjected to heavy loads, kinks or damage and no moisture can get in.
-
Page 4: Table Of Contents
Contents p.02~03 Safety Precaution p.04 Contents p.05 Features p.06 Composition p.06 Dimensions p.07 Part Names p.08~09 Installation Instructions p.10~19 Operating Instructions p.20 Specifications... -
Page 5: Features
Features Key Features • 1/2.7” CMOS Sensor • Full-HD 2Mega pixel HD-TVI CAMERA, 1920x1080(30p) • TVI Video Transmission Distance over Coax.; 500M (RG59, 75Ω) *depending on cable condition and characteristics • Automatically removable IR Cut filter by Dual filter switcher •... -
Page 6: Composition
Composition Operating Instruction Compact Box Camera Dust Protection L- Wrench: Cap (1pc) 1.5mm (1pc) Dimensions 2.89” 1.89” 2.38” Ø1.81”... -
Page 7: Part Names
Part Names Mount Holes (Top / Bottom) Flange Lock screw L-Wrench Dust Protection Cap Rear Case Back focus Front Case adjusting Flange ① Video out connector(BNC) ① ② Power input terminal ③ ③ OSD Control Joy stick ④ ② ④ DC Auto Iris Lens connector PIN 4 PIN 2 Lens Connector... -
Page 8: Installation Instructions
Installation Instructions Installation Instructions • Make sure the power is removed before installation 1. Remove the dust protection cap from the lens mount. 2. Screw the lens onto the camera firmly. 3. Plug the lens plug into the lens connector on the rear of camera case. 4. - Page 9 Installation Instructions Using OSD Controller Setup menu can be accessed and controlled by OSD control joy stick on the rear of the camera unit. Five commands are available with the joy stick. The design of rear panel could be different according to the camera models. Description of the joystick operation 1) SET Key (●) : Access to the menu or enter the setting.
-
Page 10: Operating Instructions
Operating Instructions OSD menu Startup Press the ‘OSD menu SET key’ down to access the setup menu mode. • EXIT : Enters ‘EXIT’ menu. • RETURN : Returns to the previous menu. MAIN MENU > 1. VIDEO OUT 2. DAY / NIGHT 3. - Page 11 Operating Instructions BLUE GAIN MODE USER 1~255 RETURN PUSH 8000K 6000K 4200K 3200K HOLD 1~255 R-GAIN 1~255 B-GAIN RETURN MODE DC, ESC, HOLD BRIGHT 0~255 SHUTTER AUTO, 1/25, 1/30, 1/50, 1/60, 1/100, 1/120, 1/250, 1/500, 1/1000, 1/3000, 1/10000 FLICKER OFF, 50Hz, 60Hz 0~16 ON, OFF RETURN...
-
Page 12: Osd Menu Setup
Operating Instructions 0~255 EFFECT COLOR GAIN COLOR HUE 0~71 0~255 SHARPNESS CONTRAST 0~255 -128~127 BRIGHT OFF. MIRROR OFF, ON OFF,ON FLIP RETURN 0~255 SYSTEM CAMERA ID OFF, ON ID DISP OFF,ON NAME DISP ENG, CHINESE LANGUAGE OFF, ON FACTORY INIT RETURN SAVE/EXIT EXIT... - Page 13 Operating Instructions 2. DAY / NIGHT DAY/NIGHT is used to control the setting during day-time and night-time operation. Select the mode according to the light condition and the camera types. DAY / NIGHT > 1. MODE : [EXT] 2. D TO N 3.
- Page 14 Operating Instructions 2-3. N TO D : 1~63 Sets the gap level switching from/to DAY(color) or NIGHT(B/W). 2-4. DELAY TIME : 1~60SEC Sets the delay time when the camera switches from/to DAY(color) or NIGHT(B/W). 3. AWB Automatically tracks the changes of color temperature and continuously adjusts the white balance.
- Page 15 Operating Instructions 3-1-5. 6000K : Set the white balance range by 6,000°K. 3-1-6. 4200K : Set the white balance range by 4,200°K. 3-1-7. 3200K : Set the white balance range by 3,200°K. 3-1-8. HOLD : Fixed white balnce. 3-2. R-G GAIN : 1~255 White balance is fixed to the settings of Red-Green GAIN.
- Page 16 Operating Instructions 4-3. SHUTTER Select Shutter speed, AUTO or manual. 4-3-1. AUTO: Optimizes the video level by controlling the iris and the shutter speed automatically. 4-3-2. 1/30(1/25), 1/60(1/50), 1/120(1/100), ~ 1/10000: Shutter can be set to fix. 4-4. FLICKER Reduces the flicker in video when NTSC/PAL mode is used in 50Hz / 60Hz fluorescent lighting respectively.
- Page 17 Operating Instructions 5-1-2. MASK PAT. : Off, Black, Gray, White Selects the mask color pattern Area 1 or 2 5-1-3. SX, EX. : Set the X-position or size for the selected arear (Start-X, End-X) 5-1-4. SY, EY. : Set the Y-position or size for the selected arear (Start-Y, End-Y) 5-2.
- Page 18 Operating Instructions 5-3-3. THRESHOLD : 0~255 Defines the threshold level for HLC. Lower value masks more. HLC > AREA SET > 1. AREA SET > 1. HLC 2. MASK VALUE <O> 3. THRESHOLD 4. RETURN 2. RETURN 6. EFFECT EFFECT >...
- Page 19 Operating Instructions 6-5. BRIGHT OFF : -128~127 Controls the brightness of the image, to high of setting will cause more noise in the picture 6-6. MIRROR : OFF, ON Mirrors the video signals vertically. 6-7. FLIP : OFF, ON Flips the video signals horizontally. 7.
-
Page 20: Specifications
Detailed Specifications Imaging Sensor 1/2.7” Progressive Scan CMOS Sensor Video Output HD-TVI by BNC Resolution 2.1 MegaPixel (1080p) Effective Pixels 1920(H) x 1080(V) x 30p S/N Ratio More than 52dB with AGC Off at 50 IRE Sensitivity 0.08 Lux (AGC 3) Lens Type CS Mount Lens Support DAY / NIGHT... - Page 21 ConSIder THeSe oTHer GreaT ProduCTS froM VT-SHP916 SpireHD 16 Channel Real Time Tribrid TVI / AHD / 960H Digital Video Recorder • Supports High Resolution TVI, AHD, and 960H Cameras • 16 Video Inputs with 1 HDMI, 2 Spot Monitor Outputs, and 1 VGA output •...
-
Page 23: Limited Product Warranty
(3) years, or as otherwise stated above, from the date of purchase by the end user. This warranty is nontransferable and extends only to the original buyer or end user customer of a VITEK Authorized Reseller. The product must have been used only for its intended purpose, and not been subjected to damage by misuse, willful or accidental damage, caused by excessive voltage or lightning. - Page 24 Version 1.0 28492 Constellation Road ValenCia, Ca 91355 November 2015 WWW.ViteKCCtV.CoM...
Need help?
Do you have a question about the VTC-C2BTS1 and is the answer not in the manual?
Questions and answers