Table of Contents
Advertisement
Advertisement
Table of Contents

Related Manuals for Sage BBM800BSS


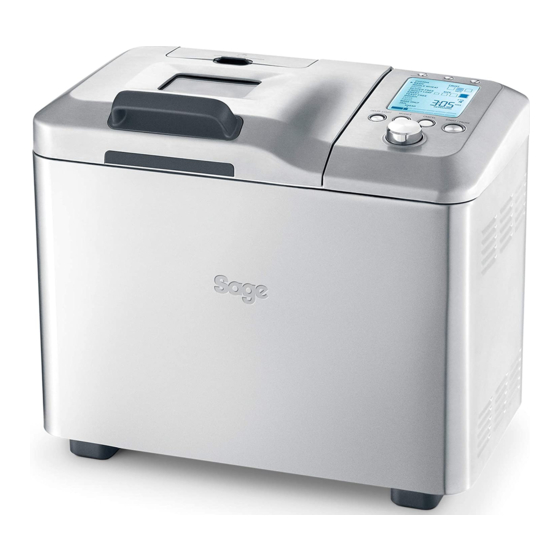
Summary of Contents for Sage BBM800BSS
- Page 1 Custom Loaf Instruction Book - BBM800BSS...
-
Page 2: Table Of Contents
• Wires are coloured as follows: we ask that you exercise a degree of care when this appliance. 25 Optional Settings on your Sage product −Blue = Neutral using any electrical appliance and adhere to the 25 - Using the PAUSE feature •... - Page 3 Return the entire appliance APPLIANCES • Do not pour any liquids into the Fruit and to the nearest authorised Sage Service Centre for • The bread machine is not intended to be Nut Dispenser. • Unwind the power cord fully before use.
-
Page 4: Components
The symbol shown indicates that this CAUTION appliance should not be disposed of in Components The lid and the outer surface may get hot when normal household waste. It should be taken the appliance is operating. The temperature of to a local authority waste collection centre accessible surfaces may be high when the designated for this purpose or to a dealer appliance is operating. - Page 5 J. WEIGHT | TEMP button S. Collapsible Paddle Press to convert the default metric temperature and weight For use with dough settings. (°C and kg) to imperial units (°F and lbs). Always ensure the collapsible paddle is inserted in the upright position for thorough mixing during the ‘knead 1’...
-
Page 6: Functions
2. Insert the Collapsible or Fixed Paddle d. If using the collapsible paddle, ensure it is inserted in the upright − The right temperature. Unless specified otherwise in a recipe, position for thorough mixing during the ‘knead 1’ phase. all liquids should be 27°C, and non liquid ingredients should Functions a. - Page 7 4. Return the Bread Pan to the Baking Chamber c. Always remember: 6. Plug in the Power Cord The loaf size can only be selected on the BASIC, BASIC RAPID, WHOLE WHEAT, WHOLE WHEAT RAPID, a. Align the coupling on the underside of the bread pan with the −...
- Page 8 The table below outlines the different settings. SETTING PADDLE DESCRIPTION CRUST COLOUR OPTIONS LOAF SIZE MORE OPTIONS INFORMATION SETTING PADDLE DESCRIPTION CRUST COLOUR OPTIONS LOAF SIZE MORE OPTIONS INFORMATION WHOLE Collapsible This is a setting for breads that contain LIGHT 0.5kg Use the MODIFY WHEAT...
- Page 9 SETTING PADDLE DESCRIPTION CRUST COLOUR OPTIONS LOAF SIZE MORE SETTING PADDLE DESCRIPTION CRUST COLOUR OPTIONS LOAF SIZE MORE OPTIONS INFORMATION OPTIONS INFORMATION GLUTEN Collapsible This is a setting for breads that contain gluten LIGHT 1.0kg Use the MODIFY SWEET Collapsible This is a setting for breads high in sugar, Not applicable.
- Page 10 SETTING PADDLE DESCRIPTION CRUST COLOUR OPTIONS LOAF SIZE MORE SETTING PADDLE DESCRIPTION CRUST COLOUR OPTIONS LOAF SIZE MORE OPTIONS INFORMATION OPTIONS INFORMATION DOUGH- Collapsible This is a setting for bread doughs that are Not applicable Not applicable Use the MODIFY BAKE Collapsible This is a setting to:...
- Page 11 10. Start the Bread Maker The table below outlines the phases of the cycle. NOTE The bread maker is now ready to activate, automatically calculating PHASE DESCRIPTION NOTES When using the bread maker for the first time you may notice the recommended temperatures and times for the ‘preheat’, ‘knead’, ‘Preheat’...
- Page 12 11. Remove the Bread Pan PHASE DESCRIPTION NOTES NOTE a. When the cycle is complete, an alert will sound and the ‘keep ‘Rise 1’ The ‘rise’ phase, also known as ‘proofing’, is a period of rest If the dough is unevenly sitting to one side of the bread pan, it should be centred To retain a crisp loaf crust, remove the bread pan before the warm’...
-
Page 13: Using The Pause Feature
OPTIONAL SETTINGS b. Place the bread upright on the wire rack to cool for at least b. With protective hot pads or insulated oven mitts, remove the 15. Store the Bread 20 minutes before slicing. paddle from the drive shaft inside the bread pan. Do not attempt •... -
Page 14: Using The Delay Start Button
1. Using the SELECT push-dial, select the desired setting, crust colour and top with Italian mixed herbs, chopped salami, chopped black and loaf size. Refer to Steps 1-9, ‘Operating your Sage Bread Maker – 5. Press the START | PAUSE button to activate the delay start feature. -
Page 15: Using The Modify Button
0mins— 0mins— 27°C—4°C 0mins— 0—20secs 0mins— 0mins— 60°C—50°C 0mins— a ‘knead’ phase, so this phase cannot be modified. and loaf size. Refer to Steps 1-9, ‘Operating your Sage Bread Maker – FREE 1:00hrs 1:00hrs 1:40hrs 1:40hrs 2hrs 1:00hrs Beginners Guide’. - Page 16 Using the CUSTOM setting Modifying a Programmed Custom Recipe TIPS The preset, recommended temperatures and times for the ‘preheat’, There are 9 custom recipe spaces for you to program. If a space has Phases can only be modified if they are already applicable to ‘knead’, ‘rise’, ‘punch-down’, ‘bake’...
-
Page 17: Tips For Better Bread Making
TIPS FOR BETTER BREAD MAKING Weighing Scales As a general guide: NOTE For consistent results it is recommended to use weighing scales as 1 cup bread flour = 150g Measuring And Weighing Ingredients Do not underfill or overfill the bread pan as the bread may not mix they provide greater accuracy than measuring cups. -
Page 18: The Vital Ingredients
THE VITAL INGREDIENTS Fats Plain Flour MILK Fats, such as butter, olive oil or vegetable oil, add taste, texture, Plain flour can be bleached or unbleached, we recommend the Milk enhances the flavour and increases the nutritional value of Baking Powder moisture and enhanced keeping qualities to breads. -
Page 19: Care & Cleaning
WATER XANTHAN GUM Cleaning the Lid Care & Cleaning 1. For thorough cleaning, the lid can be removed from the stainless When bread machine baking, all liquids, particularly water, should Xanthan gum is a thickening agent used in gluten free baking to be 27°C unless stated otherwise. -
Page 20: Troubleshooting
2. Ensure there is no baked-on residue in any of the paddle crevices, NOTE including the ‘D’ shaped hole and hinge area. If there is, soak the Troubleshooting paddle in warm soapy water. A non-abrasive liquid cleanser or mild Do not immerse the outside of the bread pan in water as this may spray solution may be used. - Page 21 TEMPERATURES PROBLEM EASY SOLUTION Why does the top of the bread Usually this is because the ingredients are not in balance or low protein flour is used. Check the method of weighing/ PROBLEM EASY SOLUTION collapse? measuring the ingredients. Too much yeast, water or other liquid ingredients, or insufficient flour, may cause the bread to Are the room and water temperatures Yes –...
- Page 22 DELAY START PROBLEM DAMP OR LOAF RISES LOAF RISES LOAF IS MOVEMENT STICKY TOO HIGH THEN FALLS SHORT & PROBLEM EASY SOLUTION IN BREAD LOAF DENSE Why can’t the Delay Start feature be The ingredients may deteriorate in quality or ferment if they are left inside the bread pan for many hours. This is especially set past 13 hours? the case during summer, when the Delay Start feature should be set to a shorter period of time.
- Page 23 IN BREAD LOAF DENSE • Operational E:02 Yeast Not enough Errors Contact your nearest authorised Sage service centre. Increase by ¼ teaspoon. • • E:02 Too much Contact your nearest authorised Sage service centre. Reduce by ¼ teaspoon. Water Not enough Wrong type of yeast used •...
-
Page 24: Custom Recipe Charts
CUSTOM RECIPE CHARTS CUSTOM RECIPE CHARTS Custom Recipe #: INGREDIENTS Custom Recipe #: INGREDIENTS Recipe Name: Recipe Name: Setting: Setting: Crust Colour: Crust Colour: Loaf Size: Loaf Size: PHASE TEMP/TIME PHASE TEMP/TIME ‘Preheat’ Temperature ‘Preheat’ Temperature ‘Preheat’ Time ‘Preheat’ Time ‘Knead 1’... - Page 25 CUSTOM RECIPE CHARTS CUSTOM RECIPE CHARTS Custom Recipe #: INGREDIENTS Custom Recipe #: INGREDIENTS Recipe Name: Recipe Name: Setting: Setting: Crust Colour: Crust Colour: Loaf Size: Loaf Size: PHASE TEMP/TIME PHASE TEMP/TIME ‘Preheat’ Temperature ‘Preheat’ Temperature ‘Preheat’ Time ‘Preheat’ Time ‘Knead 1’...
- Page 26 CUSTOM RECIPE CHARTS Setting: Basic SIZE/CRUST KNEAD 1 KNEAD 2 RISE RISE 1 PUNCH RISE 2 SHAPE RISE 3 BAKE BAKE TOTAL TIME WARM TEMP DOWN TEMP (HOUR:MIN) Custom Recipe #: INGREDIENTS (˚C) (˚C) 0.5kg Light 2 min 22 min 40 min 10 sec 25 min...
- Page 27 Setting: Basic Rapid Setting: Wholewheat SIZE/CRUST KNEAD 1 KNEAD 2 RISE RISE 1 PUNCH RISE 2 SHAPE RISE 3 BAKE BAKE TOTAL TIME WARM SIZE/CRUST PREHEAT KNEAD KNEAD RISE RISE 1 PUNCH RISE 2 SHAPE RISE 3 BAKE BAKE TOTAL TIME WARM TEMP DOWN...
- Page 28 Setting: Wholewheat Rapid Setting: Gluten Free SIZE/CRUST PREHEAT KNEAD KNEAD RISE RISE 1 PUNCH RISE 2 SHAPE RISE 3 BAKE BAKE TOTAL TIME WARM SIZE KNEAD 1 KNEAD 2 RISE TEMP RISE 1 SHAPE RISE 3 BAKE BAKE TOTAL TIME WARM TEMP TEMP...
- Page 29 Sage by Heston Blumenthal ® ® Freephone (UK Landline): 0808 178 1650 Mobile Calls (National Rate): 0333 0142 970 www.sageappliances.co.uk customerservice@sageappliances.co.uk Register your product and get more from your purchase What’s on your mind? Product registration takes only a few minutes and ensures Our constant aim is to improve the quality and features of a record of your purchase.
Need help?
Do you have a question about the BBM800BSS and is the answer not in the manual?
Questions and answers
Don't understand operating instructions
The operating instructions for the Sage BBM800BSS include:
1. Position the appliance at least 10 cm away from walls or other surfaces.
2. Connect the appliance to the power supply, ensuring:
- The Blue wire is connected to the terminal marked ‘N’ (neutral).
- The Brown wire is connected to the terminal marked ‘L’ (live).
- The Green & Yellow wire is connected to Earth.
3. When using the appliance, press the 'Start/Stop' button to begin the baking cycle.
4. Check dough consistency during the ‘knead 2’ phase:
- If too dry, add liquid (at 27°C), ½ to 1 tablespoon at a time.
- If too wet, add flour, 1 tablespoon at a time.
5. Use the recommended flour and ingredients as specified in the recipe.
6. Allow the loaf to cool for a few minutes before slicing.
Always follow safety instructions and troubleshooting steps as needed.
This answer is automatically generated
Perfect loaf until baking then the top is like a crater. Use stoneground strong wholemeal bread flour