
Subscribe to Our Youtube Channel
Related Manuals for Yardworks 60-3869-2


Summary of Contents for Yardworks 60-3869-2
- Page 1 20 V Cordless Blower 60-3869-2 Owner's Manual TOLL-FREE HELPLINE: 1-866-523-5218 WARNING WARNING Read all safety rules and instructions carefully before operating this tool.
-
Page 2: Table Of Contents
Run time ................................57 low & 30 high Weight ............................3 lb (1.36 kg) without battery 6 lb 4 oz (2.9 kg) with battery Use YARDWORKS replacement 20 V 6Ah Lithium-Ion battery 60-2181-2 (Sold Separately). Use YARDWORKS replacement 20 V 6Ah Lithium-Ion battery charger 60-2182-0 (Sold Separately). -
Page 3: Safety Symbols & Signals
Safety Symbols IMPORTANT! Some of the following symbols may appear on the blower. Study them and learn their meaning. Proper interpretation of these symbols will ensure better and safer operation of the blower. SYMBOL NAME EXPLANATION SYMBOL NAME EXPLANATION - - - Direct current Type or a characteristic of Volt... -
Page 4: Contents Of The Carton
(2) 20 V blower Accessories: The following accessories are available for purchase. Call the Toll-Free Helpline: 1-866-523-5218 Model # Description 60-2181-2 20 V Lithium-Ion battery pack for cordless Blower (60-3869-2) 60-2182-0 20 V Lithium-Ion charger for cordless Blower (60-3869-2) -
Page 5: General Safety Information
• Only use a battery-powered tool with the specified battery pack. The use of any other battery may create a risk of fire. Note: Charge only the 60-2181-2,20 V, 6 Ah lithium-ion battery pack using the 60-2182-0 Yardworks battery charger. -
Page 6: Specific Safety Rules
Specific Safety Rules Specific Safety Rules for Garden Tools • Avoid dangerous environments. Do not use the blower in damp or wet locations. Do not use it in the rain. • Keep bystanders and children away when using the blower. •... - Page 7 WARNING If battery fluid gets into the eyes, flush them immediately with clean water for at least 15 minutes, and then seek immediate medical attention. Do not charge the battery pack in the rain or in wet conditions. Do not immerse the tool, the battery pack, or the charger in water or any other liquid.
-
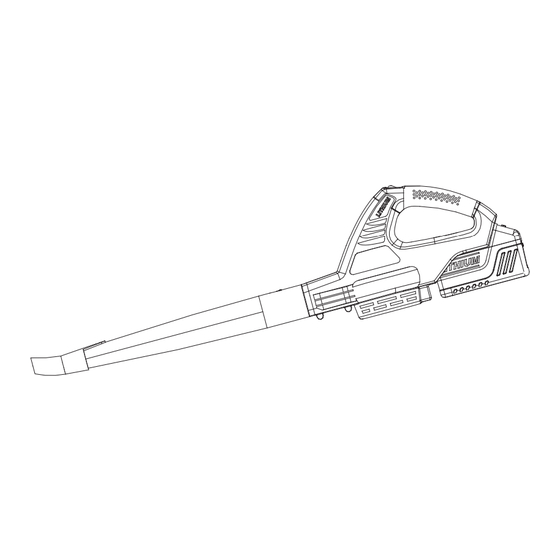
Page 8: Diagram & Location Of Parts
Diagram and Location of Parts (Fig. D) Fig. D Two-speed Switch Nozzle High Velocity Tip 20 V, 6 Ah Lithium-Ion battery 60-2181-2 (sold separately) -
Page 9: Electrical Safety Rules
Electrical Safety Rules for the Battery Pack and Charger WARNING READ ALL INSTRUCTIONS CAREFULLY AND UNDERSTAND THEM THOROUGHLY. Failure to follow safety rules listed below may result in electric shock, fire, and/or personal injury: • Do not abuse the cord. Do not use the cord to carry the blower. Do not pull on the cord in order to remove the plug from the outlet. -
Page 10: Assembly Instructions
Assembly Instructions Battery Pack (Fig.E) IMPORTANT! The battery pack is not charged when it is purchased. Before using the blower for the first time, place the battery pack in the battery charger and charge it fully. Be sure to read all safety precautions, and follow the instructions in the section entitled Charging Procedure. - Page 11 Nozzles (Fig. F) The two nozzles extend the reach of the blower. For blowing (Fig. F): 1. Align the widest end of the large nozzle (1) with the front opening on the blower (2). 2. Slide the nozzle over the blower outlet opening until the latch on the blower is inserted into the opening on the nozzle. 3.
-
Page 12: Operating Instructions
Operating Instructions Two-speed Switch (Fig. G) The blower is equipped with a two-speed switch. Starting/Stopping the blower: 1. Install the battery pack. (Refer to Installing the battery pack) 2. To start the blower, press the power switch in the HIGH or LOW position. 3. -
Page 13: Battery Charger
The Battery Charger BECOME FAMILIAR WITH THE CHARGER (Fig. I) Before attempting to use this charger, become familiar with all of its operating features and safety requirements. Fig. I 1. Charging indicator reference chart 2. Battery compartment 3. Power source LED light 4. - Page 14 BATTERY INSTRUCTIONS Press the Battery Capacity Indicator (BCI) button. The lights will illuminate according to the battery's current power level. See chart below: Battery Capacity LIGHT METRE Indicator (BCI) button BATTERY METRE Capacity Lights The battery is at full capacity 4 Green Lights 3 Green Lights The battery is at 70% capacity...
- Page 15 Mounting the charger (Fig. K) WALL-MOUNTABLE The charger features a key-hole hanging feature for convenient storage. Screws should be installed so that the centre distance is 3 5/32" (8 cm). Use proper wall fasteners to accommodate the combined weight of the charger and the battery pack (approximately 3 1/2 lb [1.6 kg]) CORD WRAP The charger is equipped with a cord wrap that is located at the rear of the unit.
-
Page 16: Maintenance
Maintenance WARNING In order to avoid personal injury and the risk of fire and electric shock, remove the battery pack before adjusting, inspecting, or cleaning the blower. Cleaning Remove the battery pack. 1. Brush or blow dust and debris out of the air vents using compressed air or a vacuum. Keep the air vents free of obstruc- tions, sawdust, and wood chips. -
Page 17: Battery Disposal
Environmentally Safe Battery Disposal The batteries used in this blower's battery pack contain the following toxic and corrosive material: LITHIUM-ION. WARNING Toxic materials must be disposed of in a specified manner in order to prevent contamination of the environment. Before disposing of damaged or worn out Lithium-Ion battery packs, contact your local waste disposal agency or the local Environmental Protection Agency for information and specific instructions. -
Page 18: Warranty
WARRANTY For TWO YEARS from the date of purchase within Canada, YARDWORKS CANADA will, at its option, repair or replace for the original purchaser, free or charge, any part or parts that are found to be defective in material or workmanship. -
Page 19: Parts List
Parts list Model Num. Description Model Num. Description 34102203 High velocity tip 3050103 Wire (RED) 31101203 Left housing 34101203 Nozzle Silver label B 34102164 31101203 Right housing Switch Screw 3220505 36202203 Silver label A Flag terminal 3650101 34101164 Flag terminal bushing 3490301 Rear cover 35102203...
Need help?
Do you have a question about the 60-3869-2 and is the answer not in the manual?
Questions and answers