
Related Manuals for Yardworks 060-3874-8


Summary of Contents for Yardworks 060-3874-8
- Page 1 Electric Leaf Blower/Vac with Bag model no. 060-3874-8 | contact us: 1.866.523.5218 IMPORTANT: Instruction Read and follow all safety rules and operating Manual instructions before using this product.
- Page 2 060-3874-8 | contact us: 1.866.523.5218 SPECIFICATIONS KNOw yOuR BLOwER SymBOLS SAFETy INFORmATION ELECTRICAL INFORmATION EXPLODED VIEw PARTS LIST ASSEmBLy OPERATION mAINTENANCE TROuBLEShOOTINg wARRANTy motor: 12 A Air volume: 375 CFm Air velocity: 150 or 230 mPh (241 or 370 km/h)
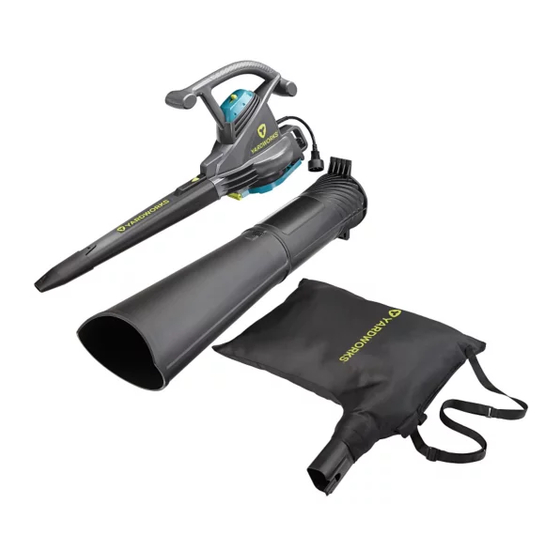
- Page 3 060-3874-8 | contact us: 1.866.523.5218 1. Switch 2. Auxiliary handle 3. Lock button 4. Blower tube 5. Concentrator nozzle 6. Power cord 7. Vacuum tubes 8. Bag...
- Page 4 060-3874-8 | contact us: 1.866.523.5218 Some of the following symbols may be used on this product. Please study them and learn their meaning. Proper interpretation of these symbols will allow you to operate the product more efficiently and more safely.
- Page 5 060-3874-8 | contact us: 1.866.523.5218 The following signal words and meanings are intended to explain the levels of risk associated with this product. SYMBOL SIGNAL MEANING Indicates an imminently hazardous situation, which, if not DANgER avoided, will result in death or serious injury.
-
Page 6: Important Safety Instructions
060-3874-8 | contact us: 1.866.523.5218 IMPORTANT SAFETY INSTRUCTIONS READ AND uNDERSTAND ALL INSTRuCTIONS. Failure to follow all instructions listed below may result in electric shock, fire, and/or serious personal injury. READ ThESE INSTRuCTIONS BEFORE uSINg ThE BLOwER. • Do not operate power tools in an explosive atmosphere, such as in the presence of flammable liquids, gases, or dust. - Page 7 060-3874-8 | contact us: 1.866.523.5218 • wear heavy long pants, boots, and gloves. Avoid loose garments or jewellery that could get caught in moving parts of the machine or its motor. • Do not force the tool. use the correct tool for your application. The correct tool will work more efficiently and safely when it is used at the rate for which it was designed.
-
Page 8: Power Cord
060-3874-8 | contact us: 1.866.523.5218 POWER CORD use a minimum 25’ (7.6 m) long, 16 Awg outdoor electrical cord when using this unit. Other sizes include: MINIMUM WIRE SIZE FOR EXTENSION CORDS FOR 120 VOLT APPLIANCES USING 0-12 AMPS* Cord length 25’... - Page 9 060-3874-8 | contact us: 1.866.523.5218...
- Page 10 060-3874-8 | contact us: 1.866.523.5218 ITEm PART No. DESCRIPTION 34104142 BLOwER TuBE-3874 31109206 12 A mOTOR ASSy. - 3874 3220735 SCREw 34103142-1 34110142-1 SwITCh BuTTON 34102142-1 RIghT hOuSINg 3220313 SCREw 3410801 CORD RETAINER 3420102 STRAIN RELIEF 36504161 B TERmINAL...
- Page 11 060-3874-8 | contact us: 1.866.523.5218 UNPACKING This product requires assembly before using. • Carefully remove the product and any accessories from the box. make sure all items listed in the packing list are included. • Inspect the product carefully to make sure no breakage or damage occurred during shipping.
- Page 12 060-3874-8 | contact us: 1.866.523.5218 model no. 060-3874-8 | contact us: 1.866.523.5218 ASSEMBLE AS A VACUUM 1. Slide the front and rear vacuum tubes together until the lock button engages. 2. Pull the lock button forward to disengage the gate. hold the gate open (see Fig. 1 on page 13).
- Page 13 060-3874-8 | contact us: 1.866.523.5218 ② ① ③ ④ ⑤...
- Page 14 060-3874-8 | contact us: 1.866.523.5218 ASSEMBLE AS A BLOWER 1. Slide the blower tube (3) back onto the blower until the lock button (1) engages. 2. Insert the concentrator nozzle (2) onto the blower tube (3). (Concentrator nozzle is used to increase air flow in tight areas: flower beds, under decks, etc.).
-
Page 15: Installing The Shoulder Harness
060-3874-8 | contact us: 1.866.523.5218 model no. 060-3874-8 | contact us: 1.866.523.5218 INSTALLING THE SHOULDER HARNESS while standing in the operating position, adjust the length to fit the operator’s size. Pull the tab to lengthen, pull the strap to shorten. -
Page 16: Connecting The Power Cord
060-3874-8 | contact us: 1.866.523.5218 CONNECTING THE POWER CORD 1. Secure the extension cord to the unit by using the cord retainer at the rear of the blower. 2. make a loop in the extension cord and pass it through the gap at the rear of the blower and place it over the hook. - Page 17 060-3874-8 | contact us: 1.866.523.5218 model no. 060-3874-8 | contact us: 1.866.523.5218 STARTING/STOPPING THE BLOWER/VACUUM This unit is equipped with a three-way (OFF/ LOw/ hIgh) switch. • Slide the switch forward for ON. • Slide the switch forward to the first position for LOW speeds up to 150 MPH (241 km/h). • Slide the switch forward to the second position for HIGH speeds up to 230 MPH (370 km/h). Once the unit is plugged in, stand in the operating position. Slide the power/speed...
-
Page 18: Holding The Blower/Vacuum
060-3874-8 | contact us: 1.866.523.5218 HOLDING THE BLOWER/VACUUM Before operating the unit, stand in the operating position. Check for the following: • Operator is wearing proper clothing, such as boots, safety glasses or goggles, ear/hearing protection, gloves, long pants and a long-sleeved shirt. WARNING : To avoid serious personal injury, wear goggles or safety glasses at all times when operating this unit. -
Page 19: Operating Tips
060-3874-8 | contact us: 1.866.523.5218 OPERATING TIPS • The bag is installed and zipped closed (when used as a vacuum). • Be sure the bag is zipped closed before operating the unit. • Ensure that the unit is not directed at anybody or any loose debris before starting the unit. • Verify that the unit is in good working condition. Make sure the tubes and guards are in place and secure. • Always hold the unit with both hands when operating. • Keep a firm grip on both the front and rear handle or grips. • To reduce the risk of hearing loss associated with sound level(s), hearing protection is required. • Use the shoulder strap when using unit as a vacuum. • Operate power equipment only at reasonable hours—not early in the morning or late at night when people might be disturbed. Comply with times listed in local ordinances. usual recommendations are 9:00 am to 5:00 pm, monday through Saturday. -
Page 20: Air Vents
060-3874-8 | contact us: 1.866.523.5218 AIR VENTS Never cover air vents. Keep them free of obstructions and debris. They must always remain clear for proper motor cooling. OPERATING AS A BLOWER hold the blower firmly. Sweep from side to side with the nozzle several inches above the ground or floor. -
Page 21: Servicing Double-Insulated Units
060-3874-8 | contact us: 1.866.523.5218 SERVICING DOUBLE-INSULATED UNITS This unit is double insulated. In a double-insulated unit, two systems of insulation are provided instead of grounding. There is no grounding provided, and no means of grounding should be added to this unit. Extreme care and knowledge of the system is required when servicing a double-insulated unit. - Page 22 060-3874-8 | contact us: 1.866.523.5218 PROBLEM POSSIBLE CAUSE SOLUTION unit will not blow 1. Bag full 1. Empty the bag. or vacuum. 2. Blocked tube 2. Clear the blockage. 3. Blocked impeller 3. Clear the blockage. 4. Dirty bag 4.
-
Page 23: Year Limited Warranty
China. Imported by yardworks from defects in material and workmanship for Canada Toronto, Canada m4S 2B8 a period of one hundred twenty (120) days from the date of retail purchase. Yardworks Canada will not be liable for incidental or consequential loss or damage.
Need help?
Do you have a question about the 060-3874-8 and is the answer not in the manual?
Questions and answers
Blower starts but stops because I closed the gate but forgot how to lock it. Can you please remind me? Model 060-3874-8