Table of Contents
Advertisement
Advertisement
Table of Contents

Subscribe to Our Youtube Channel
Summary of Contents for QuickShow FB3-QS
-
Page 1: User Manual
Lasershow Designer QuickShow FB3-QS User Manual... - Page 2 QuickShow is copyright © 2008-2010, Pangolin Laser Systems, Inc. All rights reserved. QuickShow User Interface Patent Pending. QuickShow was written by Alexey Sinitsyn, Valery Furmanov and William R. Benner, Jr., with development assistance and testing by Derek Garbos. Due to our policy of continuous product improvement,...
-
Page 3: Table Of Contents
Contents Introduction In this package DVD-ROM contents Functions Software and Hardware Installation Installing the QuickShow software USB driver installation QuickShow Introduction System Recommendations Quick Setup Settings menu Projector Settings QuickTargets Beam Settings Projection Zones DMX Settings User-interface Access Mode Main Control Window... - Page 4 Live Control tab - Position and Rotation controls Keyboard Equivalent for Invert Rotation Speed Live Control tab - Color controls Live Control tab -- Playback controls QuickTools overview QuickText QuickShape QuickTrace QuickTargets (Beam Sequencing) QuickDMX QuickTimeline QuickCapture QuickFX Advanced Tools overview Cue properties Laser Frame/Animation editor Advanced Text editor...
-
Page 5: Introduction
The tiny Flashback 3 has everything you need to control your laser projector. In this package Included in this package you will find a DVD-ROM, the FB3-QS, USB cable, and a quick start guide DVD-ROM contents The DVD-ROM included with this package includes:... -
Page 6: Functions
Functions Lasershow Designer QuickShow – a PC application for full control of FB3-QS, allows: ! Trigger cues by clicking on buttons with the mouse ! Create and edit the frames and animations on line (real time editing) ! Live control of many effects parameters during cue playback... -
Page 7: Software And Hardware Installation
Software and Hardware Installation To use the FB3-QS, you will need to install QuickShow software first, and then, while the DVD ROM is still inside the drive, connect the supplied USB cable to one USB port available on your computer. -
Page 9: Quickshow
Monitor resolution of 1024 by 768 or higher is recommended QuickShow was designed to work with a single monitor with a resolution of 1024 by 768 or higher. QuickShow will work with a lower resolution, but some of the features on the lower portion of the... -
Page 10: Quick Setup
Step 1: Specify a user level The first step in the process is to familiarize QuickShow with the type of user you are. When choosing a user level, you should be as honest as possible, since QuickShow will tailor the features you see based on your user level. - Page 11 This is important because if you only have a single-color laser and you tell QuickShow that you really have an RGB laser, then certain colors will not be seen in the projected imagery. Note that QuickShow is asking how many LASERS you have, not how many colors your projector can make (for example, a...
- Page 12 Step 4: Indicate the type of color system used by your projector The fourth and final step in the process is to familiarize QuickShow with the type of color system used by your projector. The lasers within a projector may have either TTL-modulated lasers, or Analog- modulated lasers.
- Page 13 Projector Settings window to fine-tune QuickShow's output to your projector. Once that part is finished, it is important to setup the targeted beam positions after that.
-
Page 14: Settings Menu
Settings menu The Settings menu provides access to windows that help to configure QuickShow to suit your projector and to setup targeted beam positions. Other settings menus allow access to more advanced features and options. You can see the menu below, along with text highlighting the most important two menu items. - Page 15 The DMX Settings menu allows you to setup DMX-512 for input or output. Use this if you want to control QuickShow using an external DMX lighting console, or if you want to control external lighting devices or fog machines using DMX-512.
-
Page 16: Projector Settings
Projector Settings The Projector Settings window allows you to configure QuickShow for your of projector. Available settings include size, position, scan rate, color shift, number of colors and color levels. The first page of the Projector Settings window is shown and described in the picture below. - Page 17 Setting the Scan rate Another important part of the Projector Settings window is the Scan rate tab, as shown below. Setting up the colors The Color Settings tab is shown below. Be sure to indicate the number and type of lasers in your projector, and the color modulation scheme (color system type) to use for your projector.
- Page 18 Using the ILDA Test Pattern to set the Default Scan rate The ILDA tuning standard dictates that your scanners can show the ILDA Test Pattern in a specific way (circle touching the sides of the square), when the ILDA Test Pattern is displayed at the correct scan speed (points per second): Scanning too slow: Scanning correctly:...
- Page 19 Y. Better scanners provide better results Although QuickShow will work with any scanners and scan speed, QuickShow provides the best results with 30K or faster scanners that are tuned perfectly. Please make sure that the low frequency damping and high frequency damping are adjusted properly for "critical damping."...
-
Page 20: Quicktargets Beam Settings
QuickTargets Beam Settings (recommended only for users who target mirrors, mirror balls and diffraction gratings) The QuickTargets Beam Settings window allows you to output single beams of light from your scanners. Normally this feature is used to target mirrors, mirror balls or diffraction grating effects. The main features of the QuickTargets Bean Settings window are shown and described in the picture below. -
Page 21: Projection Zones
(only recommended for Advanced users) QuickShow includes Pangolin's exclusive ILDA-Award-winning Projection Zones technology, which allows QuickShow to access up to 30 separate projection areas (zones) either from a single laser projector, or up to six laser projectors. Projection Zones combine a scanner selection with Geometric Correction for that particular zone, along with the Preview Window Appearance for that zone and a Beam Attenuation Map that can control the brightness in that particular zone. - Page 22 -Projection zone name The area toward the top of the General tab allows you to specify a Projection Zone Name. Since there are 30 zones, you should give a descriptive name to each zone such as "Main Graphics" or "Scanner 2 Beam zone".
- Page 23 -Preview Window Appearance section The next section shows the Preview Window Appearance for the selected zone, and allows you to adjust it. Note that it is possible to specify a Preview Window Appearance for each projection zone, and this preview window appearance is independent of the laser output so master size, position and geometric correction do not affect the preview window.
- Page 24 Note that with all of this flexibility, you can adjust the preview window for each zone to truly simulate what the show will look like in the final venue. -Beam Attenuation Map section The next section shows the Beam Attenuation Map section for the selected zone, and allows you to adjust it.
- Page 25 The Beam Attenuation Map is a 64 by 64 "pixel" brightness control map. Each pixel can be set to any brightness level from 0 to 100%. Rudimentary tools are provided to sample a brightness level in the map, fill the entire map with the selected brightness level, fill a rectangular area with the selected brightness level and freehand-draw brightness levels into the map.
- Page 26 Example Beam Attenuation Map use with audience scanning Another common use would be to reduce the brightness below the horizon to a level that would be more pleasing for audience scanning viewers. This can easily be done by selecting a reduced brightness level, and filling the rectangular area below the horizon.
- Page 27 Example Beam Attenuation Map use with targeted beam effects Another common use would be to protect certain areas from hazardous laser exposure or to reduce the brightness in certain areas. When doing beam shows outdoors, it is often necessary to ensure certain areas (such as the windows in certain buildings) won’t be exposed.
- Page 28 checked, all scanner output will be dedicated strictly to producing laser output and the Minimum number of points setting is ignored.
- Page 29 Sending cues to specific Projection zones Projection Zones can be specified within QuickShow cues, so that when you trigger a cue, it will automatically be sent to one or more specific zones. See the help topic about Cue Properties for more information.
-
Page 30: Dmx Settings
DMX Settings QuickShow may be setup to be controlled by an incoming DMX signal (DMX input), or to control external DMX devices such as lights and fog machines (DMX output). Both of these are specified using the DMX Settings dialog box, which is shown below. - Page 31 DMX Input If you want an external lighting console to be able to trigger QuickShow cues and control them live, choose the Enable DMX Input option. You will also need to specify the Starting DMX Channel (address) where you want QuickShow to appear within the DMX stream.
- Page 32 Enable DMX Output option. You will also need to specify the Number of channels that QuickShow should transmit. The default is 24, but you can enable QuickShow to send up to 512 channels. The DMX Output settings also has advanced controls that allow you to control the timing of the DMX signal.
- Page 33 Also note that if you have a FB3-SE with a DMX daughter board installed, this can not be used for DMX input or output with QuickShow. The DMX daughter board on the FB3 is only used by the FB3 for direct FB3 control and playback.
-
Page 34: User-Interface Access Mode
User-interface Access Mode There may be times when you want to restrict access to certain parts of QuickShow. One case would be in a disco with a "light jockey" operator. He or she may not need to access all of the creation or cue editing features of QuickShow and instead would only need to trigger the already-setup cues and perhaps access a few Live Control features. -
Page 36: Main Control Window
QuickTools where new content creation takes place. The right section contains the Live control tab and Effect Editor tab. Toolbar The main functions within QuickShow are controlled by the Toolbar which is located at the top of the Main Control Window. The toolbar is shown below. -
Page 37: Cue Triggering Mode
Cue triggering mode The Cue triggering mode controls what happens when you click on a cue with the mouse (or touch screen). If the Select mode is chosen, cues are not activated when you click on them. Cues are only selected. This is handy when you want to drag and drop cues to a QuickTimeline, or when you want to change the Properties of a cue, without activating the cue. -
Page 38: Playing Only One Cue At A Time, Or Multiple Cues
These can also controlled by showing the Dynamics tab in the View menu. Beat synchronization system QuickShow is a beat-oriented program. The beat counter is always running and you can see the beats per minute, and also a metronome icon to indicate the beat of the music. -
Page 39: Enabling Laser Output
QuickShow includes an extensive cue grid. There are 10 columns by 6 rows for a total of 60 cues visible on the screen at one time. In addition to the 60 cues, QuickShow allows for you to organize up to 32 pages of cues. In all, nearly 2000 cues can be loaded into the QuickShow workspace! -
Page 40: Keyboard Access
(A, S, D, F, etc.). Page tabs On the top of the cue grid, you will see tabs. These tabs allow you to access the Pages in QuickShow. To change pages in QuickShow, just click on the page tab with the mouse. -
Page 41: Categories
Categories On the top of the cue grid, just above the Page tabs, you will see a number of Category buttons. Categories help to organize the work space and only show the most relevant tabs. For example, if you are only looking for Graphic-related imagery, you can click on the Graphics category, and only those Pages and Cues related to graphics will be shown. -
Page 42: Creating New Content Or Editing Existing Content Within A Cue
Laser Preview Window The Laser Preview Window in QuickShow is always active, and is found in the upper right corner of the Main Control Window. In addition to simply showing the current laser output, the Laser Preview Window also provides... - Page 43 Capturing the laser preview into a cue You can also capture the currently playing laser, DMX, and beam sequencing cues into another single cue by clicking the right mouse button in the preview window, and selecting the Capture to clipboard menu.
-
Page 44: Controlling Cues During Playback
Controlling cues during playback QuickShow has the power to display more than one cue at a time. When displaying more than one cue, it can be handy to adjust the size, position, and orientation of each cue individually, so that the visuals do not overlap. -
Page 45: Cue Editing Tools
Cue editing tools The Live Performance tools within a cue are really just a shortcut to the cue controls. As you make adjustments to the Live Performance tools, you will notice that what really happens, is that the cue controls themselves are changing. Therefore, an alternative way of controlling the size, position, rotation angle, and other geometric properties of a cue is by clicking on the Cue button within the Live Controls panel, and making adjustments there. -
Page 46: Virtual Laser Jockey
Virtual Laser Jockey QuickShow includes a new and ground breaking way to help you to make laser shows called the Virtual Laser Jockey. The Virtual Laser Jockey can automatically trigger cues (and Effects as discussed below) to the beat set by the BPM system, or to the beat of externally-detected audio input. The Virtual Laser Jockey can trigger cues sequentially (linear) within the page, or randomize cues. - Page 47 Virtual Laser Jockey use within the QuickFX The QuickFX portion of QuickShow also includes the same Virtual Laser Jockey features, which may be used along with cue triggering explained above, or separately.
- Page 48 Play along with the Virtual Laser Jockey Just because the Virtual Laser Jockey is triggering cues doesn't mean that you can't. Indeed, QuickShow allows you to play cues and trigger effects even while the Virtual Laser Jockey is running. This can be...
-
Page 49: Live Control Tab Overview
Live Control tab overview The Live Control tab is on the right side of the QuickShow window and it is the main tab that is used during Live performances. - Page 50 Live Control tab - Master and Cue controls The Live Control tab can be used to control the geometric properties of all cues simultaneously, or only the geometric properties for the selected cue. This depends on whether the Master or Cue button is pressed as explained below.
-
Page 51: Live Control Tab -- Size Controls
Master and Cue buttons are only visible in Advanced mode Note that the Master and Cue buttons are only visible when you have the user interface set to Advanced mode. These buttons do not appear if you are in Intermediate or Beginner mode. (However, most of the cue-related controls can be accessed by using Live Performance tools within each cue.) Live Control tab -- Size controls Using the Live Control tab, you can affect the Size of everything together (when in Master mode), or... -
Page 52: Live Control Tab - Position And Rotation Controls
Live Control tab - Position and Rotation controls Using the Live Control tab, you can affect the position, rotation angle and rotation speed of everything together (when in Master mode), or of individual cues (when in Cue mode). The picture below explains the various options. -
Page 53: Live Control Tab - Color Controls
Live Control tab - Color controls Using the Live Control tab, you can affect the Brightness, Color and Visible Points of everything together (when in Master mode), or of individual cues (when in Cue mode). The picture below explains the various options. Right click Note that if you click the right mouse button on the Brightness or Visible Points slider, its value will be reset to 100%. -
Page 54: Quicktools Overview
QuickTools overview The QuickTools section of QuickShow is one of the most unique aspects of the program. QuickTools allow you to quickly and easily create new content without disturbing the currently-playing laser show. The QuickTools are found at the bottom of the Main Control Window, and are shown below. - Page 55 Common Features All image-generating QuickTools share some common features. These are shown and discussed below. To edit content originally created with a QuickTool, simply drag from the Cue grid back down to the most relevant QuickTool tab. Visibility of certain QuickTools depends on your user level Note that some of the QuickTools discussed above are not available if the User Level is set to Beginner or Intermediate.
-
Page 56: Quicktext
The QuickText tool allows you to quickly create non-moving text, as well as scrolling, animated and waving text effects. Simply click on the QuickText tab at the bottom of the QuickShow window and you will see the QuickText tool. The main features of the QuickText tool are shown and described in the picture below. - Page 57 fonts only have the most common (Latin) characters. Note that clicking on the T Edit... or A Font... buttons must be done last. If you click on a different effect, it will reset the font and text setting. Modifying the overall size, position and rotation angle The four buttons under the text preview window allow you to control the size, position, and rotation angle of the text effect.
-
Page 58: Quickshape
QuickShape The QuickShape tool allows you to quickly create basic shapes, such as circles, squares, lines, etc. as well as more complex shapes such as waves, loops, and spirograph figures. These figures can be made up of a solid and continuous line, or made of dots. Dots are particularly handy for beam shows. The main features of the QuickShape tool are shown and described in the picture below. - Page 59 Selecting an effect Effects modify the base shape. An effect can add waves, loops, rolls, colors, or a variety of other modifications. Simply click on the desired effect and you will see the result in the preview window. Modifying the overall size, position and rotation angle The four buttons under the shape preview window allow you to control the size, position, and rotation angle of the shape.
-
Page 60: Quicktrace
QuickTrace The QuickTrace tool allows you to quickly trace graphic images such as bitmaps stored in BMP, JPEG or GIF format. The main features of the QuickTrace tool are shown and described in the picture below. As shown, you simply select a image file, choose a trace mode, make a few adjustments, and then either Show it now, or drag and drop the image to a cue for playback later. - Page 61 When the tracing mode is set to Highlight separation or Centerline, the Separation Level slider will be available for adjustment. Simply click and drag your mouse in the slider area, and move the slider back and forth until you get the best looking output image. Modifying the overall size, position and rotation angle The four buttons under the preview window allow you to control the size, position, and rotation angle of the shape.
-
Page 62: Quicktargets (Beam Sequencing)
QuickTargets (Beam Sequencing) The QuickTargets tool allows you to quickly create targeted beams and beam sequences. Simply click on the QuickTargets tab at the bottom of the screen and you will see the QuickTargets tool. (Note that you will not see the QuickTargets feature until you have setup the QuickTargets Beam Settings.) The main features of the QuickTargets tool are shown and described in the picture below. - Page 63 Also note that you can trigger more than one beam during each step, as shown above. Controlling the speed of the sequence The speed of the sequence is controlled by the Step duration control and by the Beats and Time buttons to the right of the Step duration control.
-
Page 64: Quickdmx
QuickDMX The QuickDMX tool allows you to quickly create DMX scenes or complete DMX sequences. Simply click on the QuickDMX tab at the bottom of the screen and you will see the QuickDMX tool. (Note that you will not see the QuickDMX feature until you have DMX Output enabled using the DMX Settings dialog box.) The main features of the QuickTargets tool are shown and described in the picture below. - Page 65 Displaying the static or sequenced DMX momentarily To send the output of the QuickDMX tool to the DMX output device, simply click on the Show it now button. If the Play button is pressed in the QuickDMX window, the DMX sequence will be output to the device.
- Page 66 Changing how channels are viewed You can view the DMX either as sliders (as shown above), or as a spreadsheet format, or as a waveform, showing how the channel values will change at each step.
-
Page 67: Quicktimeline
QuickTimeline The QuickTimeline tool allows you to quickly create simple laser shows. A few noteworthy features of the QuickTimeline tool are shown and described in the picture below. Drag and drop cues onto the timeline To create a show, simply drag and drop cues from the Cue Grid onto the timeline. Four tracks are initially visible, but you can add as many as you want by using the Menu button in the upper left corner. -
Page 68: Quickcapture
QuickCapture The QuickCapture tool allows you to capture anything that is currently playing in the preview window, into a single cue, which can then be dragged and dropped into the workspace for use later. Simply click on the QuickCapture tab at the bottom of the screen and you will see the QuickCapture tool. For example, if you are in Multi-cue mode, and you have three cues playing, you can capture that into a single cue, so that next time you want to trigger the same three cues, you can do it by merely clicking on a single cue. -
Page 69: Quickfx
QuickFX The QuickFX tool is different from all of the other QuickTools. The QuickFX is intended to apply an effect to already-running cues. The main features of the QuickFX tool are shown and described in the picture below. As shown, you simply clock on a desired effect, and it will be applied on top of all playing cues (if the Master button is pressed) or it will be applied to only the selected cue (if the Cue button is pressed). -
Page 70: Advanced Tools Overview
Advanced Tools overview In addition to the QuickTools, which allow you to create content extremely quickly but with limited parameters, QuickShow also includes a full featured Laser Frame/Animation editor, Advanced Text editor, Advanced Shape (abstract) generator, and an Advanced Clock editor. -
Page 71: Cue Properties
Cue properties The Properties of each cue can be accessed by right-clicking on the cue and choosing Cue Properties. The first page of the Cue Properties window is shown and described in the picture below. Icon section The Icon section of the Cue Properties window controls the visual representation in the Cue Grid. The Cue Name is the name that shows up in the Cue Grid. - Page 72 If the cue contains an animation (i.e. a frame file with more than one frame), there are three ways in which QuickShow can animate that frame file. Refresh-based animation (provides the smoothest animation for long frame files, but is often...
- Page 73 When rerouting is prevented in this way, the cue will have a special icon indicating that it can't be rerouted by the preview window.
-
Page 74: Laser Frame/Animation Editor
Laser Frame/Animation editor QuickShow includes an easy-to-use, yet full-featured Frame and Animation editor. Powerful, yet easy to use The editor works just like a simple Paint program and yet it takes all of the headaches out of creating laser frames because points are placed automatically. - Page 75 Drop Down Menus File New: Clears all frames in cue Open: Opens Browser to Browse Frame Files to open Place: Place a file into a location within the current frame list (cue) Save: Save cue Save selected frames: Click groups of frames (Click first frame then hold SHIFT and Click last frame to highlight selected group of frames to use this function).
- Page 76 Select All: Selects all available data within frame Complete Selection: Deselects selected points or points currently being edited Invert Selection: Inverts state of point selection. If points are not selected this function inverts to selected. Extract to new frame: Extracts (Pulls out) selected points and creates a new frame next to the current frame containing the extracted points Merge with next frame: Merges current frame or selected points with the next frame in the frame list.
- Page 77 Paste: Pastes copied frame Output Stop Laser Output: Stops the laser output (Same as ESC key) use this ESC Key as a safety interlock to stop output if a hazardous condition presents itself. Enable Laser Output: Enables Laser Output to begin Play Animation: Starts to play selected cue Shortcuts 1 2 3 4 5 6 7 8 9 10 11...
- Page 78 13. Animate Opens path based animation dialogue box and tools. See section on animation further on in this manual 14. Frame Repeats: Save memory card space by using frame repeats to speed up or slow down animations. Remember animation is a visual perception based on 24-30 frames per second. Instead of drawing more frames use frame repeats to adjust the animation speed.
- Page 79 Color Quick Color selector interface (Click and Pick) Double Click in the White Square to open RGB color picker dialogue box Note: Using the RGB picker on a TTL only system may have some adverse effects. If your system is TTL only choose primary colors as you will only have 7 colors to choose from. Frame File List Shows all frames in current frame file and enables (right Click) options for animation and additional animation functions.
- Page 80 Frame Data Shows information such as number of points in the selected frame and color data and position information. OK: Click ok and the cue will automatically be available in the Cue list you selected to edit on the main page.
- Page 81 Two frames One with the selected points on the top of the edit window and the other on the bottom h. Right click frame 1 and click the menu selection Create Animation Between Frames i. Enter number of frames in the animation you desire. Remember to few frames the animation is fast, 1-100 (1 Fast –...
- Page 82 2. Move Cues a. Drag and Drop i. Left Click to Select Desired Cue and Hold left mouse button down ii. Drag cue to another cue cell and release Left Mouse Button iii. You will be prompted iv. Click yes to confirm Note: if you drag a cue to a occupied cue the cue information in the occupied cue will be lost.
- Page 83 Supported File Types: .ILD .LDA .LDB .LDS .LPC v. Select File and Click OK vi. If the Cue is not empty you may see this warning to confirm action Done: The file will now be present in the Cue Drawing Use a variety of tools to draw images.
- Page 84 iv. In the Frame File List select the first frame v. Right Click: Duplicate vi. Select First Frame vii. Transform Menu...
- Page 85 viii. With the first frame in the frame file list still selected choose a color such as pink. ix. The select the paint roller tool x. Paint half of the circle pink xi. Select the second frame file and paint the opposite half another color like Cyan xii.
- Page 86 Animate tunnels moving all around changing colors. Its your palate to play with. Get creative. It only takes minutes to make new and unique laser aerial effects with QuickShow!
-
Page 87: Advanced Text Editor
Advanced Text editor In addition to the QuickText feature, QuickShow also includes and Advanced Text editor capable of doing far more intricate work. The main window of the Advanced Text editor is shown below, along with an explanation of the main controls. -
Page 88: Advanced Shape (Abstract) Editor
Advanced Shape (abstract) editor In addition to the QuickShape feature, QuickShow also includes a full featured Advanced Shape (abstract) editor. The main window of the Advanced Shape (abstract) editor is shown below, along with a view of the main controls. -
Page 89: Advanced Clock Editor
Advanced Clock editor To round out the set of advanced features, QuickShow also includes an Advanced Clock editor which can be used to create analog or digital clocks that can count up and down, and in horizontal or vertical orientation. The main window of the Advanced Clock editor is shown below, along with a view of the main controls. -
Page 90: Effect Editor
Effect Editor The Effect Editor in QuickShow is continuously available and is found on the right side of the QuickShow window. The Effect Editor window shown below, along with an explanation of the main features. - Page 91 Adding an effect and adjusting parameters Quickly accessing often-used values...
- Page 92 Actions can be based on the beat of the music, or based on time Types of Effects QuickShow offers three different types of effects: Oscillating Effects (typically used to perform functions to the beat of the music, such as zooming, fading, rotating, etc. )
- Page 93 Oscillating Effects The list of Oscillating Effects can be seen below. Key Effects The list of Key-Effects can be seen below...
-
Page 94: Music And Beats Overview
Music and Beats overview The Beat system is always running in QuickShow, and it can be seen at the top of the toolbar window. You can set the beat by repeatedly clicking on the "BPM" label next, or by pressing the SPACE BAR on the computer keyboard. -
Page 95: Controlling Multiple Lasers
QuickShow will automatically recognize them, and place an icon in the status bar portion of the program. (* Note that the number of FB3 that QuickShow can control depends strongly on the horsepower of your computer. The more FB3s you connect to a single computer, the faster your computer will need to be since QuickShow computes the output for all laser systems using the PC processor.) - Page 96 Specifying a projection zone within the cue properties You can access the properties of each cue by right-clicking on that cue and choosing Cue Properties. The Destination section controls the destination of the cue (i.e. where the cue will be routed once it is triggered).
- Page 97 Once the Laser Preview window is split into nine zones, you may click the left mouse button on one of the zones, and, from that point forward, most laser cues will be directed to the zone you selected. Two-handed keyboard control Note that the layout of the nine zones is exactly like that of the numeric keypad on your computer keyboard.
-
Page 98: Pointing To A Cue Location
By default, when you drag a cue from the workspace onto the timeline within the QuickTimeline tab, or when you drag a cue from the workspace onto the QuickCapture tab, QuickShow will create a "pointer to that cue", instead of using the data within the cue itself. Basically this means that the QuickTimeline or QuickCapture will capture the cue location within the grid and not really the image or picture within the cue itself. -
Page 99: Keyboard Equivalents
Cue Properties. Keyboard Equivalents QuickShow has many keyboard equivalents. Some of them are listed in the menus, some of them are shown in the cue cells themselves and some of them are not shown at all. All keyboard equivalents are shown below. -
Page 100: Files And File Extensions
QuickShow uses a variety of files. The file descriptions and extensions are listed below. QuickShow Workspace - .qsw The QuickShow Workspace file is a sort of "Master file" that contains all cue information, all Frames, Text, Effects, and some configuration-related information. - Page 101 QuickShow Text - .qtxt Text files contain all information about a Text effect used in QuickShow -- whether the text is created using the QuickText feature, or using the Advanced Text editor. Text files can be saved and loaded at any time using the File menu in the Advanced Text editor.
-
Page 102: Virtual Midi Keyboard
Virtual MIDI Keyboard The Virtual MIDI Keyboard can be seen at the bottom of the cue grid. The Virtual MIDI Keyboard illustrates the mapping between cues and MIDI keys. If you press a cue in the grid, you will be able to see which MIDI key is mapped to that cell. Likewise, if you click on a MIDI key with your mouse, this will trigger the associated cue. -
Page 103: Midi Settings
MIDI Settings QuickShow includes extensive support for MIDI keyboards and controllers. All aspects of MIDI are setup with the MIDI Settings dialog box. MIDI Devices This tab allows you to select up to four MIDI Input devices and one MIDI Output device. Once you have selected the Input Devices, you should configure each device on the Input Options tab. - Page 104 For example, you may use one keyboard to trigger "images" and another keyboard to trigger "effects". In this case, you can locate all of the images on one QuickShow page, and all of the effects on another. The Channel and Page drop down list boxes allow you to control the way in which each MIDI Input is treated for the purposes of directing MIDI Input to QuickShow cues.
- Page 105 Echo This controls whether or not QuickShow will send MIDI messages received by this device back out to the MIDI Output device. Normally Echo is not enabled, but it may be handy in situations where QuickShow is incorporated into the MIDI stream of an intricate MIDI music studio. All normal messages will be echoed but System Exclusive (SYSEX) messages will not be echoed.
- Page 106 This tab allows you to either ignore or process messages, depending on the Channel number that is encoded in each MIDI message. Normally all channels should be left Enabled, but you may disable one or more channels if QuickShow is used in a MIDI environment that involves a number of MIDI instruments.
-
Page 107: Ilda Output Assignment
ILDA output assignment ILDA DB-25F pinouts Signal name Pin Notes 1 -5V to +5V 2 -5V to +5V Intensity/Blanking + 0V to +5V Interlock A Red+ 5 0V to +5V Green+ 6 0V to +5V Blue+ 7 0V to +5V Deep blue + Yellow + Cyan +... -
Page 109: Led Light Codes
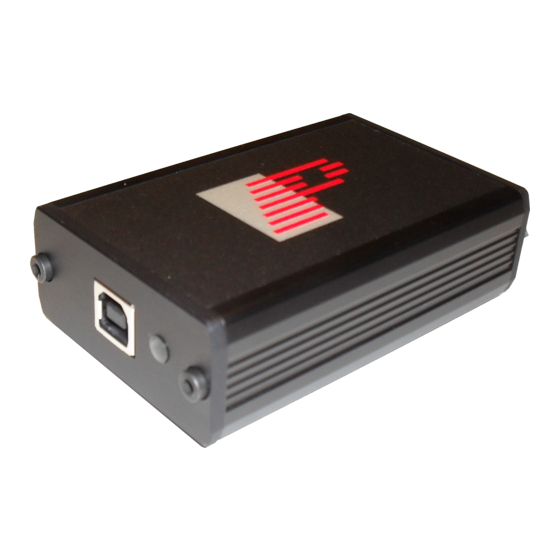
LED light codes The front LED next to the USB connector indicates the current function the FB3-QS is executing: •Solid Green -Powered (connected to USB but no connection to QuickShow) •Solid Yellow -Connected (to the Quickshow or other software), but offline •Red Slow Flash... -
Page 110: Rohs Certificate Of Compliance
RoHS Certificate of Compliance Restriction of the use of certain Hazardous Substances EC directive 2002/95/EC (the RoHS Directive) restricts the use of the hazardous substances listed below in electrical and electronic equipment. Based on information provided by our suppliers, Pangolin designates the products listed below as RoHS compliant for orders placed on or after the date of this certificate.
Need help?
Do you have a question about the FB3-QS and is the answer not in the manual?
Questions and answers