Table of Contents
Advertisement
Quick Links
Advertisement
Table of Contents

Subscribe to Our Youtube Channel
Related Manuals for Barco X4


Summary of Contents for Barco X4
- Page 1 X-series Installation manual (second generation) R5906024/01 15/03/2016...
- Page 2 Barco NV President Kennedypark 35, 8500 Kortrijk, Belgium Phone: +32 56.23.32.11 Fax: +32 56.26.22.62 Support: www.barco.com/en/support Visit us at the web: www.barco.com Printed in Belgium...
- Page 3 The period of guarantee begins on the date of transfer of risks, in the case of special systems and software on the date of commissioning, at latest 30 days after the transfer of risks. In the event of justified notice of complaint, Barco can repair the fault or provide a replacement at its own discretion within an appropriate period.
-
Page 5: Table Of Contents
Table of contents TABLE OF CONTENTS 1. Safety ....................... .. 3 Safety guidelines . - Page 6 Table of contents R5906024 X-SERIES 15/03/2016...
-
Page 7: Safety
“warnings” and “cautions” are given depending on the installation procedure. Read and follow these “warnings” and “cautions” as well. Clarification of the term “X-series” used in this document When referring in this document to the term “X-series” means that the content is applicable for following Barco products: • •... -
Page 8: Safety Guidelines
Structural & mounting components should be kept dry, clean, lubricated (only if recommended), coated properly, and otherwise maintained in a manner consistent with part design. Barco products must be used in a manner consistent with their design and inspected on a routine basis for security, wear, deformation, corrosion and any other circumstances that may affect the load handling capability of the part. -
Page 9: Important Safety Instructions
1. Safety Important safety instructions Instructions: • Read these instructions. • Keep these instructions. • Heed all warnings. • Follow all instructions. • Clean only with materials or chemicals that are inert, nonabrasive, noncorrosive and non-marking. Consult the manufacturer for further advice should any doubts exist regarding any cleaning procedure. •... -
Page 10: Important Warnings
Each power source cable should be protected by a circuit breaker or fuses rated 16 A / 250 VAC (15 A / 250 VAC in the USA and Canada). Note that one tile requires 100-240 VAC, 16 A, 50-60 Hz, X2/X4: 0.55 A at 230 VAC, X1.6/X1.9: 0.85 A at 230 VAC... - Page 11 Do not hot plug any cables. Damage to the connector pins may occur. Resulting damage is not covered under warranty. Maximum allowed display height: The maximum height of a X-series display in a base stand configuration is 10 tiles X2/X4 or 9 tiles X1.6/X1.9. The maximum height of a X-series display in a hanging (truss) configuration is 16 tiles.
-
Page 12: Proper Usage
• Only Barco cables specified to be used with the X-series display are to be used to connect components in the X-series wall. Further, care must be taken to connect signal only according to the installation manual. -
Page 13: Installation Requirements
2. Installation requirements 2. INSTALLATION REQUIREMENTS About this chapter This chapter enumerates the mechanical requirements for the X-series display, the electrical requirements to power up the X-series display and the system requirements to run the control software efficiently. ARNING The X-series display is an indoor product. Use the X-series tiles only in a dry area away from direct sunlight, dust and moisture. -
Page 14: Mechanical Requirements For The X-Series Display
Depending on the height of the display and the position of the LED-wall upon the foot beams (somewhere between front and middle) additional weight (ballast) will be required. Use the “Ballast calculator” tool available on Barco’s secured web site to calculate the minimum ballast you require for safe installation of your X-series display. -
Page 15: Electrical Requirements For The X-Series Display
Power requirements One X-series tile requires 100-240 VAC, 16 A, 50-60 Hz, X2/X4: 0.55 A at 230 VAC, X1.6/X1.9: 0.85 A at 230 VAC. Note that one X2 tile corresponds with a display surface of 0.16 m² and one X1.6/1.9 tile corresponds with a display surface of 0.18 m². Power cables are used to link the power from tile to tile. -
Page 16: System Requirements For The Control Software
2. Installation requirements System requirements for the Control software Before you begin It is assumed you are familiar with the Windows operating system at your site. System requirements PC running Infinipix™ Suite software. For system requirements see Infinipix™ Suite user guide. R5906024 X-SERIES 15/03/2016... -
Page 17: System Overview
3. System overview 3. SYSTEM OVERVIEW About this chapter This chapter enumerates the fundamental elements of the X-series display. Overview • Introduction R5906024 X-SERIES 15/03/2016... -
Page 18: Introduction
3. System overview Introduction The fundamental elements of an X-series system are: • X-series tiles. • X-series truss installation or base stand installation. • Power box. • Infinipix™ manager NM100. • Infinipix™ processor NP100. Block diagram X-series system: NM100 NP100 NP100 NP100 POWER BOX... -
Page 19: Components Of The X-Series Display
4. Components of the X-series display 4. COMPONENTS OF THE X-SERIES DISPLAY About this chapter This chapter describes all the different components, peripherals and accessories, which are used in the setup of an X-series display. Overview • X-series tile • X-series truss setup accessories •... -
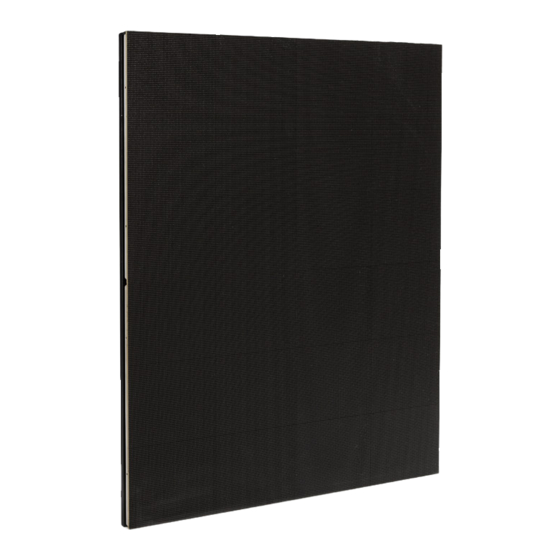
Page 20: X-Series Tile
This power cable is used to connect the power plugs between two tiles.. Image 4-3 Power cable (Z3403117) Power spider cable Barco has made a power spider cable which splits up the power circuit into several power branches. R5906024 X-SERIES 15/03/2016... - Page 21 4. Components of the X-series display Image 4-4 Power spider cable (R9801137) Multi pole power cable This multi pole power cable is used to distribute power between power box and the power spider cable of an X-series display. Image 4-5 Power cable (R9851260 (10 meter) / R9871024 (20 meter)) Tile status indicator The 4 status indicator LED’s (reference 1 image 4-6) located on the side of the X-series tile allow you to instantly see the data signal...
-
Page 22: X-Series Truss Setup Accessories
Truss setup accessories X-series truss beams are required to set up an X-series display in a hanging configuration. Barco offers three sizes of X-series truss beams, namely the dual (2x), triple (3x) and quad (4x) truss beam. These truss beams cover a width of respectively two, three and four X-series tiles. -
Page 23: X-Series Base Stand Setup Accessories
Depending on the height of the X-series display longer foot beams must be used. The maximum height of a base stand X-series display is 10 tiles X2/X4 or 9 tiles X1.6/X1.9 high. X-series truss/floor beams are available in three sizes: the dual, triple and quad truss/floor beam. - Page 24 4. Components of the X-series display Image 4-9 X-series stacker connection kit X-series stacker 1,5m X-series stacker 2 m (2 x 1m) R5906024 X-SERIES 15/03/2016...
- Page 25 4. Components of the X-series display Image 4-10 X-series foot bracket kit X-series foot beam 4 m X-series foot beam 2,4 m X-series foot beam 1,2 m R5906024 X-SERIES 15/03/2016...
-
Page 26: Overview Of Standard Connection Piece Types
4. Components of the X-series display Overview of standard connection piece types Overview of standard connection piece types • Standard connection piece (1) • Standard half connection piece (2) • Truss connection piece (3) • Truss side connection piece (4) The following image illustrates where the connection pieces are used: Image 4-11 The full connection pieces have a M8 threaded bush to attach extra support (i.e. -
Page 27: Overview Of Advanced (Rental) Connection Piece Types
4. Components of the X-series display Overview of advanced (rental) connection piece types Overview of advanced (rental) connection piece types • Advanced (rental) connection piece (1) • Advanced (rental) half connection piece (2) • Truss connection piece (3) • Truss side connection piece (4) The following image illustrates where the connection pieces are used: Image 4-12 The full connection pieces have a M8 threaded bush to attach extra support (i.e. -
Page 28: Infinipix™ Platform
4. Components of the X-series display Infinipix™ Platform General The Infinipix™ Manager (NM100) is the next generation in LED Display Management hardware/software. It has a web interface that allows users to access information in the display hardware and offers the tools to view and manipulate settings on the hardware. The hardware is related to the Infinipix™... - Page 29 Only the installation of the X-series components are described in this docu- ment. Refer to the manuals of the Infinipix Suite, NM100 and NP100 for more information. All manuals can be downloaded from the Barco website. R5906024 X-SERIES 15/03/2016...
-
Page 30: Power Boxes
To ensure safe and reliable operation of the X-series display a suitable system for AC power distribution must be used. Though 3 party solutions may be used, several sizes and types of power distributions are available from Barco. For smaller system the “Mono Phase Power Box”... -
Page 31: Infinipix™ User Interface
The Infinipix™ User Interface is a web based application that runs on the web server of the Infinipix™ NM100. Just connect via an Ethernet connection to this web server to run the application. It can be used to control and configure the Infinipix™ NM100 as well as the Barco LED wall. Image 4-17 Home page of the Infinipix™... -
Page 32: Updates
Barco’s web site • All product related information can be found on Barco’s web site. Login to myBarco to see partner related documents. • The latest software and firmware can be downloaded and the procedure on how to install these can be found in the Director Toolset manual. -
Page 33: Setup Process Of The X-Series Display
This configuration is limited in height, maximum 16 tiles tiles high for a hanging configuration. Stacked X-series tiles This configuration is limited in height, maximum 10 tiles X2/X4 or 9 tiles X1.6/X1.9 tiles high for a base stand configuration. ARNING Safety first. -
Page 34: Set Up A Hanging X-Series Display
5. Setup process of the X-series display Set up a hanging X-series display ARNING Make sure that the truss installation, on which you want to hang the X-series display, complies with the local regulations regarding such installations and that the truss installation will be able to support the complete load of the X-series display. - Page 35 5. Setup process of the X-series display Note: The truss connection pieces can be installed either in the center position or front position of the tile suspension points. Always correct the position of the truss lifting eyes to match the center of gravity (fully to the front for front installation or centered for centered installation).
- Page 36 5. Setup process of the X-series display Image 5-3 3. The next stage is the installation of the remaining X-series tiles one by one and row by row. Warning: The maximum height of a hanging X-series display is 16 tiles tiles high. Warning: Make sure that all hoist engines work in a synchronized way.
- Page 37 16 A / 250 VAC (15 A / 250 VAC in the USA and Canada). Note that one X-series tile requires 100-240 VAC, 16 A, 50-60 Hz, X2/X4: 0.55 A at 230 VAC, X1.6/X1.9: 0.85 A at 230 VAC.
- Page 38 5. Setup process of the X-series display 6. Apply power to the X-series display and start up the control software. For more information about showing content on the X-series display see manual of the Control software. Image 5-5 ARNING Never exceed the maximum allowable hoist engine capacity. Do not combine truss beams on one hoist hook: only one truss beam per hoist engine allowed.
-
Page 39: Set Up A Base Stand X-Series Display
50 centimeters. This to prevent bending of the beam. Note that the ballast has to be placed between the end and the last 30 cm of the foot beam. Consult the “Ballast calculator” on the secured Barco web site. - Page 40 5. Setup process of the X-series display Image 5-7 2. The second stage is the installation of the first row of stackers. See procedure "Installing X-series stacker", page 44. The following illustration shows the recommended stacker configurations for different display heights: X1.x Image 5-8 3.
- Page 41 4. Repeat stage 2 and 3 until all rows of the X-series display are installed. Warning: The maximum height of a base stand X-series rental display is 10 tiles X2/X4 or 9 tiles X1.6/X1.9 tiles high. Note: The previous installed stacker profiles will act as stacker feet for the next stacker profiles.
- Page 42 7. Apply power to the X-series display and start up the control software. For more information about showing content on the X-series display see manual of the Control software. ARNING The maximum height of a base stand X-series display is 10 tiles X2/X4 or 9 tiles X1.6/X1.9. R5906024 X-SERIES 15/03/2016...
-
Page 43: Basic Set Up Procedures
6. Basic Set up procedures 6. BASIC SET UP PROCEDURES About this chapter This chapter contains all installation procedures necessary to handle the X-series components, to set up an X-series display and to remove the X-series tiles from an X-series display. These procedures describe, with detailed step by step actions and illustrations, how to install the X-series display in a hanging configuration. -
Page 44: Installing An Adjustable Foot (Option) On A Foot Beam
6. Basic Set up procedures Installing an adjustable foot (option) on a foot beam Necessary tools • Allen wrench size 4 mm • Hexagon socket size 10 mm How to install an adjustable foot ? 1. Ensure there are no obstacles to smooth placement of the adjustable foot. 2. -
Page 45: Joining Multiple X-Series Truss/Floor Beams
6. Basic Set up procedures Joining multiple X-series truss/floor beams Installation 1. Place two truss/floor beams in line. Make sure that the pins of one truss/floor beam are facing the holes of the other truss/floor beam. 2. Join both truss/floor beams. Image 6-2 3. -
Page 46: Installing X-Series Truss/Floor Beams Upon Foot Beams
6. Basic Set up procedures Installing X-series truss/floor beams upon foot beams Installation 1. Place two foot beams parallel on a flat surface. 2. Slide the two beam mount plates into the slots of each foot beam. Image 6-4 3. Place the truss/floor beam(s) upon the foot beams. If more truss/floor beams are used, join the truss/floor beams (see "Joining multiple X-series truss/floor beams", page 41). - Page 47 6. Basic Set up procedures Image 6-6 AUTION It’s of great importance that the rental feet are perfectly aligned and leveled to avoid seams between the rental tiles. The rental feet are the fundamentals of the LED display. So, before continue with installing the rental tiles ensure that the rental feet are perfectly aligned and leveled.
-
Page 48: Installing X-Series Stacker
6. Basic Set up procedures Installing X-series stacker Installation 1. Install the stacker mount on the foot beam. Align the mounting holes with the threaded holes of the beam mount plates. Note: In most cases the beam mount plate of the foot mounting bracket is used to fix one mounting hole of the stacker mount. The other mounting holes is then used exclusively with the other beam mount plate. - Page 49 6. Basic Set up procedures Image 6-9 R5906024 X-SERIES 15/03/2016...
-
Page 50: Installing X-Series Tiles With Standard Connection Pieces
6. Basic Set up procedures Installing X-series tiles with standard connection pieces Installation 1. Put the tile in place using the correct type of connection plates on its four (three) corners. Note: The alignment pins ensure proper positioning and provide support for easier installation of the tiles. Image 6-10 2. -
Page 51: Installing X-Series Tiles With Advanced (Rental) Connection Pieces
6. Basic Set up procedures Installing X-series tiles with advanced (rental) connection pieces Installation 1. Put the tile in place using the correct type of connection plates on its four (three) corners. Note: The alignment pins ensure proper positioning and provide support for easier installation of the tiles. Image 6-12 2. - Page 52 6. Basic Set up procedures R5906024 X-SERIES 15/03/2016...
-
Page 53: Cabling Of The X-Series Display
7. Cabling of the X-series display 7. CABLING OF THE X-SERIES DISPLAY About this chapter This chapter describes how the power and data cabling is realized of the X-series display. It’s recommended to realize the power and data cabling simultaneously while installing the X-series tile. Overview •... -
Page 54: X-Series Tile Connectivity
The other dual socket will automatically act as output port. So, it doesn’t matter on which data input socket, left or right, the data is coming in. The X-series tile switches the functionality of the SFP+ sockets spontaneously between input and output. Barco provides short data linking cables with SFP+ plugs, which are used to realize the dual data path from tile to tile in a daisy chain manner. -
Page 55: Power Cabling Of The X-Series Display
Power boxes Barco provides several types of power boxes. Depending on the size of the X-series display you can choose to use the mono phase power box or the custom made power box or the power box. The type of power box does not influence the power cabling of the X-series display. - Page 56 7. Cabling of the X-series display Example of power cabling of the X-series display Image 7-2 The example above shows the power cabling of a 15 by 8 tiles X-series display. The power box (reference 1) is connected via a multi power cable (reference 2) with a spider connector (reference 3).
-
Page 57: Data Cabling Of The X-Series Display
7. Cabling of the X-series display Data cabling of the X-series display Purpose of redundancy loop When a data cable between 2 tiles is removed or seriously damaged so that the data link is interrupted, all next tiles in the string will loose their data link. - Page 58 7. Cabling of the X-series display Infinipix™ Processor(s) NP100: Display Processor(s) + Source Input(s). Display Module Start of data path with SFP+ optical cable and modules SFP+ optical cable and modules for data path redundancy SFP+ DAC cable for connections between tiles The example above shows the data cabling of an X-series display.
-
Page 59: Dimensions
A. Dimensions A. DIMENSIONS About this chapter This chapter contains mechanical drawings of the X-series tile and X-series accessories with the most important outer dimensions. Overview • Dimensions of an X-series tile • Dimensions of the X-series truss/floor beams • Dimensions of the X-series stacker •... -
Page 60: Dimensions Of An X-Series Tile
A. Dimensions A.1 Dimensions of an X-series tile Dimensions of the X2 and X4 tiles Image A-1 Dimensions given in millimeters. Dimensions of the X1.9 and X1.6 tiles Image A-2 Dimensions given in millimeters. R5906024 X-SERIES 15/03/2016... -
Page 61: Dimensions Of The X-Series Truss/Floor Beams
A. Dimensions A.2 Dimensions of the X-series truss/floor beams Dimensions of the dual truss/floor beam 826,5 Image A-3 Dimensions given in millimeters. Dimensions of the triple truss/floor beam 1229,5 1200 Image A-4 Dimensions given in millimeters. Dimensions of the quadruple truss/floor beam 1626,5 1600 Image A-5... -
Page 62: Dimensions Of The X-Series Stacker
A. Dimensions A.3 Dimensions of the X-series stacker Dimensions of the 2 m stacker 1000 1000 Image A-6 Dimensions given in millimeters. Dimensions of the 1.5 m stacker 1500 Image A-7 Dimensions given in millimeters. R5906024 X-SERIES 15/03/2016... -
Page 63: Dimensions Of The Foot Beams
A. Dimensions A.4 Dimensions of the foot beams Dimensions foot beams 1200 / 2400 / 4000 Image A-8 Dimensions given in millimeters. R5906024 X-SERIES 15/03/2016... - Page 64 A. Dimensions R5906024 X-SERIES 15/03/2016...
-
Page 65: Specifications
B. Specifications B. SPECIFICATIONS Overview • X-series tile specifications • Weight of individual parts of the X-series display • Ballast values for a base stand X-series X-series display • Ground pressure of a base stand X-series X-series display R5906024 X-SERIES 15/03/2016... -
Page 66: X-Series Tile Specifications
B. Specifications B.1 X-series tile specifications X1.6 specifications Pixel pitch 1.66 mm / 0.065 inch Pixel density 360,000 px/sqm Pixels per tile 240 x 270 px (H x V) LED type SMD RGB Black Brightness 1,000 nits LED lifetime 80,000 hrs (50% brightness) Color Processing 16bit (input to output) Colors... - Page 67 B. Specifications Hor. viewing angle +/-60° (min 50% brightness) Vert. viewing angle +/-60° (min 50% brightness) Tile size (WxHxD) in mm 400 x 450 x 91 mm / 15.75 x 17.72 x 3.58 inch Weight / Tile 6.6 kg / 14.55 lbs Serviceability Front/back Max.
- Page 68 Passive cooling (Active cooling for high brightness mode) IP rating Indoor only Country of origin Belgium Certifications CE, ETL/UL, FCC Class B, RoHS, TÜV, WEEE X4 specifications Pixel pitch 4.5 mm / 0.1787 inch Pixel density 48,400 pixels/sqm Pixels per tile 88 x 88 (H x V)
-
Page 69: Weight Of Individual Parts Of The X-Series Display
B. Specifications B.2 Weight of individual parts of the X-series display Weight of individual parts 0,53 Kg Standard connection piece Standard half connection piece 0,25 Kg Advanced (rental) connection piece 0,69 Kg Advanced (rental) half connection piece 0,32 Kg Quad truss/floor beam (R8768260) 17.0 Kg 13.0 Kg Triple truss/floor beam (R8768250) -
Page 70: Ballast Values For A Base Stand X-Series X-Series Display
B. Specifications B.3 Ballast values for a base stand X-series X-series display Minimum ballast calculator An online ballast calculator is available on the Barco web site. Image B-1 Ballast calculator screen R5906024 X-SERIES 15/03/2016... -
Page 71: Ground Pressure Of A Base Stand X-Series X-Series Display
B. Specifications B.4 Ground pressure of a base stand X-series X-series display Ground pressure values Ground pressure is shown in the calculation results table, along with the minimum ballast value of the online ballast calculator. Image B-2 Ballast calculator screen — ground pressure value R5906024 X-SERIES 15/03/2016... - Page 72 B. Specifications R5906024 X-SERIES 15/03/2016...
-
Page 73: Order Info
C. Order info C. ORDER INFO About this chapter This chapter contains the order numbers of all available X-series spare parts. Overview • Spare part order info R5906024 X-SERIES 15/03/2016... -
Page 74: Spare Part Order Info
C. Order info C.1 Spare part order info Order info Order info Description R9052960B1 LD X1.6 TILE B1 R9052961 LD X1.9 TILE B1 R90529581 LD X2 TILE B1 R9801387B1 X-series standard full corner piece –1 piece R9801387B10 X-series standard full corner piece – 10 pieces R9801388B10 X-series standard half corner piece –10 pieces R9801388B2... - Page 75 LD K X2 LED BRD LEFT B40600171K LD K X2 LED BRD RIGHT The above order information was valid when this manual was created. See secured Barco website for the latest update regarding order information (availability, obsolete, replaced by etc.) R5906024 X-SERIES 15/03/2016...
- Page 76 C. Order info R5906024 X-SERIES 15/03/2016...
-
Page 77: Environmental Information
D. Environmental information D. ENVIRONMENTAL INFORMATION Overview • Disposal information • RoHS compliance • Production address R5906024 X-SERIES 15/03/2016... -
Page 78: Disposal Information
For more information about recycling of this product, please contact your local city office or your municipal waste disposal service. For details, please visit the Barco website at: http://www.barco.com/en/AboutBarco/weee... -
Page 79: Rohs Compliance
Chinese Mainland, marked with the Environmental Friendly Use Period (EFUP) logo. The number inside the EFUP logo that Barco uses (please refer to the photo) is based on the “General guidelines of environment-friendly use period of electronic information products”... - Page 80 D. Environmental information Turkey RoHS compliance Türkiye Cumhuriyeti: AEEE Yönetmeliğine Uygundur. [Republic of Turkey: In conformity with the WEEE Regulation] R5906024 X-SERIES 15/03/2016...
-
Page 81: Production Address
D. Environmental information D.3 Production address Representative office Barco NV Noordlaan 5, 8520 Kuurne (BELGIUM) R5906024 X-SERIES 15/03/2016... - Page 82 D. Environmental information R5906024 X-SERIES 15/03/2016...
-
Page 83: Index
Index INDEX Accessories 18–19 Notice on safety Base stand Truss Address Adjustable foot Order info 69–70 Advanced (rental) connection pieces 23, 47 Overview 22–23, 26–27 Installation Infinipix™ Suite User Interface Power boxes Ballast Base stand Power Base stand display Cabling Power boxes Production address Cabling... - Page 84 Index X-series tile R5906024 X-SERIES 15/03/2016...
Need help?
Do you have a question about the X4 and is the answer not in the manual?
Questions and answers