Algo 8180 User Manual
Sip audio alerter
Hide thumbs
Also See for 8180:
- User manual (65 pages) ,
- Technical publications (25 pages) ,
- Manual (3 pages)

Related Manuals for Algo 8180


Summary of Contents for Algo 8180
-
Page 1: User Guide
8180 SIP Audio Alerter User Guide FW Version 2.7.4 Algo Communication Products Ltd. www.algosolutions.com 90-00041L - 1 -... -
Page 2: Table Of Contents
Advanced Multicast .................. 40 Web Interface System Settings ..........42 Maintenance ....................42 Upgrade 8180 Firmware ................43 System Log ....................44 Appendix .................45 Hardware Specifications ................45 Wiring 8180 to other Algo Devices.............46 Dimensions ....................47 FCC Compliance..................51 Important Safety Notice ................51 - 2 -... -
Page 3: Overview
Overview Introduction The 8180 SIP Audio Alerter is a SIP compliant & multicast IP speaker for loud ringing, alerting, and voice paging. The 8180 can be integrated with any Communication Server (hosted or enterprise) that supports 3rd party SIP Endpoints or multicast paging. - Page 4 Configuration & Provisioning Configure the 8180 through a web interface control panel or by using the program buttons on the back of the unit. Central provisioning may also be used to allow units to be preconfigured for a specific server prior to deployment in the field.
- Page 5 SIP Extensions The 8180 connects to an on-premise or hosted communication server in the same way as a SIP telephone. To register the 8180 with the server requires the following information: 1. IP address (eg 192.168.1.1) or domain name (eg myserver.com) of the SIP Server 2.
-
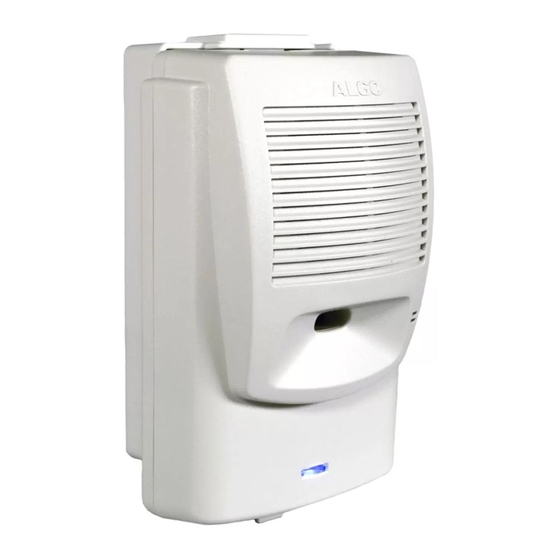
Page 6: Front And Back Views
Front and Back Views Microphone Blue Indicator Light Surface Mount Wiring Channel RJ45 Network (for LAN & PoE) Speaker Output or optional Relay LR95233 Input To External Speaker(s) 8 Wrms Audio Output To Slave Amplifier 0 dbm 67-00047D Max 30V 50mA Relay Output Play Menu Select Dn Up Program Buttons... -
Page 7: Setup And Installation
Mount the wall bracket securely and snap the 8180 into the bracket by engaging the top and then pushing the bottom firmly into place. To remove the 8180 from the bracket, press firmly on the tab of the bottom catch, then lift the cover. -
Page 8: Programming And Configuration
Connection to Network and Obtaining IP Address After connecting the 8180 to a network PoE port, the blue indicator light will turn on during initialization. The 8180 will then attempt to obtain an IP address from the DHCP server. If unsuccessful, the 8180 will default to the fixed IP address 192.168.1.111. -
Page 9: Program Buttons
Record Tone Get Device Info The Program buttons on the back of the 8180 allow local adjustment of alert tones and alert volume. The buttons are intentionally hidden from view after installation and can be disabled using the web interface. -
Page 10: Web Interface Basic Settings
Monitor “Ring” Event (default) In this mode the bottom of the page will request credentials for a SIP Ring extension. When this SIP extension is called the 8180 will play the audio file selected under the Basic Settings g Ring tab. - Page 11 Typical applications for this mode are for safety , security, and emergency notification, or latched alarms for door openings and other relay events. None Select this mode if the 8180 will not be used for ring or event notification. - 11 -...
- Page 12 With Subscribe / Notify Activated - 12 -...
- Page 13 (ring or in-use or both) can be selected under Ring/Alert Events. While the event is active, the 8180 will play the audio file selected under the Basic Settings – Ring tab continuously. Custom WAV files may be padded with silence to achieve the desired notification frequency.
-
Page 14: Ring
Ring Volume Ring volume can be selected and saved, or it can be adjusted live by clicking on “Apply”. Ring Limit Set the maximum amount of times the 8180 will ring when activated. Ambient Noise If enabled, the integrated microphone... - Page 15 Page - 15 -...
- Page 16 Page Mode One-way audio: Transmission only; from the phone to the 8180. Talkback: Allow half-duplex communication through the 8180 (direction based on voice detection). The communication can only be initiated from a phone. Page Timeout Hang up call after preselected period of time.
-
Page 17: Multicast Overview
Multicast Overview In addition to the ring and page features, the 8180 is able to send and receive IP audio multicast messages over the network to support larger deployment for both paging and ring/notification. This provides a scalable and efficient method of building large scale notification solutions. - Page 18 In the diagram below, Algo speakers are configured as multicast slaves supporting Polycom Group Paging and G.722 HD Voice for optimum intelligibility. - 18 -...
-
Page 19: Multicast Technical Information
Multicast Technical Information Each 8180, or any Algo IP endpoint involved, has its own IP address, and shares a common multicast IP and port number (multicast zone) for multicast packets. The Master unit transmits to a configurable multicast zone, and all the Slave units listen to the multicast zones assigned to them. -
Page 20: Multicast Master
Note: Expanded Zones are only available in Slave mode. The Algo 8301 Paging Adapter & Scheduler, 8186 SIP Horn Speaker, and 8188 SIP Ceiling Speaker can be used as Master device for Expanded Zones. - Page 21 The 8180 may receive or broadcast multicast paging compatible with Polycom* phones on premise group paging protocol. The 8180 may be configured as a slave to play Polycom page announcements, or as a master to generate page announcements to Polycom phones.
-
Page 22: Multicast Slave
Multicast Slave Multicast Mode If slave is enabled the 8180 will receive (Slave Selected) and play an IP audio stream or activate the selected ringtone WAV file if receiving a control signal from the master. Number of Zones Select “basic” zones if configuring nine or fewer multicast zones or “expanded”... - Page 23 Paging/PTT Mode See definition on page 21. Default Channel Priority Channel Polycom channel for Priority broadcasts that interrupt Normal broadcasts/calls (Default: Group 24). Emergency Polycom channel for Emergency broadcasts that Channel interrupt all broadcasts/calls (Default: Group 25). Priority Higher priority events will interrupt lower priority events. The priority levels are as follows, from highest to lowest: Multicast “Priority Call”...
-
Page 24: Web Interface Advanced Settings
DHCP is an IP standard designed to make administration of IP addresses simpler. When selected, DHCP will automatically configure IP addresses for each 8180 on the network. Alternatively the 8180 can be set to a static IP address. VLAN Mode Enables or Disables VLAN Tagging. VLAN... - Page 25 8180 to the DHCP server that the 8180 will wait before assuming the server is not available. After such time, the 8180 will use its default address of 192.168.1.111 Default is 60 seconds. - 25 -...
-
Page 26: Admin
Admin Password Password to log into the 8180 web interface. You should change the default password ( algo ) in order to secure the device on the network. If you have forgotten your password, you will need to perform a soft reset in order to restore the password (as well as all other settings) back to the original factory default conditions. - Page 27 Use on the advice of Algo technical support Watchdog only. SNMP Support (v1 Additional SNMP support is anticipated for get only) future, but the 8180 now responds to a simple status query for automated supervision. Contact Algo technical support for more information. SA-Announce Syn-Apps’ SA-Announce paging application...
-
Page 28: Provisioning
Provisioning Provisioning allows installers to pre-configure 8180 units prior to installa- tion on a network. It is typically used for large deployments to save time and ensure consistent setups. There are two different Provisioning methods that can be used: via DHCP Option 66 or via a Static Server. - Page 29 Generating a generic configuration file Connect an 8180 on the network Access the 8180 Web Interface Control Panel Configure the 8180 with desired options Click on the System tab and then Maintenance. Click “Backup” to download the current configuration file Save the file settings.txt...
- Page 30 The specific configuration file will only be downloaded by the 8180 with the MAC address specified in the configuration file name. Since all the necessary settings can be included in this file, the 8180 will be ready to work immediately after the configuration file is downloaded. The MAC address of each 8180 can be found on the back label of the unit.
- Page 31 During the Provisioning process, the 8180 will try to download a file called algop8180-tones.md5. If the file exists, the 8180 will compare that file to its internal file. If the files do not match, the 8180 will load a compressed file called algop8180-tones.zip that contain all the new or replaced tones, decompress it, and add the tones to the 8180 list.
-
Page 32: Tones
Tones - 32 -... - Page 33 File List Play Selected Tone This shows all the audio files currently on the 8180. Select to play, rename or delete the file. Delete Selected Note that limited storage is available on the Tone device. Rename Selected Tone to Upload New Tone...
-
Page 34: Advanced Ring/Alert Settings
Advanced Ring/Alert Settings Ring Extension Additional SIP Ring Extensions may be assigned with unique ring tones. Extension See definition on page 13. Authentication ID See definition on page 13. Ring Tone Select which ring tone will be played when the SIP extension is called. - Page 35 If no rules match, then the default tone in Basic Settings - Ring is played. Delay (seconds) This option allows time to answer a phone before loud ringing over the 8180 begins. - 35 -...
-
Page 36: Input/Output
Input/Output Speaker Mode Auto: Detect automatically if an external speaker is connected to the 8180. External/Internal: Manually select which speaker to use. Disabled: No audio Relay Mode Relay activation: Ring, Page, Both, or disabled. Relay can trigger external light or other device when specified event occurs. - Page 37 If detected, the 8180 will activate as if a ring signal were received to initiate both WAV file playback and multicast broadcast (if enabled).
-
Page 38: Advanced Sip
Default setting is 3600 seconds (1 hour). Only change if instructed otherwise. Keep-alive Method If Double CRLF is selected the 8180 will send a packet every 30 seconds (unless changed) to maintain connection with the SIP Server if behind NAT. - Page 39 Server Two secondary SIP servers may be configured. Redundancy The 8180 will attempt to register with the Feature primary server but switch to a secondary server when necessary. The configuration allows re-registration to the primary server upon availability or to stay with a server until unresponsive.
-
Page 40: Advanced Multicast
Advanced Multicast Zone Definition The “Expanded” Slave or Master zones can be enabled/disabled in the “Basic Settings > Multicast” tab. Default IP address and ports may be revised for any given zone in the table. Ensure that the address and Port settings are the same for all master and slave devices. - Page 41 > Features” tab of a master. Unique paging tones may be revised for any given zone in the table above. Note: Expanded Zones are only available in Slave mode. The Algo 8301 Paging Adapter & Scheduler can be used as Master (source) device for Expanded Zones.
-
Page 42: Web Interface System Settings
Configuration File backup or to setup a provisioning configuration file. Restore Restore settings from a backup file. Configuration File Restore Resets all 8180 device settings to factory Configuration to default values. Defaults Reboot the Device Reboots the device. Firmware Image... -
Page 43: Upgrade 8180 Firmware
Login to the device again, and click on System. In the Upgrade section, click on Choose File and select the 8180 firmware file to upload. Note that both the FW firmware and MD5 checksum files must be loaded. -
Page 44: System Log
System Log Part 1 Use on the advice of Algo technical support Part 2 only. View All - 44 -... -
Page 45: Appendix
EN60950:2001, IEEE 802.3-2008, RFC3261, RoHS, CE, FCC, CSA (USA & Canada) In the interests of continuing product improvement, specifications are subject to change without notice. For more in-depth information on the 8180, including application notes and FAQ, please visit www.algosolutions.com/8180 - 45 -... -
Page 46: Wiring 8180 To Other Algo Devices
Wiring 8180 to other Algo Devices The Relay Output on the back of the 8180 can be wired to a number of Algo devices like 1127, 1128, 8186, or 8128. - 46 -... -
Page 47: Dimensions
Dimensions - Front and Side 4 “ (10.2 cm) 2.2” (5.5 cm) With wall bracket: 2.6 “ (6.5 cm) - 47 -... - Page 48 Dimensions - Wall Bracket 3.5 “ (8.8 cm) - 48 -...
- Page 49 This page intentionally blank. - 49 -...
- Page 50 This page intentionally blank. - 50 -...
-
Page 51: Fcc Compliance
Important Safety Notice The 8180 is intended for installation in a dry indoor location with all connected wiring located within the perimeter of a building. The 8180 is a Power over Ethernet (PoE) device. The PoE power source must be a Limited Power Source (LPS), provided by CAT5 UTP cable, and isolated from mains by minimum reinforced or double insulation.
Need help?
Do you have a question about the 8180 and is the answer not in the manual?
Questions and answers