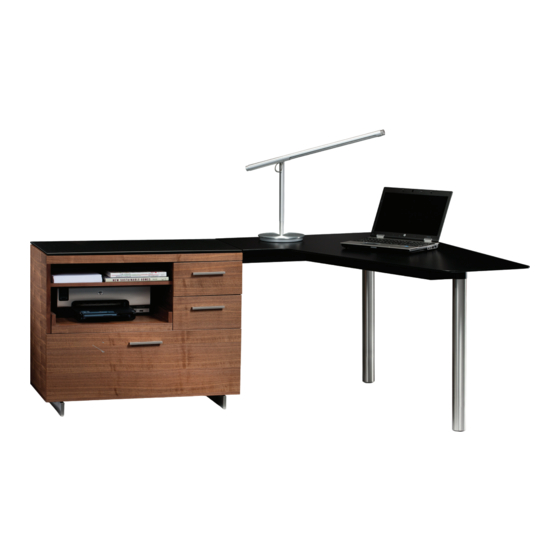
BDI Sequel Assembly Instructions Manual
Hide thumbs
Also See for Sequel:
- Owner's manual (15 pages) ,
- Assembly instructions manual (11 pages) ,
- Assembly instructions (5 pages)
Advertisement
Quick Links
Download this manual
See also:
Owner's Manual
ATTE NTION :
PLEASE FOLLOW
THESE INSTRUCTIONS
CAREFULLY.
®
SEQUEL
Sequel Peninsula 6018
Assembly and Placement Information
PENINSULA
6018
BDIUSA.COM
Advertisement

Summary of Contents for BDI Sequel
- Page 1 ATTE NTION : PLEASE FOLLOW THESE INSTRUCTIONS CAREFULLY. ® SEQUEL Sequel Peninsula 6018 Assembly and Placement Information PENINSULA 6018 BDIUSA.COM...
- Page 3 Thanks for purchasing the Sequel System. Before you begin setting up the Sequel System Components, it is imperative that you read the Consumer Considerations section on the next page.
- Page 4 Placement Once the Sequel System is fully assembled, it cannot be moved. Make all positioning adjustments prior to final assembly. Plan your space. Forethought is essential in determining the placement of each component. Using a measuring tape, determine how much fl...
- Page 5 Power & Placement This page outlines two scenarios: Scenario 1 If cabinet is NOT blocking an AC power outlet, it may be positioned close to the wall. Power Top View Scenario 2 If cabinet is going to block an AC power outlet, position cabinet approximately 3”...
- Page 6 Unpack and identify the components. The assembly workspace should be a non-marring surface such as carpet. For missing hardware pieces, please contact BDI Customer Service at customerservice@ bdiusa.com. For all other concerns, please contact your BDI Retailer. Hex Wrench 4mm x 1...
- Page 7 K x 6 L x 6 Wire Management (Optional) For the purpose of wire management, use Plastic Clip (L) to install Velcro Straps (K) to outside perimeter of Desk Frame Assembly (G).
- Page 8 C x 4 Attach Leg to Desk Frame While the second person holds the desk frame on its side position, attach Round Leg (H) to the underside of Desk Frame Assembly (G) using the Hex Wrench (A) and Machine Screws (C).
- Page 9 Cabinets With the help of another person, carefully lower Desk Frame Assembly (H) onto the adjacent cabinets (Sequel Models 6014, 6015, 6016, or 6017). Adjust frame so that the holes are aligned with the threaded inserts on top of the cabinets. Once holes are aligned, install Flat Head Screws (D) using Hex Wrench (A).
- Page 10 Bumpers Install Rubber Stem Bumpers (E). E x 5...
- Page 11 F x 4 Install Glass With the help of another person, carefully lower the Glass Top (I) onto the frame. Register the steel discs on underside of glass into the holes on the frame; then attach the glass using Machine Screws (F) and Allen Wrench (A).
- Page 12 Designed by Matthew Weatherly. These distinctive product confi gurations are protected BDIUSA.COM by US and international patents, trade dress, and/or copyright laws. “Sequel” and BDI are trademarks of Becker Designed, Inc. All Rights reserved. ©2011, BDI Made in Taiwan. 6018REV052611v1...


Need help?
Do you have a question about the Sequel and is the answer not in the manual?
Questions and answers