Advertisement
Quick Links
Advertisement

Related Manuals for BDI JEFF BARE SOMA 6351


Summary of Contents for BDI JEFF BARE SOMA 6351
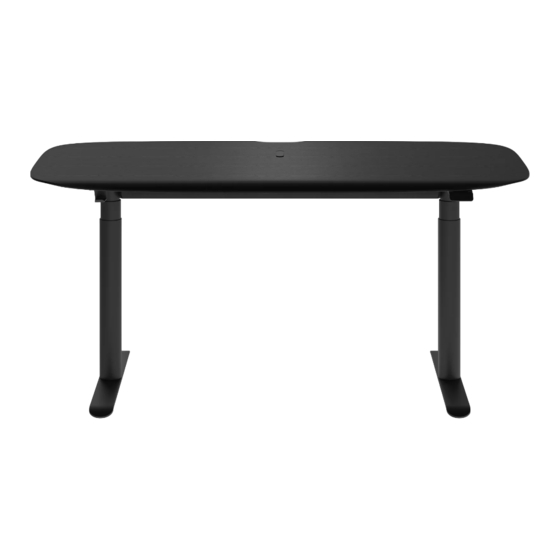
- Page 1 SOMA 6351/6352 ™ LIFT DESK INSTRUCTION MANUAL LET’S GET STARTED. DESIGN JEFF BARE...
- Page 2 Congratulations on the purchase of your Soma Lift Desk from BDI. Your lift desk has been designed to provide a lifetime of enjoyment. This manual will provide you with assembly instructions and other helpful information to ensure you get the most out of your product.
- Page 3 HARDWARE AND COMPONENTS Unpack and identify the parts listed below. The assembly workspace should be a non-marring surface, such as carpet. For missing hardware pieces, please contact BDI Customer Service at customerservice@bdiusa.com. Do not use power tools for the assembly of this product.
- Page 4 HARDWARE AND COMPONENTS HARDWARE AND COMPONENTS KLEET (C3) QTY: 2 Power Strip (C4) QTY: 1 Lift Leg (C2) QTY: 2 Digital Control Paddle (C5) QTY: 1 Control Module (C6) QTY: 1 Hook (C7) QTY: 1 Power Cord (C9) QTY: 1 90 Degree Plug (C8) QTY: 1 Desk Foot (C10)
- Page 5 HARDWARE AND COMPONENTS HARDWARE AND COMPONENTS Wire Cradle (C11) QTY: 1 Grommet Lid (C12) QTY: 1 NEED ASSISTANCE? customerservice@bdiusa.com BDIUSA.COM | 5...
- Page 6 ASSEMBLY STEP 1. ATTACH LEGS TO TOP PANEL Lay the Top Panel (C1) upside down on a soft, DESCRIPTION – PART # non-marring surface like carpet. Position 2 Lift Legs (C2) inside the metal HEX WRENCH – T1 frames, lining up the mounting holes on the legs with the slotted holes in the metal frame.
- Page 7 STEP 2. ATTACH KLEETS ASSEMBLY Attach 2 KLEETS (C3) using 4 Wood Screws (H2) DESCRIPTION – PART # going into 2 sets of pilot holes located as shown. Tighten with a Phillips Screwdriver (not included). NOT INCLUDED Phillips Screwdriver WOOD SCREW – H2 NEED ASSISTANCE? customerservice@bdiusa.com BDIUSA.COM | 7...
- Page 8 STEP 3. ATTACH POWER STRIP, DIGITAL CONTROL PADDLE, ASSEMBLY CONTROL MODULE, AND HOOK Attach the Power Strip (C4) on the desired side DESCRIPTION – PART # (left or right) using the included wood screws going into pre-drilled pilot holes. Tighten with a NOT INCLUDED Phillips Screwdriver.
- Page 9 STEP 4. CONNECT PLUG & POWER CORD ASSEMBLY Route the Control Paddle cord into the groove in the Top Panel (C1). Plug the end of the Control Paddle into the HS socket on the Control Module (C6). Rotate the metal tabs near the groove to cover the cord and secure it in place.
- Page 10 ASSEMBLY STEP 5. ATTACH DESK FEET Attach both Desk Feet (C10) with the 8 Screws DESCRIPTION – PART # (H4) using the Hex Wrench (T1). HEX WRENCH – T1 SCREW – H4 10 | BDIUSA.COM SOMA LIFT DESK 6351/6352...
- Page 11 2 PERSON TASK STEP 6. ATTACH WIRE CRADLE ASSEMBLY Attach the Wire Cradle (C11) to the Top Panel DESCRIPTION – PART # (C1) using 8 Screws (H1). Ensure the grooved side of the Wire Cradle (C11) is facing the front of the desk.
- Page 12 ASSEMBLY STEP 7. INSTALL GROMMET LID Install the Grommet Lid (C12) by placing it in the grommet slot. Slide it to its forward or rear position based on where you would like your wires to fall underneath your desk. Wires routed through the grommet will fall directly into the Wire Cradle.
- Page 13 FINE TUNING ADJUST LEVELERS Levelers are integrated into each leg assembly and are accessed at the bottom of each leg. If your floor is uneven, you may extend one or more levelers to attain a level, stable position Down ATTACH A MONITOR ARM FINE TUNING The Soma Lift Desk is compatible with most third-party monitor...
- Page 14 USING YOUR DIGITAL CONTROL PADDLE Your desk’s Control Paddle is designed to be intuitive and easy-to-use. Follow these steps to ensure that you are using your desk safely while getting the most out of its features. SAFETY INFORMATION Ensure there are no obstructions in the desk’s path (i.e. window sill, shelves) Position the desk slightly away from walls to avoid possible wall damage Be sure power cords and other wiring are long enough to reach the lowest &...
- Page 15 USING YOUR DIGITAL CONTROL PADDLE (CONTINUED) ADJUSTING THE HEIGHT Manually adjust the height by pressing or raising the control paddle until you achieve the desired height. Menu Button PROGRAMMING DESK HEIGHT PRESETS 1. To program your favorite seated and standing position, start by using the paddle to position the desktop to the desired height.
- Page 16 USING YOUR DIGITAL CONTROL PADDLE (CONTINUED) Menu Button ADVANCED USER SETTINGS For further optional customizations, you will need to access the Settings Menu. To access this menu, press and hold the Menu Button for approximately five seconds. Your settings options will appear. You can scroll through four menu screens by pressing the paddle.
- Page 17 USING YOUR DIGITAL CONTROL PADDLE (CONTINUED) CHANGING YOUR DISPLAY FROM INCHES TO CENTIMETERS If you would prefer to see your display in metric dimensions, you can change this setting while your desk is in Reset Mode. 1. Press the paddle DOWN until the desk is in its lowest position. Release the paddle. 2 Press and hold the paddle DOWN again until the display reads RESET.
- Page 18 Your BDI furniture has been constructed with the finest materials, manufactured with care and is designed to last a lifetime. Regular care of your furniture will prolong your enjoyment and keep it looking its best. Here are some general tips for taking care of BDI furniture. Your surfaces may vary. GLASS Glass surfaces are maintained using household glass cleaner and a paper towel or cloth.
- Page 19 BDI’s sole discretion. BDI furniture is warranted for three (3) years from the date of purchase as shown on your sales receipt. The warranty period starts from the date of purchase. This warranty extends only to the original purchasers who acquire new products from BDI Authorized Resellers.
- Page 20 These distinctive product configurations are protected by US and international patents, trade dress, and/or copyright laws. Soma & BDI are trademarks of Becker Designed, Inc. All rights reserved. ©2022, BDI | V.10.28.2022 Made in China...
Need help?
Do you have a question about the JEFF BARE SOMA 6351 and is the answer not in the manual?
Questions and answers