Table of Contents
Advertisement
Quick Links
Download this manual
See also:
Operating Manual
Advertisement
Table of Contents

Related Manuals for HiTi Digital P910L


Summary of Contents for HiTi Digital P910L
-
Page 1: User Manual
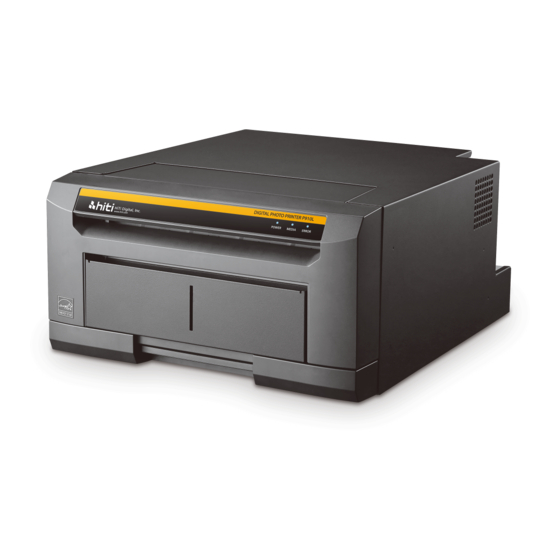
HiTi P910L Digital Photo Printer User Manual... - Page 2 Introduction This manual describes detailed instructions for handling of and basic operation of HiTi P910L Digital Photo Printer. We will describe this product as “the printer” in the manual. Read this manual thoroughly to understand how to install and operate the printer before using it.
-
Page 3: Table Of Contents
Content Chapter 1. Important Safety Instruction .......... 1 Environments ....................... 1 Handling Instruction.................... 2 Handling Instruction for Consumable and Printed Output........ 4 Chapter 2. Installing and Set Up............5 Unpacking and Checking the Accessories ............5 Parts Name and Function..................6 Printer Status Lamps Name and Printer Status .......... -
Page 4: Chapter 1. Important Safety Instruction
Chapter 1. Important Safety Instruction This manual provides detailed instructions for the safety use of the printer. Read this manual before operating the printer to ensure to have proper use. In this manual, there are notes that require special attention. ... -
Page 5: Handling Instruction
Chapter 1. Important Safety Instruction Caution: Do not place the printer on rickety place and/or inclined place. Printer may fall down or tumble and it can cause injury. Warning: Do not insert or fall the metallic items or flammable items into the printer through the openings of the printer, it can cause the fire and electric shock. - Page 6 Chapter 1. Important Safety Instruction Warning: In case you drop the printer, firstly turn off the power of the printer and remove the power cable, then contact the dealers or service center. To use the printer without any checking, can cause the fire or electric shock. Warning: This product must be grounded, and always used with only the specified power cable or the power cable accompanying this product.
-
Page 7: Handling Instruction For Consumable And Printed Output
・ Do not touch the paper surface before printing to avoid the fingerprints. Attention: Ink Ribbon Handling ・ Use the ink ribbon specified by HITI DIGITAL, INC. ・ Store the ink ribbon in cool place to avoid the direct sunlight. -
Page 8: Chapter 2. Installing And Set Up
Chapter 2. Installing and Set Up This chapter explains the unpacking and set up of the printer. Before proceeding to this chapter, please make sure to read Chapter 1. Important Safety Instruction. Unpacking and Checking the Accessories 1. Open the box and remove the box containing the accessories and protection materials. -
Page 9: Parts Name And Function
Chapter 2. Installing and Set Up Parts Name and Function ④ ① ② ⑤ ③ ⑥ Front View Rear View ⑦ ⑨ ⑧ (Front Internal View) (Upper Internal View) № Name Function Printer status display lamps are located Printer Status Lamps ... -
Page 10: Printer Status Lamps Name And Printer Status
Chapter 2. Installing and Set Up USB Connector To be used to connect the USB cable. When setting the paper, insert the paper until the lamp is lit. When the lamp Paper Setting Lamp blinks, remove the paper until the lamp goes off. -
Page 11: Fixing Anti-Tip Plate
Chapter 2. Installing and Set Up Fixing Anti-tip Plate Use a Phillips screwdriver to fix Install the printer with the anti- the anti-tip place to the back of the tip place and fix it onto the printer. wooden. Connecting Power Cable Insert the power cable attached to the printer into the power connector located on the rear of the printer. -
Page 12: Connecting Usb Cable
Connecting Personal Computer 1. Visit the following website, and download the Printer Driver from HiTi P910L Driver Download. http://www.hiti.com 2. Follow the installation instructions which is contained in the printer driver package, install the printer driver on your personal... -
Page 13: Setting Ink Ribbon
Chapter 2. Installing and Set Up Setting Ink Ribbon 1. Remove dust box. 2. Carefully lift the drawer lever and pull the drawer unit. Attention: Do not open the drawer unit quickly or with unnecessary force. Do not press the drawer unit or place a heavy object other than paper after opening the drawer unit. -
Page 14: Loading Paper
Chapter 2. Installing and Set Up 4. Take the slack ink ribbon by turning the ink ribbon supply core. Loading Paper Turn on the power of the printer by pressing "|" on the power switch. 1. In the drawer unit pull out, pull the lever to open the open guide unit. - Page 15 Chapter 2. Installing and Set Up Caution: The paper is not set correctly if there is a gap of about 5mm ~ 10mm between the paper flange and paper. Match the notch of the paper flange and the notch of the paper core by rotating the paper flange. Set the paper in the printer.
-
Page 16: Installing Dust Box
Chapter 2. Installing and Set Up Close the open guide unit. When close the open guide unit, press on the center of the open guide unit. Close the drawer unit. In case that both the paper and the ink ribbon are loaded into the printer and the drawer unit is closed, initialization starts and four sheets of paper are ejected automatically. -
Page 17: Chapter 3. Routine Maintenance
Chapter 3. Routine Maintenance Cleaning of Thermal Head, Platen, and Decurl Roller By using thermal transfer technology, daily maintenance is not really necessary if the printer is being use properly. However, in order to keep the best print quality, it is recommended to do the cleaning of Thermal Head, Platen and Decurl Roller once in a month. -
Page 18: Cleaning Of Outer Cover
Chapter 3. Routine Maintenance 3. Using gauze dipped with isopropyl alcohol or ethyl alcohol, clean the rubber section of the platen roller. Platen Attention: Printing should be performed after the alcohol dried up completely (approx. 5 minutes) Cleaning of Outer Cover Wipe the printer outer cabinet with a soft cloth. -
Page 19: Cleaning Of Filter
Chapter 3. Routine Maintenance Cleaning of Filter If the dust collects on the openings, clean it with vacuum cleaner. -
Page 20: Chapter 4. Error Handling
Chapter 4. Error Handling Printer Status lamps are displayed in red When the error happens, the details of the error can be confirmed with the printer status lamps. Printer Status Lamps and Paper Setting Lamp display ●:on、○:off、 *:flashing / : Indicates that irrespective lit LED Display Status Corrective Action... -
Page 21: Failure Symptoms
Chapter 4. Error Handling Failure Symptoms When detecting a failure symptom, check the printer using the following table. Symptom Action Power is not Check if the power cable is connected to the plug socket turned on. or the printer. The personal ... -
Page 22: Power Supply Interrupted During Printing
Chapter 4. Error Handling 3. Open the open guide unit. PAPERSET lamp 4. Pull out the paper until the paper setting lamp goes off. Attention: ・ If the paper is used without cutting off the folded section or printed section, paper jam occurs again or the ink ribbon may snap during printing. -
Page 23: Chapter 5. In Order To More Comfortably Use
Chapter 5. In order to more comfortably use Paper Pre-Cut function can be turned off through the printer driver. Caution: Dust on the surface of the paper may damage the thermal head. Clean the dust on the paper surface and install the paper roll into the printer. Caution: Clean the finger print on the paper surface to avoid the finger print on the print image. -
Page 24: For The Customers In The U.s.a
This is a Class A product. In a domestic environment, this product may cause radio interference in which case the user may be required to take adequate measures. HiTi Digital, Inc. hereby declares that this digital photo printer is in compliance with the essential requirements and other relevant provisions of Directive 1999/5/EC. -
Page 25: Specification
Specification Product name HiTi Digital Photo Printer Model name P910L Printing method Dye sublimation thermal transfer Resolution 300 dpi 203 mm x 305 mm (8 x 12 size) 203 mm x 254 mm (8 x 10 size) 203 mm x 203 mm (8 x 8 size)
Need help?
Do you have a question about the P910L and is the answer not in the manual?
Questions and answers