Table of Contents
Advertisement
Advertisement
Table of Contents

Related Manuals for HiTi Digital P510S


Summary of Contents for HiTi Digital P510S
- Page 1 HiTi P510S/P510Si User’s Manual E N G L I S H ...
-
Page 2: General Information
General Information = Copyrights = All rights reserved. The information contained in this user’s manual is subject to change without notice. HiTi Digital Inc. makes no warranty with regard to the material, including, but not limited to, the implied warranties of merchantability and fitness for a particular purpose. - Page 3 General Information = Trademarks = Microsoft, MS-DOS, and Windows are registered trademarks of Microsoft Corporation. Adobe and Acrobat are registered trademarks of Adobe Systems Incorporated. Mac, Macintosh, and Mac OS are trademarks of Apple Computer, Inc., registered in the U.S. and other countries. Pentium is a U.S. trademark of Intel Corporation. All other trademarks or registered trademarks are properties of their respective companies.
-
Page 4: Table Of Contents
Getting the Latest Update Introduction of P510S Series Front Rear Sides Making P510S Ready to Print Installing the ribbon cartridge Installing the paper box a. Assembling the paper roll and flange b. Putting the paper roll into paper box c. Inserting the paper box to the printer... -
Page 5: Checking Package Contents
Checking Package Contents HiTi Photo Printer P510S/P510Si Paper Box Power Cord Note 1. If something missed from the package, please contact your local dealer or HiTi service center nearest to you. 2. Paper roll spacer is NECESSARY only for 5x7 size paper roll installation. -
Page 6: Getting The Latest Update
Getting the Latest Update HiTi Digital Inc. website provides the latest driver, application, user’s manual, printer firmware, and so on for users to download. Please visit our website at www.hiti.com for more information. Any questions toward HiTi product(s), please contact your local service center for detail. ... -
Page 7: Introduction Of P510S Series
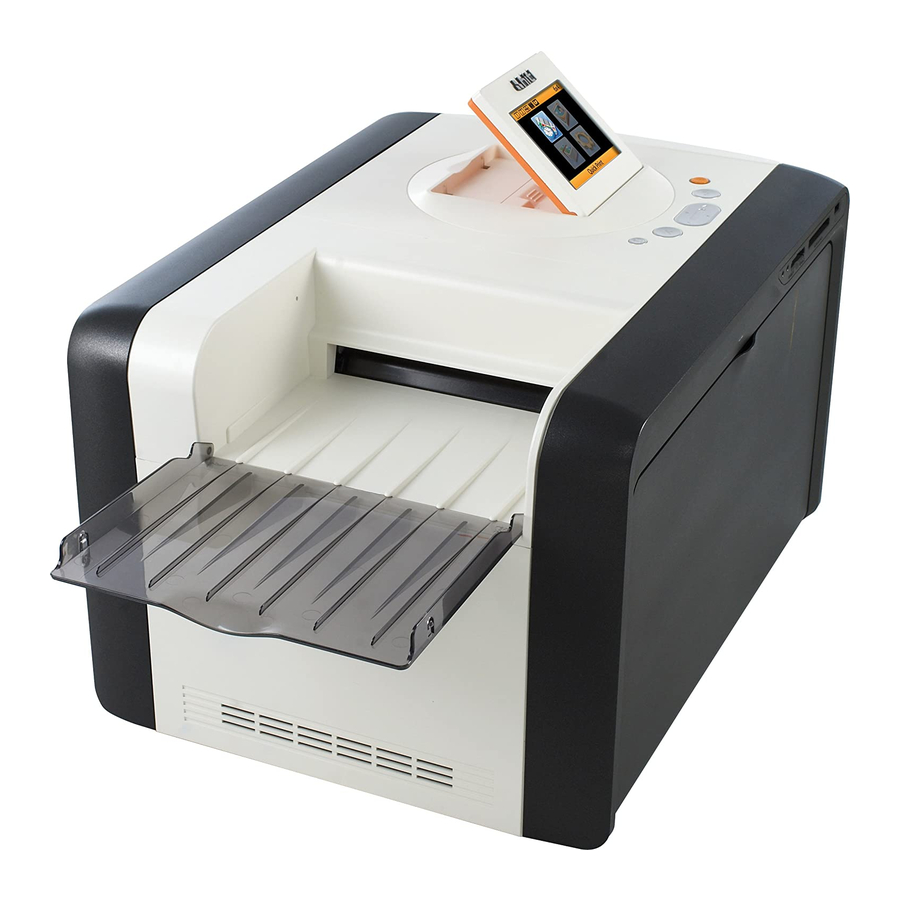
Introduction of P510S Output Tray = Edit Front For use of SD / MMC / MS / MS Pro memory card = Exit/Cancel For use of CF / Micro Drive memory card 3.6-inch LCD [Tilt-able] = PRINT = OK/Set/... -
Page 8: Rear
Introduction of P510S Rear USB Device Socket Video-Out Socket Sides Vents Power Cord Socket Vents Power Switch... -
Page 9: Making P510S Ready To Print
Making P510S Ready to Print Installing the ribbon cartridge Installing the paper box a. Assembling the paper roll and flange ❶ ❷ ❶ = Flange (Two colors) ❷ = Spacer (Necessary only on 5x7 size paper roll installation) ❸ = Paper roll Upon assembly, please install the spacers in the paper flange (green) and paper flange (orange) first when using 5x7 size paper roll. -
Page 10: Putting The Paper Roll Into Paper Box
Making P510S Ready to Print b. Putting the paper roll into paper box (After assembly) ❶ Flip the paper box as shown, and then press the box button to open the box. (Open the box) - Page 11 Making P510S Ready to Print ❸ Remove the seal from the paper after setting the paper roll, and then pull out the paper so that it comes out across the box edge. ❷ Place the paper roll into the box as shown, make sure the color of paper roll flange is in consistency with same color of flange holder inside the box.
-
Page 12: Powering Up The Printer
Powering up the printer After the printer is turned on, your P510S is ready for use. ❻ Load the paper box into the... -
Page 13: Introduction Of Standalone Function
Print All Index Print Print Mode: Event Photo Three different print modes are designed on P510S Series. quickly switching the print mode among Event Photo, Passport/ID Photo, and Personalized Photo. Photo , as long as the eFrame is selected it ALWAYS applies to finishing photo till the print mode is reset. -
Page 14: Standalone Function
Standalone Function Settings Printer Settings Print Mode (Event Photo, Personalized Photo, Passport/ID Photo) ColorWizard (HiTi Classic Color) Color Filter LCD Adjustment Languages Video-Out (NTSC, PAL, OFF) Advanced Settings Wireless-Camera Wireless-Mobile Phone LinkPrint™ Border Print Date Print Print Size Printer Maintenance Printer Cleaning Paper Cutting Offset Alignment... -
Page 15: Printing Out Photo(S) By Standalone
Printing Out Photo(s) By Standalone Correctly inserting the memory card Note A USB card reader or adapter is needed when the Memory Stick Duo is used. ... -
Page 16: Photo Finishing By Quick Print
Printing Out Photo(s) By Standalone Quick Print Photo finishing by ❶ ❷ ❸ Quick Print provides a way for users to print out a photo with all speed. Go to Quick Print and press [ Use [ ] to select a photo and press [ printing * Edit function CANNOT... -
Page 17: Photo Finishing By Multiple Print: Selected Print
Printing Out Photo(s) By Standalone Photo finishing by Multiple Print: ❶ ❷ ❸ ❹ ❺ Selected Print Multiple Print provides varied printing categories for users in photo finishing: 1) Selected Print 2) Batch Print 3) Print All 4) Index Print Selected Print is designed for users to print multiple photos at one time. -
Page 18: Photo Finishing By Multiple Print: Batch Print
Printing Out Photo(s) By Standalone Photo finishing by Multiple Print: ❶ ❷ ❸ ❹ Note: : DO NOT remove memory card Batch Print Batch Print is designed for users to print as many as digital photos by few clicks. By setting Start and End, images in between will be printed. - Page 19 Photo Finishing With eFrame On Photo finishing with eFrame on by the print mode: ❶ ❷ ❸ ❹ Event Photo Two of three print modes are capable of eFrame application, Event Photo & Personalized Photo ] is the hot key to quickly switch the print mode among Event Photo, Personalized Photo, and Passport/ID Photo.
- Page 20 Photo Finishing With eFrame On Photo finishing with eFrame on by the print mode: ❶ ❷ ❸ ❹ ❺ Personalized Photo Personalized Photo provides 2 options for users to apply: Collage Print & eFrame Print In eFrame Print, users can print one or multiple images with designated eFrame on.
- Page 21 Photo Finishing With eFrame On Photos are being printed with eFrame on ❻ ...
-
Page 22: Printing Out Passport/Id Photo(S) By Standalone
Printing Out Passport/ID Photo(s) By Standalone Before making ID photos, print mode must be set at Passport/ID Photo. By the hot key [ can be quickly switched to Passport/ID Photo. ❶ ❷ ❸ ❸ ❹ Make sure the print mode is set at Passport/ID Photo, and then press [ ] to next ] to target an ID format... - Page 23 Printing Out Passport/ID Photo(s) By Standalone ❺ ❻ When all columns are fully loaded, the printer will remind you to press [ ] for printing. Set the copies of print and then press [ printing. ] to set copies of print ] to start...
-
Page 24: How To Manage My Photo Eframe Or Id Format
How to Manage My Photo eFrame or ID Format P510 photo eFrame and ID format are saved in the internal flash of the printer. Users can freely add new or delete undesired files from the printer. Before managing them, there’s need to check the status of print mode in advance. -
Page 25: How To Use Id Creator To Make New Id Formats
How to Use ID Creator to Make New ID Formats Before using ID Creator, please make sure you’ve installed this program onto the computer. You can find the software source on the CD of printer driver. ❶ Choose a item to apply ❷... - Page 26 How to Use ID Creator to Make New ID Formats (Continue from last page) ID Creator will automatically produce the format right after you give the size. You can decide whether to set Interval between ID formats or White border for the ID prints. = No Interval and no White border = ...
- Page 27 How to Use ID Creator to Make New ID Formats = With Interval but no White border = Interval = 3mm Interval = 3mm ...
- Page 28 How to Use ID Creator to Make New ID Formats = No Interval but with White border = White border=3mm White border = 3mm ...
- Page 29 How to Use ID Creator to Make New ID Formats = With Interval and White border = ...
- Page 30 How to Use ID Creator to Make New ID Formats ❸ Set alignment line [or biometric line], if need. ID Creator allows 5 alignment lines each for horizontal and vertical orientation. You can key in or directly draw out the alignment line from the top or side meter. Alignment line (or biometric line) ...
-
Page 31: How To Edit My Photo(S) - Photo Enhancement
How to Edit My Photo(s) – Photo Enhancement P510 allows users to Edit their digital photos with no inconvenience. ❶ ❷ ❸ ❹ Function of Edit CAN ONLY BE USED functions: 1) Multiple Print\Selected Print 2) Personalized Photo\Collage Print 3) Personalized Photo\Event Print 4) Event Photo 5) Passport / ID Photo... -
Page 32: What Is Color Filter
What Is Color Filter & How It Works Color Filter is similar to the adjustor of P510 series driver. All adjustment made will be applied to all finished photos. Before using Color Filter, please make sure you’ve inserted a memory card with at least one digital photo. -
Page 33: Pc-Link Printing
PC-Link Printing Before working on photo finishing, please make sure you have followed the User’s Manual booklet supplied for printer installation. Please pay particular attention to the safety instructions. The printer driver enables you to do photo printing through a computer. Please see below for the system requirement of a PC. -
Page 34: Installing The Printer Driver
PC-Link Printing Installing the printer driver 1) Make sure the printer is turned off 2) Insert the CD into CD/DVD ROM, and then the computer will automatically start the installation. If the installation does not start automatically, please run the autorun.exe file in the driver CD. Press [Start] for driver installation 3) If the driver is successfully installed, you got to turn on the printer. -
Page 35: Photo Finishing By Pc-Link Printing
Photo Finishing By PC-Link Printing Software: Windows Photo Gallery Step 1: Select an image and use Windows Photo Gallery to browse Step 2: Click the icon [ ] and choose “Print” ... - Page 36 Photo Finishing By PC-Link Printing Step 3: Print pictures Make sure P510 is truly selected Click “Print” to photo finishing… ...
-
Page 37: Specification
Specification Please note that specification of P510 Series is subject to change without notice. Item Resolution Max Prints Size Printing Speed (4x6) Capacity Printing Category Display Memory Card* Wireless Capability Driver Power Requirement Operation Condition Dimension & Weight 300 x 300 dpi 6x9 borderless Around 12 sec 4x6: 330 images... -
Page 38: How To Do Direct Wireless Printing By P510Si (P510Si Only)
How to Do Direct Wireless Printing By P510Si Scenario 1 Using Canon DSLR to take pictures and printing photos by P510Si (Example on Canon 30D/20D) Before the setting, you need to connect Canon wireless file transmitter to your camera in advance. For detailed instruction of transmitter setting, there’s need to read the user’s manual of Canon wireless file transmitter WFT-E1A. - Page 39 Scenario 2 Using Nikon DSLR to take pictures and printing photos by P510Si (Example on Nikon D200) Before the setting, you need to connect Nikon wireless transmitter to your camera in advance. For detailed instruction of transmitter setting, there’s need to read the user’s manual of Nikon wireless transmitter WT-3. On P510Si, we provide a brief introduction of how to set up your Canon transmitter.
- Page 40 If setup is correct, you will see signal shown on camera LCD FTP setup ...
Need help?
Do you have a question about the P510S and is the answer not in the manual?
Questions and answers