Table of Contents
Advertisement
Quick Links
Download this manual
See also:
Service Manual
Advertisement
Table of Contents

Related Manuals for HiTi Digital 640PS


Summary of Contents for HiTi Digital 640PS
-
Page 1: User Manual
HiTi Photo Printer PhotoShuttle / 640PS User Manual... - Page 2 COPYRIGHT The information contained in this document is subject to change without notice. Hi-Touch Imaging Technologies makes no warranty of any kind with regard to this material, including, but not limited to, the implied warranties of merchantability and fitness for a particular purpose.
-
Page 3: Fcc Information
SAFETY INSTRUCTIONS 1. Read these instructions carefully. reference. Follow all warnings and instructions marked on the product. 2. Unplug this product from the wall outlet before cleaning. Do not use liquid cleaners or aerosol cleaners. Use a damp cloth for cleaning. 3. - Page 4 instruction, may cause harmful interference to radio communication. However, there is no guarantee that interference will not occur in a particular installation. If these equipment doses cause harmful interference to radio or television reception, which can be determined by interference by on or more of the following measures: 1.
- Page 7 CE Information...
-
Page 8: Chapter 1. Welcome
1-1 Our Invitation to HiTi Photo Printer Family It is our pleasure to have you onboard as the member of HiTi Photo Printer family. We thank you for your patronage and hope this is just the beginning of our long-term association. Through our printer, picture will be transformed into masterpieces. - Page 9 USB feature. Titan of Software Program Our Desiree is a perfect tool that will perpetuate your Photo Printer to its optimal performance. Flexible in design, the software allows you to be creative and innovative. Photo image, calendar, stickers, and many other features will be just a finger away.
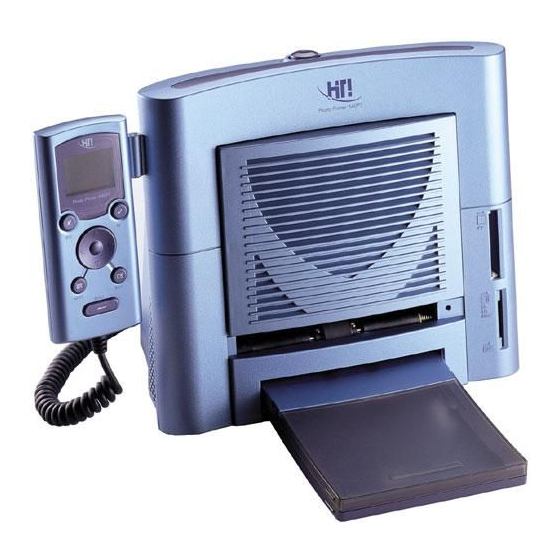
- Page 10 1-2 Inside view of HiTi Photo Printer Led Light Turn the power on. The printer will automatically start to initialize and LED blinking green color about 5 seconds. Then LED turn to stable green color. If not, please begin to check.
- Page 11 Ventilation Holes Ventilation holes are located in the front and back of the printer. Please allow adequate airflow by removing all matters from the surface of the ventilation holes. These holes are designed to cool down the printer during operation.
- Page 12 Power Switch This is where printer can be turned. Eject Button Paper Out Slot Spec Label USB socket Power Socket Connect your power line here. USB Connector Please connect USB cable to the connector to your other device, such as PC and other peripheral devices.
-
Page 13: Chapter 2 Quick Installation
4. The main page of the LCD will appear, and ready for the further operation. Note: If the USB cable is connected to PC, the printer will be in PC Mode (Shown on the LCD), the controller function will be disable at the same time. - Page 14 -OK: Confirmation. Confirm the image chosen or the result of the image editing. -ESC: Escape to the upper layer or cancel the current job. -Menu: The main page of the OSD. Note: All the jobs in process will be aborted at the same time. -Edit: Enter the Editing Page of the OSD, please refer to Photo Printing for details.
- Page 15 Press Print again to reconfirm and start printing Note: If two slots (CF/Micro Drive and SM/SD/MMC/MS) have been already inserted, printer will only let the card inserted first active, if you want to change the memory card status, please: -Pull out the other card...
- Page 16 Brightness: Right for increase and Left for decrease Contrast: Right increase and Left for decrease Color R/G: Right for more red tone and Left for more green tone Color B/Y: Right for more blue tone and Left for more yellow tone OK: Save the change in enhance and back to Image Editing Page -OK: Save the change and back to Preview Page Note:...
- Page 17 5) Quick Photo Operation Flow: Preview Page Press the arrow keys to select image you want to print then press OK Start printing 6) DPOF(Digital Printer Order Format) Operation Flow: Press Print to confirm and start printing 7) Print All: Operation Flow:...
- Page 18 Color B/Y: Right for more blue tone and Left for more yellow tone Default: Return to original factory setting OK: Save the change in Printout Setting and back to Printer Setting Matte effect: Select to turn on/off the matte effect...
- Page 19 2. If CD-ROM does not auto start, please double click My Computer Icon in your Window and double click your CD-ROM drive. 3. Select "Install HiTi Photo Printer PhotoShuttle(640PS) Driver" and install. 4. When you begin install you will see the following screen.
- Page 20 5. When finish, Install Program will ask you to make this printer as default or not.
- Page 21 2-4 Install Driver (Win2000) 1. Please insert "Software CD" into CD-ROM drive. (Do not plug USB cable to printer or PC this time). 2. If CD-ROM does not auto start, please double click My Computer Icon in your Window and double click your CD-ROM drive.
- Page 22 3. Select "Install HiTi Photo Printer PhotoShuttle(640PS) Driver" and install. 4. When you begin install you will see the following screen.
- Page 23 Signature Not Found.” Please press “yes” to continue. 6. Then will disappear this message to tell you finishing. Press OK to continue. 7. At this time, connect USB cable to printer and PC, then power on the machine. Windows 2000 PnP system will find the driver automatically.
- Page 24 9. Windows 2000 begins to search a device driver have already installed on system. 10. Found a driver without “Digital Signature Not found” warning message. Please press “Yes” to continue. 11. After copy several files, the Windows 2000 system recognize this printer. Installation is finished.
- Page 25 2. If CD-ROM does not auto start, please double click My Computer Icon in your Window and double click your CD-ROM drive. 3. Select “Install HiTi Photo Printer PhotoShuttle(640PS) Driver” and install. 4. When you begin install you will see the following screen.
- Page 26 5. Connect USB cable to printer and PC, then power on the machine. 6. Windows XP begins to search a device driver have already installed on system. 7. Windows XP shows driver incompatibility, press “Yes” to continue installation...
- Page 27 8. After copy several files, the Windows XP system recognize this printer. Installation is finished.
- Page 28 2-6 Install PhotoDesiree 1. Please insert "Software CD" into CD-ROM drive. 2. If CD-ROM does not auto start, please double click My Computer Icon in your Window and double click your CD-ROM drive. 3. Select "Install PhotoDesiree " and install. 4.
- Page 29 2-7 Load paper and ribbon 1. There are 4 types of HiTi paper. Photo Paper (portrait view) 1x1 sticker 4x4 sticker 4/2/4 sticker...
- Page 30 2. While taking out the paper, please take the longer exterior part of the tear line, in order to prevent your fingerprint on the paper. 3. Please follow the correct way to hold the paper.
- Page 31 4. Make sure the tear-line under the longer exterior aimed at the notch in paper tray. 5. Press the upper "ID button" to open the "Ribbon Door".
- Page 32 6. Use your right hand to take right-lower "Ribbon Cartridge" handler. 7. Hold the "Ribbon Cartridge" and place it inside the printer. Please pay attention to meet the “Drive” while putting the "Ribbon Cartridge". 8. When you finished, close "Ribbon Door".
-
Page 33: Install Hardware
2-8 Install Hardware 1. Connect "Power Cord" to "AC power connector". 2. Connect "USB Cable" to printer. Connect the other side to PC. - Page 34 3. Turn on "AC power Switch". 4. When LED turns stable green, the printer is ready. If LED turns green blinking or orange, please check all the printer status. 5. You will see "New Hardware Found" message on the screen.
- Page 35 2-9 Print 1 Photo 1. Click the image from the Left Window. 2. Change layout style to portrait.
- Page 36 3. Fit to width. 4. Press "Drag Down to Queue" icon. 5. Press "Print" icon , then Print it. 6. If success, you will see print progress bar appear.
-
Page 37: Chapter 3. Photodesiree
Chapter 3. PhotoDesiree This chapter is devoted to provide you with comprehensive detail information on the functions of our PhotoDesiree software. PhotoDesiree gives you quality studio result inside the crazy surroundings of your computer. It changes ordinary to extraordinary. It is the vehicle that brings countless moments alive. 3-1 PhotoDesiree in a view PhotoDesiree delivers professional quality result and easy to use User interfaces. - Page 38 Before you run PhotoDesiree, please preset your display at resolution of 800 x 600 pixels or 1024 x 768 pixels and Hi Color (16bit or higher) or True Color (24 bit) mode.
- Page 39 3-2 Basic Operation Concepts Follow the step for printing. Step A: Select image file. Step B: Layout your image, Adjust color effects. Step C: Drag to Print Queue, then print.
- Page 40 Mouse select originated function. When you open file, you can drag mouse to select multiple files. 1. Drag and Drop operation. We can do 2 styles drag and drop. Path A: file windows layout windows. Path B: Printing queue Layout windows.
- Page 41 2. HTF format file When you drag HTF (HiTi Format) format file, screen will display following message. HTF: special format for HiTi PhotoDesiree. HTF is including original printing data and original layout. HTF as COLLECTION: You can save HTF, as your editing/layout project file.
- Page 42 3-3 Functional Icons PhotoDesiree can be started from the shortcut in the Windows Start menu or double clicking icon on your desktop. File Window Add Image Twain DPOF Thumbnail View Detail View Delete Direct Indexed Printing Right pointing Arrow Brings you images or files that you wish to view and refine.
-
Page 43: Layout Window
Layout Window Photo paper Sticker 4X4 Sticker 4/2/4 Sticker 1X1 Fit to Height Fit to Width Delete All Edit in ImagEnhancer Edit External Image Editor Gray scaled icon It is full selection of printing formats. Standard A6 photo and variety of different format can be comprised in this section. - Page 44 Images can be save as in album format for easy access. If there are on albums, some icons will be gray-scaled. Execute the final printer command to the printer for image print out. Reset and clean the bottom window for next...
- Page 45 3-4 Photo printing 1. Click the image from the Left Window. 2. Change layout style to portrait.
- Page 46 3. Fit to width. 4. Click the downward arrow for printing queue. 5. Click the "Print Queue" icon for print out.
- Page 47 3-5 ImagEnhancer: light on your photo 1. Click the image from the Left Window. 2. Change layout style to portrait.
- Page 48 3. Fit to width. 4. Click on editor for ImagEnhancer. Templates of different designs will appear on the left window.
- Page 49 5. Double click your favorite template. 6. Click on the Text Icon to key in your content, such as “My girl friend Lisa”, and choose correct font style.
- Page 50 7. Click the finish check on the bottom right. 8. Click the downward arrow for printing queue. 9. Click the Print Queue for print out.
- Page 51 3-6 Calendar 1. Click the image from the Left Window. 2. Click on editor for ImagEnhancer. 3. Click on the top add calendar. 4. Click year and month follow by type of format and background color. Click the finish check on the bottom left.
- Page 52 5. Click the finish icon on the bottom and click finish check icon on the follow page. 6. Click the downward arrow for printing queue. 7. Click the Print Queue to print out.
- Page 53 3-7 ID Picture 1. Click the image from the Left Window. 2. Click on Photo Icon and drag the box right below Photo Icon and select ID One Inch or Two Inches. 3. Drag the box right next to the ID card box for picture combinations. 4.
-
Page 54: Business Card
3-8 Business Card 1. Click the image from the Left Window. 2. Click on Photo Icon and drag the box right below Photo Icon and select Business Card. 3. Drag the box right next to the business card box for picture combinations. 4. - Page 55 6. Click on the bottom left for color and contrast adjustment or Click on the bottom right for rotation and size adjustments. Click the finish check on the bottom right and return back to main menu. 7. Click the downward arrow for printing queue. 8.
- Page 56 3-9 Book Marker 1. Click the image from the Left Window. 2. Click on Photo Icon and drag the box right below Photo Icon and select Book Marker. 3. Drag the box right next to the Book Marker box for picture combinations. 4.
- Page 57 3-10 Sticker 1. Click the image from the Left Window. 2. Click on Sticker Icon. 3. Drag the box right next to the Sticker box for picture combinations. 4. (If need) Use ImagEnhancer to Add colored and transparent text. Add colored and transparent calendar. Rotate and resize photo.
- Page 58 3-11 Magic Coating and Mirabella Entering into the Magic Coating function, you may choose the built-in horoscope signs or Twelve Branches patterns, or import your image to do some watermark editing: 1. Duplicate to full page (Duplicate): you can decide whether or not import your image to the full page duplication 2.
- Page 59 You may decide to use which method to convert you color graphic file into a black and white watermark file. 1. Threshold Method (Threshold): The threshold method will convert the image to a black and white graphic file with large contrast. 2.
- Page 60 After the configurations are set up, you can save it as a self-defined template for later use. Matte effect You can also choose this function to apply matte. Mirabella Mirabella makes use of the analytical printing method to have 9 kinds of unspecific effects for the image.
-
Page 61: Chapter 4. Driver Details
Chapter 4. Driver Details 4-1 Driver Setting (Win98) You can find driver setting under Control Panel/Printers. Just choose it and right click “Properties”, the display every details. The printer driver is divided into six different categories:... - Page 62 4-1-1 General This Category gives you greater flexibility in printing out photo of your liking. It prints out draft copies of your photos with selection window on the top for image selection and page divider. Upon selecting your photos, please click the bottom preview bottom for draft print out for your review.
- Page 63 You can drag down the right arrow to make your selection. Use the printer driver below for printing icon provides a full range of driver that you could utilize for printing.
-
Page 64: Color Management
4-1-3 Color Management This feature allows you to connect or disconnect from various different software setting that will effect the coloration of the printer out. You may selection them from the window below. Please press Add or Cancel bottom to make your selection. - Page 65 4-1-4 Sharing This feature is ONLY available when you install “Microsoft Networks". It is using this printer in a local LAN environment. You can share it as a public printer,...
- Page 66 Titles Gives you a choice between Full Page or 2” ID photo Printer mode Provides range of printer speeds for your selection. Copies edit box set the number of copies that you may want to print.
- Page 67 4-1-6 Tools...
- Page 68 Position Calibrating 1. According to your print out, choose the perfect one that matches the sticker dimension. 2. You must fill in the number of PART A and PART B in order to adjust the horizontal and vertical margin. Color Preference Setting 1.
- Page 69 4-1-7 About This section shows the detail copyright information of this driver and web site address for any inquiries.
- Page 70 4-2 Driver Setting (Win2000) You can find driver setting under Control Panel/Printers. Just choose it and right click “Properties”, the display every details. In Windows 2000, it is very similar with Windows 98 setting. We only introduce the difference between Win98 and Win2000. If other part we not mentioned, please take reference with same part on Windows 98.
- Page 71 4-2-1 General "General" tab only display general info of printer. You can change Location, and Add comment if you want to share with others. Please press Printer Preferences… button.
-
Page 72: Printer Preferences
4-2-2 Printer Preferences When you press “Preference” will appear 3 tabs. These 3 tabs functions are the same as win98 driver. Please "win98 driver settings" for details. - Page 73 4-2-3 Ports HiTi printer will create “virtual Printer port” for printing through USB. All you need to do is to make sure that your Printer status is “Connected”.
- Page 74 4-3 Preview function in driver In Windows 98 /2000, the preview part is the same. Function: Before you printing, if you have checked the box of “Run preview” from the contents of “Setting” tab, preview application will run for the final checking.
-
Page 75: Uninstall Driver
4-4 Uninstall Driver 4-4-1 Uninstall Win98 driver Driver Uninstalling happened on: If you want to complete uninstall your printer driver, or you want to change new driver. 1. Action: Use Control Panel/Printers/ Choose "Uninstall HiTi PhotoShuttle(640PS)", then press "Add/Remove". - Page 76 2. Then begin to uninstall driver. 3. Wait the program finished this procedure. 4. Uninstall program will prompt you to restart Windows.
- Page 77 4-4-2 Uninstall Win2000 driver 1. Under Control Panel/Add Remove Programs, you can find "Uninstall HiTi USB Photo Printer". 2. Then begin to uninstall driver.
- Page 78 3. No system restart required. Finished Uninstall driver.
- Page 79 4-4-3 Uninstall WinXP driver 1. Under Control Panel/Add Remove Programs, you can find “Uninstall HiTi USB Photo Printer”. 2. Then begin to uninstall driver.
- Page 80 3. Uninstall program will prompt you to restart Windows.
-
Page 81: Chapter 5. Troubleshooting
5-1 Orange LED and Troubleshooting In normal condition, the LED on the front panel of your printer shows a green light, which is steady during idling, and blinking during operation. Once the printer detects a problem, the orange LED blinks periodically. The number of... - Page 82 If you are not using PhotoDesiree for printing, make sure the setup for paper type is correct in the printer driver as below: Change the setting for paper type at [Control panel]/[Printer]/ HiTi PhotoShuttle(640PS)/ [Property]/[Paper Type].
- Page 83 Insufficient onboard memory 8 times Improper action of printer head contact Hi-Ti or distributor for assistance. Please reboot and check if the printer can automatically resume normal operation. If such problem reoccurs, please contact the distributor or Hi-Ti for repair.
-
Page 84: Error Message And Solution
If you see error message on the screen, do not press [Yes] immediately, record the message first. Please follow the method described in this section for troubleshooting. Note: After you press [Yes] in the error message window, the printer will reset, and the problem may be cleared during “Reset”. Error... - Page 85 Close the ribbon cartridge to the fixed position. Do NOT tear the paper immediately because the paper is stuck in the roller of the printer and cannot be removed. Please turn off your printer first. After 5 seconds, power on the printer.
- Page 86 Intel Chipset Software: http://support.intel.com/support/chipse Via Chipset Software: http://www.via.com.tw/jsp/en/dr/driver.j Turn off the printer and the PC. Reboot after 5 seconds. If the problem is still there, please contact Hi-Ti or distributor for assistance. Please refer to the installation guide for the installation of the driver.
- Page 87 You have no Such problem only occurs privilege to in Windows 2000, create a folder; because: When program is run in Windows 2000, users must set the authority You have no to ”Administrator”, privilege to otherwise WIN 2000 will save restrict the user’s authority temporary for applications.
-
Page 88: Chapter 6. Q&A Of Frequently Asked Questions
Chapter 6. Q&A of Frequently Asked Questions Operation Problem Installing and Uninstalling Driver Printing Problem Photo output quality Problem Where Can I Get Service for This Product Basic Requirements for Widnows Operating System Problem of Running PhotoDesiree... -
Page 89: Operating Problem
Please use Hi-Ti photo paper and sticker. How to get the driver of Hi-Ti Digital Photo Printer? When you purchase Hi-Ti Digital Photo Printer, the driver is bundled in a CD. In addition, you also can download it from the Hi-Ti website: http://www.hi-ti.com/downloads.html... - Page 90 Please do not let your operating system enter the suspend or sleep mode. 2. If you are using the USB hub to connect the printer, we recommend you to connect the device to the first level of the hub.
- Page 91 Q21: When should I change the ribbon cartridge? A21: The Hi-Ti Photo Printer - PhotoShuttle(640PS) will detect the ribbon cartridge automatically. When the ribbon cartridge is used up, the message of “Out of ribbon”...
- Page 92 Photo Printer, or get more information from the Hi-Ti website: http://www.hi-ti.com/Taiwan/wheretobuy.htm Q28: If I am not using the Hi-TiDigital Photo Printer very often, can we put the ribbon cartridge in the printer all the time? A28: Hi-Ti recommends that stores the ribbon cartridge into the sealed palastic bag to avoid moisture, heat, or contamination by dust if the printer is not used for long time.
- Page 93 Installing and Uninstalling Driver When I see “Add New Hardware” in the Windows 98 SE operating system that I am using before the Hi-Ti Digital Photo Printer driver is installed, what should I do? 1. Cancel the windows of “Installing Driver”.
- Page 94 3. After you click the installation, the driver window will appear, please select “Yes”. 4. The files will be copied to your hard disk, and the window will show “Do you want to set the Hi-Ti PhotoShuttle(640PS) as the default printer?” 5. After you selected, the installation is completed.
- Page 95 2. The window of uninstalling the printer driver will appear. Press “Start”. 3. The window of restarting the computer will appear. Press “Yes”. Q10: How can I reinstall the Hi-Ti Digital Photo Printer Driver in Windows 98 SE, ME, or 2000? A10: 1. Press "Start/Set Up/Control panel/Add/Delete Program/Uninstall HiTi PhotoShuttle(640PS).
-
Page 96: Printing Problem
(with a slight noise) to locate the labeled mark on the ribbon. After it is found, the photo printer will start printing. If not, the paper will withdraw. If you hear the sound of rotation, but the printer still shows the error message of “Out of ribbon”... - Page 97 I do? 1. Make sure the printer and computer are connected properly. 2. Make sure the power of the printer has not been broken down. 3. Make sure you are not printing from two printers. 4. Do not start any other application program during printing.
- Page 98 USB printer, and lower the transmission speed. Intel Chipset Software: http://support.intel.com/support/chipsets/ Via Chipset Driver: http://www.via.com.tw/jsp/en/dr/driver.jsp 6. Turn off the printer and PC. Turn on the power again after 5 seconds. 7. If the problem is still there, please contact Hi-Ti or its distributor for assistance.
- Page 99 USB printer, and lower the transmission speed. Intel Chipset Software: Via Chipset Driver: 6. Turn off the printer and PC. Turn on the power again after 5 seconds. 7. If the problem is still there, please contact Hi-Ti or its distributor for assistance.
- Page 100 Reboot the computer and printer, and print again. 2. Make sure you have installed the Hi-Ti PhotoShuttle(640PS) driver. Q15: What should I do if I see the error message of “Paper empty” in Windows 98, ME, and 2000 operating system? A15: 1.
- Page 101 Please refer to related documents and website of manufacturers for color matching systems. 4. To assure the photo printed from Hi-Ti Digital Photo Printer is close to the one you see on screen, please confirm the following: 1) Calibrate your monitor.
- Page 102 Hi-Ti recommends you to use 1200x1600 or above for printing graphic files. How to improve the problem of printing at incorrect starting point? 1. Check the version of your Digital Photo Printer driver is correct. 2. Check whether the position of paper is placed properly from the torn edge.
- Page 103 2. Do not use the recycled ribbon cartridge for printing. Q16: Why there is horizontal dash lines on the output photo? A16: The input AC voltage may be not stable. Do not use the printer with other device consuming high electricity.
- Page 104 2-inch photo. Q19: How do I execute the printing test for “Position calibration” and adjust the setting? A19: 1. Click “Start/Setup/Printer/HiTi PhotoShuttle(640PS)/Contnet/Tool”. 2. Click Color Setting/White Skin Optimization/Printing Calibration Sketch to run the printing test. 3. Examine the calibrations of the testing photo output. From the...
- Page 105 1. You may buy the ribbon cartridge, photo paper, and sticker from the Hi-Ti distributor. 2. Visit our Hi-Ti website: What should I do if the new printer does not come with an USB cable? Please contact the distributor whom you bought the printer: http://www.hi-ti.com/Taiwan/wheretobuy.htm...
- Page 106 To maximize the function of the Hi-Ti printer and its related software, your system and hardware equipment should have the following configurations or above: PC compatible with Microsoft Windows operating system, and the recommended processor is at least 500 MHz or faster.
- Page 107 What should I do if my graphic file is smaller than the image frame? To avoid too much blank along the edges, you can manually adjust the graphic file according to the proportion by appropriate height, width, or from the image editor of ImagEnhancer to adjust the size until it is the same size of the image frame.
- Page 108 A16: Link to the Hi-Ti website by clicking the HI-Ti logo on the upper left corner to download the updated functions of this software. Hi-Ti Website︰www.hi-ti.com...
-
Page 109: Specification
(4/2/4) sticker kit Accessories Power cord, USB cable, CD (Driver, Application and Electronic Manual) Power Supply 100~240V,50/60 Hz,75W Model HiTi 640PS Print Method Dye Diffusion Thermal Transfer Color Continuous-tone output, 256-level each color Resolution 403x403dpi, equals to inkjet 6400dpi... -
Page 110: Limited Warranty Statement
1 year A. Extent of Limited Warranty 1. Hi-Touch Imaging Technologies (HiTi) warrants to the end-user customer that the HiTi products specified above will be free from defects on materials and workmanship for the duration specified above, which duration begins on the date of purchase by the customer. - Page 111 5. If HiTi receives, during the applicable warranty period, notice of a defect in any software, media, or ink cartridge product, which is covered by HiTi's warranty, HiTi shall replace the defective product.
- Page 112 1. To the extent that this Warranty Statement is inconsistent with local law, this Warranty Statement shall be deemed modified to be consistent with such local law. Under such local law, certain disclaimers and limitations of this Warranty Statement may not apply to the customer.
-
Page 113: Customer Technical Support
Please support following information, and we can solve your problem in the fastest way. 1. Printer S/N. 2. Printer Model No. 3. Printer driver version (you can get it from "Control Panel/Printer/HiTi PhotoShuttle(640PS)/Properties/About") 4. PhotoDesiree version. (you can get version number from PhotoDesiree) 5. Brand name/Model/System configuration of your PC. - Page 114 Contact Info Hi-Touch Imaging Technologies. Address: 3F, 31, Shuang-Shih Rd. Sec.3, Pan-Chiao City, Taipei County 220, Taiwan Tel: +886-2-82583060 FAX: +886-2-82583062 Web: http://www.hi-ti.com E-mail: csd@hi-ti.com...
Need help?
Do you have a question about the 640PS and is the answer not in the manual?
Questions and answers