
Related Manuals for Psion Teklogix OMNii HDK XT10


Summary of Contents for Psion Teklogix OMNii HDK XT10
- Page 1 Omnii HDK User Manual (Omnii XT10) December 8, 2010 P/N 8100210.A ISO 9001 Certified Quality Management System...
- Page 2 This document and the information it contains is the property of Psion Teklogix Inc., is issued in strict confi- dence, and is not to be reproduced or copied, in whole or in part, except for the sole purpose of promoting the sale of Psion Teklogix manufactured goods and services.
- Page 3 Return-To-Factory Warranty Psion Teklogix Inc. provides a return to factory warranty on this product for a period of twelve (12) months in accordance with the Statement of Limited Warranty and Limitation of Liability provided at: www.psionteklogix.com/warranty The warranty on Psion Teklogix manufactured equipment does not extend to any product that has been tam- pered with, altered, or repaired by any person other than an employee of an authorized Psion Teklogix service organization.
-
Page 5: Table Of Contents
Non-Psion Teklogix Drivers ........ - Page 6 Psion Teklogix Mobile Devices SDK ........
- Page 7 GPIO Devices ................... 132 Psion Teklogix Omnii HDK User Manual...
- Page 8 Psion Teklogix Accessory And Parts Information ........
- Page 9 ................... . . I Psion Teklogix Omnii HDK User Manual...
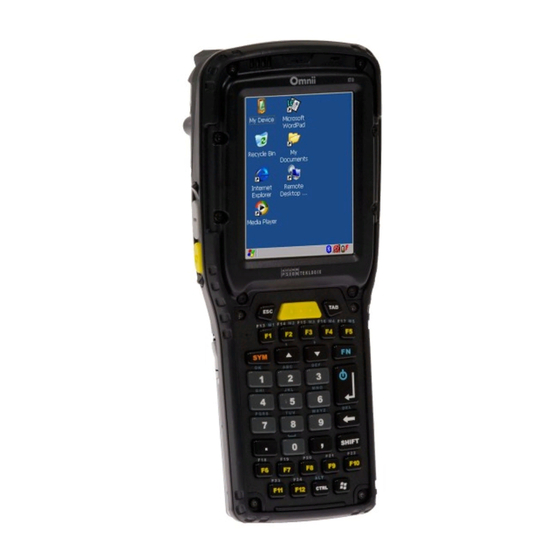
- Page 11 1.7 About the Omnii Hand-Held Computer ........7 Psion Teklogix Omnii HDK User Manual...
-
Page 13: Chapter 1: Introduction
Chapter 1: Introduction About This Manual About This Manual This manual provides guidance on creating expansion devices for Psion Teklogix Omnii devices using the Omnii HDK. The manual is organised into the following chapters: Chapter 1: Introduction provides an overview of the Omnii Hand-Held Computer and the Omnii HDK. -
Page 14: Text Conventions
HDK Demo application. See Section 4.7: “Omnii HDK Application Development Software” and Chapter 10: “HDK Demo Application” for more details on these files. • 2D drawings and 3D models of the areas of Omnii where devices and modules can be mounted. Psion Teklogix Omnii HDK User Manual... -
Page 15: Files In The Hdk
2D line drawing of the large standard back cover with locations of mounting points for the back cover and pistol grip Back_Cover_Large_Std_2D.pdf 2D line drawing of the large standard back cover with locations of mounting points for the back cover and pistol grip Psion Teklogix Omnii HDK User Manual... - Page 16 3D CAD model of Omnii chassis with back cover removed showing keep-away areas, with GPS and WWAN radio installed Scanner_Pod_Std_2D.dwg 2D line drawing of the standard scanner pod with locations of mounting points for the pod and for the scanner assembly Psion Teklogix Omnii HDK User Manual...
-
Page 17: Obtaining The Hdk
3D CAD model of the standard scanner pod Obtaining the HDK The Omnii HDK is available for download on the Psion Teklogix Community website (http://community.psionteklogix.com). You will need an account on the website in order to down- load files. An account can be easily created by clicking on the Join link in the upper right corner of the home page. - Page 19 2.4.2 Device Registry Keys ........13 Psion Teklogix Omnii HDK User Manual...
-
Page 21: Overview
Omnii hand-held computer. - Section 5.4: “Expansion Module and Device Design and Installation” • install non-Psion Teklogix serial, USB or GPIO devices in existing Psion Teklogix end-cap, pod and back cover modules. - Section 5.5: “Installing Devices Inside Existing Modules”... -
Page 22: Expansion Areas
Chapter 2: Getting Started Expansion Areas Expansion Areas The following illustrations show the areas where custom expansion modules can be mounted on your Omnii hand-held computer: End-Cap Back Cover Psion Teklogix Omnii HDK User Manual... -
Page 23: Expansion Device Requirements
Details on these registry keys can be found in Section 4.4: “Registry Keys”, and specific examples are given in Section 10.4: “Creating Registry Keys”. Psion Teklogix Omnii HDK User Manual... - Page 25 3.7.1 Batteries ..........21 Psion Teklogix Omnii HDK User Manual...
-
Page 27: Chapter 3: Hardware
This full alphanumeric keyboard has the numeric keys arranged telephone-style with the numbers 1,2,3 along the top row, and the alphabetic keys arranged in order from A to Z. It has 30 function keys (6 single-press and 24 shifted), and 6 macro keys available. Psion Teklogix Omnii HDK User Manual... -
Page 28: Back Cover Variants
The following scanner/imager options are currently available to order from the factory: Expansion Back Cover with Scanner Pod Module • SE1223LR long range bar code scanner • SE1224HP high performance bar code scanner • EV15 1D imager • 5080 2D imager Psion Teklogix Omnii HDK User Manual... -
Page 29: Processor
Large Standard Back Cover • SE1224HP high performance bar code scanner • EV15 1D imager • 5080 2D imager Processor Omnii XT10 is built around a Texas Instruments OMAP3515 600MHz ARM Cortex-A8 dual- core processor. Psion Teklogix Omnii HDK User Manual... -
Page 30: Identifying Hardware
The following illustration shows the positions of the electrical connectors on the Omnii XT10 main logic board. These locations are shown in more precise detail in the drawing and model files included with the HDK. See Section 5.4.1: “Physical Space Considerations” for details. Psion Teklogix Omnii HDK User Manual... -
Page 31: Power Management
Omnii is powered by a lithium-ion rechargeable battery pack and can also be powered from external power. When Omnii is powered from external power, the battery pack also charges. Use only power sources recommended or sold by Psion Teklogix for Omnii. 3.7.1... - Page 33 4.2.1 Windows Drivers ........25 4.2.2 Non-Psion Teklogix Drivers ........25 4.3 System Initialization .
- Page 34 4.7.7 Omnii HDK API Constants ........59 Psion Teklogix Omnii HDK User Manual...
-
Page 35: Overview
4.2.2 Non-Psion Teklogix Drivers The Psion Teklogix platform loads some standard device drivers. If the expansion module uses standard drivers such as serial or USB, there is no need to load custom drivers. There must be a registry entry for the driver and its parameters. For details see Section 4.4: “Registry Keys”. -
Page 36: Registry Keys
3. Create the DeviceId subkey as a concatenation of the device manufacturer and model names, separated by a space. For example, for a device made by Psion Teklogix with the model name “Exp1_UART” the subkey should be: [HKLM\Drivers\BuiltIn\Peripherals\devices\0\Psion Teklogix Exp1_UART] 4. - Page 37 0x02, load default USB host driver ; Flags_UsbClient: 0x04, load default USB client driver ; Flags_Spi: 0x08, load default SPI driver ; Flags_UsbOtg: 0x10, load default USB OTG driver ; Flags_None: 0x00, load vendor supplied driver Psion Teklogix Omnii HDK User Manual...
-
Page 38: Device Information Registry Keys
Fields” for more details). For example, if an end-cap expansion device manufactured by Psion Teklogix with the model field defined as “Endcap” was connected to the end-cap expansion port, the correct registry key for parameters pertaining to that device would be:... - Page 39 Device Name from the registry key itself is used. The default setting for this value is 0, which displays an icon in the taskbar. The other setting, which displays a “new device” window, is primarily intended for docking devices. Psion Teklogix Omnii HDK User Manual...
-
Page 40: Device Driver Registry Keys
• Icon (REG_DWORD): This is the Resource ID of the icon to be displayed for this device in the status bar. Currently, icons can only be loaded from Psion Teklogix DLLs. • DeviceNameID (REG_DWORD): This is the Resource ID of the name string to be displayed in the “New Device”... - Page 41 ; 0/1: sample on the leading/trailing clock edge “BitSequence”=dword:0 ; 0/1: MSB/LSB “BitRate”=dword:1E8480 ; Baudrate 2Mb/s “DataWidth”=dword:8 ; Data Width 8; igloo IP only support 8 bits width “BufferLen”=dword:400 ; Loop Buffer Length 1024 bytes “Bubble”=dword:0 ; the Bubble char Psion Teklogix Omnii HDK User Manual...
-
Page 42: Software Registry Entries
5. Power is enabled to the connector. 6. If USB or UART functionality is specified, the Peripherals driver enables and configures the specified interface pins accordingly. 7. The device driver is loaded. Psion Teklogix Omnii HDK User Manual... -
Page 43: Serial (Com) Port Assignments
Note: 1. The proper name for COM ports above COM9 is \$device\COMxx (no “:” following the COM port number). 2. COM ports cannot be reassigned on the Omnii. 3. Bluetooth creates and destroys many virtual ports. Psion Teklogix Omnii HDK User Manual... -
Page 44: Omnii Hdk Application Development Software
Windows Embedded CE 6.0 Development Platform for Visual Studio This package installs a development platform in Visual Studio 2008 named PsionTeklogixCE600. Use this platform to develop applications for Psion Teklogix devices running Windows Embedded CE 6.0. This package is located in the Mobile Devices SDK subfolder of the Community website Downloads section as “Windows Embedded CE 6.0 Native (C/C++) MSI Installer for Visual... - Page 45 4. If you wish to see a breakdown of the installation progress, click the Show details button. The details window appears. Click and drag the scroll bar on the right to scroll the information up or down. 5. Click Close to end the installation. Psion Teklogix Omnii HDK User Manual...
-
Page 46: Omnii Hdk Api Functions
(or other connector) being controlled. Description This function is used to open a handle to the Psion Teklogix HDK. The handle opened can then be used in other HDK functions. The handle must be closed using Hdk7545_Close(). This parameter must not be null. -
Page 47: Hdk7545_Close
ERROR_SUCCESS – if successful. The handle is now closed. • ERROR_INVALID_HANDLE – the specified handle is invalid or null. • ERROR_INVALID_DATA - an exception was generated. • Other errors are possible. Sample Code See sample code for “Hdk7545_Open”. Psion Teklogix Omnii HDK User Manual... -
Page 48: Hdk7545_Setpower
– [out] pointer to a BOOL containing the current connector power state. Description This function is used to determine the current power state of a connector. The default power state for connectors is off. Psion Teklogix Omnii HDK User Manual... -
Page 49: Hdk7545_Setpowermode
The default power mode is Manual. This function can only be called by a driver, not by an application. The driver that calls this function must be loaded by the Peripherals driver at startup. Psion Teklogix Omnii HDK User Manual... -
Page 50: Hdk7545_Getpowermode
ERROR_SUCCESS – if successful. • ERROR_INVALID_HANDLE – the specified handle is invalid. • ERROR_INVALID_PARAMETER – one of the parameters is incorrect or invalid. • ERROR_INVALID_DATA - an exception was generated. • Other errors are possible. Psion Teklogix Omnii HDK User Manual... -
Page 51: Hdk7545_Expansionsetpindirection
46). The pin direction does not need to be set if the alternate (non-GPIO) function for the pin is enabled. Drivers and/or applications must set the pin direction to output before calling the Hdk7545_ExpansionSetPinState function. Psion Teklogix Omnii HDK User Manual... -
Page 52: Hdk7545_Expansiongetpindirection
46). The pin direction does not need to be set if the alternate (non-GPIO) function for the pin is enabled. Drivers and/or applications must set the pin direction to output before calling the Hdk7545_ExpansionSetPinState function. Psion Teklogix Omnii HDK User Manual... -
Page 53: Hdk7545_Expansionsetpinmode
Changes the mode of the specified pin on the expansion connector. The mode can be set to either 'Hdk7545_PinMode_NoInterrupt' or to a combination of one or more of the following values: Hdk7545_PinMode_InterruptLowHigh [edge-triggered interrupts] Hdk7545_PinMode_InterruptHighLow [edge-triggered interrupts] Hdk7545_PinMode_InterruptLow [level-triggered interrupts] Hdk7545_PinMode_InterruptHigh [level-triggered interrupts] Psion Teklogix Omnii HDK User Manual... -
Page 54: Hdk7545_Expansiongetpinmode
ERROR_NOT_SUPPORTED; Hdk7545_ExpansionSetPinDirection(hdkHandle, HDK7545_GPIO_PIN_EXPANSION_GPIO1_RXD,Hdk7545_PinDirection_Input); Hdk7545_ExpansionSetPinDirection(hdkHandle, HDK7545_GPIO_PIN_EXPANSION_GPIO2_CTSN,Hdk7545_PinDirection_Input); Hdk7545_ExpansionSetPinMode(hdkHandle, HDK7545_GPIO_PIN_EXPANSION_GPIO1_RXD,Hdk7545_PinMode_InterruptHigh); Hdk7545_ExpansionSetPinMode(hdkHandle, HDK7545_GPIO_PIN_EXPANSION_GPIO2_CTSN,Hdk7545_PinMode_InterruptLow); Hdk7545_Close(&hdkHandle); return ERROR_SUCCESS; 4.7.4.11 Hdk7545_ExpansionGetPinMode Syntax DWORD Hdk7545_ExpansionGetPinMode( HANDLE hdk, DWORD pin, DWORD *mode ); Parameters • hdk – [in] an open HDK handle. Psion Teklogix Omnii HDK User Manual... - Page 55 (mode[0] & Hdk7545_PinMode_InterruptHighLow) != 0)); RETAILMSG(1, (L"GPIO2: Low:%u High:%u Low/High:%u High/Low:%u\r\n", (mode[1] & Hdk7545_PinMode_InterruptLow) != 0, (mode[1] & Hdk7545_PinMode_InterruptHigh) != 0, (mode[1] & Hdk7545_PinMode_InterruptLowHigh) != 0, (mode[1] & Hdk7545_PinMode_InterruptHighLow) != 0)); Hdk7545_Close(&hdkHandle); return ERROR_SUCCESS; Psion Teklogix Omnii HDK User Manual...
-
Page 56: Hdk7545_Expansionsetpinfunction
Hdk7545_Connector expansionSlot = Hdk7545_Connector_Expansion1; HANDLE hdkHandle = INVALID_HANDLE_VALUE; DWORD result = Hdk7545_Open(&hdkHandle, expansionSlot); if( result != ERROR_SUCCESS ) { return ERROR_NOT_SUPPORTED; Hdk7545_ExpansionSetPinFunction(hdkHandle, HDK7545_GPIO_PIN_EXPANSION_GPIO1_RXD,Hdk7545_PinFunction_Alternate); Hdk7545_ExpansionSetPinFunction(hdkHandle, HDK7545_GPIO_PIN_EXPANSION_GPIO0_TXD,Hdk7545_PinFunction_Alternate); Hdk7545_ExpansionSetPinFunction(hdkHandle, HDK7545_GPIO_PIN_EXPANSION_GPIO2_CTSN,Hdk7545_PinFunction_Alternate); Hdk7545_ExpansionSetPinFunction(hdkHandle, HDK7545_GPIO_PIN_EXPANSION_GPIO3_RTSN,Hdk7545_PinFunction_Alternate); Hdk7545_ExpansionSetPinFunction(hdkHandle, HDK7545_GPIO_PIN_EXPANSION_GPIO4_MOSI,Hdk7545_PinFunction_Alternate); Hdk7545_ExpansionSetPinFunction(hdkHandle, HDK7545_GPIO_PIN_EXPANSION_GPIO5_MISO,Hdk7545_PinFunction_Alternate); Hdk7545_ExpansionSetPinFunction(hdkHandle, HDK7545_GPIO_PIN_EXPANSION_GPIO6_SCLK,Hdk7545_PinFunction_Alternate); Psion Teklogix Omnii HDK User Manual... -
Page 57: Hdk7545_Expansiongetpinfunction
HANDLE hdkHandle = INVALID_HANDLE_VALUE; DWORD result = Hdk7545_Open(&hdkHandle, expansionSlot); if( result != ERROR_SUCCESS ) { return ERROR_NOT_SUPPORTED; Hdk7545_PinFunction functions[4] = { Hdk7545_PinFunction_GPIO,Hdk7545_PinFunction_GPIO, Hdk7545_PinFunction_GPIO,Hdk7545_PinFunction_GPIO Hdk7545_ExpansionGetPinFunction(hdkHandle, HDK7545_GPIO_PIN_EXPANSION_GPIO0_TXD, &functions[0]); Hdk7545_ExpansionGetPinFunction(hdkHandle, HDK7545_GPIO_PIN_EXPANSION_GPIO1_RXD, &functions[1]); Hdk7545_ExpansionGetPinFunction(hdkHandle, HDK7545_GPIO_PIN_EXPANSION_GPIO2_CTSN, &functions[2]); Hdk7545_ExpansionGetPinFunction(hdkHandle, HDK7545_GPIO_PIN_EXPANSION_GPIO3_RTSN, &functions[3]); Psion Teklogix Omnii HDK User Manual... -
Page 58: Hdk7545_Expansionsetpinstate
Sample Code DWORD SetState() Hdk7545_Connector expansionSlot = Hdk7545_Connector_Expansion1; HANDLE hdkHandle = INVALID_HANDLE_VALUE; DWORD result = Hdk7545_Open(&hdkHandle, expansionSlot); if( result != ERROR_SUCCESS ) { return ERROR_NOT_SUPPORTED; Hdk7545_ExpansionSetPinFunction(hdkHandle, HDK7545_GPIO_PIN_EXPANSION_GPIO0_TXD,Hdk7545_PinFunction_GPIO); Hdk7545_ExpansionSetPinDirection(hdkHandle, HDK7545_GPIO_PIN_EXPANSION_GPIO0_TXD,Hdk7545_PinDirection_Output); Hdk7545_ExpansionSetPinState(hdkHandle, HDK7545_GPIO_PIN_EXPANSION_GPIO0_TXD, Hdk7545_PinState_Set); Hdk7545_Close(&hdkHandle); return ERROR_SUCCESS; Psion Teklogix Omnii HDK User Manual... -
Page 59: Hdk7545_Expansiongetpinstate
DWORD result = Hdk7545_Open(&hdkHandle, expansionSlot); if( result != ERROR_SUCCESS ) { return ERROR_NOT_SUPPORTED; Hdk7545_ExpansionSetPinFunction(hdkHandle, HDK7545_GPIO_PIN_EXPANSION_GPIO0_TXD, Hdk7545_PinFunction_GPIO); Hdk7545_ExpansionSetPinDirection(hdkHandle, HDK7545_GPIO_PIN_EXPANSION_GPIO0_TXD, Hdk7545_PinDirection_Output); Hdk7545_PinState state = Hdk7545_PinState_Unknown; Hdk7545_ExpansionGetPinState(hdkHandle, HDK7545_GPIO_PIN_EXPANSION_GPIO0_TXD, &state); if( state != Hdk7545_PinState_Clr ) { Hdk7545_ExpansionSetPinState(hdkHandle, HDK7545_GPIO_PIN_EXPANSION_GPIO0_TXD, Hdk7545_PinState_Clr); Hdk7545_Close(&hdkHandle); return ERROR_SUCCESS; Psion Teklogix Omnii HDK User Manual... -
Page 60: Hdk7545_Expansionsetpullupdown
// enable a pull-up on the Expansion 1 // HDK7545_GPIO_PIN_EXPANSION_GPIO0_CTSN pin. DWORD SetPulldown() Hdk7545_Connector expansionSlot = Hdk7545_Connector_Expansion1; HANDLE hdkHandle = INVALID_HANDLE_VALUE; DWORD result = Hdk7545_Open(&hdkHandle, expansionSlot); if( result != ERROR_SUCCESS ) { return ERROR_NOT_SUPPORTED; Hdk7545_ExpansionSetPullUpDown(hdkHandle, HDK7545_GPIO_PIN_EXPANSION_GPIO0_TXD, Hdk7545_PullUpDown_Pullup, FALSE); Hdk7545_Close(&hdkHandle); return ERROR_SUCCESS; Psion Teklogix Omnii HDK User Manual... -
Page 61: Hdk7545_Expansiongetirq
!= ERROR_SUCCESS ) { Hdk7545_Close(&hdkHandle); return result; DWORD sysIntr = 0; BOOL ok = KernelIoControl(IOCTL_HAL_REQUEST_SYSINTR, &irq, sizeof(irq), &sysIntr, sizeof(sysIntr), 0); if( !ok || sysIntr == SYSINTR_UNDEFINED || sysIntr == 0 ) { Hdk7545_Close(&hdkHandle); return ERROR_NO_SYSTEM_RESOURCES; Psion Teklogix Omnii HDK User Manual... -
Page 62: Hdk7545_Readeepromheader
ERROR_INVALID_DATA - an exception was generated. • ERROR_REVISION_MISMATCH – the EEPROM structure size/format/version supplied by the caller does not match what was expected by the HDK and/or the hand-held device. • Other errors are possible. Psion Teklogix Omnii HDK User Manual... -
Page 63: Hdk7545_Writeeepromheader
EEPROM on the connector in bytes, and a multiple of 128. If a size that is larger than the actual size of the EEPROM is written, the behaviour of further Psion Teklogix Omnii HDK User Manual... - Page 64 = 0x1e; // 30 eeprom.m_MfgTestRegion[2] = 0x0a; // 2010 eeprom.m_MfgTestRegion[3] = 0x00; // test result (0 = okay) result = Hdk7545_WriteEepromHeader(hdkHandle, &eeprom); if( result != ERROR_SUCCESS ) { Hdk7545_Close(&hdkHandle); return result; Hdk7545_Close(&hdkHandle); return ERROR_SUCCESS; Psion Teklogix Omnii HDK User Manual...
-
Page 65: Hdk7545_Readeepromextendeddata
= sizeof(eeprom); eeprom.m_Version = HDK7545_EEPROM_VERSION; result = Hdk7545_ReadEepromHeader(hdkHandle, &eeprom); if( result != ERROR_SUCCESS ) { Hdk7545_Close(&hdkHandle); return result; BYTE data[24] = { 0 } ; DWORD dataSize = sizeof(data); DWORD offset = 0; Psion Teklogix Omnii HDK User Manual... -
Page 66: Hdk7545_Writeeepromextendeddata
ERROR_INVALID_HANDLE – the specified handle is invalid. • ERROR_INVALID_PARAMETER – one of the parameters was null/invalid, or the caller specified an invalid offset or size. • ERROR_INVALID_DATA - an exception was generated. • Other errors are possible. Psion Teklogix Omnii HDK User Manual... -
Page 67: Api Structures
The following C Structures are declared in the file hdk7545Structs.h: 4.7.5.1 Hdk7545_Eeprom The Hdk7545_Eeprom structure is defined as follows: struct Hdk7545_Eeprom DWORD m_Size; DWORD m_Version; DWORD m_EepromId; BYTE m_MfgTestRegion[HDK7545_EEPROM_MFGTESTREGION_SIZE]; char m_PartNumber[HDK7545_EEPROM_PART_NUMBER_SIZE+1]; char m_SerialNumber[HDK7545_EEPROM_SERIAL_NUMBER_SIZE+1]; char m_Manufacturer[HDK7545_EEPROM_MANUFACTURER_SIZE+1]; char m_Model[HDK7545_EEPROM_MODEL_SIZE+1]; char m_HardwareRevision[HDK7545_EEPROM_HWREVISION_SIZE+1]; DWORD m_EepromSize; DWORD m_ExtendedSize; Psion Teklogix Omnii HDK User Manual... -
Page 68: Api Enumerations
Hdk7545_PowerMode_Manual = 2, Hdk7545_PowerMode_Invalid = 0xffffffff } Hdk7545_PowerMode; 4.7.6.2 Hdk7545_Connector The Hdk7545_Connector enumeration is defined as follows: typedef enum { Hdk7545_Connector_Expansion1 = 0, Hdk7545_Connector_Expansion2 = 1, Hdk7545_Connector_Expansion3 = 2, Hdk7545_Connector_Invalid = 0xffffffff } Hdk7545_Connector; Psion Teklogix Omnii HDK User Manual... -
Page 69: Hdk7545_Pindirection
#define HDK7545_GPIO_PIN_EXPANSION_GPIO1_RXD // clear-to-send (active low) #define HDK7545_GPIO_PIN_EXPANSION_GPIO2_CTSN // ready-to-send (active low) #define HDK7545_GPIO_PIN_EXPANSION_GPIO3_RTSN // Master Output, Slave Input (output from master) #define HDK7545_GPIO_PIN_EXPANSION_GPIO4_MOSI // Master Input, Slave Output (output from slave) #define HDK7545_GPIO_PIN_EXPANSION_GPIO5_MISO Psion Teklogix Omnii HDK User Manual... - Page 70 #define HDK7545_GPIO_PIN_EXPANSION_GPIO7_CSN // the EEPROM structure version information #define HDK7545_EEPROM_VERSION_MAJOR 0x0001 #define HDK7545_EEPROM_VERSION_MINOR 0x0002 #define HDK7545_EEPROM_VERSION \ ((HDK7545_EEPROM_VERSION_MAJOR << 16) | (HDK7545_EEPROM_VERSION_MINOR)) #define HDK7545_EEPROM_MFGTESTREGION_SIZE #define HDK7545_EEPROM_PART_NUMBER_SIZE #define HDK7545_EEPROM_SERIAL_NUMBER_SIZE #define HDK7545_EEPROM_MANUFACTURER_SIZE #define HDK7545_EEPROM_MODEL_SIZE #define HDK7545_EEPROM_HWREVISION_SIZE Psion Teklogix Omnii HDK User Manual...
- Page 71 5.5.3 End-Cap ..........78 Psion Teklogix Omnii HDK User Manual...
-
Page 73: Chapter 5: Mechanical Considerations
GPS or WWAN radio installed 3D CAD model of Omnii chassis with back cover removed Omnii_Connectors_Radio_3D.stp showing keep-away areas, with GPS and WWAN radio installed 3D CAD models of the standard scanner pod Scanner_Pod_Std_3D.igs Scanner_Pod_Std_3D.stp Psion Teklogix Omnii HDK User Manual... -
Page 74: Files
GPS and WWAN Omnii_Connectors_Radio_2D.pdf radio installed 2D line drawings of the standard scanner pod with Scanner_Pod_Std_2D.dwg locations of mounting points for the pod and for the Scanner_Pod_Std_2D.pdf scanner assembly Psion Teklogix Omnii HDK User Manual... -
Page 75: Expansion Module And Device Design And Installation
5.4.1 Physical Space Considerations Whether installing a non-standard expansion device into an existing Psion Teklogix module (back cover, end-cap or pod expansion), or creating a custom module to contain an expansion device, it is vitally important that your device does not intrude on space already occupied by the internal components of the hand-held computer. -
Page 76: End-Cap Modules And Devices
The end-cap module must be designed with a corresponding hard ridge that presses into the overmould to form this seal. The 3D CAD model of the standard end- cap can be used to obtain the required width, depth and shape of this ridge. Psion Teklogix Omnii HDK User Manual... - Page 77 Remove the two T6 Torx screws at the top of the display on the front of the unit. d. Separate the back cover from the main housing. You can now disconnect the antenna wire from the GPS module. Psion Teklogix Omnii HDK User Manual...
-
Page 78: Pod Expansion Modules And Devices
3D CAD models of the standard scanner pod Scanner_Pod_Std_3D.igs Scanner_Pod_Std_3D.stp Table 5.8 Required Fasteners Torque How Used Quantity Part Number Screw Size (in-lb) Pod Expansion/Blanking Plate to 1005090 M3x5 Main Housing Scanner Assembly to Pod Expansion 1004945 M2.5x5 Psion Teklogix Omnii HDK User Manual... - Page 79 5 in-lb (0.56 N-m) in order to maintain a proper seal. Figure 5.4 Location of Pod Expansion Mounting Points units = mm Psion Teklogix Omnii HDK User Manual...
- Page 80 1. Connect the pod expansion flex cable to the pod module. 2. Seat the pod module on the main housing. 3. Install four M3x5 T10 Torx screws to secure the pod module to the main housing. Torque the screws to 5.0 in-lb (0.56 N-m). Psion Teklogix Omnii HDK User Manual...
-
Page 81: Back Cover Modules And Devices
The 3D CAD model of any of the supplied back covers can be used to obtain the required width, depth and shape of this ridge. Psion Teklogix Omnii HDK User Manual... - Page 82 Figure 5.6 Location of Back Cover Mounting Points Back Screw Holes Front Inserts units = mm Psion Teklogix Omnii HDK User Manual...
- Page 83 4. Install two M2x8 T6 Torx screws in the two mounting points at the top of the display on the front of the unit. Torque the screws to 2.5 in-lb (0.28 N-m). Psion Teklogix Omnii HDK User Manual...
-
Page 84: Pistol Grip Modules
Table 5.12 Required Fasteners Quantity Part Number Screw Size Torque How Used (in-lb) Pistol Grip to Main Housing 1005118 M3x6 Phillips Figure 5.7 Location of Pistol Grip Mounting Points on Expansion Back Cover units = mm Psion Teklogix Omnii HDK User Manual... -
Page 85: Keyboard Modules
Artwork for the 36-key, alpha modified, numeric calculator, KB_HardCaps_36ModNumCal12.pdf 12 Fn keyboard hard caps Artwork for the 36-key numeric telephony, 12 Fn keyboard KB_HardCaps_36NumTel12.pdf hard caps Artwork for the 59-key, alpha ABC, numeric telephony, 6 Fn KB_HardCaps_59ABCTel6.pdf keyboard hard caps Psion Teklogix Omnii HDK User Manual... -
Page 86: Installing Devices Inside Existing Modules
2. Seat the new pod module on the opening in the back cover. 3. Install four M3x5 T10 Torx screws to secure the scanner pod to the back cover. Torque the screws to 5.0 in-lb (0.56 N-m). Psion Teklogix Omnii HDK User Manual... -
Page 87: Large/Auto-Range Standard Back Covers
2.5 in-lb (0.28 N-m). To attach the back cover to the main housing: 1. Attach any cables to the appropriate sockets on the main logic board. 2. Seat the back cover on the main housing. Psion Teklogix Omnii HDK User Manual... -
Page 88: End-Cap
Gently lift the back cover from the main housing to allow access to the cables that are still attached. d. Disconnect any cables attaching the back cover and end-cap to the main unit. Psion Teklogix Omnii HDK User Manual... - Page 89 Install two M2x8 Torx screws in the two mounting points at the top of the display on the front of the unit. Torque the screws to 2.5 in-lb (0.28 N-m). Psion Teklogix Omnii HDK User Manual...
- Page 91 6.5 100-Pin Multi-Function Connector........102 Psion Teklogix Omnii HDK User Manual...
-
Page 93: Chapter 6: Omnii Expansion Ports And Connectors
The connectors on the back of the GPS module provide access to: • Proprietary interface pins reserved for future use (J1). • Expansion Port 3 (J3). This connector is identical to the pod expansion connector (expansion port 2) on the main logic board. Psion Teklogix Omnii HDK User Manual... -
Page 94: Audio Connector
Manufacturer: Manufacturer Part Number: SM16B-SURS-TF(LF)(SN) Mating Connector: 16SUR-32S Number of Pins: Current Rating: 0.5 A per pin for 32 AWG wire (do not use 36 AWG wire) Figure 6.3 Diagram of JST Audio Connector Psion Teklogix Omnii HDK User Manual... - Page 95 PTT_DETECT Input Digital Active-low signal when a push-to-talk micro- phone is enabled. Enables reading of the MIC lines when active. A 100 kohm pull-up resistor to 1.8 V is placed on the MLB. Psion Teklogix Omnii HDK User Manual...
-
Page 96: Audio Reference Designs
To prevent GSM interference in the 850/900/1800/1900 MHz bands from coupling into the audio path and demodulating into the audio band, 33 pF and 10 pF capacitors are placed at various locations throughout the circuit. Psion Teklogix Omnii HDK User Manual... - Page 97 Figure 6.6 2.5 mm Single-Ended Headset Audio Jack Connection Diagram Psion Teklogix Omnii HDK User Manual...
-
Page 98: Push-To-Talk Handset
The reference design for a push-to-talk audio expansion board has a 3.5 mm audio jack which provides connections to a single-ended microphone and a differentially driven loudspeaker. This is the only connector configuration supported in the reference design. Psion Teklogix Omnii HDK User Manual... - Page 99 Table 6.3 Comparator Thresholds and Hysteresis for PTT_DETECT Comparator Input Thresholds Condition Minimum (V) Typical (V) Maximum (V) PTT_DETECT 2.77 2.81 2.86 Falling Edge PTT_DETECT 2.70 2.75 2.80 Rising Edge Figure 6.9 Push-to-Talk Handset Switch Operation Psion Teklogix Omnii HDK User Manual...
-
Page 100: External Speaker
22-pin connector on the back of the module. In this case, the pinout for expansion port 3 is the same as for expansion port 2. Figure 6.11 Location of Expansion Ports on Omnii Main Logic Board Expansion Port 1 Expansion Port 2 Expansion Port 3 Psion Teklogix Omnii HDK User Manual... -
Page 101: Expansion Port Power
VSYS for each subsystem under given conditions, when VSYS is at a typical battery voltage of 3.7 V. Table 6.4 Subsystem Power Usage Subsystem Condition Current (mA) Display (DISP) Maximum brightness Minimum brightness Default brightness Psion Teklogix Omnii HDK User Manual... - Page 102 Idle, associated to device Transmitting/Receiving Idle, not associated 11.5 Vibrator Motor (VIB) Vibrating Micro SD (USD) Writing Reading SE1223 (SE1223) Idle Scanning SE1224 (SE1224) Idle Scanning SE1524 (SE1524) Idle Scanning SE955 Idle (not on Omnii XT10) Scanning Psion Teklogix Omnii HDK User Manual...
- Page 103 The internal resistance of Li-ion batteries increases as the temperature decreases, so be aware that operating the system at low temperatures (below 0 °C) will make the battery more susceptible to voltage drops due to transient loads. Psion Teklogix Omnii HDK User Manual...
-
Page 104: Expansion Port 1 (End-Cap Connector)
Manufacturer: AVX/KYOCERA Manufacturer Part Number: 08-6222-022-101-829+ Mating Connector: Flex – 0.5 mm pitch Number of Pins: Current Rating: 0.4 A per pin The AVX/Kyocera end-cap connector is a low-insertion-force, right-angle mounted, bottom- contact connector. Psion Teklogix Omnii HDK User Manual... - Page 105 Push the stiffened end of the flex cable, with the exposed contacts facing downwards towards the main logic board, straight into the socket until it is firmly seated. Psion Teklogix Omnii HDK User Manual...
-
Page 106: Expansion Port 2 (Pod Expansion Connector)
EXP2_CS_N_GPIO7 SPI chip select / GPIO pin 7 (Modem DTR) EXP2_SCLK_GPIO6 SPI SCLK / GPIO pin 6 (Modem DSR) EXP2_MISO_GPIO5 SPI MISO / GPIO pin 5 (Modem DCD) EXP2_MOSI_GPIO4 SPI MOSI / GPIO pin 4 (Modem RI) EXP2_1WIRE Connection for 1-Wire EEPROM Psion Teklogix Omnii HDK User Manual... - Page 107 Insert the stiffened end of the flex cable into the socket, with the exposed contacts facing the top of the unit. Close the latch on the socket to secure the cable in place. Close Latch Insert Cable Psion Teklogix Omnii HDK User Manual...
-
Page 108: Expansion Port 3 (100-Pin Multi-Function Connector)
The following pinout table only shows the pins for the expansion port 3 interface of the 100-pin connector. For descriptions of the remaining pins and interfaces, see Section 6.5 on page 102. Psion Teklogix Omnii HDK User Manual... - Page 109 See Section 6.4.4 on page 98 for more information on the 100-pin connector. To connect to the 100-pin socket, align the pins of the connector to the socket and press down firmly and evenly across the entire connector. Psion Teklogix Omnii HDK User Manual...
-
Page 110: Expansion Port Standard Interfaces
Section 6.4.5.3 on page 101), and set the following registry keys for the serial driver: [HKLM\Drivers\Expansion\iglooUart_Exp1] “GpioPinRI”=dword:1 ; Enable/Disable GPIO RI (1=Enable) “GpioPinDCD”=dword:1 ; Enable/Disable GPIO DCD “GpioPinDSR”=dword:1 ; Enable/Disable GPIO DSR “GpioPinDTR”=dword:1 ; Enable/Disable GPIO DTR Serial communication is supported up to 115200 kbps. Psion Teklogix Omnii HDK User Manual... -
Page 111: Usb Interface
1 & 2 Pin EXPn_TXD_GPIO0 GPIO pin 0 EXPn_RXD_GPIO1 GPIO pin 1 EXPn_CTS_GPIO2 GPIO pin 2 EXPn_RTS_GPIO3 GPIO pin 3 EXPn_MOSI_GPIO4 GPIO pin 4 EXPn_MISO_GPIO5 GPIO pin 5 EXPn_SCLK_GPIO6 GPIO pin 6 EXPn_CS_N_GPIO7 GPIO pin 7 Psion Teklogix Omnii HDK User Manual... -
Page 112: Spi (Serial Peripheral Interface)
SAMTEC Manufacturer Part Number: CLM-150-020-F-D-K Mating Connector: MW-50-03-G-D-150-065 Number of Pins: Current Rating: 1.5 A per pin Figure 6.14 Diagram of SAMTEC 100-Pin Connector (Top View) 50.43 mm 1 mm 2.54 mm 1 mm Psion Teklogix Omnii HDK User Manual... - Page 113 GPS serial port receive (input to GPS) Output EXP3_MOSI_GPIO4 SPI MOSI / GPIO pin 4 (Modem RI) GPS_TX GPS serial port transmit Input (input from GPS) EXP3_1Wire Connection for 1-Wire EEPROM GPS_BOOT GPS boot mode control Output Psion Teklogix Omnii HDK User Manual...
- Page 114 31, 33, 35, 37-48, RESERVED Reserved for future use 50, 51, 52, 55, 56, 58-60, 62-64, 66- 77, 79-93, 95-98 GPS_CTS GPS serial port CTS / GPIO GPS_RTS GPS serial port RTS / GPIO Psion Teklogix Omnii HDK User Manual...
- Page 115 7.2.3 Docking Station Ethernet RJ45 Connector......109 7.2.4 Docking Station Expansion Module (X-Mod) Connector ....110 Psion Teklogix Omnii HDK User Manual...
-
Page 117: Chapter 7: Docking Stations
USB 2.0 microB Interface The USB microB connector on the docking station allows Omnii to connect to a USB client device. It supports low speed (1.5 Mbps), full speed (12 Mbps) and high speed (480 Mbps) communications. Psion Teklogix Omnii HDK User Manual... - Page 118 DC supply from Omnii. Output to connected external device. Current 500 mA maximum. Voltage minimum 4.35 V. Voltage maximum 5.25 V. USB_H4_D- USB Host port 4 D- Bidirectional (half-duplex). USB_H4_D+ USB Host port 4 D+ Ground Psion Teklogix Omnii HDK User Manual...
-
Page 119: Docking Station Rs-232 Connector
Figure 7.5 RJ45 Connector Table 7.4 Pinout Of The RJ45 Connector Name Description Transmit Data + Transmit Data - Receive Data + 4, 5, 7 No Connection Receive Data - DGND Ground Shield SGND Shell Ground Psion Teklogix Omnii HDK User Manual... -
Page 120: Docking Station Expansion Module (X-Mod) Connector
USB Host port 1 D+ USB_H2_D- USB Host port 2 D- USB_H2_D+ USB Host port 2 D+ XModDetect Connect to ground through 845R resistor on expansion module PCB assembly. Identifies module as custom-built to hand-held computer. Psion Teklogix Omnii HDK User Manual... - Page 121 Description Filename Datasheet for 20-pin X-Mod connector header (on X-Mod PCB) 114-24004-2011 2x10 connector on Xmod PCA (header).dwg Datasheet for 20-pin X-Mod connector socket (on docking station) 124-21022-201 2x10 connector on Main PCA (socket).dwg Psion Teklogix Omnii HDK User Manual...
- Page 122 M3 x 8 mm screws. The expansion module must be designed with cutouts to fit around the mounting standoffs for these screws. Figure 7.8 Sample X-Mod PCB Assembly with Connector and Mounting Points Psion Teklogix Omnii HDK User Manual...
- Page 123 7. Install four M3 x 8 mm Phillips screws to secure the expansion module to the docking sta- tion. Torque the screws to 2.5 in-lb (0.28 N-m). Psion Teklogix Omnii HDK User Manual...
- Page 125 8.4 EEPROM Reading/Writing ........119 Psion Teklogix Omnii HDK User Manual...
-
Page 127: Chapter 8: Eeprom Specifications
Data in a text field must start at the first byte of the field. If the data does not fill the text field, the first occurrence of byte 0xFF or 0x00 terminates the text string. Psion Teklogix Omnii HDK User Manual... - Page 128 System applet in the Windows Control Panel. If the ASCII string is less than 16 bytes, it must be null-terminated. For OEM expansion modules, this field may be any format. For Psion Teklogix modules, this field will use the 12-digit Psion Teklogix part number format. •...
-
Page 129: Eeprom Reading/Writing
The HDK Demo application program included with the Omnii HDK can be used to more easily read and write these fields. See Chapter 10: “HDK Demo Application” for information on how to install and use this application, and Section 10.6.2.4: “EEPROM” for specific details regarding EEPROM reading and writing. Psion Teklogix Omnii HDK User Manual... - Page 131 9.10 Troubleshooting ..........141 Psion Teklogix Omnii HDK User Manual...
-
Page 133: Chapter 9: Breakout Board
• 1 breakout board • 1 flex cable • 1 DCE-DTE serial communication cable • 1 USB patch cable • 25 jumpers • 4 standoffs • 4 screws Figure 9.2 Breakout Board Kit Contents Psion Teklogix Omnii HDK User Manual... -
Page 134: Board Components
Chapter 9: Breakout Board Board Components Board Components The components of the breakout board are indicated on the following illustration: Figure 9.3 Breakout Board Components Psion Teklogix Omnii HDK User Manual... - Page 135 32. DS11: LED indicator for VSYS 3.3 V (HDK_3V3) power enabled Detailed schematic diagrams for the breakout board, showing how all the components are connected, can be found in the file BreakoutSch.pdf, included with the Omnii HDK. Psion Teklogix Omnii HDK User Manual...
-
Page 136: Connecting To Omnii
J33 socket unless necessary. The J33 and J42 connectors are not independent and cannot be used to connect to two expansion ports at one time. Psion Teklogix Omnii HDK User Manual... - Page 137 3. Remove the eight T10 Torx screws holding the back cover to the main housing. 4. Remove the two T6 Torx screws at the top of the display on the front of the unit. Psion Teklogix Omnii HDK User Manual...
- Page 138 2. Fit the back cover in place on the main housing, making sure no cables are caught in the seal. If a pod expansion module is required, fold the flex cable so that it is accessible through the pod opening in the expansion back cover. Psion Teklogix Omnii HDK User Manual...
-
Page 139: Power Configuration
LED DS2 illuminates to indicate the 5 V (HDK_5V0) power supply is enabled. 3. Install a jumper across the pins of jumper header J37 to enable the 3.3 V power supply. LED DS11 illuminates to indicate the 3.3 V (HDK_3V3) power supply is enabled. Psion Teklogix Omnii HDK User Manual... - Page 140 The scratch pad provides 20 solder points for HDK_3V3 power, 20 solder points for HDK_5V0 power, and 40 solder points for connecting to ground. These solder points are clearly marked on the board: Psion Teklogix Omnii HDK User Manual...
- Page 141 Figure 9.8 Power Header J35 Pin Order For further information on working with RS-232 devices, see Section 9.7 on page 134. For more information on programming the 1-wire EEPROM, see Chapter 8: “EEPROM Specifications”. Psion Teklogix Omnii HDK User Manual...
-
Page 142: Gpio Devices
SPI_MOSI / RS-232 RI & GPIO_4 SPI_MISO / RS-232_DCD & GPIO_5 SPI_SCLK / RS-232_DSR & GPIO_6 SPI_CS_N / RS-232_DTR & GPIO_7 SPI INT / GPIO_0 GPIO_4 / RS-232_RI GPIO_5 / RS-232_DCD GPIO_6 / RS-232_DSR GPIO_7 / RS-232_DTR Psion Teklogix Omnii HDK User Manual... -
Page 143: Gpio Inputs And Outputs
GPIO lines 0 through 3 are connected to red LEDs DS3, DS4, DS5 and DS6, respectively. Activity on these LEDs indicates activity on their respective data lines. VSYS 5 V(HDK_5V0) power must be enabled to illuminate these LEDs. Psion Teklogix Omnii HDK User Manual... -
Page 144: Uart Devices
2 to change the line status to Low. VSYS 3.3 V (HDK_3V3) power must be enabled to power these switches. Figure 9.13 GPIO Tactile Switches (SW3 & SW4) RS-232 / UART Devices This section describes how to configure the breakout board to test serial devices. Psion Teklogix Omnii HDK User Manual... -
Page 145: Uart Power
Data lines for full modem support are also provided and are similarly configured in two stages. First, set jumpers J24-J27 to indicate GPIO and RS-232 functions. Next, use jumpers J43-J46 to select the modem signals. Psion Teklogix Omnii HDK User Manual... - Page 146 GPIO_7 / RS-232_DTR Figure 9.15 RS-232 Jumper Headers and Pin Order The RS-232 standard male DE9 serial connector (J30) has the following pinout: Table 9.9 RS-232 Header J30 Pinout Name Description Data Carrier Detect Received Data Psion Teklogix Omnii HDK User Manual...
- Page 147 UART_RXD & RS-232 RXD / GPIO_1 UART_CTS & RS-232 CTS / GPIO_2 UART_RTS & RS-232 RTS / GPIO_3 UART_TXD / RS232_TXD UART_CTS / RS232_CTS UART_RXD / RS232_RXD UART_RTS / RS232_RTS Figure 9.17 UART Data Pin Jumper Headers Psion Teklogix Omnii HDK User Manual...
-
Page 148: Usb Devices
USB port, and J14 is a 6-pin in-line connector. The two headers are not independent and cannot be used to connect to two different USB devices simultaneously. Table 9.12 USB Headers J14 and J40 Pinout Name Description VBUS USB 5 V power USB host D- USB host D+ Ground Psion Teklogix Omnii HDK User Manual... -
Page 149: 1-Wire Eeprom Programming
To power the EEPROM from an external device, construct a cable to connect to EEPROM header J39 with the following pinout: Table 9.13 1-Wire EEPROM External Device Cable Pinout Description No connection No connection External 3.3 V power supply 1-Wire EEPROM data Ground No connection Psion Teklogix Omnii HDK User Manual... -
Page 150: 1-Wire Eeprom Details
HDK Demo application included with the Omnii HDK. See Chapter 10: “HDK Demo Application” for information on how to install and use this application, and Section 10.6.2.4: “EEPROM” for specific details regarding EEPROM reading and writing. Psion Teklogix Omnii HDK User Manual... -
Page 151: Troubleshooting
Install jumpers across pins of J38 and J3. not illuminating. (are LEDs DS2 and DS12 lit)? LED DS3 only Is jumper installed correctly on Install jumper across pins 2-3 of J41. not illuminating. jumper header J41? Psion Teklogix Omnii HDK User Manual... - Page 152 Is device being recognized as Program 1-wire EEPROM and configure USB by Omnii? registry entries on Omnii to properly identify device as USB. (See Chapter 8: “EEPROM Specifications” and Section 4.4.1: “Registry Settings for Expansion Devices”.) Psion Teklogix Omnii HDK User Manual...
- Page 153 10.6.2.4 EEPROM ........155 Psion Teklogix Omnii HDK User Manual...
-
Page 155: Chapter 10: Hdk Demo Application
Omnii HDK, the HDK Demo application is also supported on Visual Studio 2005. To modify and compile these files using Visual Studio 2005, substitute the files HDKDemoRelease VS2005.vcproj and TestDriverRelease VS2005.vcproj for the project files in the above paragraph. Psion Teklogix Omnii HDK User Manual... -
Page 156: Creating Registry Keys
Manufacturer and Model names stored in the 1-wire EEPROM of the expansion device. For more information on these fields, see Section 10.6.2.4: “EEPROM”. In the examples that follow, the Manufacturer is “Psion Teklogix” and the Model is “Exp1_[devicetype]”. -
Page 157: Connecting The Hardware
TestDriver.dll driver. This driver can only be loaded for one expansion port at a time. ; Registry entry for a GPIO device [HKLM\Drivers\BuiltIn\Peripherals\devices\0\Psion Teklogix Exp1_GPIO] ; EEPROM Manufacturer field = “Psion Teklogix”, EEPROM Model field = “Exp1_GPIO” “Name”=sz:”GPIO Device” “ConnectorId”=dword:0 ;0 = Expansion Port 1 (End-Cap Expansion) -
Page 158: Attach The Omnii
Cables can be designed using the socket and pin descriptions provided in Section 6.4: “Expansion Ports”. Instructions on how to connect your cable to the expansion ports can also be found in that section. Psion Teklogix Omnii HDK User Manual... -
Page 159: Using The Hdk Demo Application
Section 10.4: “Creating Registry Keys”, and programmed the 1-wire EEPROM fields as described in Section 10.6.2.4: “EEPROM”. Browse to the Flash Disk folder and double-tap on the “HDKDemo” icon. Psion Teklogix Omnii HDK User Manual... - Page 160 TestDriver.dll driver have not been created, the following error message will appear: Tap OK to clear this message and continue. The HDK Demo application program will still function, with the sole exception of the “GPIO Interrupt 7” feature. See Section 10.6.2.3: “GPIO” for more details. Psion Teklogix Omnii HDK User Manual...
-
Page 161: Main Tabs
- Cut – Flag the currently highlighted object for relocation to another folder in the file system. The object will not be removed until the Paste button is clicked. - Copy – Flag the currently highlighted object for duplication in another folder in the file system. Psion Teklogix Omnii HDK User Manual... -
Page 162: Uart
Modem Indicators – These indicators illuminate to indicate activity on the modem data lines: - cts – Clear-to-Send - dsr – Data Set Ready - ring – Ring Indicator - dcd – Data Carrier Detect Psion Teklogix Omnii HDK User Manual... - Page 163 Verify the registry settings for the UART device, and ensure that the subkey name of the device matches the Manufacturer and Model fields of the 1-wire EEPROM, as described in Section 10.4: “Creating Registry Keys”. Psion Teklogix Omnii HDK User Manual...
-
Page 164: Gpio
UART and GPIO devices share the same data pins on the expansion port, so the current function of the pins must be defined by the application. If the UART tab was previously selected, the following warning message will appear when selecting the GPIO tab: Psion Teklogix Omnii HDK User Manual... -
Page 165: Eeprom
EEPROM of any device connected to the breakout board. Ensure that the information stored in the EEPROM of the breakout board is correct and matches the information in the EEPROM of the device being tested . File Controls EEPROM Controls Data Fields Psion Teklogix Omnii HDK User Manual... - Page 166 - Serial No – The serial number of the expansion device. - Part No – The part number of the expansion device. - Revision – The revision number of the expansion device. Psion Teklogix Omnii HDK User Manual...
-
Page 167: Psion Teklogix User Manuals
PPENDIX ESOURCES Most of the following resources are available on the Psion Teklogix Community website (http://community.psionteklogix.com). Website registration is required to log in to the site and obtain the materials. Psion Teklogix User Manuals The following user manuals are available on the Psion Teklogix Community website, under Knowledge >... -
Page 169: B.6 Camera (Optional)
B.7 GPS (Optional) ..........B-13 Psion Teklogix Omnii HDK User Manual... -
Page 171: Appendix B: Omnii Specifications
Battery Pack: lithium-ion 5000 mAh capacity with 8-hour life under normal operating conditions. • Advanced Smart Battery with gas gauge. • 3 power source options: Runs off battery, AC power, or automotive power supplies. • Backup power: >5 minutes. Psion Teklogix Omnii HDK User Manual... -
Page 172: Software
Bundled Applications ® • Internet Explorer • Windows Mobile Device Center • Wordpad • ActiveSync Device Management & Utilities • PsionVU • Mobile Control Center (MCC) • Total Recall / TweakIt / Dr. Debug Psion Teklogix Omnii HDK User Manual... -
Page 173: Approvals
25°C (77 ºF) — recommended storage temperature. Cycle Life 300 cycles minimum with no degradation below 80% of nominal capacity based on 1C charge / 1C discharge rates (to 3.0 V) @ 25°C (77 ºF). Psion Teklogix Omnii HDK User Manual... -
Page 174: Wireless Radios
RX Sensitivity -80 dBm max (BER<0.1%) Data Rate V1.2 = 732.2 kbps and 57.6 kbps asymmetric, 433.9 kbps symmetric V2.0 = 2 & 3 Mbps 802.11 Coexistence Collaborative with 802.11 radio and adaptive frequency hopping. Psion Teklogix Omnii HDK User Manual... -
Page 175: Internal Scanners And Imagers
Input Current: 115 mA typical Standby Current: 70 μA max. Laser Classification Intended for use in CDRH Class II and IEC Class 2 devices Electrical Safety UL, VDE, and CUL recognized component laser Environmental RoHS-compliant Psion Teklogix Omnii HDK User Manual... -
Page 176: Se1224Hp - High Performance Scanner
Laser On Time, Aim Duration, Power Mode, Trigger Mode, Bi- directional Redundancy, Symbology types/lengths, Data format- ting. Ambient Light Artificial: 450 ft. candles (4844 Lux). Sunlight: 8000 ft. candles (86112 Lux). Laser Output Power (peak) 1.35 mW B.4.2.1 SE1224HP Decode Zones Psion Teklogix Omnii HDK User Manual... -
Page 177: Se1524Er - Extended Range Scanner
Redundancy, Symbology types/lengths, Data format- ting. Ambient Light Artificial: 450 ft. candles (4,844 Lux) Sunlight: 4,000 ft. candles (86,112 Lux). Laser Output Power (peak) 1.26 mW B.4.3.1 SE1524ER Decode Zones SE1524ER Decode Zone A (Short Range, Small Codes) Psion Teklogix Omnii HDK User Manual... -
Page 178: Ev15 Imager
Works in any lighting conditions, from 0 to 100,000 lux B.4.4.1 EV15 Imager Decode Zone 0 Lux to 100,000 Lux Minimum Range Maximum Range Mil Size Inches Inches 14.5 35.5 High quality symbols in normal room light. B-10 Psion Teklogix Omnii HDK User Manual... -
Page 179: 5080 Imager/Decoder
Code 39, Code 128, Codabar, UPC, EAN, Interleaved 2 of 5, Reduced Space Symbology, Code 93, Codablock Postal Postnet (US), Planet Code, BPO 4 State, Canadian Post, Japanese Post, KIX (Netherlands) Post OCR Fonts OCR-A and OCR-B Psion Teklogix Omnii HDK User Manual B-11... -
Page 180: Accessories
- Fast charging of both internal battery and spare battery pack. - Host USB port. - Client USB port. - ST4003: - A DE9M serial port (unpowered) and an RJ45 10Base-T Ethernet interface. Both compati- ble with the Omnii USB to Ethernet/serial drivers. B-12 Psion Teklogix Omnii HDK User Manual... -
Page 181: Camera (Optional
DE9M connector is capable of speeds up to 115,200 kbp. Camera (Optional) • Colour, 3 Megapixel, autofocus, manual 4X digital zoom, dual LED flash, video capable (optional with or without PTT speaker). GPS (Optional) • High performance antenna. • SIRF III receiver. Psion Teklogix Omnii HDK User Manual B-13... - Page 183 C.10 GENERAL ..........C-5 Psion Teklogix Omnii HDK User Manual...
-
Page 185: Appendix C: Hdk License Agreement
Agreement, we do not grant you a license to the HDK, and you may not install or use the HDK or any accompanying documentation. The HDK is the property of Psion Teklogix Inc. or its licensors and is protected by copyright laws and international copyright treaties, as well as other intellectual property laws and treaties. The HDK is licensed, not sold. -
Page 186: High Risk Activities
COPYRIGHTS, OWNERSHIP AND PROPRIETARY RIGHTS All title and copyrights in and to the HDK, and any copies thereof, are owned by Psion Teklogix Inc. or its suppliers. The HDK also contains copyrighted material licensed from our suppliers and all rights to such copyrighted material rests with such suppliers. -
Page 187: Confidentiality
No modifications of this Agreement shall be effective unless in writing and approved by us. You acknowledge that you have read this Agreement, understand it, and that it is the complete agreement between you and Psion Teklogix with respect to the subject matter hereof and super- sedes all prior agreements, oral or written. -
Page 189: Index
77 components 124 end-cap 78 connecting 126 large standard back cover 77 GPIO standard scanner pod 76 devices 132 pod expansion 68–70 header pinout 133 registry keys 13 inputs and outputs 133 Psion Teklogix Omnii HDK User Manual... - Page 190 USB pinout 101 keyboard hard caps 75 overlays 75 keyboard module 75–76 files 5 2D 64 3D 63 Flags (registry value) 30 large standard back cover see standard back cover (large) LEDs 20 license agreement C-3 Psion Teklogix Omnii HDK User Manual...
- Page 191 1 95 material 63 expansion port 2 96 Mfg Test Region (EEPROM field) 118 expansion port 3 99 Mobile Devices SDK, Psion Teklogix 34 GPIO 101 Model (EEPROM field) 118, 156 pod expansion connector 96 module RS-232 connector (ST4003 docking station) 109 back cover 71–73...
- Page 192 USB client connector (docking station) pinout 108 USB host connector (docking station) pinout 108 USB pinout (expansion ports) 101 Value (registry value) 32 Windows drivers 25 X-Mod connector 110–113 pinout 110 X-Mod expansion module designing 111 installing 113 Psion Teklogix Omnii HDK User Manual...
Need help?
Do you have a question about the OMNii HDK XT10 and is the answer not in the manual?
Questions and answers