
Related Manuals for Rock Shox Judy XC


Summary of Contents for Rock Shox Judy XC
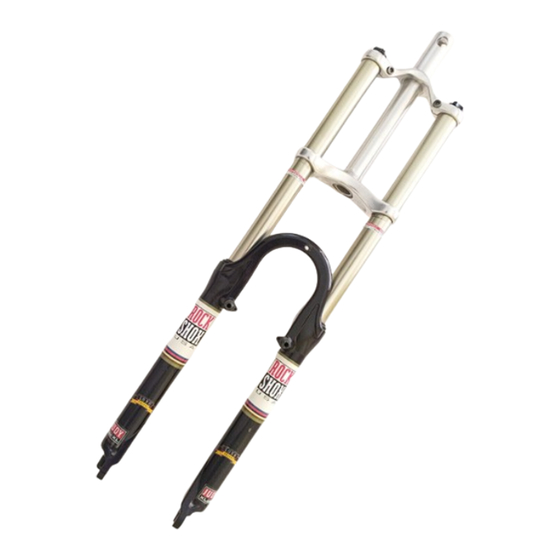
- Page 1 1998 Ju dy Ow n e r’s Ma n u a l Ju dy XC , S L , XL and XLC mod e l s ®...
-
Page 2: Table Of Contents
At A Gl a n ce Ma i nte n a n ce Inte rval Ch e c kl i s t heck the following for each maintenance interval. For further details see page 8. Every Ride (Inspect) Eight Hours of Riding Twenty-five hours of Riding Front wheel Clean upper tubes... -
Page 3: Features
Bolt-on brake cable hanger (for those without ‘V’style brakes) One Piece Fork Brace Brake Post and Lower Tube Assembly PTIONAL QUIPMENT 63 and 80mm Travel Spring Tuning Kits (Judy XC,SL,XL/XLC)* Spring Kit Description Primary Springs Secondary Springs Disk Brake Mount (XC,SL,XL,XLC) Extra Soft... -
Page 4: Installation
5. Always use genuine RockShox parts. Use of non-RockShox after-market replacement parts voids the warranty and could cause structural failure to the fork. Structural failure could result in loss of control of Judy XC/SL 63mm Travel Damper Cartridge Kit the bicycle with possible serious and/or fatal injuries. - Page 5 1mm and must always be engaged in the crown. 7. Complete the rest of the XL/XLC installation by following steps three through seven under “Installation Instructions (Judy XC/SL),”page 5. Ju dy XL/XLC Installation Instru ct i o n s 1.
-
Page 6: Tuning
height and allow more of the fork’s travel to be used during bump impac t. Ma i nte n a n ce Judy forks are designed to be nearly maintenance free. However,as long as moving parts are exposed to the o Change Preload: The top cap adjustment knob on each leg adjusts the sag of the fork (the preload on the elements, moisture and contamination can reduce performance. - Page 7 R E G U LAR MAINTENANCE O CLEANANDGREASE BUSHINGSAND WIPERSEAL DOTHEFOLLOWING EFORE EVERY RIDE 1. Mount the bike in a stand,disconnect the front brake cable,and remove the front wheel (the brakes do not need to be removed). EFORE EVERY RIDE INSPECTTHEFOLLOWING PARTS 2 .
-
Page 8: Service
seal groove at the rear and rotate boot around the upper tube to fully engage its lower edge behind the PRING EPLACEMENT brace. Compressing the boot and twisting as well as applying a small amount of oil on the mating The Ty pe 3 spring sys tem in Ju dy fo rks provide cutting edge pe rfo rm a n ce with the lively action of a coil spri n g surfaces helps. -
Page 9: Glossary Of Terms
upper tubes in lower tubes (similar to a loose headset) and/or slow action, even after a fresh greasing,signal Gl o s s a ry of Te rm s the need to remove and replace the bushings. Bottoming Out – the condition when all suspension travel has been used up. Compression Stroke –... - Page 10 27 Upper Shaft Guide O-ring † Indicates Threadless Steerer 12 Judy XC Panel Decal 29 Flat Washer † Indicates Threadless Steerer 13 Judy XC Decal (L & R) 30 Top Out Bumper * Crown/steerer includes four 12 Judy SL Panel Decal 28 Neutral Shaft...
-
Page 11: Warranty
Wa rra nty WARRANTS ITS FORKS FOR A PERIOD OF ONE YEAR FROM ORIGINAL DATE OF PURCHASE TO BE FREE FROM DEFECTS IN MATERIALSOR WORKMANSHIP HOX FORKTHAT ISRETURNED TO THE FACTORY ANDISFOUNDBY HOX TO BEDEFECTIVEIN MATERIALS OR WORKMANSHIP WILL BE REPAIRED OR REPLACED AT THE OPTION OF HIS WARRANTY ISTHE SOLE AND EXCLUSIVEREMEDY HOX SHALLNOT BEHELDLIABLEFORANYINDIRECT... - Page 12 Germany Norway Spain Sport Import GmbH Foss Sykler K.Motor Dealer S.L. Phone: 49 44 05 9280 0 Phone: 47 22382636 Phone: 34 1 637 70 97 FAX: 49 44 05 9280 49 FAX: 47 22382644 FAX: 34 1 637 72 64 L i s te de véri f i cation aide-mémoire Greece Panama...
- Page 13 l t t ® l t t t p t t t ll t , l p à tt t , à d t l , t à à l t t t Table des Mat i è re s Tube pivot Introduction .
-
Page 14: Consignes De Sécurité
à Kits de réglage de ressorts pour débattements de 63 et 80 mm (Judy XC,SL,XL/XLC)* disque, uniquement, fixéà la jupe fournie.N'utilisez les supports de câble de frein à disque qu'avec... -
Page 15: Instructions Pour L'installation
maintient les pattes de fourche.Il est également essentiel de bien fixer la roue arrière, faute de quoi la ni frottement. masse de la bicyclette risquerait de balancer latéralement et de peser sur les pattes, les amenant à 3. Installez les freins selon les instructions du fabricant et réglez les patins de freins correctement. N’utilisez casser ou à... -
Page 16: Réglage De La Fourche
7. Complétez le reste de l’installation XL/XLC en suivant les étapes trois à sept figurant dans la section t ê tes supéri e u res disponibles pour la Ju dy “Instructions d’installation (Judy XC/SL),”à la page 26. X L / X LC et pour maximiser la rigidité de la fo u rche pour sélection et ori e nt at i o n... -
Page 17: Maintenance
’ CONSEIL :Diminuer l’amortissement est généralement mieux. Les systèmes légèrement amortis sont TOURNEZ LESAJUSTEURSDEPRÉ CHARGE AU DELÀDELEURSARRÊT S DELIMITE Y A QUETROIS TOURS COMPLETS plus actifs et moins durs pour le cycliste. ’ DE LA PRÉ CHARGE MINIMALE À LA PRÉ CHARGE MAXIMALE E PASSUIVRE CESINSTRUCTIONS RISQUERAIT D ENTRAÎNER UNE... - Page 18 UBRIFIANTS ET NETTOYANTS HAQUE MOIS OU APRÈS HEURES DE RANDONNÉE Dégraisseur HAQUEMOIS OUAPRÈS HEURESDE RANDONNÉE NETTOYEZETHUILEZLESPILESDERESSOR T LES BAGUESETLEJOINT WIPER Huile RockShox 5 wt ou 8 wt (ou huile de fourche sans additif de gonflement de joints) OURNETTOYERETGRAISSERLESPILESDERESSOR TS SUIVEZ LA PROCÉDURECI DESSOUS udy Butter ou graisse fortifiée au Téflon de haute qualité...
-
Page 19: Entretien
: N’ 4. Dégagez l'ensemble de tige neutre du tube inférieur gauche. Notez MPORTANT UTILISEZ DEGRAISSE À BASEDELITHIUM ELA PROVOQUERAITUNE RÉACTION AVEC LEREVÊTEMENTDES l’orientation des pièces :(de haut en bas) :plaque de bout de tige, guide AGUES de tige supérieur avec joint torique, rondelle,butée supérieure,guide de 8. -
Page 20: Glossaire Des Termes
Gl o s s a i re des te rm e s NTRETIEN DE CARTOUCHE ette cartouche ne requiert aucun entretien. Elle est conçue comme une unité hermétique ne comprenant Débattement - La condition lorsque le débattement de suspension a été complètement utilisé. aucune pièce réparable à... - Page 21 Ga ra nt i e Pr ü f l i s te für regelmäßige Wa rtung auf einen Bl i c k Prüfen Sie folgendes bei jeder regelmäßigen Wartung.Weitere Einzelheiten finden Sie auf Seite 49. ’ ’ GARANTITSESFOURCHES CONTRE TOUSDÉFAUTS DEMAIN D OEUVREOUDEMATIÈRESPREMIÈRESPOURUNEDURÉE D UNAN ’...
- Page 22 Oberer Gabelholm JUDY Butter (alle JUDYs fŸr den Servicevertrieb) (mit Schmutzfängermanschette) Einheit aus Stabilisator und ONDERZUBEHÖR Bremsenhalterung unterem Gabelholm aus einem Stück Einstellkit für 63 und 80 mm Federweg (JUDY XC,SL,XL/XLC)* Federkit-Beschreibung Primärfedern Sekundärfedern extra weich extra weich extra weich weich...
- Page 23 Dˇmpferpatronen-Kit fŸr JUDY XC/SL mit 80 mm Federweg diese Mängel aufweist, kann zum Verlust der Kontrolle über das Fahrrad führen, wodurch ernsthafte Dˇmpferpatronen-Kit fŸr JUDY XC/SL mit 100 mm Federweg (Bei einer Änderung des Feder wegs und/oder lebensgefährliche Verletzungen verursacht werden können.
- Page 24 Lenkern ohne Gewinde (Aheadset-Ausführung) muß sichergestellt werden,daß eine ausreichende Mo ntage für Ju dy XL/XLC Länge zum Befestigen des Vorbaus vorhanden ist (siehe die Anweisungen des Herstellers des Vorbaus). 1. Entfernen Sie die vorhandene Gabel und den unteren Steuersatz-Lagerkonus vom Fahrrad. Stellen Sie den Steuersatz so ein,daß...
- Page 25 Steuersatzes und Vorbaus gemäß den Herstelleranweisungen zu Ende. Ziehen Sie die Schrauben des oberen Gabelkopfes mit 6.8NM (60 in-lb.) an. 7. Der Rest der XL/XLC-Montage entspricht den Schritten 3 bis 7 unter “Montage (Judy XC/SL)”auf Seite 43. RUNDLEGENDE NWEISUNGEN ZUM...
- Page 26 Fahren. ABELLE DER NZUGSMOMENTE WICHTIG:DREHEN SIE DEN EINSTELLER VON DER POSITION GANZ IM UHRZEIGERSINN NICHT WEITER Gabelkopfschrauben 6,8 Nm ALS DREI UMDREHUNGEN. Verschlußkappen 3,4 Nm Gabelbrückenschrauben 6,8 Nm Bremshalterungen 6,8 Nm Wa rt u n g Schaftschrauben 6,8 Nm udy-Gabeln sind nahezu wartungsfrei. Aber überall dort, wo sich bewegende Teile dem Wetter ausgesetzt sind, können Feuchtigkeit und Schmutz die Leistung beeinträchtigen.
- Page 27 Resi-Wischerdichtung und das obere Rohr. Geben Sie 2 bis 3 Tropfen Öl Sie die Gabelbälge. mit Teflonzusatz im Bereich der Resi-Wischer an die oberen Rohre. 5. Reinigen Sie die oberen Rohre,und überprüfen Sie sie auf Verschleiß (Siehe Abb.4.) und/oder Schäden (Scharten,Kratzer oder Dellen). 2.
- Page 28 instellen der Federn”).Entfernen Sie zunächst die einteilige untere Rohreinheit nach den Anweisungen unter bei der eingestellten Kompression deutlich bemerkbar, wenn die Schraubenfedern im Ruhezustand kürzer “Reinigen und Schmieren der Buchsen und der Resi-Wischerdichtung”auf Seite 50. sind, als sie es im Neuzustand waren. Die nachstehende Tabelle gibt Anhaltspunkte, wann ein Type 3- Federsystem ausgewechselt werden sollte.
- Page 29 Voraussetzung für hohe Leistung und lange Nutzungsdauer der Buchsen. Aber wie alle beweglichen Teile Be folgen Sie die No r b a - Ve rh a l te n s re g e l n unterliegen Buchsen einem Verschleiß und müssen irgendwann ausgewechselt werden. Erhöhte Vorwärts- Ich beachte die Vorfahrt von anderen nicht motorisier ten Fahrern.
-
Page 30: Garantie
Ga ra nt i e Guida al co nt rollo rapido dell’ i nte rvallo di manute n z i o n e Controllare quanto segue per ciascun intervallo di manutenzione.Per ulteriori informazioni vedere pagina 67. GARANTIERT FÜR EIN AHR AB RSTKAUFDATUM DAß... - Page 31 (con cuffia antipolvere) QUIPAGGIAMENTO OPTIONAL Monoblocco della Forcella e Supporto dei Freni Gruppo del Cilindro Kit di regolazione molle con corsa da 63 mm e 80 mm (Judy XC,SL,XL/XLC)* Inferiore Descrizione del kit molle Molle primarie Molle secondarie Extra soffice...
- Page 32 5. Utilizzare sempre ricambi originali RockShox.L’utilizzo di ricambi non RockShox rende nulla la garanzia e Kit cartuccia di smorzamento con corsa da 63 mm per JUDY XC/SL può causare cedimento strutturale della forcella,che possono portare alla perdita di controllo del mezzo, con possibili incidenti gravi e/o mortali.
- Page 33 norme CPSC e JIS. L’attacco del manubrio deve essere inserito ad una profondità Is t ruzioni per l’installazione di Ju dy XL/XLC di innesto non inferiore a 2,5 volte il diametro dell’estremità inferiore dell’attacco 1. Rimuovere dalla bicicletta la forcella esistente e l’anello inferiore della serie sterzo. del manubrio,non il cuneo (vedere fig.
- Page 34 7. Completare l’installazione di Judy XL/XLC seguendo le fasi 3-7 del paragrafo “Istruzioni per l’installazione Ad esempio,i ciclisti con uno stile di guida grintoso possono aumentare la rigidezza della sospensione oltre il di (Judy XC/SL)”a pagina 61. valore raccomandato sostituendo le molle nella forcella con quelle più adatte alle loro esigenze. La tabella seguente indica il peso del ciclista e i kit di molle raccomandati per quei pesi.I kit possono essere acquistati...
- Page 35 Ma n u te n z i o n e MPORTANTE PER I MIGLIORIRISULTATI EVITAREDIUSARE GRASSIALLITIO LCUNIDIQUESTIPRODO TTIPOSSONO DIVENTARE APPICCICOSI GRIGI O AMMASSARSI SE USATIPER LUBRIFICARE LE BOCCOLE N QUESTI CASI SI IMPEDISCE UNAAZIONE DOLCE e forcelle Judy sono state progettate per non richiedere quasi mai la manutenzione.Tuttavia,quando le parti DELLA FORCELLA E SI RIDUCONO LE PRESTAZIONI E SI USA GRASSO AL LITIO...
- Page 36 Rimuovere il gruppo molle, pulirlo con uno sgrassatore e asciugarlo. in modo che le bussole inferiori impegnino con i tubi superiori. Fermarsi poco prima di impegnare completamente la cartuccia e gli steli nell’allargamento cilindrico dell’estremità del foro. 2. Ispezionare il gruppo di compressione della molla Tipo 3 (consultare la tabella “Specifiche Molle Tipo 3” , pag.70).
- Page 37 all’albero neutro possono rimanere nel tubo superiore. Rimuovere il gruppo molle come descritto sopra. 1. Per riempire la cartuccia, rimuovere la vite dell’albero dello smorzatore con un cacciavite a stella n.2. Picchiettare la piastra e guidare fuori il fondo del tubo con la prolunga lunga per bussole (vedi i disegni 2.
- Page 38 Gl o s s a rio te c n i co Il cod i ce NORBA ine corsa – La condizione in cui tutta la corsa della sospensione è stata sfruttata. Dare la precedenza agli altri mezzi ricreativi non motorizzati. orsa di compressione –...
- Page 39 Lista de Ve ri f i cación de los Inte rvalos de Ma nte n i m i e nto ® Ve rifique las siguientes piezas en cada inte rvalo de mante n i m i e nto. Pa ra mayo res detalles, co n s u l te la página 84. Antes de utilizar la bicicleta Cada ocho horas Cada veinticinco...
-
Page 40: Características
No emplee frenos Kits de ajuste de recorrido de muelles de 63 mm y 80 mm (Judy XC,SL,XL/XLC)* de disco con ningún otro aditamento en el tubo inferior que no sean los suministrados con la horquilla. - Page 41 podrían sufrir daños estructurales si la bicicleta está inclinada mientras que las punteras de la horquilla horquilla (consulte las instrucciones del fabricante de este componente).Ajuste el juego de dirección se encuentran en el portabicicletas.También debe fijar la rueda delantera con un dispositivo de hasta no que no se deslice ni tenga juego.
-
Page 42: Instalación
(Judy XC/SL)” , página 78. m e d i a nte la elección y ori e nt a c i ó n adecuadas de la co rona supe ri o r. -
Page 43: Ajuste
que existen piezas móviles expuestas a los elementos atmosféricos,la humedad y la suciedad pueden reducir GIRE LOSAJUSTADORESDEPRECARGAMÁSALLÁDESUS TOPES ÓLO HAY TRESVUELTAS COMPLETASDE LA PRECARGAMÍNIMA el rendimiento. Para mantener un elevado nivel de prestaciones y seguridad, y una dilatada vida útil, es LA MÁXIMA O SEGUIR ESTA INDICACIÓN PODRÍA OCASIONAR LA FALLA PREMATURA DEL CONJUNTO DE LA CAPERUZA DEL necesario realizar un mantenimiento periódico. - Page 44 M A N T E N I M I E N TO PERIÓDICO muelles Tipo 3,en la página 87.) Sustitúyalo si es necesario. 3. Aplique una capa fina de Judy Butter al muelle Tipo 3. ADA VEZ QUE UTILICE LA BICICLETA 4.
-
Page 45: Servicio Técnico
10.Dé la vuelta a la horquilla y rellene cada uno de los brazos inferiores con 10cc de aceite para horquillas a nte ri o rm e nte.Ext raiga el plato y la guía de la parte infe rior del tubo mediante el alargador de llave de RockShox 15wt.,vertiéndola por los orificios de los pernos del eje situados en la parte de abajo de los t u bo. -
Page 46: Glosario De Términos
1. Para rellenar el cartucho,retire el tornillo en el eje de amortiguación con un destornillador de cabeza Gl o s a rio de T é rm i n o s Phillips Nº 2. Ángulo de Cabeza - Ángulo que resulta de la desviación del eje de la dirección respecto a la vertical. 2. -
Page 47: Garantía
Ga ra ntía GARANTIZA SUSHORQUILLASDURANTEUNPERÍODODEUNAÑO A PARTIRDE LA FECHADE COMPRA ORIGINAL A GARANTÍA CUBRE LOS DEFECTOS EN LOS MATERIALES Y EN ELPROCESO DE FABRICACIÓN ODAS LAS HORQUILLAS DEVUELTAS A FABRICA Y QUE TRAS EXAMENPOR PARTE DE REVELEN DEFECTOS MATERIALES O DE FABRICACIÓN SERÁN SUSTITUIDAS O REPARADAS A CRITERIO DE A RESPONSABILIDAD ACEPTADA POR...
Need help?
Do you have a question about the Judy XC and is the answer not in the manual?
Questions and answers