Table of Contents
Advertisement
Advertisement
Table of Contents

Subscribe to Our Youtube Channel
Related Manuals for Rock Shox BoXXer R2C2


Summary of Contents for Rock Shox BoXXer R2C2
- Page 1 2011 Technical Manual...
-
Page 2: Table Of Contents
Table of ConTenTs geTTing sTarTed ...............................................3 PARTS ........................................................3 TOOLS ........................................................3 RecORd YOUR SeTTINGS ................................................4 OIL vOLUme cHART ..................................................5 TORqUe cHART ....................................................5 SeRvIce INTeRvALS ..................................................5 ANATOmY ......................................................6 forK reMoval ................................................8 lower leg reMoval ..............................................9 seal serviCe ................................................11 wIPeR & OIL SeAL RemOvAL..............................................11 wIPeR &... -
Page 3: Getting Started
Tools The following chart is a list of the tools needed for service of your 2011 BoXXer R2c2. while this chart is intended to be comprehensive, it is still only a guide. The tools required for each step of service are detailed in the text of each service section. -
Page 4: Record Your Settings
er r2C2 TeChniCal Manual g eT T in g s Tar Ted ( Con Tin ued ) reCord Your seTTings Take a moment and record all of your BoXXer fork’s settings in the chart below. This will allow you to return your fork to its original settings after service. -
Page 5: Oil Volume Chart
(mL) (mL) technology technology Upper leg Lower leg Upper leg Lower leg (drive side) (non-drive side) BoXXer R2c2 mission control dH coil with drop Stop TorQue CharT Part/fastener Tool size Torque maxle dH (non drive-side) 6 mm 8 clicks maxle dH (drive-side) 6 mm 5.7 N·m (50 in-lb) -
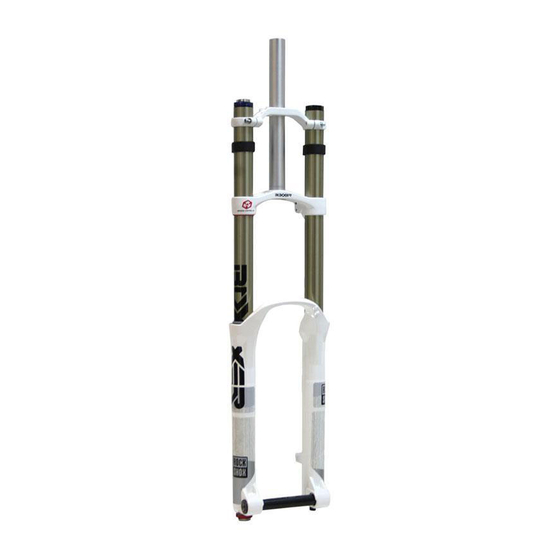
Page 6: Anatomy
er r2C2 TeChniCal Manual an aT oM Y Steerer Tube Upper crown Low Speed compression Adjuster Knob High Speed compression Adjuster Knob Bottom Out Adjuster Knob Frame Bumper Lower crown Upper Tube Brake Hose Guides Lower Leg ending Stroke Rebound Adjuster Knob Bottom Bolt Beginning Stroke Rebound... - Page 7 er r2C2 TeChniCal Manual safeTY firsT! At SRAm, we care about YOU. Please, always wear your safety glasses and protective gloves when servicing your RockShox suspension. Protect yourself! wear your safety gear! GEN.0000000003185 REV A...
-
Page 8: Fork Removal
er r2C2 TeChniCal Manual f o r K r e M o va l in T r od uCTi on Removing your fork from the bike is the first step required in order to perform service. BoXXer’s dual crown feature allows the fork to be easily disassembled and removed from the bike. -
Page 9: Lower Leg Removal
er r2C2 TeChniCal Manual l o w e r l eg r e M o va l clamp one of the upper tubes, just below the top cap, in a bike stand and place an oil pan beneath the fork to catch any oil that will drain. - Page 10 er r2C2 TeChniCal Manual lo w e r le g r e M o va l (Co nTi n ued) Use a 5 mm hex wrench to loosen the spring shaft bolts three to four turns. Use a plastic mallet to firmly strike the spring shaft bolt to free the spring shaft from its press-fit to the lower leg.
-
Page 11: Seal Service
er r2C2 TeChniCal Manual se a l s e r v i C e in T r od uCTi on Suspension fork seals are considered "wear and tear" parts and require regular maintenance. The frequency of seal replacement will depend on the frequency of riding, riding terrain, rider body weight, and type of fork. The following chapter covers wiper and oil seal removal and installation. -
Page 12: Coil Spring Service
er r2C2 TeChniCal Manual C o il sp r ing se r v i C e C o il s pr in g r eM ova l /servi Ce Use a 1.5 mm hex wrench to loosen the bottom out adjuster pinch bolts 1 full turn each. Remove the adjuster cap. -
Page 13: Coil Spring Installation
er r2C2 TeChniCal Manual C o il sp r in g i nsTa ll aTio n make sure the base plate is installed on the spring supporT wavY Top ouT base perCh washer washer spring plaTe spring shaft so that the small top out spring is oriented toward the spring perch. -
Page 14: Damper Service
er r2C2 TeChniCal Manual da M p e r s e r v i C e d a Mpe r r eM oval / serv iCe Turn the blue high speed compression knob fully clockwise, to set it to the maximum compression position. -
Page 15: Damper Installation
er r2C2 TeChniCal Manual d a Mp e r i ns Ta ll aTi on Spray isopropyl alcohol on the rebound damper pisTon daMper shafT seal head shaft and clean it with a lint free rag. Remove the glide ring from the rebound shaft assembly. - Page 16 er r2C2 TeChniCal Manual d a Mp e r in s Tal l aTi on ( Con Tin ued ) Orient the upper tube upright in the bicycle stand. Pull the rebound damper shaft down to the fully extended position. measure and slowly pour 239 mL of RockShox 5wt suspension oil into the upper tube.
-
Page 17: Lower Leg Installation
er r2C2 TeChniCal Manual l o w e r l eg in s Ta l l aT io n Spray the upper tubes with isopropyl alcohol and wipe with a clean rag. clean and inspect the shaft bolts, nylon crush washers, and crush washer retainers. - Page 18 er r2C2 TeChniCal Manual lo w er le g in s Tall aTi on ( Con Ti nu ed ) Install the ending stroke rebound adjuster knob, followed by the washer onto the rebound adjuster shaft. Apply a small amount of threadlock to the rebound knob retaining bolt.
-
Page 19: Fork Installation
er r2C2 TeChniCal Manual f o r K in s Ta l l aT io n in T r od uCTi on Re-installing the fork onto the bike is the final step in servicing your Boxxer fork. Once you have installed the fork onto the bike, you will be ready to ride! Slide each upper tube through the lower crown, leaving enough clearance to install the frame... - Page 20 3.4 N·m (30 in-lb). Re-check that all damping adjusters are at their original positions (documented in the table in the “Getting Started” section), or refer to the BoXXer R2c2 Tuning Guide to aid in tuning adjustments for the rider. GEN.0000000003185 REV A...
- Page 21 www.sram.com world headQuarTers european headQuarTers asian headQuarTers SRAm, LLc SRAm europe SRAm Taiwan 1333 N. Kingsbury St., 4th Fl Paasbosweg 14-16 No. 1598-8 chung Sahn Rd chicago, Il 60642 3862ZS Nijkerk Shen Kang Hsiang, Taichung The Netherlands county 429 Taiwan R.O.c. Phone +1-312-664-8800 Phone +31-33-450-6060 Phone +886-4-2564-3678...
Need help?
Do you have a question about the BoXXer R2C2 and is the answer not in the manual?
Questions and answers