Table of Contents
Advertisement
Quick Links
Advertisement
Table of Contents

Related Manuals for Martin Exterior 1200 Wash


Summary of Contents for Martin Exterior 1200 Wash
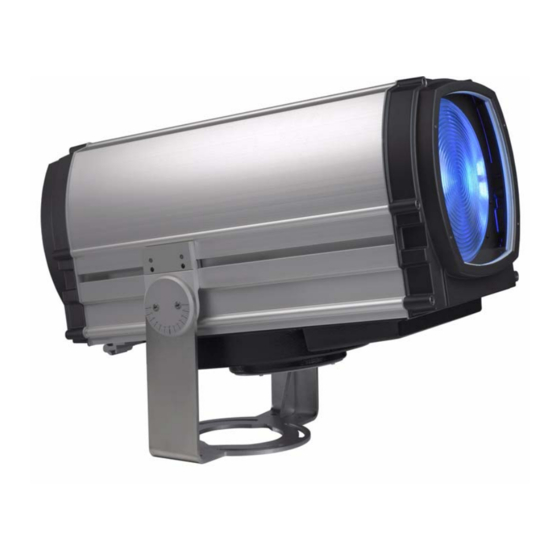
- Page 1 Exterior 1200 Wash user manual...
- Page 2 Ø247 © 2006 Martin Professional A/S. All rights reserved. No part of this manual may be reproduced, in any form or by any means, without permission in writing from Martin Professional A/S. Information subject to change without notice. Martin Professional A/S and all affiliated companies disclaim liability for any injury, damage, direct or indirect loss, consequential or economic loss or any other loss occasioned by the use of, inability to use or reliance on the information contained in this manual.
-
Page 3: Section 1. Safety
Section 1. Safety... -
Page 4: Safety Information
• Always ground (earth) the luminaire electrically. • Use only a source of AC power that complies with local building and electrical codes and has both overload and ground fault (earth fault) protection. Exterior 1200 Wash user manual... - Page 5 • Do not expose the heat exchanger to water projections. • Do not immerse the luminaire in water or install it in a location where flooding may occur. • Refer all service not described in this manual to a Martin service technician. Lamp safety •...
- Page 6 • The four eyebolts supplied are for lifting purposes during installation or service only. Do not expose them to undue stress while lifting, by allowing the luminaire to drop and then catching it again, for example. Do not use the eyebolts for safety attachment. Exterior 1200 Wash user manual...
-
Page 7: Table Of Contents
2.1 About this manual ..........10 2.2 Introduction to the Exterior 1200 Wash ......11 Section 3. - Page 8 ........78 Exterior 1200 Wash user manual...
-
Page 9: Section 2. Introduction
Section 2. Introduction... -
Page 10: About This Manual
Service, maintenance and adjustment Owner, service accessories, page 55 procedures. Overview of accessories. technician Section 9. Reference, page 71 Reference diagrams, charts, etc. Exterior 1200 Wash Product specifications specifications, page 78 Table 1: Using this manual Exterior 1200 Wash user manual... -
Page 11: Introduction To The Exterior 1200 Wash
The beam angles of Narrow and Medium models can be controlled remotely using a motorized zoom feature. The Exterior 1200 Wash is available in the following optical configurations (figures are for one- tenth peak beam angles, ranges indicate minimum and maximum zoom limits): •... - Page 12 Exterior 1200 Wash user manual...
-
Page 13: Section 3. Installation
Section 3. Installation Introduction to the Exterior 1200 Wash... -
Page 14: Physical Installation
Exterior 1200 Wash. Installation must be carried out by qualified professionals only. Contact your Martin Architectural supplier for assistance if you have any questions about how to install this product safely. -
Page 15: Location And Mounting
Eyebolts must be securely installed with washers at all four corners of the luminaire as illustrated below. See Figure 2. The Exterior 1200 Wash is supplied with four eyebolts for lifting purposes during installation or service. Do not use any other method to lift the luminaire. The eyebolts screw into blocks in the yoke slider channels on each side of the fixture. - Page 16 Ensure sufficient drainage to cope with the heaviest rainfall. Make sure that water can drain away from the installation area at least as fast as it can enter it. The Exterior 1200 Wash requires free and unobstructed airflow around the heat exchanger to ensure adequate cooling: •...
-
Page 17: Power And Dmx Data Cable Layout
that one bolt passes through each curved slot in the yoke base (see Figure 4). If additional bolts are required to mount the luminaire safely, pan adjustment range will be reduced. Ø247 Figure 4: Mounting yoke attachment points 3 . 1 . 3 P o w e r a n d D M X d a t a c a b l e l a y o u t Figure 5 gives an overview of a suitable cable layout. -
Page 18: Connections Compartment Access
3. Cross-tighten the cover plate screws gradually and evenly to 2 Nm (1.5 ft.-lbs.). At this torque, the seal will be compressed by about one-third and will be waterproof to IP65. Exterior 1200 Wash user manual... -
Page 19: Installing Ac Power
3 . 2 . 1 C o n f i g u r i n g f o r l o c a l A C p o w e r Before AC power is applied to the Exterior 1200 Wash for the first time (or if the AC power voltage or frequency changes), the luminaire must be configured to accept the local power voltage and frequency as described in this section. -
Page 20: Connecting To Ac Power
2. If necessary, remove the rear cover plate as described in "3.1.4: Connections compartment access" on page 18 3. Check that the jumper leads are correctly connected to match the local AC power voltage and frequency (see "3.2.1: Configuring for local AC power" on page 19). Exterior 1200 Wash user manual... - Page 21 4. See Figure 8. Ensure that there is a rubber seal B on the locking nut end of the cable gland C, and push this end through the hole provided in the housing so that the seal faces the outer surface of the housing.
-
Page 22: Installing A Data Link
3.3 Installing a data link Exterior 1200 Wash luminaires must be connected via a serial data link for DMX controller operation and for synchronized stand-alone operation of multiple luminaires. The data link is used to transmit DMX commands or synchronization data. - Page 23 Connection pinouts XLR connection XLR connectors are suitable if DMX cable is used for the data link. XLR pin numbers are normally marked on connectors. Connectors must be wired using the standard XLR DMX pin-out: • Pin 1: Cable shield •...
- Page 24 32 luminaires, output to input, as described above. Add an optically isolated amplifier/splitter into the link if you intend to add more than 32 luminaires or branch the link. The Data 2 connections are reserved for future use. Exterior 1200 Wash user manual...
-
Page 25: Section 4. General
Section 4. General Installing a data link... -
Page 26: General
Exterior 1200 Wash. This section contains general information about the features and functions as well as basic programming and operating principles of the Exterior 1200 Wash. Read this section to familiarize yourself with the luminaire before attempting to program or operate it. -
Page 27: Exercise Program' At Lamp Off
4 . 1 . 4 ‘ E x e r c i s e P r o g r a m ’ a t l a m p o f f To ensure free and correct effect movement even if some effects are not used for long periods, the Exterior 1200 Wash runs an ‘exercise program’ and checks effect movement every time the lamp is switched off. -
Page 28: Cooling Fans
Self-diagnostic feedback messages In the event of a problem, the Exterior 1200 Wash will show a message in the display indicating the type of problem that has occurred. 4 . 1 . 6 C o o l i n g f a n s When power is applied, cooling fans run at full speed for a few seconds to clear any dust that has accumulated in the heat exchanger. -
Page 29: Operating In Cold Environments
4 . 1 . 8 O p e r a t i n g i n c o l d e n v i r o n m e n t s If the temperature is expected to fall below freezing, leave the luminaire powered on when not in use to keep the electronics warm. - Page 30 Exterior 1200 Wash user manual...
-
Page 31: Section 5. Settings And Configuration
Section 5. Settings and configuration General... -
Page 32: Luminaire Settings
• DMX operation, in which luminaires on a data link are controlled remotely using a DMX control device. There are three ways to set up luminaires: MUM (Multi- The Martin MUM (Multi-Utility Manager) is a PC software Utility application available from Martin Architectural in a set Manager) (P/N 90758090) that also includes a DABS1 interface adaptor and suitable cables. -
Page 33: Setting Up A Luminaire With A Pc And Mum
If connecting via the data link, note that you may only connect to one luminaire at a time. 4. Apply power to the Exterior 1200 Wash and start the MUM application. The application will automatically detect an Exterior 1200 Wash if it is powered on and correctly connected. It... - Page 34 Configuring a luminaire with MUM Clock The Exterior 1200 Wash has a battery-operated 24-hour clock that is used to start and stop stand-alone operation. To set the clock: 1. Click on the Fixture Info button in MUM. 2. Using the Fixture real-time clock spin buttons, set the luminaire to the current time (expressed in the 24-hour clock in hours and minutes) and date.
- Page 35 DMX ad dre ss, DMX L amp Off an d DMX Rese t se ttin gs If you intend to operate the Exterior 1200 Wash with a DMX controller, the DMX address must be set on all luminaires for which individual control is required. If you are not familiar with the principles of DMX addressing in an installation with multiple fixtures, see "7.1.1:...
-
Page 36: Setting Up A Luminaire With An Mp-2
Martin Uploader help file and MP-2 user manual. 2. Connect the MP-2 to the Exterior 1200 Wash using either an XLR connector connected to the data link or the RJ-45 service socket in the connections compartment behind the rear cover plate. -
Page 37: Setting Up A Luminaire With The Onboard Control Panel
Clock The Exterior 1200 Wash has a battery-operated 24-hour clock that is used to start and stop stand-alone operation. To set the clock: 1. Scroll through the MP-2 menus and select A d j us t → R e a l t i m e c l o ck . - Page 38 90 seconds of power on. Use this setting if you intend to run stand-alone shows. When set to O f f (the default setting), a lamp-on command from the DMX controller is required to turn on the lamp. Exterior 1200 Wash user manual...
-
Page 39: Section 6: Stand-Alone Operation
Section 6: Stand-alone operation Luminaire settings... -
Page 40: Stand-Alone Programming: General
Wash is not connected to a control device, but is pre-programmed with a series of up to 20 scenes that play continuously in a loop. An Exterior 1200 Wash can run a stand-alone show independently or with synchronized scene changes with other Exterior 1200 Wash luminaires and most other Martin Architectural luminaires (see "6.1.2: Synchronized operation with multiple luminaires"... - Page 41 • Exterior 600 • Exterior 600 Compact • Inground 200 CMY • FiberSource CMY150 • Imager series • Alien 02 series • MiniMAC Maestro In synchronized operation, one luminaire is set as the master and the others are set as slaves.
-
Page 42: Stand-Alone Programming Methods
6 . 1 . 3 S t a n d - a l o n e p r o g r a m m i n g m e t h o d s The Exterior 1200 Wash provides three stand-alone programming methods; using: 1. the Martin MUM application on a personal computer (recommended because it provides an intuitive, easy-to-use, graphical user interface), 2. -
Page 43: Stand-Alone Programming With A Pc And Mum
1. Connect a DABS1 adaptor to a PC and to the Exterior 1200 Wash. 2. Power on the Exterior 1200 Wash and start the MUM application. The application will automatically detect an Exterior 1200 Wash if it is powered on and correctly connected. -
Page 44: Stand-Alone Settings
See ": If both the timer and the light-level trigger are used, timer settings operation starts whenever it is darker than the light-level setting, and within the times set." on page 45. Stand-alone ": Setting a light-level trigger" on page 45. light sensor settings Exterior 1200 Wash user manual... -
Page 45: Programming Effects In Scenes
Automatically triggering stand-alone operation Stand-alone operation can be set to a timer trigger that activates operation for one or two periods in a 24 hour period, or set to a light-level trigger that uses a light sensor to activate operation when ambient light is below a certain level. If both the timer and the light-level trigger are used, operation starts whenever it is darker than the light-level setting, and within the times set. - Page 46 Note that, if a “slave” luminaire has: • Fewer scenes than the master luminaire, it will run these in a cycle continuously, until the master luminaire signals that the program should start from the beginning again. Exterior 1200 Wash user manual...
-
Page 47: Programming The Same Stand-Alone Show On Multiple Luminaires
• More scenes than the master luminaire, then the additional scenes will never run, because the program will reset to the first scene when the master starts its program from the beginning. 6 . 2 . 4 P r o g r a m m i n g t h e s a m e s t a n d - a l o n e s h o w o n m u l t i p l e l u m i n a i r e s Although you can only connect to and program a single luminaire at a time using the MUM application, you can use MUM to program a single luminaire, then use the commands in... -
Page 48: Stand-Alone Operation
If an Exterior 1200 Wash is connected to a DMX controller and receives DMX signals during show playback, the stand-alone show will stop running and the luminaire will respond to the DMX controller. -
Page 49: Section 7. Dmx Control
Section 7. DMX control Stand-alone operation... -
Page 50: Preparing For Dmx Control
You can use a personal computer with the Martin MUM (Multi-Utility Manager) application running on a PC, a Martin MP-2 Uploader or a Martin DAD (DMX Addressing Device) to prepare your Exterior 1200 Wash. Of these options, MUM is the easiest to use because it has a graphical user interface. -
Page 51: Dmx Lamp Off Option
DMX addressing with a DAD To set a DMX address using a DAD, follow the instructions in the DAD user manual. The DAD can only set the DMX address on one luminaire at a time, and must be connected to one luminaire only via the data link. -
Page 52: Dmx Controller Operation
The effects reset to their “home” position when the Exterior 1200 Wash is powered on. The Exterior 1200 Wash can also be reset from the DMX controller on channel 1. To limit the possibility of accidentally resetting the luminaire in the middle of a light show, you can set up the luminaire so that the reset command only works if the CMY channels are all set to a DMX value from 230 to 232 (see "7.1.3: DMX Reset option"... -
Page 53: Color
• With tracking control, fades are programmed using the controller’s fade time. The controller divides the fade into small elements that the luminaire “tracks.” The Exterior 1200 Wash has a digital filter algorithm that averages several updates to ensure smooth movement. - Page 54 Exterior 1200 Wash user manual...
-
Page 55: Section 8. Service And Accessories
Section 8. Service and accessories DMX controller operation... -
Page 56: Service: General
8.1 Service: general DANGER! Read "Safety information" on page 4 before servicing the Exterior 1200 Wash. Important! The Exterior 1200 Wash requires regular service and maintenance to maintain reliable operation and protect the investment it represents. Before servicing, switch off the lamp via DMX or the onboard control panel and allow the luminaire to cool with fans running for 20 minutes before powering off. -
Page 57: Cleaning
If the heat exchanger appears to be clean, contact Martin Architectural for assistance. 8 . 3 . 1 C l e a n i n g t h e h e a t e x c h a n g e r The heat exchanger cooling fan, vents and channels must be kept clean to allow free airflow through the heat exchanger. -
Page 58: Cleaning The Housing And Front Glass
8 . 3 . 2 C l e a n i n g t h e h o u s i n g a n d f r o n t g l a s s The Exterior 1200 Wash’s aluminum housing and front glass can be cleaned with mild detergents such as those for washing cars. -
Page 59: Cable Glands
Replacement seals may be ordered from Martin Architectural. For part numbers, see Table 3 on 60. The seals must extend 0.5 - 1 mm (1/64 - 1/32 in.) beyond the outside of the casing. If you can feel the seal when you run a finger across the joint, that’s enough. -
Page 60: Torque Settings
To ensure that the Exterior 1200 Wash is waterproof and to avoid damaging threads, a torque driver with a range from 2 Nm (1.5 ft.-lbs.) to 16 Nm (11.8 ft.-lbs.) must be used. -
Page 61: Lamp Maintenance
B. Checking and resetting the lamp life counters using MUM To reset the counters: 1. Connect a PC and DABS1 adaptor to the Exterior 1200 Wash via the service port in the connections compartment. 2. Power on the Exterior 1200 Wash and start the MUM application. The application will automatically detect an Exterior 1200 Wash if it is powered on and correctly connected. -
Page 62: Installing The Lamp
Avoid damaging the seal during removal. If you do not remove the seal, you may damage it and will make access more difficult. Figure 18: Removing the front cover and seal Exterior 1200 Wash user manual... - Page 63 3. See Figure 19. Loosen the locking screws in the sliders on each side at the front of the housing. 4. Slide the lamp/effects module out of the housing, avoiding strain on internal wiring. Note that a lamp cutout mechanism is activated as soon as the module is moved from its normal position.
-
Page 64: Replacing Fuses
See "8.5.2: Lamp life and monitoring lamp hours" on page 61. Lamp alignment is factory-set. If after installing a new lamp the Exterior 1200 Wash has a noticeable hot-spot or dark area in the centre of the beam, or if the brightest part of the beam is significantly off-center, the lamp may need to be realigned. - Page 65 MAINS To replace a main fuse: 1. Switch off the lamp, allow the luminaire to cool Hz Setting Volt Setting Volt Setting with fans running for 20 minutes, then isolate it from AC power and ensure that power cannot be SERVICE reconnected accidentally.
-
Page 66: Software-Based Service Functions
The M o n it o r function in MUM and the onboard control panel is for use primarily by Martin Global Service and its authorized agents, but can be a means of obtaining information that is useful for problem diagnosis. -
Page 67: Software Updates
DMX data link or to the RJ-45 service port located behind the rear cover plate, and perform a DMX mode upload as described in the upload device’s documentation. If uploading via the DMX data link, there is no need to isolate Exterior 1200 Wash luminaires from other types of luminaires on the link. -
Page 68: Troubleshooting
Leave power applied for at least 8 minutes after switching off lamp to allow cooling fans to reduce temperature. Exterior 1200 Wash user manual... -
Page 69: Accessories
8.9 Accessories This section lists the optional accessories available for the Exterior 1200 Wash. You can find an updated list on the Martin Architectural website at http://www.martin-architectural.com. Installation instructions are included with all accessories and can also be downloaded from the Support area of the Martin Architectural website. - Page 70 Exterior 1200 Wash user manual...
-
Page 71: Section 9. Reference
Section 9. Reference Accessories... -
Page 72: Connections Compartment
B - AC power frequency setting jumper F - DMX connection terminals C - AC power voltage setting jumper G - Main fuseholders D - Main power on/off switch H - PCB (low voltage) fuseholder Exterior 1200 Wash user manual... -
Page 73: Led Status Messages
9.2 LED status messages Appearance Message, LED 1 Message, LED 2 Steady green Effects OK Data OK. Steady red Invalid data/no data Waiting for upload, or Waiting for upload, or Steady yellow upload in progress upload in progress Flashing yellow Reset in progress Reset in progress See message in display... -
Page 74: Onboard Control Panel Menus
A l l – Z o o m: open or close effects (for seconds to activate Ad j u st e f fe c t s adjustment and test purposes) menus) Prepare luminaire for boot mode Fo r c e U p l o ad software upload Exterior 1200 Wash user manual... -
Page 75: Control Menus
9.4 MP-2 control menus Menu Options Notes Fi x t ur e a d d re s s 1 - 5 0 3 Set the luminaire’s DMX address E na b l e S A Enable/disable stand-alone operation Set luminaire to independent stand- Si n g l e alone operation Set luminaire as master in... - Page 76 Fa c t o ry d e fa u l t default Re s e t c o u n te r s Reset all counters Displays currently installed luminaire V e r s io n X. X software version Exterior 1200 Wash user manual...
-
Page 77: Dmx Protocol
If DMX lamp off without confirmation is disabled in the control menus (P e r so n a l it y → D M X L a m p o f f ), the Exterior 1200 Wash can still be reset via DMX if confirmation is given by setting channels 3 (cyan), 4 (magenta) and 5 (yellow) to a value of 230 - 232. -
Page 78: Exterior 1200 Wash Specifications
Exterior 1200 Wash specifications P h y s i c a l Length............................860 mm (33.9 in.) Width including mounting yoke ....................448 mm (17.6 in.) Height including mounting yoke....................620 mm (24.4 in.) Weight............................68 kg (150 lbs.) EPA (Effective Projected Area) ....................0.6 m2 (6.5 sq. ft.) L a m p Type ............................ - Page 79 C o n n e c t i o n s Power cable entry ........................IP68 cable gland Power connection ........................Quick connectors Data cable entry ........................IP68 cable gland Data connection.................. RJ-45 or screw terminal/quick connectors E l e c t r i c a l AC power ....................200/208/220/230/240/250/277 V, 50/60 Hz Main fuse ...........................
- Page 80 O r d e r i n g I n f o r m a t i o n Exterior 1200 Wash, Narrow (14° - 31°) ..................P/N 90504010 Exterior 1200 Wash, Medium (20° - 50°) ..................P/N 90504020 Exterior 1200 Wash, Wide (60°) ..................... P/N 90504030 Exterior 1200 Wash, Very Wide (97°) .....................
- Page 81 Electronic Equipment), as amended by Directive 2003/108/EC, where applicable. Help preserve the environment! Ensure that this product is recycled at the end of its life. Your ® supplier can give details of local arrangements for the disposal of Martin products.
- Page 82 Notes...
- Page 84 • Olof Palmes Allé 18 • 8200 Aarhus N • Denmark Tel: +45 8740 0000 • Fax +45 8740 0010...
Need help?
Do you have a question about the Exterior 1200 Wash and is the answer not in the manual?
Questions and answers