Table of Contents
Advertisement
Quick Links
OPERATING INSTRUCTIONS
Kit Product Number:
128301
128302
128303
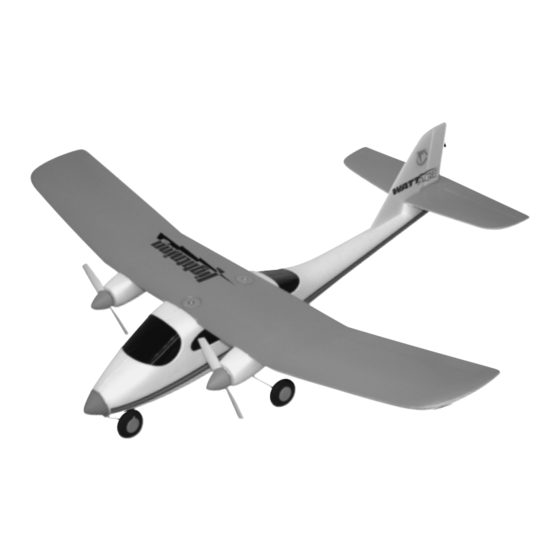
Thank you for purchasing the Wattage Lightning EP. These Operating Instructions are provided to help you
learn to fly and enjoy your new airplane without any of the hassles you might expect. Please read through these
operating instructions in their entirety before starting. Doing so will help you become familiar with how your
airplane and radio system operate.
IMPORTANT
Before beginning assembly, please read and understand the warnings listed on the next page. Failure
to do so could lead to bodily harm and/or injury. The Wattage Lightning EP is not intended for those
under 12 years of age, unless closely supervised by an adult.
The Wattage Lightning EP is distributed exclusively by Global Hobby Distributors 18480 Bandilier Circle, Fountain Valley, CA 92728
All contents copyright © 2001, Global Hobby Distributors Version V1.0 September 2001
Visit our website at http://watt-age.globalhobby.com for information on other Wattage products
- Red
- Yellow
- Silver
Lightning EP Features:
Completely Ready-to-Fly
Solid State Electronic Motor Control
Twin Electric Motors
2 Channel Radio Control w/Auto Pilot
5 Cell Nickel Metal Hydride Flight Pack
Makes Learning to Fly Easy
1
Advertisement
Table of Contents

Subscribe to Our Youtube Channel
Related Manuals for WattAge 128301


Summary of Contents for WattAge 128301
-
Page 1: Operating Instructions
Before beginning assembly, please read and understand the warnings listed on the next page. Failure to do so could lead to bodily harm and/or injury. The Wattage Lightning EP is not intended for those under 12 years of age, unless closely supervised by an adult. -
Page 2: For Your Information
If you cannot solve a problem using the troubleshooter, or if you have any other questions or concerns, please contact us below: Wattage Customer Service 18480 Bandilier Circle Fountain Valley CA 92728... -
Page 3: Section 1: Our Recommendations
Phone (714) 963-0329 Fax (714) 964-6236 Email: service@globalhobby.net Fuselage Assembly Wing Assembly Horizontal Tail Spare Propellers Landing Gear Assembly Transmitter Flight Battery Screwdriver Wing Mounting Screws Transmitter Flag Assembly Training Stand Visit our website at http://watt-age.globalhobby.com for information on other Wattage products... -
Page 4: Section 3: Becoming Familiar With Your Airplane
Section 3: Becoming Familiar with Your Airplane Each airplane kit comes with a sticker on the bottom of the airplane showing which channel the radio operates on . No two radio systems can operate nearby each other if they are on the same channel. Listed below are the three different channels the airplane is available on: Channel # Airplane Color... - Page 5 Vertical Tail: Provides stability for the airplane during turns. Wing: The wing has a special airfoil shape and provides the main source of lift for the airplane. Visit our website at http://watt-age.globalhobby.com for information on other Wattage products...
-
Page 6: Section 4: Assembling Your Airplane
Section 4: Assembling Your Airplane Step 1: Installing the Transmitter Batteries Remove the battery cover by pushing with your thumb at the mark on the bottom of the battery cover. Install 8 fresh AA Alkaline batteries, being careful to watch that the polarity is correct for each battery. Push the battery cover back into place until you hear it "click"... - Page 7 The side of the tail with the double-sided tape should face down. Slide the tail completely forward. With the tail completely forward, carefully push down on the tail to secure it to the fuselage. Visit our website at http://watt-age.globalhobby.com for information on other Wattage products...
-
Page 8: Step 3: Installing The Wing
Step 3: Installing the Wing Plug the wire lead from the wing into the wire lead inside the fuselage. IMPORTANT There are white dots on each wire lead. When plugged in properly, the white dots should be matched together as shown. -
Page 9: Step 5: Charging The Flight Battery
With fresh AA Alkaline batteries, the flight battery can be fully charged approximately 10 times. Visit our website at http://watt-age.globalhobby.com for information on other Wattage products... -
Page 10: Step 6: Installing The Flight Battery
Step 6: Installing the Flight Battery WARNING Before installing the flight battery, verify that the on/off switch on both the transmitter and the bottom of the fuselage are in the "off" position. Remove the plastic battery cover on the bottom of the fuselage by carefully pulling back, then up, on the tab on the back of the cover. -
Page 11: Section 5: Ground School
IMPORTANT The longer portion of the training stand should face toward the back of the airplane. This will ensure the airplane stays stable on the training stand. Visit our website at http://watt-age.globalhobby.com for information on other Wattage products... -
Page 12: Flight Training
While holding the training stand in place, turn the airplane over and slide the end of the stand over the end of the transmitter antenna. WARNING Be careful not to press the climb button or push the turn lever while doing this. Flight Training: You should practice the techniques listed in the section until you are comfortable with how to control the airplane and how the airplane responds to your commands. -
Page 13: Section 6: Getting Ready To Fly
Until you are very proficient with the airplane, we don't recommend taking off or landing from hard surfaces like asphalt or concrete. Visit our website at http://watt-age.globalhobby.com for information on other Wattage products... - Page 14 Step 2: Choosing a Day to Fly Until you become a proficient flyer you should always plan on flying your airplane when there's no wind. We strongly suggest waiting for a calm day. Do not fly in more than a 5 m.p.h. wind. Assemble the transmitter flag assembly as shown.
-
Page 15: Section 7: Your First Flight
The airplane will slowly start to turn. Once the airplane has turned the direction you want, release the turn lever. During this time, the airplane has most likely climbed to a safe height. Visit our website at http://watt-age.globalhobby.com for information on other Wattage products... - Page 16 Flying In the Air: With the auto pilot switched on, and with the airplane at a safe height, you can release the climb button. Continue to make turns, holding the turn lever in the direction you want the airplane to turn. You will notice that when you turn, the airplane will climb, too.
-
Page 17: Taking Off From The Ground
Do not mistake the normal up and down characteristics of the airplane for trim problems. Chances are, you will never have to make an adjustment to the up and down tail tabs. Visit our website at http://watt-age.globalhobby.com for information on other Wattage products... -
Page 18: Section 9: Troubleshooting Guide
C) Turn on transmitter D) Flight battery not plugged in D) Plug flight battery in securely securely E) Return airplane to Wattage Service E) A crash has damaged an internal following the instructions on the component back page of these instructions... -
Page 19: Section 10: Fixing Minor Crash Damage
Section 11: Replacement Parts Listed below are the replacement parts that are available. The part numbers for each part are provided for ordering convenience. Replacement parts are available through your local authorized Wattage dealer or directly from us. First, Visit Your Local Dealer: To locate the dealer nearest you, please call us at (714) 963-0133 or visit our dealer directory on the Internet at www.globalhobby.com/where2buy.htm... -
Page 20: Warranty Service
Our Guarantee Wattage guarantees this kit to be free from defects in both material and workmanship, at the date of purchase. This does not cover any component parts damaged by use, misuse or modification. In no case shall Wattage's liability exceed the original cost of the purchased kit.
Need help?
Do you have a question about the 128301 and is the answer not in the manual?
Questions and answers