Table of Contents
Advertisement
Quick Links
Advertisement
Table of Contents

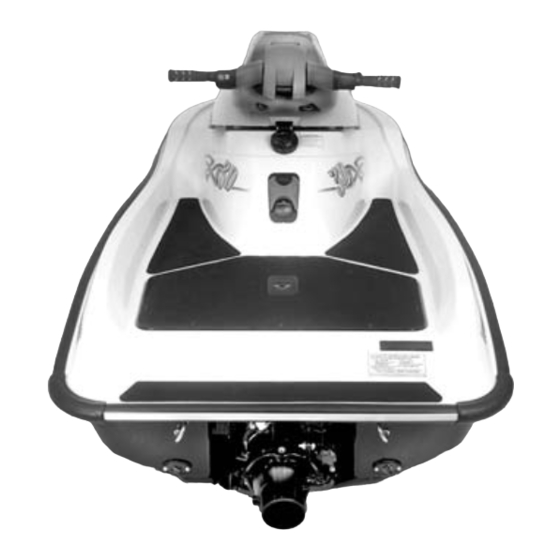
Related Manuals for Sea-doo 2006 3D RFI


Summary of Contents for Sea-doo 2006 3D RFI
- Page 2 Bombardier Recreational Products Inc. or its affiliates: XP-S Mineral Injection Oil Sea-Doo LK XP-S Synthetic 2-stroke Oil ® O.P.A.S. Sea-Doo Synthetic Grease Rotax 4–TEC DESS ® Sea-Doo O.T.A.S. Printed in Canada. (smo2006-003 en DR) ®™ and the BRP logo are trademarks of Bombardier Recreational Products Inc. or its affiliates.
- Page 3 FRONT is referred to BOW and REAR the WARRANTY section in this guide, as STERN. and/or an authorized Sea-Doo dealer. In USA, products are distributed by BRP US Inc. In Canada, products are distributed by Bombardier Recreation- al Products Inc.
-
Page 4: Table Of Contents
TABLE OF CONTENTS SAFETY INFORMATION INTRODUCTION ..............8 SAFETY CHECK LIST . - Page 5 15) Cooling System Bleed Outlet ..........38 16) Flushing Connector.
- Page 6 POST-OPERATION CARE............63 General Care ..
- Page 7 ® BRP NORTH AMERICA LIMITED WARRANTY: 2006 SEA-DOO PERSONAL WATERCRAFT ........... .. 103...
- Page 8 _______________________...
-
Page 9: Safety Information
SAFETY INFORMATION ____________ ____________ SAFETY INFORMATION... -
Page 10: Introduction
INTRODUCTION Congratulations, you are now the This safety section is for initial refer- proud owner of a Sea-Doo personal ence and its content is therefore limit- watercraft. You have selected one ed. section It should be read in con- of the most popular watercraft on junction with the rest of this OPER- water. -
Page 11: Safety Check List
SAFETY CHECK LIST To fully appreciate the pleasures, en- A PWC will not self-right if capsized. joyment and excitement of boating The operator must know the proper there are some basic rules that should righting procedure as explained in the be observed and followed by any OPERATOR’S GUIDE. -
Page 12: Getting Underway
GETTING UNDERWAY To Wear The operator must wear a Coast Guard approved Personal Flotation Device (PFD) that is suitable for PWC use. An operator should have ready access to shatterproof glasses should riding conditions or personal preference war- rant. Wind, water spray and speed may cause a person’s eyes to water and create blurred vision. - Page 13 ____________ ___________ SAFETY INFORMATION...
-
Page 14: Helmets
“bucket”, and put severe authorized Sea-Doo dealer. Such re- stresses on the neck or spine. This quired safety items usually include, could result in choking, severe or per- without limitation, a sound signaling manent neck or spine injury, or death. -
Page 15: To Do
To Do Read and understand all warning/cau- tion labels on your Sea-Doo PWC, your OPERATOR’S GUIDE, all other safety documents, and watch properly your SAFETY VIDEO, before operating. Al- ways keep in mind that the “ “ sym- bol, the Warning symbol, identifies an... -
Page 16: Operation
OPERATION Collision Avoidance Ride within your limits and level of riding ability. Avoid aggressive ma- Do not release throttle when trying to neuvers to reduce the risk of loss of steer away from objects. You need control, ejection and collision. Under- throttle to steer. -
Page 17: Operator/Passenger Awareness
Maneuverability of the In shallow water, proceed with caution and at very low speeds. Grounding Watercraft or abrupt stops may result in injury. Do not overload the watercraft or take Debris may also be picked up and be on a passenger. Overloading can af- thrown rearward by the jet pump onto fect maneuverability, stability and per- people or property. -
Page 18: Operating Rules
OPERATING RULES Operating a watercraft can be com- Meeting Head-On pared with driving unmarked high- Keep right. ways and roads. To prevent collisions or avoid other boaters, a system of operating rules must be followed. It’s not only common sense... it’s the law! Remember these Rules of the Road... -
Page 19: Web Sites
WEB SITES Sea-Doo website: www.sea-doo.com Canadian Coast Guard www.ccg-gcc.gc.ca/obs-bsn/sbg-gsn/ (Office of Boating Safety) main_e.htm www.uscgboating.org/regulations/ United States Coast Guard boating_laws.htm Alabama www.dcnr.state.al.us/mp/menu.htm Alaska www.dnr.state.ak.us/parks/boating Arizona www.azgfd.com Arkansas www.agfc.state.ar.us/ www.dbw.ca.gov California Colorado http://parks.state.co.us/boating/ Connecticut http://dep.state.ct.us/rec/prgactiv.htm Delaware www.dnrec.state.de.us/fw/index.htm Florida (freshwater) http://floridaconservation.org/law Florida (saltwater) www.dep.state.fl.us/law... - Page 20 New Hampshire www.state.nh.us/safety/ss/links.html New Jersey www.state.nj.us/mvs/boats.htm www.emnrd.state.nm.us/nmparks/pages/ New Mexico question/regulate/rules/nmac172.pdf www.ncwildlife.org/ North Carolina fs_index_02_regulations.htm North Dakota http://www.state.nd.us/gnf/boating/ Ohio www.dnr.state.oh.us/odnr/watercraft Oregon www.osmb.state.or.us Pennsylvania www.fish.state.pa.us Rhode Island www.state.ri.us/dem/topics/boating.htm www.dnr.state.sc.us/etc/boating.html South Carolina www.state.sd.us/gfp/divisionwildlife/ South Dakota boating/index.htm Tennessee www.state.tn.us/twra/boatmain.html Texas www.tpwd.state.tx.us/boat/boat.htm Utah www.stateparks.utah.gov/parks/safety.htm Virginia www.dgif.state.va.us/boating Washington www.parks.wa.gov/boating.asp...
-
Page 21: Location Of The Important Labels
LOCATION OF THE IMPORTANT LABELS The following labels are on your watercraft. If missing or damaged, they can be replaced free of charge. See an authorized Sea-Doo dealer. Please read the following labels carefully before operating this watercraft. ____________ ___________... - Page 22 “MOTO“ CONFIGURATION KART SEAT CONFIGURATION (IF SO EQUIPPED) ___________ ___________ SAFETY INFORMATION...
- Page 23 Label 1 To reduce the risk of SEVERE INJURY or DEATH: WEAR A PERSONAL FLOTATION DEVICE (PFD). All riders must wear a Coast Guard approved PFD that is suitable for personal watercraft (PWC) use. WEAR PROTECTIVE CLOTHING. Severe internal injuries can occur if water is forced into body cavities as a result of falling into water or being near jet thrust nozzle.
- Page 24 Label 3 smo2006-003-017_aen Label 4 smo2006-003-018_a Label 5 ___________ ___________ SAFETY INFORMATION...
- Page 25 Label 6 Label 7 Label 9 Label 8 IF SO EQUIPPED ____________ ___________ SAFETY INFORMATION...
- Page 26 Label 10 Label 11 Label 12 smo2006-003-019 ___________ ___________ SAFETY INFORMATION...
-
Page 27: Vehicle Information
VEHICLE INFORMATION _____________________... -
Page 28: Registration Number Location
REGISTRATION NUMBER LOCATION All personal watercraft are required by federal law to be registered and legally numbered. Due to space availability for proper display of registration number, refer to follow- ing illustration for location. The registration number should appear on each side of the watercraft. -
Page 29: Identification Numbers
IDENTIFICATION NUMBERS Engine The main components of the water- craft (engine and hull) are identified The Engine Identification Number by different serial numbers. It may (E.I.N.) is located on the upper sometimes become necessary to lo- crankcase on PTO (Power Take-Off) cate these numbers for warranty pur- side. -
Page 30: Controls/Instruments/Equipments
CONTROLS/INSTRUMENTS/EQUIPMENTS NOTE: Some components do not apply or are optional on some models. “VERT” CONFIGURATION ______________________... - Page 31 “MOTO” CONFIGURATION KART CONFIGURATION (IF SO EQUIPPED) 1. Safety Lanyard (engine cut-off 16. Flushing Connector cord) 17. Bilge Drain Plugs 2. Handlebar 18. Jet Pump Nozzle 3. Handlebar Adjuster 19. VTS Adjuster 4. Throttle Lever 20. Jet Pump Water Intake 5.
-
Page 32: Controls/Instruments/Equipments Functions
CONTROLS/INSTRUMENTS/EQUIPMENTS FUNCTIONS 1) Safety Lanyard (engine cut-off cord) The safety lanyard cap should be se- curely snapped onto its post to be fully operational. 1. Safety lanyard cap on the post 2. Safety lanyard secured on operator's PFD 1. Safety lanyard on its post Pulling the safety lanyard cap from its post stops the engine operation. -
Page 33: Handlebar
This watercraft features the O.T.A.S. To have additional safety lanyard, refer system. Refer to THROTTLE LEVER to an authorized Sea-Doo dealer. for more information. Limited-Speed Operation 3) Handlebar Adjuster This model is also equipped with spe- WARNING cial safety lanyard. -
Page 34: Throttle Lever
Lift the adjuster and hold while mov- ing handlebar to the desired position. When handlebar is in position, release adjuster. There are 3 positions. Notice that in the rearward position it is appropriate to use your index finger to activate the throttle. -
Page 35: Engine Start/Stop Button
1. Engine start/stop buttons 6) Indicator Light Cluster 1. Throttle lever O.T.A.S. System (Off-Throttle Assisted Steering) The O.T.A.S. (Off-Throttle Assisted Steering) system provides addition- al maneuverability in off-throttle sit- uations. The O.T.A.S. system is electronically activated and slight- 1. Low oil warning light 2. -
Page 36: Steering Pole
The warning light will turn on whenev- er there is a problem with the engine management system. It will blink when there is a problem with the O.T.A.S. system or the electric bilge pump. NOTE: When engine is not running and safety lanyard is on its post, the warning light will remain turned on un- til safety lanyard is removed. -
Page 37: Engine Cover Latch
9) Engine Cover Latch WARNING CAUTION: Removing engine cov- Always install steering pole holder er should be done only when the immediately after engine cover re- watercraft is out of the water. Re- moval to support the pole securely moving engine cover while on wa- while working in the engine com- ter might allow water to enter and partment. - Page 38 WARNING To prevent pinching your fingers in the latch when installing the engine cover, always hold it by putting your hand in the recess designed for that purpose and identified by a pictogram. 1. Fire extinguisher storage area 2. Storage tray When done, unhook the steering pole holder and place the end in its recep- tacle as shown.
-
Page 39: Oil Injection Reservoir Cap
Storage Tray WARNING Referring to the above illustration, that Do not overfill. Reinstall cap and area is a convenient tray to store per- fully tighten. Oil is flammable. Al- sonal articles. The tray is designed ways wipe off any oil spillage from to receive the “Safety equipment for the bilge. -
Page 40: Boarding Pads
POST-OPERATION CARE and look for COOLING SYS- TEM FLUSHING or refer to an au- thorized Sea-Doo dealer for servic- ing. 16) Flushing Connector A convenient connector is provided 1. Stern eyelets to allow easy installation of a garden hose to flush the cooling system. -
Page 41: Jet Pump Nozzle
Tilt the watercraft slightly to the rear There are reference numbers to indi- so that the water can flow out of the cate nozzle position and to facilitate bilge completely. fine tuning. It is suggested to drain bilge when the watercraft is on a ramp. -
Page 42: Fuses
1. Rear access cover To remove cover, use a small screw- 1. Water intake driver to pry caps off. 2. Ride plate Use the small socket supplied in toolk- 21) Fuses it to remove screws then pull cover out. The fuses are located in the engine compartment. - Page 43 “Moto” Seat Installation Rotate the seat out, raise and pull rear- wards. Hold in this position. WARNING Before installing or stowing the “moto” seat. – Stop the watercraft in a safe area away from traffic or obsta- cles. – Turn off engine. –...
- Page 44 1. Lift receiver cap To lock post in position: Rotate the post to a vertical position – Slide seat rearward. and move the seat to line up the post – Firmly push seat down. You should with its receiver. hear a “clunk“. NOTE: Notice that when rotating post, it will lock at an intermediate position.
- Page 45 Keep the seat high enough and rotate the post into seat. “Moto” Seat Stowage Unlock the seat post by lifting the red locking lever while firmly holding the steering pole by the handlebar. NOTE: Pushing down on handlebar can ease to unlock seat. Firmly push the post in the seat until you hear a “clunk“.
-
Page 46: Moto" Seat Post Receiver
If you cannot rest your feet com- fortably on the footrests, install the footrest spacers (refer to your autho- rized Sea-Doo dealer for more infor- mation). This will help achieve a more stable riding position. ______________________... -
Page 47: Steering Pole Retainer (If So Equipped)
The spacers have 2 steps to accom- modate different rider heights. Use the one that best suits your leg size. Make sure to latch the spacers secure- ly in the footwells of the watercraft. 1. Lever 2. Push and hold 3. - Page 48 Continue lowering the steering pole down until the retainer can be insert- ed into the body hook. Then, push re- tainer to lock in position. 1. Position retainer in body hook 2. Push to lock ______________________...
-
Page 49: Liquids
Fu- el tank may be pressurized, turn Use only two-stroke engine injection cap slowly when opening. Never oil sold by authorized Sea-Doo dealers. use an open flame to check fuel level. When fueling, keep water- MODELS OIL TYPE craft level. -
Page 50: Oil Injection System
If a high quality tem and it should be bled. Immedi- equivalent were available, it could ately refer to an authorized Sea-Doo be used. dealer to have the oil injection sys- tem inspected. -
Page 51: Break-In Period
BREAK-IN PERIOD CAUTION: Scrupulously follow the instructions of this section. Failure to do so may reduce the engine’s life and/or performance. With Sea-Doo watercraft powered by ® Rotax engines, a break-in period of 10 hours is required before continuous operation at full throttle. -
Page 52: Pre-Operation Checks
PRE-OPERATION CHECKS WARNING The pre-operation check is very important prior to operating the water- craft. Always check the proper operation of critical controls, safety fea- tures and mechanical components, before starting as listed hereinafter. If not done as specified here, severe injury or death might occur. Bring all safety equipment required by local laws. -
Page 53: Hull
NOTE: Pay attention that some water sary. If any obstruction can not be re- will also flow out of exhaust outlet. moved, refer to an authorized Sea-Doo Make sure water is effectively flowing dealer for servicing. out of jet pump. -
Page 54: Battery
Battery Steering Pole Check steering pole up and down WARNING movement for free and smooth op- eration. Pay attention to the weight Verify tightness of battery cables to feeling of the pole. It can be adjust- their posts and condition of battery Refer to CONTROLS/INSTRU- retaining bracket(s)/fasteners. -
Page 55: Optional Configurations
Optional Configurations Refer to CONTROLS/INSTRUMENTS/ EQUIPMENTS. WARNING To make sure you are in a riding position that allows you to be in control of the watercraft, always check that any optional seat or accessory that you are using are properly latched and stable before turning on the watercraft engine. -
Page 56: Operating Instructions
Become thorough- ly familiar with all controls and the function of each. Should any control or instruction not be fully understood, refer to an authorized Sea-Doo dealer. This watercraft is designed for one person only. WARNING WARNING – Never allow a passenger on- board. - Page 57 When first using the watercraft, the Steering operator should become familiar with the use of the variable trim system (VTS) at varying speeds and water conditions. A mid-range trim is gener- ally used when cruising. Experience alone will dictate the best trim for the conditions.
- Page 58 WARNING Throttle should be applied and handlebar turned to change the direction of the watercraft. Steer- ing efficiency will differ depending on load, water conditions and en- vironmental factors such as the wind. Unlike a car, a watercraft needs some throttle to turn.
-
Page 59: Boarding The Watercraft
We recommend that you familiarize NOTE: When boarding a watercraft yourself with this feature during your with the “moto“ or kart seat configu- first ride. ration, you can use the seat as an ad- ditional support point to keep your bal- ance. - Page 60 Put your hands on the boarding plat- NOTE: When boarding a watercraft form and pull yourself up until your with the “moto“ seat configuration, knee can reach the boarding platform, you can find helpful to use the seat then get on. strap.
-
Page 61: Engine Starting Procedure
Engine Starting Procedure Preparation Before unloading the watercraft from the trailer, it can be started for about 10 seconds to verify proper operation. WARNING Components inside the engine compartment may be hot. Keep away from electrical parts or jet pump area when engine is run- ning. -
Page 62: Riding
”Vert” Configuration NOTE: Never depress the throttle lever to start engine wether it is warm or cold. Release the engine start/stop button immediately once the engine is start- If engine fails to start after 10 seconds, wait a few seconds then repeat proce- dure. -
Page 63: Rough Water Or Poor Visibility Operation
”Moto” Configuration WARNING It is recommended to deploy and stow – Only install or remove the kart the “moto” seat when the watercraft seat when the watercraft is out is out of the water or securely docked. of the water or docked securely If not possible, it should be done on on calm water. -
Page 64: Stopping/Docking
WARNING WARNING When crossing wakes, slow down. Directional control reduced Operator can brace himself by when the throttle is released and posting. Do not jump waves or lost when engine is off. wakes. Beaching Stopping/Docking CAUTION: It is not recommended to The watercraft is slowed down by wa- run the watercraft to the beach. -
Page 65: Post-Operation Care
POST-OPERATION CARE Cooling System Flushing WARNING and Engine Internal Allow engine to cool before per- Lubrication forming any maintenance. General General Care Flushing the cooling system with fresh Take the watercraft out of the water water is essential to neutralize corrod- every day to prevent marine organism ing effects of salt or other chemical growth. - Page 66 NOTE: The quick connect adapter has to be removed once the procedure is completed. Flushing and Lubrication To flush cooling system, start the en- gine then immediately open the water tap. WARNING Components inside the engine compartment may be hot. Keep away from electrical parts or jet 1.
-
Page 67: Anticorrosion Treatment
Remove both spark plugs and spray XP-S LUBE or an equivalent lubricant into each cylinder. To prevent fuel to be injected and also to cut the ignition at the engine start- ing, proceed as follows. While engine is stopped, fully depress throttle lever and HOLD for cranking. -
Page 68: Special Procedures
To assist you when using the water- If engine still overheats, refer to an au- craft, a system monitors the electron- thorized Sea-Doo dealer for servicing. ic components of the fuel injection system and some components of the Jet Pump Water Intake electrical system. -
Page 69: Capsized Watercraft
CAUTION: Inspect water intake ponents. grate for damage. Refer to an au- Bring the watercraft to be serviced by thorized Sea-Doo dealer for repair an authorized Sea-Doo dealer as soon as necessary. as possible. Capsized Watercraft CAUTION: The longer the delay... -
Page 70: Water-Flooded Engine
WARNING Start engine as explained above. If en- Always reconnect spark plug ca- gine remains flooded, see an autho- bles at the same spark plugs where rized Sea-Doo dealer. they come from. Start engine normally. ______________________... -
Page 71: Out Of Fuel
Towing the Watercraft on the Water Special precautions should be taken when towing a Sea-Doo watercraft on the water. smo2006-003-015_b The maximum recommended towing 1. Water supply hose speed is 24 km/h (15 MPH). - Page 72 ______________________...
-
Page 73: Maintenance Information
MAINTENANCE INFORMATION _____________________... -
Page 74: Engine Emissions Information
When performing service on all 1999 taining to the EPA requirements on ex- and more recent Sea-Doo watercrafts haust emissions for marine products. that carry an emissions control infor- For more detailed information on this... -
Page 75: General
Only perform servicing procedures which are detailed in this safety sec- tion. Further assistance or informa- tion can be obtained from your au- thorized Sea-Doo dealer. In many instances proper tools and training is required for certain servicing or repair procedures. -
Page 76: Maintenance Chart
The following maintenance chart gives guidelines for regular watercraft servicing scheduled to be performed by you and/or by an authorized Sea-Doo dealer. The schedule should be adjusted according to operating conditions and use. - Page 77 PERIODIC MAINTENANCE CHART FIRST 10 HOURS A: ADJUST 25 HOURS OR 3 MONTHS C: CLEAN I: INSPECT 50 HOURS OR 6 MONTHS L: LUBRICATE R: REPLACE 100 HOURS OR 1 YEAR T: PROCEED WITH TASK TO BE PERFORMED BY PART/TASK LEGEND FUEL SYSTEM I, A,...
- Page 78 PERIODIC MAINTENANCE CHART FIRST 10 HOURS A: ADJUST 25 HOURS OR 3 MONTHS C: CLEAN I: INSPECT 50 HOURS OR 6 MONTHS L: LUBRICATE R: REPLACE 100 HOURS OR 1 YEAR T: PROCEED WITH TASK TO BE PERFORMED BY PART/TASK LEGEND O.T.A.S.
-
Page 79: Maintenance
MAINTENANCE WARNING Only perform procedures as de- tailed in this guide. It is recom- mended that the assistance of an authorized Sea-Doo dealer be peri- odically obtained on other compo- nents/systems not covered in this guide. Unless otherwise speci- fied, engine must not be running... -
Page 80: Throttle Cable Inspection
Repeat the test for each ad- CAUTION: An obstructed oil filter justable handlebar position. Refer to will cause oil starvation resulting in an authorized Sea-Doo dealer if neces- serious engine damage. sary. Steering Alignment WARNING When the handlebar is positioned in... -
Page 81: Handlebar And Adjuster Operation
If any of the above tests fail, do not then lubricate with XP-S LUBE. If it use the “moto“ seat and refer to an is still stiff, refer to an authorized authorized Sea-Doo dealer. Sea-Doo dealer. M ake sure there is no excessive play in the handlebar. _____________________... -
Page 82: Kart Seat (If So Equipped)
Otherwise, repeat the test and turn handlebar earlier after throttle release. If the RPM still does not increase, re- fer to an authorized Sea-Doo dealer. VTS Adjustment Turn the adjuster knob so that the noz- zle reaches its highest position. Turn the adjuster knob in the opposite direc- tion to reach the lowest position. - Page 83 See an authorized Sea-Doo dealer for servicing. Fuses can be found on the MPEM in engine compartment. To access fuses, remove engine cov- er and lock the steering pole with the holder in the upright position.
-
Page 84: General Inspection And Cleaning
Inspection present, do not start the engine. Have the watercraft serviced by an Remove engine cover and lock the authorized Sea-Doo deal er. steering pole with the holder in the up- right position. Inspect muffler, battery, fuel tank and oil reservoir fastening devices. Visual- ly check electrical connections for cor- rosion and tightness. - Page 85 Cleaning ner, acetone, products containing chlorine, etc. The bilge should be cleaned by an authorized Sea-Doo dealer to remove To clean the carpets, use 3M™ Citrus any fuel/oil/electrolyte deposits and Base Cleaner (24 oz spay can) or the mildew.
-
Page 86: Trailering, Storage And Preseason Preparation
(if so equipped) normal operating position. If a Sea-Doo cover is not used, the steering pole must be locked down to Check the laws and regulations in your prevent any movement during trans- area that apply, especially the rules portation. -
Page 87: Storage
It is strongly recommended that the watercraft be serviced by an autho- rized Sea-Doo dealer for storage but the following operations can be per- formed by you with a minimum of tools. - Page 88 Lubricant in jet pump reservoir should In cool regions where freezing point be drained and reservoir cleaned. Re- may be encountered, cooling system fer to an authorized Sea-Doo dealer for should be filled with antifreeze or this operation. recreational vehicle antifreeze.
- Page 89 Pour antifreeze mix in engine until the colored solution appears at cooling system bleed outlet. At this point, install a hose pincher on bleed outlet hose. smo2006-003-015_a 1. Disconnect the water supply hose (identified with a red tape) 2. T-fitting 3.
- Page 90 Rinse thoroughly. Lift front end of water- craft to completely drain bilge. If any repairs are needed to body or to the hull contact your authorized Sea-Doo dealer. For paint touch up to mechan- ical parts use BOMBARDIER spray paint.
-
Page 91: Preseason Preparation
Reinstall engine cover and rear access tailed in this guide. It is recom- cover. mended that the assistance of an authorized Sea-Doo dealer be peri- Final Steps odically obtained on other compo- nents/systems not covered in this Apply a good quality marine wax to the guide. -
Page 92: Preseason Preparation Chart
Preseason Preparation Chart NOTE: It is highly recommended that an authorized Sea-Doo dealer perform the annual safety inspection and factory campaigns in addition to the preseason preparation all at the same time. TO BE OPERATIONS PERFORMED Lubrication/corrosion protection Operator GENERAL... - Page 93 TO BE OPERATIONS PERFORMED Steering system adjustment/inspection Dealer Steering pole condition Dealer STEERING SYSTEM Handlebar and adjuster condition Dealer “Moto” seat condition Dealer O.T.A.S. SYSTEM Check O.T.A.S. system operation Dealer VTS (Variable Trim System) (if so equipped) Dealer PROPULSION Propulsion system inspection Dealer SYSTEM Jet pump oil replacement...
-
Page 94: Troubleshooting
You may be able to solve many of these problems rather quickly, but others may require the skills of a mechanical technician. In such cases, con- sult an authorized Sea-Doo dealer for servicing. Monitoring Beeper Coded Signals CODED SIGNALS... -
Page 95: Engine Will Not Start
Engine does not turn over. Safety lanyard removed. Install cap over post. Burnt fuse on MPEM. Check wiring then replace fuse(s). Discharged battery. Refer to an authorized Sea-Doo dealer. Battery connections, corroded Refer to an authorized Sea-Doo or loose. Bad ground. dealer. Water-flooded engine. -
Page 96: Engine Overheats
REMEDY Lean fuel mixture. Fuel: Level too low, stale or Siphon and/or refill. water-contaminated. Fuel filter clogged. Refer to an authorized Sea-Doo Clogged injectors. dealer. Defective sensor or MPEM. Rich fuel mixture (high fuel Flame arrester dirty/clogged. Clean or replace. - Page 97 REMEDY Readjust to try another setting. VTS (if so equipped) is adjusted to suit other riding conditions. Exhaust gases leak in bilge. Refer to an authorized Sea-Doo dealer. Jet pump water intake clogged. Clean. Cavitation. Damaged impeller. Replace. Refer to an authorized Sea-Doo dealer.
- Page 98 Steering pole return spring Set the adjuster to reduce the adjustment. weight at the handlebar. Refer to STEERING POLE. Steering pole return spring is Refer to an authorized Sea-Doo broken. dealer. Steering Pole is Stiffer than Usual OTHER OBSERVATION POSSIBLE CAUSE...
-
Page 99: Specifications
SPECIFICATIONS VEHICLES ENGINE Type Rotax ® 947 DI, 2-stroke Induction type Reed valve Exhaust system Water cooled Exhaust valve Rotax Adjustable Variable Exhaust (RAVE) Type Oil injection Lubrication Oil type XP-S synthetic 2-stroke oil Number of cylinders Displacement 951.2 cc (58 cu. in) Bore 88 mm (3.465 in) Stroke... - Page 100 VEHICLES Battery Regulator (charging system) Fuel pump Fuse Injection system Bilge pump Spare (not used) Main FUEL SYSTEM Type Regular unleaded gasoline Fuel Minimum octane Inside North America: 87 (R + M) / 2 number Outside North America: 91 RON Orbital direct fuel injection, twin throttle Fuel injection body (46 mm (1.81 in))
- Page 101 VEHICLES CAPACITIES Fuel tank (including reserve) 35 L (9.2 U.S. gal) Fuel tank reserve (from low level signal) Roughly 5 L (1.3 U.S. gal) Oil injection reservoir 4 L (1 U.S. gal) Capacity 100 mL (3.4 U.S. gal) Impeller shaft reservoir Oil level Up to plug...
-
Page 102: Abbreviations Used In This Manual
ABBREVIATIONS USED IN THIS MANUAL ABBREVIATION DESCRIPTION Alternate current American petroleum institute CARB California air resource board Direct current Digitally encoded security system DESS E.I.N. Engine identification number Environmental protection agency Light-emitting diode Magneto MPEM Multi-purpose electronic module Mile per hour N.A. -
Page 103: Warranty
WARRANTY _____________________... - Page 104 (819) 566-3062 www.brp.com If your Sea-Doo watercraft requires warranty service, you should take it to any authorized Sea-Doo dealer. Be sure to bring your warranty registration card or other valid proof of the original date of purchase. If a question or problem arises regarding warranty, first contact the service manager or owner of the Sea-Doo dealership.
-
Page 105: Brp North America Limited Warranty: 2006 Sea-Doo
For Sea-Doo personal watercraft produced for sale in the states of California or New York, that are originally sold to a resident or subsequently warranty regis- tered to a resident in the sta te of California or New York, please also refer to the applicable California and New York Emissions Control Warranty Statement. - Page 106 This warranty coverage is available only on Sea-Doo personal watercraft pur- chased as new and unused by its first owner from a BRP dealer authorized to distribute Sea-Doo products in the country in which the sale occurred (“BRP dealer”), and then only after the BRP specified predelivery inspection process is completed and documented.
- Page 107 6. EXCLUSIONS The following are not warranted under any circumstances: – Normal wear and tear; – Routine maintenance items, tune ups, adjustments; – Damage caused by failure to provide proper maintenance and/or storage, as described in the OPERATOR’S GUIDE; – Damage resulting from removal of parts, improper repairs, service, mainte- nance, modifications or use of parts not manufactured or approved by BRP or resulting from repairs done by a person that is not an authorized servicing BRP dealer;...
- Page 108 8. TRANSFER If the ownership of a product is transferred during the warranty coverage period, this warranty shall also be transferred and be valid for the remaining coverage period provided that BRP is notified of such transfer of ownership in the following way: a) The former owner contacts BRP (at the phone number provided below) or an authorized BRP dealer and gives the coordinates of the new owner;...
-
Page 109: California And New York Emission Control Warranty
SEA-DOO DI PERSONAL WATERCRAFT. For California, your Sea-Doo 3D DI personal watercraft has a special environmen- tal label required by the California Air Resources Board. The label has 1, 2, 3 or 4 stars. A hangtag, provided with your personal watercraft, describes the meaning of the star rating system. -
Page 110: Your Emission Control Warranty Rights And Obligations
Conservation, and BRP US Inc. (“BRP”)* on behalf of Bombardier Recre- ational Products Inc. are pleased to explain the emission control system warranty on your model-year 2006 Sea-Doo personal watercraft. In the states of Califor- nia and New York, new personal watercraft engines must be designed, built and equipped to meet the States’s stringent anti-smog standards. - Page 111 Select emission control parts of your 2006 Sea-Doo 3D DI personal watercraft are warranted from the date of delivery to the first retail consumer for a period of 4 years, or for 250 hours of use, whichever occurs first. However, warranty coverage based on the hourly period is only permitted for personal watercraft equipped with the appropriate hour meters or their equivalent.
- Page 112 Emission warranty parts that are scheduled for replacement, as required main- tenance, are warranted by BRP for the period of time before the first scheduled replacement date for that part. Emission warranty parts that are scheduled for regular inspection, but not regular replacement, are warranted by BRP for the entire warranty period of the personal watercraft.
-
Page 113: Brp International Limited Warranty: 2006 Sea-Doo
All genuine BRP parts and accessories, installed by an authorized BRP distribu- tor/dealer (as hereinafter defined) at the time of delivery of the Sea-Doo personal watercraft, carry the same warranty as that of the personal watercraft. - Page 114 5. WHAT BRP WILL DO BRP’s obligations under this warranty are limited to, at its sole discretion, repair- ing parts found defective under normal use, maintenance and service, or replac- ing such parts with new genuine BRP parts without charge for parts and labor, at any authorized BRP distributor/dealer.
- Page 115 Neither the BRP distributor nor any other person has been authorized to make any affirmation, representation or warranty regarding the product, other than those contained in this limited warranty, and if made, shall not be enforceable against BRP. BRP reserves the right to modify this warranty at any time, being understood that such modification will not alter the warranty conditions applicable to the products sold while this warranty is in effect.
-
Page 116: Privacy Information
PRIVACY INFORMATION We wish to inform you that your coordinates will be used for safety and warranty purposes. Sometimes, we also use the coordinates of our clients to inform them about our products and to present them offers. Should you prefer not to receive information on our products, services and offers, please let us know by writing to the address below. - Page 117 STOLEN UNITS: If your personal watercraft is stolen, you should notify BRP or an authorized Sea-Doo dealer. We will ask you to provide your name, address, phone number, the hull identification number of your personal watercraft and the date it was stolen.
- Page 118 _____________________...
- Page 119 Please verify with your selling dealer to ensure your SEA-DOO watercraft has been registered with BRP. _____________________...
- Page 120 219 000 407 OPERATOR’S GUIDE, 3D RFI / ENGLISH GUIDE DU CONDUCTEUR, 3D RFI / ANGLAIS FAIT AU / MADE IN CANADA U/M:P.C.
Need help?
Do you have a question about the 2006 3D RFI and is the answer not in the manual?
Questions and answers