Webasto Air Top Evo 40 Installation Instructions Manual
Hide thumbs
Also See for Air Top Evo 40:
- Installation manual ,
- Service manual (63 pages) ,
- Workshop manual (59 pages)
Table of Contents
Advertisement
Advertisement
Table of Contents

Related Manuals for Webasto Air Top Evo 40


Summary of Contents for Webasto Air Top Evo 40
-
Page 1: Installation Instructions
Installation Instructions Air heaters Air Top Evo 40 | Air Top Evo 55 English... -
Page 2: Table Of Contents
10.4 Starting up system with two units Removing fuel from vehicle fuel tank 10.5 Product registration Removing fuel from separate fuel tank Troubleshooting Fuel line 11.1 Error code output Fuel pump Fuel filter Sticker Air Top Evo 40 | Air Top Evo 55... - Page 3 Technical data 12.1 Heater Annex 13.1 Drilling template: heater 13.2 Legends to the wiring diagrams 13.3 Wiring diagrams Air Top Evo 40 | Air Top Evo 55...
-
Page 4: About This Document
Warranty and liability These installation instructions are an integral part of the product Webasto shall not assume liability for defects or damage that are and contain all the information required to ensure correct and the result of the installation and operating instructions being dis- safe installation. -
Page 5: Safety
Installation of heater in ADR vehicles: Comply with ADR gui- delines. Cables damaged on sharp edges can cause short-circuits Fit protectors on sharp edges. Danger of lacerations on sharp edges Fit protectors on sharp edges. Air Top Evo 40 | Air Top Evo 55... -
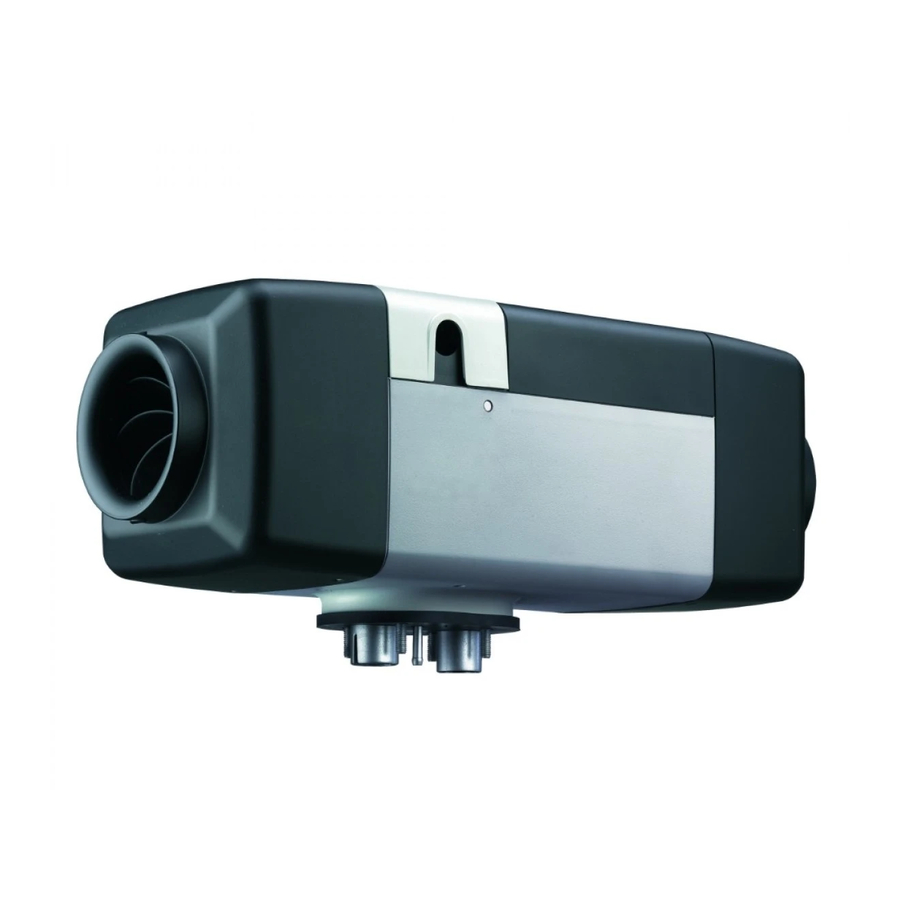
Page 6: Heater
Fig. 01: Installation example (installation conditions dependent on vehicle type) Control element Fuel pump Heater Exhaust silencer (accessory) Fuse Combustion air intake line Fuel standpipe Combustion air intake silencer (accessory) Fuel filter (accessory) 10 Maximum permissible fording level Air Top Evo 40 | Air Top Evo 55... -
Page 7: Installation Location Requirements
■ The installation location is protected from mechanical damage. ■ Persons cannot come in contact with hot surfaces. Install con- tact guard if necessary. ■ Heat-sensitive parts are protected from high temperatures. Ins- tall heat shield if necessary. Air Top Evo 40 | Air Top Evo 55... -
Page 8: Heater Dimensions
Cable outlet (optionally on right or left) Space requirements for cold air inlet Hot air outlet Space requirements for removing heater Exhaust gas outlet Heater is supported only by the base Fuel inlet Combustion air inlet Air Top Evo 40 | Air Top Evo 55... -
Page 9: Installation Position
Make sure that the installation location satisfies the require- ments. Ensure the correct installation position. Comply with vehicle manufacturer's instructions. Unevenness >1 mm: Flatten out support surface. Drill holes with the aid of the drilling template (see „13 Annex“). Air Top Evo 40 | Air Top Evo 55... -
Page 10: Cold And Hot Air System
Risk of injury by rotating fan wheel heater or the hot air from the vehicle heating sys- Lacerations tem is not drawn in directly. If no cold air duct is used: Install mesh guard over intake. Air Top Evo 40 | Air Top Evo 55... -
Page 11: External Temperature Sensor
■ The installation location is outside the range of other heat sour- ces (e.g. vehicle heating system). ■ The installation location is not in direct sunlight (e.g. not on the dashboard). ■ The air can circulate unhindered (e.g. not covered by curtains). Air Top Evo 40 | Air Top Evo 55... -
Page 12: Fuel Supply
(bar) Fuel take-off from swirl pot: – Make sure that the swirl pot is not completely emptied. Removing fuel from vehicle fuel tank The Webasto fuel extractor can be installed on the fuel delivery unit. p (bar) CAUTION Risk of fire by fuel escaping from leaking fuel... -
Page 13: Removing Fuel From Separate Fuel Tank
Make sure that the connections are tight. Minimum distance 10 mm Installing fuel lines Make sure that the intake pipe of the Webasto fuel extractor cannot impair operation of the vehicle's fuel delivery unit with Malfunctions caused by gas bubbles and high fuel fuel gauge in any operating mode. -
Page 14: Fuel Pump
Enter fuel filter in the vehicle's service booklet. Installation position of fuel filter Webasto recommends installing the fuel filter in ver- tical position. Vertical installation improves bleeding of the fuel filter. Air Top Evo 40 | Air Top Evo 55... -
Page 15: Sticker
(arrow). Sticker Fig. 14: Sticker "Switch Off Heater Before Refuelling" Affix the sticker "Switch Off Heater Before Refuelling" (included in scope of delivery) in area of fuel filler neck. Air Top Evo 40 | Air Top Evo 55... -
Page 16: Combustion Air System
Damage caused by confusing the exhaust line with the combustion air intake line Damage to fuel pump cable caused by sharp end of pipe Connect exhaust line only to the exhaust outlet coupling. Air Top Evo 40 | Air Top Evo 55... -
Page 17: Exhaust System
90° Install exhaust line continually falling from heater so that con- ±10° to the ground. densation can drain off. If exhaust line cannot be installed continually falling: Air Top Evo 40 | Air Top Evo 55... -
Page 18: Exhaust Silencer
Maintain adequate distance from heat-sensitive parts. A heat shield can be fitted. Install exhaust silencer such that condensation can drain off through the condensation drain hole in the exhaust silencer. Air Top Evo 40 | Air Top Evo 55... -
Page 19: Electrical Connection
Drill holes according to the control element installation instruc- tions. Connect plug to control element according to the labelling on the heater wiring harness. You will find further information in the installation instructions for the control element. Air Top Evo 40 | Air Top Evo 55... -
Page 20: Installation As System With Two Heaters
(see „13 Annex“). Connect the control element to the master heater. Connect the external temperature sensor to the master heater. Switch on voltage supply. Carry out initial operation procedure for both heaters. Air Top Evo 40 | Air Top Evo 55... -
Page 21: Initial Operation
10.2 Checking operation with Webasto Thermo Test PC Diagnosis Correct operation of the heater can be checked with the Webasto Thermo Test PC Diagnosis. Check heater in stable operation for approx. 15 minutes with the diagnosis monitoring function. -
Page 22: Troubleshooting
If an error occurs, the unit outputs a fault code via the control ele- ment. You will find further information in the operating ins- tructions and in the heater workshop manual. Air Top Evo 40 | Air Top Evo 55... -
Page 23: Technical Data
The standard tolerances of ±10 % for heaters shall apply if no limits are specified. The values in brackets apply for the extended heating capacity (boost function) that is activated temporarily during each start. Air Top Evo 40 | Air Top Evo 55... -
Page 24: Annex
13 Annex 13.1 Drilling template: heater Ø 7.5 Ø 29 Ø 28 Ø 7.5 Ø 7.5 Fig. 25: Drilling template: heater Air Top Evo 40 | Air Top Evo 55... -
Page 25: Legends To The Wiring Diagrams
Plug connection Wiring harness connection DP42 orange Plug connection Wiring harness connection DP42 Fuel pump DP42 black auxiliary drive / pumping device violet Solenoid valve / pump (max. 500 mA) white Air Top Evo 40 | Air Top Evo 55... - Page 26 Switch-on signal (ON/OFF) Multifunction (ventilation, boost, ECO) with control element MC02, only Boost activation for ambulance units Setpoint sensor – CO2 setting Not used Setpoint sensor + W-bus (Webasto Thermo Test PC-Diagnosis connection) Air Top Evo 40 | Air Top Evo 55...
-
Page 27: Wiring Diagrams
Air Top Evo 40 and Air Top Evo 55, 12 V/24 V with rotary selector control element and vehicle blower Fig. 26: Wiring diagram - Air Top Evo 40 and Air Top Evo 55, 12 V/24 V with rotary selector control element and vehicle blower... - Page 28 Air Top Evo 40 and Air Top Evo 55, 24 V ADR operation with rotary selector control element Fig. 27: Wiring diagram - Air Top Evo 40 and Air Top Evo 55, 24 V ADR operation with rotary selector control element...
- Page 29 0,5 mm² ge ws sw ge Fig. 28: Wiring diagram - Air Top Evo 40 and Air Top Evo 55, 12 V/24 V with Combi timer control element and electrical battery disconnector Air Top Evo 40 | Air Top Evo 55...
- Page 30 Air Top Evo 40 and Air Top Evo 55, 24 V with SmartControl / MultiControl control element Fig. 29: Wiring diagram - Air Top Evo 40 and Air Top Evo 55, 24 V with SmartControl / MultiControl control element Air Top Evo 40 | Air Top Evo 55...
- Page 31 0,5mm² X9 (b) Fig. 30: Wiring diagram - Air Top Evo 40 and Air Top Evo 55, 12 V/24 V with Multi Control (MC04) control element and vehicle blower (wiring harness: optional) Air Top Evo 40 | Air Top Evo 55...
- Page 32 Air Top Evo 40 and Air Top Evo 55, 24 V with SmartControl / MultiControl Unibox control element Fig. 31: Wiring diagram - Air Top Evo 40 and Air Top Evo 55, 24 V with SmartControl / MultiControl Unibox control element...
- Page 33 Air Top Evo 40 and Air Top Evo 55, 24 V ADR operation with SmartControl control element Fig. 32: Wiring diagram - Air Top Evo 40 and Air Top Evo 55, 24 V ADR operation with SmartControl control element Air Top Evo 40 | Air Top Evo 55...
- Page 34 0,5mm² br 0,5mm² X9(a) rt 0,5mm² sw 0,5mm² bl 0,5mm² ws 0,5mm² Fig. 33: Wiring diagram - Air Top Evo 40 and Air Top Evo 55, 12 V/24 V, "Master heater“ Air Top Evo 40 | Air Top Evo 55...
- Page 35 Air Top Evo 40 and Air Top Evo 55, 12 V/24 V, "Slave heater“ Fig. 34: Wiring diagram - Air Top Evo 40 and Air Top Evo 55, 12 V/24 V, "Slave heater“ Air Top Evo 40 | Air Top Evo 55...
- Page 36 In multilingual versions the German language is binding. The telephone number of the respective country can be obtained from the Webasto service point flyer or the homepage of your respective Webasto country representative. Webasto Thermo & Comfort SE Postfach 1410...
Need help?
Do you have a question about the Air Top Evo 40 and is the answer not in the manual?
Questions and answers