Webasto Air Top 2000 STC Installation Manual
Hide thumbs
Also See for Air Top 2000 STC:
- Workshop manual (74 pages) ,
- Installation instructions manual (43 pages)

Related Manuals for Webasto Air Top 2000 STC


Summary of Contents for Webasto Air Top 2000 STC
- Page 1 Air Top Installation Guide Air Top 2000 STC Air Top EVO 40 Air Top EVO 55 More information https://www.caravansplus.com.au...
-
Page 2: General Information
Failure to follow these installation instructions and the notes contained therein will lead to all warranty being refused by Webasto Thermo & Comfort Australia Ltd Pty . The same applies if the repairs are carried out incorrectly or with use of parts other than genuine Webasto service parts. This will result in the voiding of all warranty. All service and repairs have to be carried out by authorised Webasto service dealers. -
Page 3: Pre-Installation Considerations
Fig 1 – Serial number labels – Heater Fig 2 – Serial number label written Note: In case of warranty situations, the serial number will be requested by Webasto or an authorised dealer to validate. Air Top Installation Guide | Webasto Thermo & Comfort Australia Pty Ltd Page 3 More information https://www.caravansplus.com.au... -
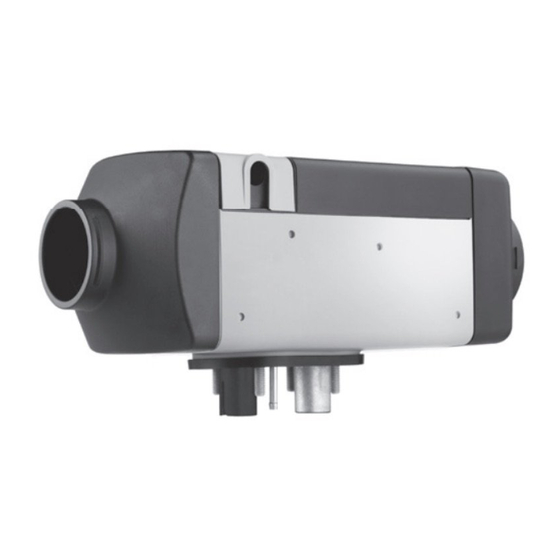
Page 4: Technical Details
C Space Requirement for Installation & Removal of Heater 4 Exhaust Gas Outlet 6 Cable Outlet (Optional Right or Left) 5 Fuel Inlet Air Top Installation Guide | Webasto Thermo & Comfort Australia Pty Ltd Page 4 More information https://www.caravansplus.com.au... -
Page 5: Technical Data
423 x 148 x 162 423 x 148 x 162 Weight (kg) 1.4 Floor Mounting Bracket 50mm Fig 5 - Floor bracket with 140mm OD diameter flange Air Top Installation Guide | Webasto Thermo & Comfort Australia Pty Ltd Page 5 More information https://www.caravansplus.com.au... - Page 6 2 black wires are for the fuel pump. Fig 8 – Bracket facing upwards and notice the wires in the combustion air inlet. Air Top Installation Guide | Webasto Thermo & Comfort Australia Pty Ltd Page 6...
- Page 7 The combustion air must be extracted using a combustion air tube supplied in the kit and protected from dust and water ingress. Air Top Installation Guide | Webasto Thermo & Comfort Australia Pty Ltd Page 7 More information https://www.caravansplus.com.au...
- Page 8 (fig 12.1). The exhaust must not point in the direction of travel. The exhaust must be secured and away from heat sensitive components, vehicle fuel lines and harnesses. Webasto can supply exhaust lagging if required Fig 12 – The exhaust or combustion pipe must be located so...
-
Page 9: Electrical System
Do not cut or extend the controller wiring harness. This will void the warranty. If an extension is required for the control element plug (Fig 13) (X9), an extension harness is available from Webasto. We only recommend extending the battery positive (red) and negative (brown) wires. Correct wire size of 6mm to be used to avoid any current or voltage drop in the circuit. - Page 10 Due to the plug location on the EVO 40 / 55 main harness, a 1.8m extension may be supplied in the kit. Fig 15 – 1.8m or 6m extension harness for controller Air Top Installation Guide | Webasto Thermo & Comfort Australia Pty Ltd Page 10...
- Page 11 Do not cut or extend the controller wiring harness. This will void the warranty. If an extension is required for the control element plug (Fig 16), an extension harness is available from Webasto. We only recommend extending the battery positive (red) and negative (brown) wires. Correct wire size of 6mm to be used to avoid any current or voltage drop in the circuit.
- Page 12 Auxiliary vehicle power outputs for any other electronic accessories are not considered adequate for the power supply for the heater. If any battery management system is used, please contact a Webasto authorised dealer to ensure correct shutdown cycle is maintained and prevent carbon build up.
-
Page 13: Fuel Systems
Fig 22 – Sample fuel system layout with Webasto 12L plastic fuel and vehicle fuel tank. For caravans, Webasto can supply a 12L plastic fuel tank with sight level gauge and a quick connect for the fuel line. With Motorhomes, fuel can be sourced out of the vehicle’s own fuel tank via a fuel pick up supplied with the kit. - Page 14 For vehicle specific installation details per refer to the vehicle manufacturer. Fig 26 – Installing fuel extracting device - Bottom Mount In case you are not able to use the stand pipe shown Fig 24 (Top mount type), Webasto can supply another option (Fig 26 bottom mount type).
- Page 15 On some motor-home vehicle chassis’ a factory auxiliary fuel pick up is supplied however does not have the extraction tube going to the bottom of the tank. Webasto can supply the correct parts & fittings (Fig 24) to suit. Ensure the fuel extraction tube is cut at 45 as shown below.
- Page 16 Webasto Air Top Installation Guide Air Top Installation Guide | Webasto Thermo & Comfort Australia Pty Ltd Page 16 More information https://www.caravansplus.com.au...
-
Page 17: Fuel Filter
4.5 Fuel Line Only Webasto supplied Fuel Line should be used for the fuel delivery to the heater. Use of any other fuel line will result in malfunction of the heater and will void warranty. To ensure correct connections, rubber hose connectors, 10 mm hose clamps and fuel line are supplied in the kit. - Page 18 Ensure that the hot air and return air outlets are at least 1m away from each other or located in different directions to avoid any short cycle. Any short cycle in the system will affect the performance of the heater. Air Top Installation Guide | Webasto Thermo & Comfort Australia Pty Ltd Page 18...
-
Page 19: Starting The Heater For The First Time
F01 - No start (after 2 attempts to start). You will need to reset the heater by following the reset procedure – see Page 20, Section 9. Air Top Installation Guide | Webasto Thermo & Comfort Australia Pty Ltd Page 19... -
Page 20: Reset Procedures
1) Whilst the controller is in the on position & code flashing, remove the fuse (15A) or disconnect power to the heater 2) Turn the dial switch to off 3) Wait for a few minutes 4) Re-install the fuse 5) Restart the heater Air Top Installation Guide | Webasto Thermo & Comfort Australia Pty Ltd Page 20 More information https://www.caravansplus.com.au... - Page 21 Select the current Time - turn the Control Knob clockwise to select Hour, press the Control Knob to confirm, then turn the Control Knob clockwise again to select the Minutes, press the Control Knob to set. Press the Control Knob Air Top Installation Guide | Webasto Thermo & Comfort Australia Pty Ltd Page 21 More information https://www.caravansplus.com.au...
- Page 22 The Control is now ready for use. Select your Heater (Note: Air Top Evo 40/55 is displayed as AT 40/55) Press the Control Knob Air Top Installation Guide | Webasto Thermo & Comfort Australia Pty Ltd Page 22 More information https://www.caravansplus.com.au...
-
Page 23: Timer Setup
Turn the Control Knob again to choose the Minutes Press the Control Knob to confirm Select the “Heating” operation mode from the Main Menu screen Air Top Installation Guide | Webasto Thermo & Comfort Australia Pty Ltd Page 23 More information https://www.caravansplus.com.au... - Page 24 Note: The altitude function must be switched off manually when it is no longer required. Air Top Installation Guide | Webasto Thermo & Comfort Australia Pty Ltd Page 24 More information https://www.caravansplus.com.au...
-
Page 25: Preventive Maintenance
Webasto Air Top Installation Guide 11 Preventive Maintenance To ensure trouble-free operation of your Webasto heater, please observe the following: 1) Operate heater for at least an hour once a month, regardless of the season 2) Keep return air inlet and hot air outlet free of obstructions to prevent overheating... - Page 26 The recommended course of action would be to turn the heater off, allow it to complete a full shut down and then restart. If the fault continues you would be best advised to contact a Webasto-authorised agent as it is possible the ECU will need replacing.
- Page 27 (refer to section 9, page 20 for more details on resetting the heater), OR contact your local Webasto agent and they can unlock your heater with the PC diagnostics. You should always be able to unlock the heater without the need for an agent to attend.
- Page 28 The recommended course of action would be to turn the heater off, allow it to complete a full shut down and then restart. If the fault continues you would be best advised to contact a Webasto-authorised agent as it is possible the ECU will need replacing.
- Page 29 Airtop units may be that the overheat sensor on the heat exchanger is faulty, and some heaters models have an independent fault code for this problem. Air Top Installation Guide | Webasto Thermo & Comfort Australia Pty Ltd Page 29...
- Page 30 Switch on the heater Remember the original fault that caused the lock-out will probably need correction prior to satisfactory operation of the heater. Air Top Installation Guide | Webasto Thermo & Comfort Australia Pty Ltd Page 30 More information https://www.caravansplus.com.au...
- Page 31 Webasto Air Top Installation Guide 12.3 Air Top 2000STC Full List of Error Codes Air Top Installation Guide | Webasto Thermo & Comfort Australia Pty Ltd Page 31 More information https://www.caravansplus.com.au...
- Page 32 Webasto Air Top Installation Guide Air Top Installation Guide | Webasto Thermo & Comfort Australia Pty Ltd Page 32 More information https://www.caravansplus.com.au...
- Page 33 Webasto Air Top Installation Guide Air Top Installation Guide | Webasto Thermo & Comfort Australia Pty Ltd Page 33 More information https://www.caravansplus.com.au...
- Page 34 Webasto Air Top Installation Guide 12.4 EVO 40 / 55 Error Code Table Air Top Installation Guide | Webasto Thermo & Comfort Australia Pty Ltd Page 34 More information https://www.caravansplus.com.au...
- Page 35 Webasto Air Top Installation Guide Air Top Installation Guide | Webasto Thermo & Comfort Australia Pty Ltd Page 35 More information https://www.caravansplus.com.au...
- Page 36 Webasto Air Top Installation Guide 12.5 Digital Multi Controller error table Air Top Installation Guide | Webasto Thermo & Comfort Australia Pty Ltd Page 36 More information https://www.caravansplus.com.au...
-
Page 37: Optional Parts
Note: The comprehensive one and two outlet kits are supplied with all necessary components required for installation, however, should additional items be required for more complex installations please use the above list or contact your nearest Webasto Authorised dealer. Air Top Installation Guide | Webasto Thermo & Comfort Australia Pty Ltd Page 37 More information https://www.caravansplus.com.au... - Page 38 Webasto Air Top Installation Guide Air Top Installation Guide | Webasto Thermo & Comfort Australia Pty Ltd Page 38 More information https://www.caravansplus.com.au...
- Page 39 Webasto Air Top Installation Guide Air Top Installation Guide | Webasto Thermo & Comfort Australia Pty Ltd Page 39 More information https://www.caravansplus.com.au...
- Page 40 Webasto Air Top Installation Guide Webasto Thermo & Comfort Australia Pty Ltd 423-427 The Boulevarde, Kirrawee NSW 2232 Australia Ph: +61 (0)2 8536 4800 svc-info@webasto.com www.webasto.com Air Top Installation Guide | Webasto Thermo & Comfort Australia Pty Ltd Page 40 More information https://www.caravansplus.com.au...
Need help?
Do you have a question about the Air Top 2000 STC and is the answer not in the manual?
Questions and answers