Table of Contents
Advertisement
Quick Links
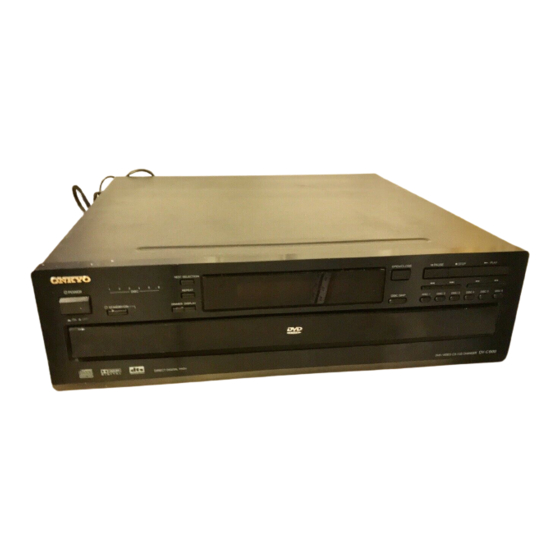
DVD Changer
DV-C600
Instruction Manual
NEXT SELECTION
1
2
3
4
5
6
POWER
DISC
REPEAT
STANDBY/ON
DIMMER DISPLAY
ON
OFF
DIRECT DIGIT AL ATH
P
THIS DVD CHANGER IS MANUFACTURED FOR
PLAYBACK OF REGION 1 (USA, CANADA) ENCODED
DVD SOFTWARE. USE OF SOFTWARE NOT INTENDED
F O R R E G I O N 1 P L AY B A C K M AY R E S U LT I N
UNDESIRABLE PLAYER PERFORMANCE.
Thank you for purchasing the ONKYO DVD Changer.
Please read this manual thoroughly before making
connections and turning on the power.
Following the instructions in this manual will enable
you to obtain optimum performance and listening
enjoyment from your new DVD Changer.
Please retain this manual for future reference.
OPEN/CLOSE
PAUSE
STOP
PLAY
DISC SKIP
DISC 1
DISC 2
DISC 3
DISC 4
DISC 5
DISC 6
DV-C600
DVD / VIDEO CD / CD CD CHANGER
Contents
Before Using Your DVD Changer
Getting Started
Connections
Basic Playback
Advanced Playback
Function Setup
Others
2
6
10
14
20
32
40
Advertisement
Table of Contents

Related Manuals for Onkyo DV-C600


Summary of Contents for Onkyo DV-C600
-
Page 1: Function Setup
F O R R E G I O N 1 P L AY B A C K M AY R E S U LT I N UNDESIRABLE PLAYER PERFORMANCE. Thank you for purchasing the ONKYO DVD Changer. Please read this manual thoroughly before making connections and turning on the power. -
Page 2: Important Safeguards
WARNING: WARNING AVIS TO REDUCE THE RISK OF FIRE OR ELECTRIC SHOCK, RISK OF ELECTRIC SHOCK RISQUE DE CHOC ELECTRIQUE DO NOT OPEN NE PAS OUVRIR DO NOT EXPOSE THIS APPLIANCE TO RAIN OR MOISTURE. The lightning flash with arrowhead symbol, within an equilateral triangle, is intended to alert the user to the presence of uninsulated CAUTION: “dangerous voltage”... - Page 3 Precautions • Reorient or relocate the receiving antenna. DANGER: • Increase the separation between the equipment and receiver. INVISIBLE LASER RADIATION WHEN OPEN AND INTER- • Connect the equipment into an outlet on a circuit different from that LOCK FAILED OR DEFEATED. AVOID DIRECT EXPOSURE to which the receiver is connected.
- Page 4 Precautions 1. Warranty Claim 8. To Obtain a Clear Picture You can find the serial number on the rear panel of this unit. In case The DVD Changer is a high technology, precision device. If the of warranty claim, please report this number. optical pick-up lens and disc drive parts are dirty or worn down, the picture quality becomes poor.
-
Page 5: Table Of Contents
Notes on Copyright ............ 9 Discs You can Use ............ 9 Connections Connecting the DV-C600 to a TV ......... 10 Connecting to an Amplifier Equipped Connecting the DV-C600 to a TV ......10 with Dolby Pro Logic Surround ........ 12... -
Page 6: Getting Started
• 5-Disc Exchange Video Features • CD Mode (DVD Skip) Control • DTS ® Compatibility means the DV-C600 can pass a DTS- • Next Selection encoded digital signal from discs with DTS soundtracks to an external processor or receiver with a DTS decoder •... -
Page 7: Supplied Accessories
Supplied Accessories After unpacking, check whether the box contains all items listed below. If anything is missing, contact the ONKYO dealer where you bought the DVD Changer. The number of accessories is indicated in brackets. Remote controller (RC-406DV) [1] Batteries for the remote controller (size AA/UB-3) [2]... -
Page 8: Preparing The Remote Controller
Using the remote controller Point the remote controller toward the remote control sensor. DV-C600 Remote control sensor Notes: • Place the unit away from strong light such as direct sunlight or inverted fluorescent light which can prevent proper operation of the remote controller. -
Page 9: Notes On The Discs You Can Use With This Unit
Notes on the Discs You Can Use with this Unit In this section, you will learn which discs can be used with your DV-C600, and how to handle, clean, and store them. Discs You can Use Cleaning Discs Your DVD Changer can play back the following discs: •... -
Page 10: Connecting The Dv-C600 To A Tv
TV’s audio input. • Be sure to establish a direct video connection between the DV-C600 and your TV set. Do not route the video signal through your VCR or other video component. Otherwise the picture may be distorted due to the DVD disc’s copy protection. -
Page 11: Connecting To An Audio System And Tv With Component Video Inputs
Your DV-C600 provides several options for audio playback: you can use the analog or one of the digital audio outputs. If your amplifier only provides analog inputs, use the DV-C600’s ANALOG OUTPUTs and select them via the on-screen menu (“Analog 2ch”). -
Page 12: Other Audio Playback Options
Other Audio Playback Options You can enjoy high-quality surround audio playback by connecting the DV-C600 to an amplifier equipped with a Dolby Digital, Dolby Pro Logic Surround, or DTS decoder. Furthermore you can transfer the signal of audio CDs to your amplifier in the digital domain if it is fitted with a digital input. -
Page 13: Connecting To An Amplifier Equipped With A Dts Decoder
Warnings • If you connect to the digital input of an amplifier that does not have a Dolby Digital decoder or DTS decoder, set the DV-C600’s “Audio Out Select” function to “PCM.” Any other setting may damage your ears or speakers when using high volume levels. -
Page 14: Playing Back Discs
Basic Playback Preparations • To view a video disc, switch on your TV set and select the video input the DV-C600 is connected to. See also pages 10, 11 for how to connect the DVD Changer to your TV set. -
Page 15: Dv-C600
The FIRST SETUP screen is only displayed the very first time 1. Stop playback of the DVD Changer. you switch on your DV-C600. This page allows you to set the 2. Press the OPEN/CLOSE button to open the disc drawer. -
Page 16: Direct Playback, Stop And Pause
Notes: Resuming Normal Playback after Fast Forward- • Do not move the DV-C600 during playback or subject it to strong ing/Reversing vibrations to avoid damaging the discs. • Use the OPEN/CLOSE button on the remote controller or DVD... -
Page 17: Slow-Motion Playback
OPEN/ OPEN/ POWER POWER CLOSE CLOSE PLAY PLAY PAUSE/STEP PLAY PAUSE/STEP DOWN SLOW DOWN SLOW STOP STOP SLOW MENU SETUP MENU SETUP ENTER ENTER TITLE TITLE RETURN RETURN AUDIO ANGLE SUBTITLE AUDIO ANGLE SUBTITLE SUBTITLE SUBTITLE ON/OFF ON/OFF RANDOM MEMORY RANDOM MEMORY ZOOM... -
Page 18: Locating Titles, Chapters, Or Tracks
Locating Titles, Chapters, or Tracks DVD video disc Title 1 Title 2 VIDEO CD/ Audio CD Chapter 1 Chapter 2 Chapter 1 Chapter 2 Chapter 3 Track 2 Track 1 Track 3 Track 4 Track 5 Normally, DVD video discs are divided into “titles”, while the titles are themselves sub-divided into “chapters”. VIDEO CDs and audio CDs are divided into “tracks”. -
Page 19: Selecting Chapters Or Tracks
Direct Selection using the Numeric Buttons Note: The DV-C600 also allows you to directly select a Chapter of a • Press the CLEAR button if you do not wish to start playback from Title (DVD video discs) or a Track (Video or audio CD). -
Page 20: Selecting A Precise Scene Or Audio Passage
Selecting a Precise Scene or OPEN/ Audio Passage POWER CLOSE PLAY PLAY PAUSE/STEP DOWN SLOW STOP MENU SETUP ENTER TITLE RETURN AUDIO ANGLE SUBTITLE SUBTITLE ON/OFF RANDOM MEMORY ZOOM CLEAR Numeric buttons REPEAT SEARCH DISPLAY SEARCH CD MODE DIMMER DISC 1 DISC 2 DISC 3 DISC... -
Page 21: Repeat Functions
Repeat Functions OPEN/ POWER CLOSE PLAY PLAY PAUSE/STEP DOWN SLOW STOP MENU SETUP ENTER TITLE RETURN AUDIO ANGLE SUBTITLE SUBTITLE ON/OFF RANDOM MEMORY CLEAR ZOOM CLEAR REPEAT REPEAT SEARCH DISPLAY CD MODE DIMMER DISC 1 DISC 2 DISC 3 DISC DISC 4 DISC 5 DISC 6... -
Page 22: Setting The Desired Playback Order
REMOTE CONTROLLER RC- 406DV Your DV-C600 comes with a special 28-step memory that allows you to program the order in which the Titles and Chapters/tracks are to be played back. Such “sequences” can include material from several discs. Programming Memory Sequences Programming the D, T and C entries The DV-C600’s Memory function allows you to program the... - Page 23 Other Memory Functions Here are a few programming examples: Chapters 25 and 12 of Title # 2 on disc #3 (two steps): Leaving the MEMORY display page To leave the MEMORY display page, press the RETURN or Disc number Title number Chapter number MEMORY button.
-
Page 24: Additional Playback Functions
4 without selecting a track. AL: means that all tracks will be played back. Tip: You can also use the DISC SKIP button on the DV-C600 to select the next disc. Select the track using the numeric buttons. -
Page 25: Using The Dvd Changer As Cd Player
Using the DVD Changer as CD player Since your DV-C600 allows you to insert up to six discs in any combination (DVD video discs, Video CDs, audio CDs), there may be times when you only want to listen to music and avoid having to press the DISC SKIP or DISC+ and DISC– buttons several times to skip to the next audio CD. -
Page 26: Random Playback
STOP MENU SETUP ENTER TITLE RETURN AUDIO ANGLE SUBTITLE The DV-C600’s Random playback functions allow you to select a mode where SUBTITLE ON/OFF RANDOM MEMORY RANDOM the DV-C600 decides which Title or Chapter/track to play next. A similar CLEAR ZOOM... -
Page 27: Dvd Video Disc Functions
DVD Video Disc Functions Zooming in Changing the Camera Angle OPEN/ POWER CLOSE OPEN/ POWER CLOSE PLAY PAUSE/STEP PLAY PAUSE/STEP DOWN STOP SLOW DOWN STOP SLOW MENU SETUP MENU SETUP / / / ENTER ENTER TITLE RETURN RETURN TITLE RETURN 1, 4 AUDIO ANGLE... -
Page 28: Audio Playback Settings
DV-C600 automatically converts the audio data to an acceptable format for your amplifier. The DV-C600 accepts the Dolby Digital, DTS, and PCM recording systems. Other systems cannot be played back. See also the conversion table below for details about the available options. - Page 29 • The Audio settings are not saved internally. When you switch off the DVD Changer or open the disc tray, the DV-C600 returns to the default setting. See page 34. • When you select an option that is not available on the selected DVD video disc, the DV-C600 ignores your setting and goes on using the previously selected language, etc.
-
Page 30: Using The Subtitle Feature
• The Subtitle settings are not saved internally. When you switch off the DVD Changer or open the disc tray, the DV-C600 returns to the default settings. See page 34. • When you select an option that is not available on the selected DVD video disc, the DV-C600 ignores your setting and goes on using the previously selected language, etc. -
Page 31: Using The On-Screen Display Functions
DISC 4 DISC 5 DISC 6 NEXT SELECTION CDs, please remember to connect the DV-C600 to your TV set (see REMOTE CONTROLLER RC- 406DV pages 10 and 11) and to switch it on. Please note that the information provided on screen is only for refer- ence purposes and cannot be changed. -
Page 32: Advanced Settings
CD MODE DIMMER DISC 1 DISC 2 DISC 3 DISC The DV-C600 contains a lot more functions than have been covered so DISC 4 DISC 5 DISC 6 NEXT SELECTION far. Most of these functions can only be accessed via the on-screen... - Page 33 Setting Details Page On-Screen Language Allows you to select the language of the on-screen displays. Disc Menu Language Allows you to select the language to be used by the disc menus (menus included on the discs you are playing back). Audio Language Allows you to select the sound track language.
-
Page 34: Language Functions
Advanced Settings (continued) LANGUAGE On-Screen Language Disc Menu Language Audio Language Subtitle Language LANGUAGE Functions On-Screen Language Audio Language This function allows you to select the language for the on- If the DVD video disc you are playing back contains multilin- screen displays. -
Page 35: Picture Settings
PICTURE TV Shape 4:3LB Black Level Nrml PICTURE Settings Subtitle Language TV Shape This is where you can specify the shape of your TV screen. Use this function to select the subtitle language, or to switch the subtitles off altogether. This is important for determining whether you would like to see the whole picture, or a slightly bigger version. -
Page 36: Audio Settings
Always select the setting that best matches probably don’t need for Karaoke applications. That is why the your amplifier’s capabilities and input connectors. The DV-C600 allows you to switch the lead vocal off. “Bitstream” and “PCM” options refer to the DV-C600’s digital Off: The lead vocal track is muted. -
Page 37: Display Settings
OPERATION DISPLAY Auto On-Screen Displays Pause/Still Parental Lock OSD Background Color Gray Title Stop Extended Subtitle Features Screen Saver OPERATION Settings DISPLAY Settings On-Screen Displays Pause/Still This function allows you to obtain an even better quality for This function allows you to activate or suppress the display of still pictures. - Page 38 It is now impossible to play back DVD video discs rated higher than the selected level. For example, when you select level 7 The DV-C600 stops after playback of a title is com- (“Viewable”), discs rated higher than level 7 are locked out pleted.
-
Page 39: Table Of Languages
Table of Languages Table of Languages and Their Abbreviations Abbreviation Abbreviation Abbreviation Abbreviation of the Language of the Language of the Language of the Language Language Language Language Language ––– No alternate Esperanto Lingala Slovenian language Estonian Laotian Samoan CHI (ZH) Chinese Basque Lithuanian... -
Page 40: Troubleshooting
Troubleshooting If your DV-C600 does not seem to work as expected, check the following table for the possible cause before contacting your ONKYO dealer or service. Symptoms and Corrections Symptom Cause Correction Page No power. • Insert the power plug firmly. -
Page 41: Identification Of Controls
• Remote controller operation is not possible when only the remote controller cable is connected — the audio jacks must also be connected. • One remote controller cable equipped with a 1/8" (3.5mm) diameter miniature two-conductor phone plug is included with the DV-C600 and with every ONKYO tuner, compact disc player or cassette tape deck with the... -
Page 42: Dvd Display
Identification of Controls (continued) DVD Display • Pressing of the DIMMER button changes the brightness of the Display. DISC number indicator Normal Dimmed TITLE, TR number indicator Chapter number indicator Total playing time/remaining time/ Operating status Memory indictors indicator Angle icon indicator DVD indicator REPEAT indicator CD/VCD indicator... -
Page 43: Remote Controller
Most steps in this manual need to be performed using the supplied remote controller. That is why the functions of the remote controller’s buttons are explained in the relative chapters and sections. See the pages in [ ] for details. Remote Controller STOP button [16, 17, 38] UP button [19]... -
Page 44: Specifications
Audio output (analog audio) • Design and specifications are subject to change without notice. Sales & Product Planning Div. : 2-1, Nisshin-cho, Neyagawa-shi, OSAKA 572-8540, JAPAN Tel: 072-831-8111 Fax: 072-833-5222 http://www.onkyo-intl.com ONKYO U.S.A. CORPORATION 18 Park Way, Upper Saddle River, N.J. 07458, U.S.A.
Need help?
Do you have a question about the DV-C600 and is the answer not in the manual?
Questions and answers
After watching several DVD's, the player stopped playing.