Table of Contents
Advertisement
Advertisement
Table of Contents

Subscribe to Our Youtube Channel
Related Manuals for Wincor Nixdorf TA61-2


Summary of Contents for Wincor Nixdorf TA61-2
- Page 1 TA61-2 POS Keyboard User Guide...
- Page 2 Please send us a copy of this page if you have any constructive criticism. We would like to thank you in advance for your comments. With kind regards. Your opinion: Wincor Nixdorf International GmbH Dokumentation RD PD1 Rohrdamm 7 Haus 16 D-13629 Berlin E-Mail: retail.documentation@wincor-nixdorf.com...
- Page 3 Published by Wincor Nixdorf International GmbH D-33094 Paderborn Order No. 01750170065A...
- Page 4 TA61-2 POS Keyboard User Guide Edition February 2009...
- Page 5 All brand and pro duct na mes men tio ned in this do cu ment are tra de marks of their re spec ti ve owners. Co py right© Win cor Nix dorf In ter na tio nal GmbH, 2009 The re pro duc ti on, trans mis si on or use of this do cu ment or its con tents is not per mit ted wit hout ex press aut ho ri ty.
-
Page 6: Table Of Contents
In ser ting Key Caps ......7 The TA61-2 Key bo ard ....8 Ge ne ral . -
Page 7: Manufacturer's Declaration And Approval
GENERAL AUTHORIZATION Manufacturer’s Declaration and Approval General Authorization This de vi ce com plies with the re qui re ments of the di rec ti - ve 2004/108/EC with re gard to “Elec tro mag ne tic Com pa ti - bi li ty”... -
Page 8: Safety Instructions
Do not allow dust to get in through the open keyboard mechanics. Warranty Wincor Nixdorf guarantees generally a warranty engagement for 12 months beginning with the date of delivery. This warranty engagement covers all those damages which occur despite a normal use of the product. -
Page 9: About This Manual
All parts of the product which are subject to wear and tear are not included in the warranty engagement. Please order spare parts at the Wincor Nixdorf customer service. About this Manual This ma nu al in forms you about ever ything you might need to know for the in stal la ti on (soft wa re and hard wa re), the ope ra ti on and the main ten an ce of your TA61-2. - Page 10 Accessories kit 3: 12 single key caps Depending on your order, the keyboard may have a swipecard reader. If damage has occurred during shipping or if the package contents do not match the delivery note, promptly notify your Wincor Nixdorf sales outlet.
-
Page 11: Mounting Keys
EXCHANGING THE KEYS AND KEY LABELS Mounting Keys Exchanging the Keys and Key Labels You can remove each of the key caps using the key removal device enclosed, pulling the key upwards. Place the key removal device on the selected key until you hear a click. Now remove this key from the keyboard by pulling upwards. -
Page 12: Inserting Key Labels
INSERTING KEY LABELS If the key that has been removed has a number or character on it, you can change the lettering as follows: Using a thin object (e.g. paper-clip etc.), press upwards against the plastic cover through the opening on the underside of the key. -
Page 13: Inserting Key Caps
INSERTING KEY CAPS The labels are replaced as follows: Re mo ve the key cap from the key bo ard (see re mo ving the key cap) and pull the trans pa rent key cap up wards. The trans pa rent key co ver is then re lea sed and the la bel can be re mo - ved. -
Page 14: The Ta61-2 Keyboard
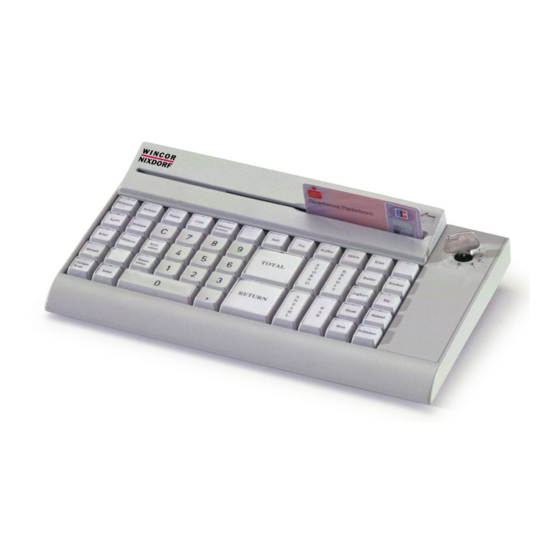
The TA61-2 keyboard is equipped with a key switch with 6 switch positions and is available with or without a swipecard reader. A power-up reset and an automatic self-test are performed each time the POS terminal is switched on. -
Page 15: Keypad
TA61-2 key bo ard without swi pe card rea der Keypad In the TA61-2 keypad, two keys can be replaced by a double key and four keys to form a quadruple key, either horizontally or vertically. Only one key code is generated by each double or quadruple key. Different key codes can be set for the multiple keys by rotating the key caps. -
Page 16: Key Switch
Note: For a better differentiation with the TA61 and the TA61-1, the TA61-2 has a grey key switch and a different key design! Keys for the TA61 and TA61-1. -
Page 17: Swipecard Reader (Optional)
In order to ensure that the quality of reading results is maintained, clean the swipecard reader at least once a week. To do this, use the special cleaning card that can be ordered from Wincor Nixdorf. Connection Method The connector for the keyboard is a standard 6-pin mini-DIN connector. -
Page 18: Re Lea Sing The Ca Ble Con Nec Ti On
SELF-TEST Re lea sing the Ca ble Con nec ti on Never remove a cable from a connector socket by simply pulling on the cable. Always remove the cable by the connector housing. Please follow the instructions below when removing cables: Switch off your POS sys tem. -
Page 19: Appendix
TECHNICAL DATA Appendix Technical Data footprint: 280mm * 172mm Housing dimensions height: 49mm Standard: 1.0 m Cable length Optional: 2.0 m Power Supply 5V +/- 10%, 30 mA typical Protocol PC-AT interface, bidirectional, seriel, synchronous Connection Mini- DIN- connector (6-pin) Keyboard with variable key assignment (1, 2, 3, 4), Keyboard two key rollover... -
Page 20: Keyboard Layout
KEYBOARD LAYOUT Keyboard Layout 7 8 9 1 2 3 La bel led key, sing le (fit ted at the fac to ry) Key with ins crip ti on (nu me ric key pad) Free ly as sig na ble...
Need help?
Do you have a question about the TA61-2 and is the answer not in the manual?
Questions and answers