Table of Contents
Advertisement
Quick Links
Advertisement
Table of Contents

Related Manuals for Ironton 45981


Summary of Contents for Ironton 45981
- Page 1 35-PC. ROTARY TOOL KIT OWNER’S MANUAL WARNING: Read carefully and understand all ASSEMBLY AND OPERATION INSTRUCTIONS before operating. Failure to follow the safety rules and other basic safety precautions may result in serious personal injury. Item# 45981...
-
Page 2: Intended Use
Thank you very much for choosing an Ironton product! For future reference, please complete the owner’s record below: Model: _______________ Purchase Date: _______________ Save the receipt, warranty and these instructions. It is important that you read the entire manual to become familiar with this product before you begin using it. -
Page 3: Work Area Safety
SAVE THESE INSTRUCTIONS WORK AREA SAFETY • Keep work area clean, free of clutter and well lit. Cluttered and dark work areas can cause accidents. • Do not use your tool where there is a risk of causing a fire or an explosion; e.g. in the presence of flammable liquids, gasses, or dust. -
Page 4: Personal Safety
CHART FOR MINIMUM WIRE SIZE OF EXTENSION CORD: Nameplate AMPS CORD LENGTH 25’ 50’ 100’ 150’ 18 AWG 16 AWG 16 AWG 14 AWG 6-10 18 AWG 16 AWG 14 AWG 12 AWG 10-12 16 AWG 16 AWG 14 AWG 12 AWG 12-16 14 AWG... -
Page 5: Operation
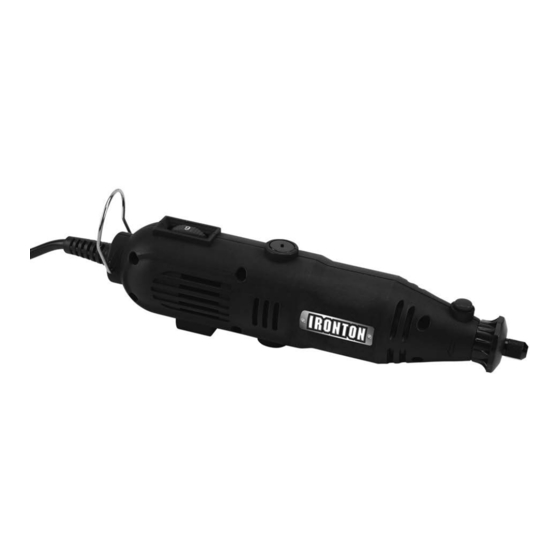
OPERATION: Spring chuck Securing ring Spindle lock Carbon brush cap Speed dial On/Off switch Manual stand OPERATING INSTRUCTIONS Fitting the accessories to the tool (Figure 1) 1. Switch off the tool and disconnect from the main power supply before fitting accessories. 2. - Page 6 Assembling abrasive discs and grinding stones to accessory shaft 1 (Figure 2) 1. Mount the selected disc onto the accessory shaft 1 as illustrated. Ensure the two washers are correctly placed. 2. Do not over-tighten the screw. Assembling abrasive bands to accessory shaft 2 (Figure 3) 1.
-
Page 7: Maintenance
Avoiding Motor Damage: If you are running the tool continuously at low speed, it’s important to occasionally take the tool off load. Running the tool off load at full speed for approximately one minute creates a cooling airflow for the motor. MAINTENANCE •... - Page 8 Part list Part# Description Part# Description Collet nut Speed control switch Collet Screw Base Screw Bearing Right body Rotor Spindle lock button Stator Spring piece Carbon brush Left body Cap body Switch Cord sleeve Trimming circuit board Cord Lock board Plug For replacement parts and technical questions, please call 1-800-222-5381.
- Page 9 WARNING Some dust created by power sanding, sawing, grinding, drilling, and other construction activities contains chemicals known to the State of California to cause cancer, birth defects or other reproductive harm. Some examples of these chemicals are: • lead from lead-based paints, •...
Need help?
Do you have a question about the 45981 and is the answer not in the manual?
Questions and answers