Table of Contents
Advertisement
Quick Links
Download this manual
See also:
Instruction Manual
™
ASSEMBLY INSTRUCTIONS
90-Day Limited Warranty
If you, as the original owner of this model, discover defects in parts or workmanship within 90 days of purchase, Hobbico will repair or replace it – at the option of
our authorized U.S. repair facility, Hobby Services – without charge. Our liability does not include cost of shipping to us. However, Hobby Services will pay
shipping expenses to return your model to you. You must provide proof of purchase, such as your original purchase invoice or receipt, for your model's warranty
to be honored. This warranty does not apply to damage or defects caused by misuse or improper assembly, service or shipment. Modifications, alterations or
repair by anyone other than Hobby Services voids this warranty. We are sorry, but we cannot be responsible for crash damage and/or resulting loss of kits,
engines, accessories, etc.
Repair Service
Your Twinstar must be returned directly to Hobby Services for warranty work. The address is: Hobby Services, Attn: Service Department, 1610 Interstate
Drive, Champaign, IL 61821-1067 Phone: (217) 398-0007. Please follow the instructions below when returning your model. This will help our experienced
technicians to repair and return it as quickly as possible.
1. ALWAYS return your entire system, including airplane and radio.
2. Disconnect the receiver battery switch harness and make sure that the transmitter is turned off. Disconnect all batteries and drain all fuel.
3. Include a list of all items returned and a THOROUGH, written explanation of the problem and service needed. If you expect the repair to be covered under
warranty, also include your proof of purchase.
4. Include your full return address and a phone number where you can be reached during the day.
If your model is past the 90-day warranty period or is excluded from warranty coverage, you can still receive repair service through Hobby Services at a
nominal cost. Repair charges and postage may be prepaid or billed COD. Additional postage charges will be applied for non-warranty returns. All repairs
shipped outside the United States must be prepaid in U.S. funds only. All pictures, descriptions and specifications found in this instruction manual and on the
product package are subject to change without notice. Hobbico maintains no responsibility for inadvertent errors.
© Copyright 1997
HCAZ3091 for HCAA2075 V 1.0
Advertisement
Table of Contents

Related Manuals for Hobbico TWINSTAR


Summary of Contents for Hobbico TWINSTAR
-
Page 1: Assembly Instructions
90-Day Limited Warranty If you, as the original owner of this model, discover defects in parts or workmanship within 90 days of purchase, Hobbico will repair or replace it – at the option of our authorized U.S. repair facility, Hobby Services – without charge. Our liability does not include cost of shipping to us. However, Hobby Services will pay shipping expenses to return your model to you. -
Page 2: Table Of Contents
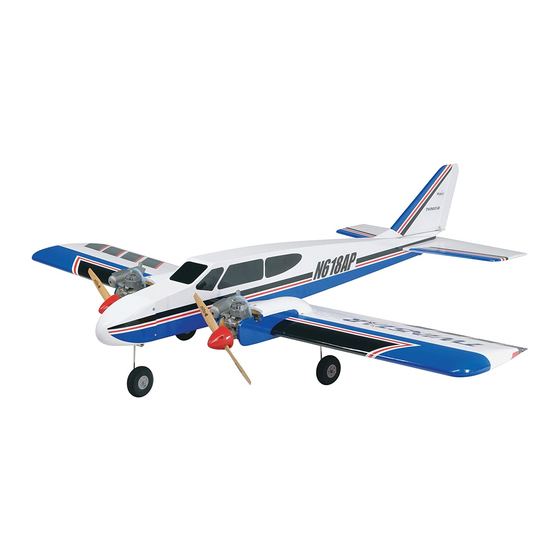
Part # Quantity created for you and other experienced radio control Stabilizer and Elevator ....1 modelers, Hobbico’s Twinstar offers nearly all the 16 Rudder and Fin......1 excitement of piloting a real airplane...and develops skills 28 *Clevises ........5 that will take you anywhere you want in your hobby. - Page 3 Plastic Parts Tree Fuel Tank & Parts Engine Mounting Parts • Parts Shown Below Part # Quantity Part # Quantity 11 Engine Mount ........2 19 Fuel Tank ...........2 36 Pushrods ..........2 20 Rubber Tank Stopper......2 37 Pushrod Wire ........2 21 Fuel Pick-up Weight (Clunk) ....2 65 Pushrod Tubes ........2 22 Plastic Stopper Compression Disks (One Large and One Small) ....4...
-
Page 4: Radio Equipment
Getting Ready for Flight 1. While building your Twinstar, make sure to follow the instructions. Do not alter or modify the model, as doing so may result in an unsafe or unflyable model. In a few cases the instructions differ slightly from the photos. In those instances the instructions are correct. -
Page 5: Before You Fly
Protect Your Model, Yourself & Others... Follow This Important Safety Precaution You may also want to contact the our Hobbico Twinstar is not a toy, but Academy of Model Aeronautics (AMA), rather a sophisticated, working model that which has more than 2,500 chartered functions very much like an actual airplane. - Page 6 Special Note: Remove the Excess Epoxy: You should charge your radio system before starting to build. Following the manufacturer’s directions, connect your transmitter and receiver batteries to the system’s charger. This way the radio will be ready when it is time to install the radio components.
- Page 7 Even the Edges: with the fit, use 6-minute epoxy to attach the rib to the wing. Use masking tape to hold the rib securely to the wing until the epoxy has fully cured. Mark the Wing Joiner Pocket: 6. Using a flat sanding block or similar tool, lightly sand the wing roots to remove any irregularities.
- Page 8 drawn for the opening. Measure down 1" (26mm) from Lightly sand the leading edge flush with the ribs on both the top of the wing at the front and rear edges of the sides of the nacelle opening. Sand the wing sheeting at servo opening.
- Page 9 nacelle to the wing. Use masking tape to hold the trim the wing sheeting forward to the wing spar, being nacelle in position until the epoxy has fully cured. (The careful not to cut into the spar itself. Holding the servo photo shows the installation of the right nacelle.) tray in position, trace the outside edges of the tray.
- Page 10 Sand the Joiner: Apply Epoxy to the Wing Root: 2. If the wing joiner will not fit in the pocket, lightly 4. Mix 3/4 oz. (25ml) of 30-minute epoxy and apply sand any excess epoxy and uneven surfaces from the an even coat to the wing root ribs of both panels.
- Page 11 Prepare for the Aileron Servo Tray: Prepare the Wing Bolt Plate: 6. Position the aileron servo tray so it is centered over 9. Lay the wing bolt plate on a table with the punch the opening made in the wing. Using a felt-tip marker, marks facing upwards.
- Page 12 Prepare and Assemble the Wing Hold-Down Plate: Aligning the Wing: 1. Locate and separate the three 1/8" (3mm) plywood 3. Position the wing on the fuselage with the wing hold-down plates from each other using a razor centerline of the wing along the centerline of the saw or hobby knife.
- Page 13 Install the Blind Nuts: Install the Elevator and Rudder Locate the Stabilizer Slot: 6. Slide a 4mm washer onto one of the 4mm wing bolts. Slide the bolt through the wing hold-down plate. Thread a 4mm blind nut with the “pronged” side up 1.
- Page 14 into position. Remove any excess epoxy from the Align the Stabilizer with the Wing: fuselage sides and the exposed portion of the stabilizer mount using a paper towel dampened with rubbing alcohol. Use masking tape to hold the plate securely in position.
- Page 15 Mark the Stab Location: Locate the Vertical Fin Slot: 8. Using a felt-tip pen, trace a line around the tail of 11. Using your finger, locate the vertical fin slot on the fuselage on the top and bottom of the stabilizer. Be the top of the fuselage.
-
Page 16: Main Landing Gear
slot, making sure the fin base is seated firmly on the Install the Landing Gear horizontal stabilizer. Check for a perpendicular angle between the fin and the horizontal stabilizer when Locate the Main Gear Channel: viewing from the rear. Check this alignment several times as the epoxy cures. -
Page 17: Nose Gear
6. Make a “Z” bend at one end of a 17-3/4" x 1/16" (1.5mm x 450mm) pushrod wire. Note: Hobbico offers pliers that easily make perfect “Z” bends (HCAR2000). Drill the Steering Pushrod Exit Hole: Install the Nose Gear Strut: 4. -
Page 18: Wheels
Install the Main Wheels: Fuel Tank Installation Assemble the Fuel Tank Plugs: 8. Trim the two remaining 5/52" x 3/8" (4mm x 9.5mm) nylon wheel spacers from the nylon parts tree. Slide the spacers onto the main gear struts. Next, slide 1. - Page 19 Install the Clunk: Now would probably be the best time to fuelproof the engine and fuel tank compartments. Use your favorite method for this process. We recommend using 30-minute epoxy thinned with isopropyl alcohol, then just brush the mixture onto the surface you want to fuelproof. It is necessary to remove the engine mounts to fully fuelproof the firewall.
- Page 20 the sides and rear of the tank to prevent fuel foaming Drill the Mounting Holes: 2. Remove the engine from the mount and drill four caused by engine vibration. Do not glue the tube at the 3/32" (2.5mm) holes at the marks you just made. Make rear former.
- Page 21 use a prop reamer for this procedure. Install the spinner Install the Engines backplate, propeller, propeller washer and propeller nut onto the engine. Position the propeller so it is horizontal when the engine is against compression (the point at which resistance is felt as the engine is rotated counter- clockwise).
- Page 22 against both the former at the rear and the tray support Connect the Rudder and Elevator Servos: at the front. Sand the tray if necessary to provide a snug 4. Following the manufacturer’s recommendations, fit of the tray into the fuselage. Once satisfied with the connect the rudder and elevator servos to the receiver.
-
Page 23: Rudder And Fin
Secure the Steering Pushrod Tube: Position the Rudder Control Horn: 7. Using the scrap plywood from the servo tray, install a brace for the steering pushrod tube. Use medium CA to attach the brace to the fuselage side. Medium CA is also used to attach the tube to the brace. -
Page 24: Clevises
Install the Rudder Pushrod: horn as the attachment point. Enlarge the opening slightly, if needed, to prevent binding. Mark the Rudder Pushrod: 12. Insert the pushrod, threaded end first, into the fuselage. Pass the pushrod out through the exit. 15. After checking to make sure the servo arm is Install the Clevis: centered, check that the rudder is aligned with the fin. - Page 25 in the servo arm located at the 1/2" (13mm) position Install the Elevator Pushrod: using a 5/64" (2mm) drill bit. Pass the wire through the hole in the arm. (The arm may need to be removed from the servo to install the wire.) Use a nylon pushrod connector from the nylon parts tree to secure the wire to the horn.
-
Page 26: Plastic
the servo wire to pass through. Test fit the aileron servo Connect the Aileron Pushrods: into the tray with the output of the servo facing the trailing edge of the wing. Secure the aileron servo to the tray. Install the Torque Rod Horns: 25. -
Page 27: Pushrod Tubes
Install the Throttle Pushrod Wires: at this time. Once you are satisfied with the operation of the first installation, repeat this set-up for the other linkage. Some hints about using a computer radio: When using a computer radio for throttle operation you will need a radio that allows mixing of one channel to another. -
Page 28: Fuselage
brace. Test fit the braces in position, starting with the Route the Antenna Wire: vertical braces. The vertical braces should have a downward angle when installed. Once the braces are fitted, use medium CA to glue the braces into position. Install the Nose Cone: 5. - Page 29 If any of the servo movements are opposite, reverse the servo direction with the servo reversing switches on the transmitter. 2. Check the movement of the control surfaces. Use a ruler to match our measurements listed below. If your radio features dual rates, set up both the high and low rates following the radio system’s instructions.
- Page 30 Now that you have the airframe nearly completed, this your area and join. Club fields are set up for R/C flying is a good time to balance the airplane laterally (side-to- and that makes your outing safer and more enjoyable. side).
- Page 31 Use safety glasses when starting or running engines. high throttle. With the Twinstar it is less important that the engines are running at exactly the same RPM. For Do not run the engine in an area of loose gravel or sand,...
- Page 32 You will find with a little bit of power you The Twinstar flies just like any other sport airplane you can drag the Twinstar all the way across the field in a may have flown with the exception that it has a sound nose high attitude.
- Page 33 Communications Commission (FCC). control surface. Curved to match control motions, the ruler provides exact readings in both standard or metric Good luck and have fun flying your Twinstar, but measurements. GPMR2405 always stay in control and fly in a safe manner.
- Page 34 BUILDING NOTES Kit Purchased Date Date Construction Finished Where Purchased Finished Weight Date Construction Started Date of First Flight FLIGHT LOG...
- Page 35 APPENDIX bit? If so, you need some down thrust, or nose weight. When the thrust is correct, the model should continue along the same flight path for at least FLIGHT TRIMMING a dozen plane lengths before gravity starts to naturally bring it down. Note: The following article has been reprinted in part for future Do each maneuver several times, to make sure that you are getting a reference and also as a guide for your flight instructor or experienced...
- Page 36 TRIM FEATURE MANEUVERS OBSERVATIONS CORRECTIONS CONTROL Fly general circles and Try for hands off straight and Readjust linkages so that CENTERING random maneuvers. level flight. Tx trims are centered. If A, change linkages to CONTROL Random maneuvers A. Too sensitive, jerky THROWS controls.
Need help?
Do you have a question about the TWINSTAR and is the answer not in the manual?
Questions and answers