Table of Contents
Advertisement
Available languages
Available languages
Quick Links
PHONES
(044) 360-7-130
(050) 336-0-130
(063) 788-0-130
(067) 233-0-130
(068) 282-0-130
CAR RECEIVERS — Receivers • Media receivers and stations • Native receivers • CD/DVD changers • FM-modulators/USB adapters • Flash memory • Facia plates and adapters • Antennas • Accessories |
CAR AUDIO — Car audio speakers • Amplifiers • Subwoofers • Processors • Crossovers • Headphones • Accessories | TRIP COMPUTERS — Universal computers • Model computers • Accessories |
GPS NAVIGATORS — Portable GPS • Built-in GPS • GPS modules • GPS trackers • Antennas for GPS navigators • Accessories | VIDEO — DVR • TV sets and monitors • Car TV tuners • Cameras • Videomodules
• Transcoders • Car TV antennas • Accessories | SECURITY SYSTEMS — Car alarms • Bike alarms • Mechanical blockers • Immobilizers • Sensors • Accessories | OPTIC AND LIGHT — Xenon • Bixenon • Lamps
• LED • Stroboscopes • Optic and Headlights • Washers • Light, rain sensors • Accessories | PARKTRONICS AND MIRRORS — Rear parktronics • Front parktronics • Combined parktronics • Rear-view mirrors
• Accessories | HEATING AND COOLING — Seat heaters • Mirrors heaters • Screen-wipers heaters • Engine heaters • Auto-refrigerators • Air conditioning units • Accessories | TUNING — Vibro-isolation
• Noise-isolation • Tint films • Accessories | ACCESSORIES — Radar-detectors • Handsfree, Bluetooth • Windowlifters • Compressors • Beeps, loudspeakers • Measuring instruments • Cleaners • Carsits
• Miscellaneous | MOUNTING — Installation kits • Upholstery • Grilles • Tubes • Cable and wire • Tools • Miscellaneous | POWER — Batteries • Converters • Start-charging equipment • Capacitors
• Accessories | MARINE AUDIO AND ELECTRONICS — Marine receivers • Marine audio speakers • Marine subwoofers • Marine amplifiers • Accessories | CAR CARE PRODUCTS — Additives • Washer fluid •
Care accessories • Car polish • Flavors • Adhesives and sealants | LIQUID AND OIL — Motor oil • Transmission oil • Brake fluid • Antifreeze • Technical lubricant
In store "130" you can find and buy almost all necessary goods for your auto in
Kyiv and other cities, delivery by ground and postal services. Our experienced
consultants will provide you with exhaustive information and help you to chose
the very particular thing. We are waiting for you at the address
http://130.com.ua
Internet store of
autogoods
ICQ
294-0-130
597-0-130
SKYPE
km-130
Advertisement
Chapters
Table of Contents

Related Manuals for Pioneer NavGate HUD SPX-HUD01


Summary of Contents for Pioneer NavGate HUD SPX-HUD01
- Page 1 Internet store of PHONES (044) 360-7-130 294-0-130 autogoods (050) 336-0-130 597-0-130 (063) 788-0-130 SKYPE (067) 233-0-130 km-130 (068) 282-0-130 CAR RECEIVERS — Receivers • Media receivers and stations • Native receivers • CD/DVD changers • FM-modulators/USB adapters • Flash memory • Facia plates and adapters • Antennas • Accessories | CAR AUDIO —...
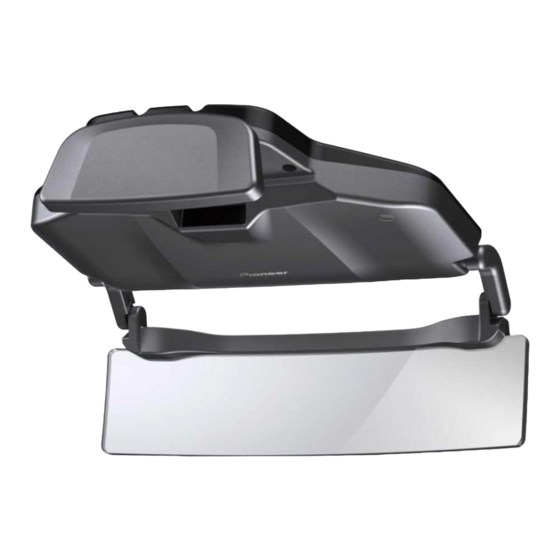
- Page 2 SPX-HUD01 Installation and Quick Start Guide NavGate HUD Manuel d’installation et de démarrage rapide Guida rapida all’avvio e di installazione Guía de instalación e iniciación rápida Installations- und Kurzanleitung Installatie- en Snelstartgids Руководство по установке и быстрому запуску Autogood products «130»...
-
Page 3: Table Of Contents
Software updates – Position Visit our website (Symbol for equipment) – Zoom Saved customer data Thank you for purchasing this PIONEER – Rotation Notes on this unit product – Aspect Ratio To ensure proper use, please read through this – Geometric Correction Parts supplied manual before using this product. -
Page 4: Connection And Installation
Section Precautions Precautions ! Secure the unit to sun visor with a fall pre- These symbols on the products, packaging, When installing the unit to a vehicle Installation, wiring, and disinstallation of the and/or accompanying documents mean that equipped with airbags, ask the vehicle manu- unit require special skills and experience. -
Page 5: About This Unit
PIONEER Service Station. Do not use the erating the menus of this unit. (positive and negative) specified in this man-... -
Page 6: If You Experience Problems
! If you experience tiredness or discomfort be connected to this unit. or the nearest authorised PIONEER Service Sta- ! Do not operate this unit whilst driving. It will whilst using this unit, stop use immediately tion. -
Page 7: Important Safety Information
Important safety information ! The taillight of the vehicle in front may be re- ! Some SD memory cards may not be recog- ! Pioneer accepts no liability for any data loss Precautions for operation at flected on the combiner. -
Page 8: Copyrights
Pioneer or of the third parties have granted being performed. Retain a list of important rights to Pioneer to the use of such data or pro- contents. Pioneer accepts no liability for grammes under copyright. You shall not copy,... -
Page 9: Parts Supplied
Section Parts supplied Before connection ! Do not tie the aerials together, stack them, or Head-up display unit: Precautions for connection cross them over each other. Noise received by the aerial and aerial cable CAUTION reduces reception sensitivity. ! Do not take accessory power from the CAN Bus interface, etc. -
Page 10: Precautions For Installation
Section Precautions for installation Connections Connection diagram WARNING CAUTION ! Secure the unit to sun visor with a fall pre- ! When installing the unit to a vehicle vention belt. equipped with airbags, ask the vehicle manu- Failure to do so may cause the unit to fall, facturer for precautions for the installation causing an accident and injury. -
Page 11: Seting The Size Of The Cigarette Plug
Section Connections Installation position Notes When replacing cigarette Precautions for installing unit ! The LED indicator on the cigarette plug lights plug fuse when the power is on, and turns off when the WARNING unit is turned off. Turn the plug counterclockwise to loosen ! Use the supplied screws and install the unit If the LED indicator does not turn off when as specified. -
Page 12: Engb
Section Preparation for installing the unit Preparation for installing the unit Align the screw holes on the sun visor Sun Visor Thick- Sun visor thickness ad- CAUTION thickness adjustment plate with those on ness justment plate Do not install the unit to an unstable or defective the mounting bracket, and tighten the re- sun visor. -
Page 13: Installing Main Unit
Section Installing Main Unit Installing Main Unit 2 22 mm Align the HUD lock lever to the lock-re- 3 24 mm lease position. 4 26 mm Pull the HUD lock lever, and slide it to the lock- release position. Mount the mounting bracket to the sun visor. - Page 14 Section Installing Main Unit Installing Main Unit 2 Align the bosses with the groove. 10 Mount the mounting bracket of which Hold the left and right ends of lock plates on the thickness was adjusted to the main unit. Main unit back: mounting bracket, and mount the unit to the Check that the diffuser and combiner of the sun visor by pushing the mounting bracket all...
- Page 15 Section Installing Main Unit Installing Main Unit Pass the fall prevention belt through as shown in the illustration. Left Right Left Right Tilt the sun visor vertically about 20 degrees and firmly tighten the two mounting screws at the back of the main unit that were loosened in step Pull the fall prevention belt downward and se- 17 Push the sun visor up to the horizontal cure it as it is pulled downward.
- Page 16 Section Installing Main Unit Installing Main Unit ! Align the HUD lock lever to the lock-release ! Adjust the power cable so that it will not ob- position before mounting the unit to the sun struct the driver’s vision. ! Route the cable so that it will not interfere visor.
-
Page 17: After Installation
Section Installing Main Unit Installing Main Unit ! When removing the unit from the sun visor 29 Remove the combiner protection sheet. Check that the power cable is connected and and storing it, be sure to close the diffuser routed correctly, and then remove the combiner and combiner. -
Page 18: Setting Your Iphone Or Android Device
For more details on navigation application, refer ! Use a USB-microUSB data communication to the following site. cable of 1 m or less. A charge cable cannot http://www.pioneer.eu/navgatehud be used. Starting the navigation Connect the USB cable to your iPhone or application Android device. -
Page 19: Display Modes
Section Display modes When you finish with installation and connection Adjusting the display settings Press the a/b button to select a setting Five types of view are available for this unit: AR view (low speed mode and high speed mode), list view (low item, and then press the d button. -
Page 20: Rotation
Section When you finish with installation and connection When you finish with installation and connection Rotation Press the a/b button to adjust the Setting item Description brightness. Adjust the rotation of the displayed image. Trapezoidal Dis- Select to correct the trape- Ex.: Adjusting the red colour tortion zoidal distortion. -
Page 21: Before Driving
Section Before driving Before driving Configuring the unit Notes Adjust the combiner angle so that the Correct combiner position ! Function Settings can only be set when the whole diffuser can be reflected on the function settings Before use, be sure to check that the lower end combiner. - Page 22 Section Before driving % Press the button. Note Changing the brightness may also cause the display hue to change. Engb Autogood products «130»...
-
Page 23: Fonctionnement
Réglage de votre iPhone ou ou un dysfonctionnement. Dans ce cas de Si l’écran est difficile à consulter périphérique Android figure, Pioneer décline toute responsabi- Précautions d’utilisation à des températures Raccordement de votre iPhone ou lité. élevées/faibles Information à destination des périphérique Android à... -
Page 24: Connexion Et Installation
Section Précautions Précautions ! N’exposez pas l’appareil à la lumière directe ! Installez les pièces fournies comme indiqué. Ces symboles qui figurent sur les produits, Ceci pourrait entraîner un risque d’incendie les emballages et/ou les documents d’ac- ou de dysfonctionnement. du soleil. -
Page 25: Quelques Mots Sur Cet Appareil
à ne pas vous cogner la tête dans l’ap- guidage vocal, respectez toujours les régle- PIONEER le plus proche. N’utilisez pas l’ap- voquer un incendie, un choc électrique ou pareil. mentations de la circulation routière locale pareil dans cette situation parce que cela un dysfonctionnement. -
Page 26: Précautions Relatives À La Batterie
PIONEER agréé le plus pro- à l’eau claire et consultez un médecin immé- ! N’utilisez pas un iPhone ou périphérique autres pour corriger votre acuité... -
Page 27: Pour Éviter L'épuisement De La
(Valide jusqu’en juin 2012) chées à l’écran. Réglez l’angle du supports de stockage sont collectivement ap- ! Pioneer ne garantit pas la réparation d’une pelés “carte mémoire SD” dans ce manuel. l’appareil. multiplexeur (la page 40) et les réglages d’af- ! Lors du retrait de l’appareil du pare-soleil et... -
Page 28: Remarques Sur Les Périphériques Android
Web. et avec l’autorisation préalable du client. conduisant dans votre juridiction, vous devez ! Pioneer a testé et vérifié que les images pro- connaître de telles restrictions et les respec- jetées sont visibles à une distance de 3 m de ter. -
Page 29: Pièces Fournies
Section Pièces fournies Avant de procéder au raccordement — Récepteur de signaux de balise et son Affichage tête haute : Précautions de raccordement câble d’antenne — Câble d’alimentation PRÉCAUTION Éloignez le plus possible les antennes les ! N’utilisez pas l’alimentation accessoire de- unes des autres. -
Page 30: Précautions D'installation
Section Précautions d’installation Précautions d’installation ! N’utilisez pas le pare-soleil latéral sur lequel Lors de la fixation de l’appareil ATTENTION cet appareil est installé. ! Un couple de serrage de 0,36 N•m à ! Fixez l’appareil au pare-soleil à l’aide d’une 0,59 N•m est recommandé... -
Page 31: Schéma De Connexion
Section Connexions Connexions Schéma de connexion Remarques Lors du remplacement du ! L’indicateur DEL de la fiche allume-cigare fusible de la fiche allume-cigare s’allume lorsque l’appareil est sous tension et s’éteint lorsque l’appareil est hors tension. Tournez la fiche dans le sens inverse des Si l’indicateur DEL ne s’éteint pas alors que aiguilles d’une montre pour la desserrer. -
Page 32: Position D'installation
Section Position d’installation Préparation à l’installation de l’appareil 1 Appareil principal Précautions d’installation de Épaisseur du Plaque de réglage d’é- PRÉCAUTION 2 Câble d’alimentation l’appareil pare-soleil paisseur du pare-soleil N’installez pas l’appareil sur un pare-soleil ins- table ou défectueux. Ceci pourrait provoquer la Plaque de réglage d’épais- 15 mm à... -
Page 33: Installation De L'appareil Principal
Section Préparation à l’installation de l’appareil Installation de l’appareil principal Alignez les orifices des vis de la plaque Alignez le levier de verrouillage de l’affi- Libérez les plaques de verrouillage du de réglage d’épaisseur du pare-soleil avec chage tête haute en position de libération du support de montage. - Page 34 Section Installation de l’appareil principal Installation de l’appareil principal Fixez le support de montage. Relevez le pare-soleil en position horizontale, Appuyez fermement sur les plaques de verrouil- puis retirez le support de montage du pare-so- lage vers la gauche et la droite pour fixer le sup- leil.
- Page 35 Section Installation de l’appareil principal Installation de l’appareil principal 15 Fixez l’appareil au pare-soleil à l’aide 16 Fixez le support de montage. d’une sangle antichute. Appuyez fermement sur les plaques de verrouil- Avancez la sangle antichute depuis l’arrière du lage vers la gauche et la droite pour fixer le sup- pare-soleil abaissé...
- Page 36 Section Installation de l’appareil principal Installation de l’appareil principal 19 Réglez l’inclinaison de l’appareil princi- 24 Installez l’appareil sur le pare-soleil. pal. Procédez aux étapes 13 à 17 pour installer l’ap- Réglez l’angle afin de mettre l’appareil principal pareil sur le pare-soleil. ! Alignez le levier de verrouillage de l’affichage de niveau.
- Page 37 Section Installation de l’appareil principal Installation de l’appareil principal ! Positionnez le câble d’alimentation de sorte 27 Verrouillez la position de l’appareil princi- qu’il n’obstrue pas le champ de vision du pal. conducteur. Tirez sur le levier de verrouillage de l’affichage ! Acheminez le câble de sorte qu’il n’entrave tête haute et faites-le glisser en position de ver- pas le mouvement vers l’arrière et l’avant de...
-
Page 38: Après L'installation
1 et installez l’appareil correctement. tion, reportez-vous au site suivant. gare du câble d’alimentation en l’insérant dans l’allume-cigare du véhicule. http://www.pioneer.eu/navgatehud Raccordez le câble USB à votre iPhone ou L’indicateur DEL de la fiche allume-cigare s’al- périphérique Android. lume en vert lorsque l’appareil est sous tension. -
Page 39: Modes D'affichage
Section Modes d’affichage Modes d’affichage Si l’application ne démarre pas automatique- Cinq types de vues sont disponibles sur cet appareil : vue AR (mode faible vitesse et mode vitesse élevée), vue ment lorsque l’iPhone est raccordé à l’appa- de liste (mode faible vitesse et mode vitesse élevée), vue des croisements, vue d’ensemble de l’itinéraire et reil, tapotez sur “Allow”... -
Page 40: Lorsque L'installation Et Le Raccordement
Section Lorsque l’installation et le raccordement sont terminés Lorsque l’installation et le raccordement sont terminés % Appuyez sur le bouton a/b pour afficher Ajustement des réglages Position Appuyez sur le bouton a/b pour sélec- le modèle de grille entier. tionner un élément de réglage, puis appuyez d’affichage Réglez la position de l’image affichée. -
Page 41: Avant De Conduire
Section Lorsque l’installation et le raccordement sont terminés Avant de conduire Configuration des réglages Élément de ré- Menu Description Description de fonction de l’appareil glage Consultez la version logi- Sélectionnez cet élément Les réglages de fonction de l’appareil peuvent cielle de l’appareil et les Rouge pour régler les tons rouges. -
Page 42: Lors De L'entrée Et De La Sortie Du Véhicule
Section Avant de conduire Avant de conduire % Appuyez sur le bouton Réglez l’angle du multiplexeur de sorte Position appropriée du que l’afficheur entier puisse être reproduit multiplexeur sur le multiplexeur. Avant l’utilisation, vérifiez que l’extrémité infé- rieure du multiplexeur se trouve au-dessus de votre champ de vision lorsque vous vous instal- lez sur le siège et que vous regardez devant vous en position de conduite. -
Page 43: Per Il Manuale Di Funzionamento
Se risulta difficile vedere le immagini su presa dell’accendisigari incidenti, lesioni personali o malfunziona- schermo menti. In questi casi, Pioneer non si assu- Precauzioni per il funzionamento a Impostazione dell’iPhone o del me alcuna responsabilità. temperature alte/basse... -
Page 44: Precauzioni
Sezione Precauzioni Precauzioni Altrimenti, potrebbero verificarsi incendi o Non rimuovere la pellicola protettiva del Se le parti in dotazione non vengono installa- malfunzionamenti. combinatore prima di aver completato l’in- te come specificato, esse potrebbero allen- ! Non installare mai l’unità né instradare i cavi stallazione. -
Page 45: Informazioni Sull'unità
Anche quando si usano le immediatamente il rivenditore o la più vicina testa. mappe dell’itinerario o la guida vocale alla stazione assistenza PIONEER. Non utilizzare Altrimenti, potrebbero verificarsi lesioni per- navigazione, durante la guida del veicolo, ri- questa unità in tali condizioni, perché posso- sonali. -
Page 46: Precauzioni Per La Batteria
Parcheggiare il veicolo in un luogo si- sione della batteria o dalla perdita di liquidi o il più vicino centro di assistenza PIONEER curo e innestare il freno di stazionamento l’uso di questa unità, interrompere immedia- dalla stessa. -
Page 47: Per Evitare Di Scaricare La Batteria
(Valido al giugno 2012) la prima volta, regolare l’angolazione del ! Quando si rimuove l’unità dal parasole per ! Pioneer non copre in garanzia l’eventuale ri- ! Questo lettore non supporta schede di me- combinatore (a pagina 61) e le impostazioni... -
Page 48: Note Sui Dispositivi Android
è necessario conoscere e osservare tutte le I dettagli verranno pubblicati sul sito web. cliente fornirà la preventiva autorizzazione. ! Pioneer ha verificato e confermato che le im- normative vigenti. In caso di dubbi in merito a una funzione magini proiettate possano essere visualizzate Visita il nostro sito Web specifica, utilizzarla solo quando il veicolo è... -
Page 49: Parti In Dotazione
Sezione Parti in dotazione Prima del collegamento — Antenna FM/AM e relativo cavo dell’an- Unità head-up display: Precauzioni per il collegamento tenna — Antenna GPS e relativo cavo dell’antenna ATTENZIONE — Ricevitore di segnale radiofaro e relativo ! Non erogare l’alimentazione accessoria dal- cavo dell’antenna l’interfaccia del bus CAN, ecc. -
Page 50: Precauzioni Per L'installazione
Sezione Precauzioni per l’installazione Precauzioni per l’installazione Quando si deve montare AVVERTENZA ATTENZIONE saldamente l’unità ! Assicurare l’unità al parasole con una cin- ! Quando si installa l’unità in un veicolo dotato ghia anticaduta. di airbag, richiedere al produttore del veicolo ! La coppia raccomandata di serraggio per Altrimenti, l’unità... -
Page 51: Collegamenti
Sezione Collegamenti Collegamenti Schema di collegamento Note Sostituzione del fusibile per ! L’indicatore a LED sulla spina dell’accendisi- la presa per l’accendisigari gari si accende quando l’alimentazione viene collegata e si spegne quando l’unità viene Ruotare la spina in senso antiorario per spenta. -
Page 52: Posizione Di Installazione
Sezione Posizione di installazione Preparazione per l’installazione dell’unità Precauzioni per Spessore del pa- Piastra di regolazione ATTENZIONE l’installazione dell’unità rasole spessore parasole Non installare l’unità su un parasole instabile o difettoso. Altrimenti, l’unità potrebbe cadere, Piastra di regolazione spes- Da 15 mm a 20 mm AVVERTENZA provocando incidenti o malfunzionamenti. -
Page 53: Installazione Dell'unità Principale
Sezione Preparazione per l’installazione dell’unità Installazione dell’unità principale Allineare i fori delle viti sulla piastra di re- Allineare la leva di blocco dell’HUD in po- golazione dello spessore parasole con quelli sizione di rilascio del blocco. della staffa di montaggio, quindi serrare Tirare la leva di blocco dell’HUD e farla scorrere nelle posizioni originali le viti rimanenti pre- in posizione di rilascio del blocco. - Page 54 Sezione Installazione dell’unità principale Installazione dell’unità principale 1 20 mm 2 22 mm 3 24 mm 4 26 mm Fissare la staffa di montaggio al parasole. Spingere in alto il parasole, in posizione orizzon- Verificare che lo spessore regolato per la tale.
- Page 55 Sezione Installazione dell’unità principale Installazione dell’unità principale Unità principale, posizione anteriore: 12 Allentare di un giro le viti di regolazione 14 Spingere in basso il parasole, in posizione della direzione longitudinale sull’unità. verticale. Unità principale, posizione anteriore: 15 Assicurare l’unità al parasole con una cin- ghia anticaduta.
- Page 56 Sezione Installazione dell’unità principale Installazione dell’unità principale 18 Bloccare la posizione dell’unità principa- 20 Regolare la direzione dell’unità principa- 23 Serrare saldamente le viti di montaggio sulla parte anteriore dell’unità principale. Tirare la leva di blocco dell’HUD e farla scorrere Aprire il diffusore e il combinatore dell’unità...
- Page 57 Sezione Installazione dell’unità principale Installazione dell’unità principale ! Se è necessario montare il cuscinetto per il 25 Collegare il cavo di alimentazione all’uni- Instradare il cavo di alimentazione fissandolo ai 28 Assicurare il cavo di alimentazione. tà. parasole, fissare il cuscinetto per il parasole punti indicati con morsetti disponibili in com- Fissare il nastro a doppio lato alla scatola di col- all’apposito supporto, montarlo sulla cinghia...
-
Page 58: Dopo L'installazione
Sezione Installazione dell’unità principale Installazione dell’unità principale ! Non installare mai il cavo di alimentazione in Dopo l’installazione Collegamento del cavo di una posizione in cui non sia possibile fissare alimentazione alla presa il cavo, a causa di vibrazioni del veicolo, ecc. ATTENZIONE dell’accendisigari ! Se non è... -
Page 59: Collegamento Dell'iphone O Del Dispositivo Android All'unità
USB-microUSB da 1 m o meno. Non è possi- Per ulteriori dettagli sull’applicazione di naviga- bile utilizzare un cavo di ricarica. zione, vedere il seguente sito web. Collegare il cavo USB all’iPhone o al di- http://www.pioneer.eu/navgatehud spositivo Android utilizzato. Avvio dell’applicazione di Collegare saldamente l’altra estremità navigazione del cavo USB alla scatola di collegamento del cavo di alimentazione. -
Page 60: Modalità Di Visualizzazione
Sezione Modalità di visualizzazione Dopo aver completato l’installazione e il collegamento Regolazione delle Premere il pulsante a/b per selezionare Per questa unità sono disponibili cinque tipi di viste: Vista AR (modalità a bassa velocità e modalità ad alta ve- la voce di impostazione, quindi premere il locità), vista Elenco (modalità... -
Page 61: Zoom
Sezione Dopo aver completato l’installazione e il collegamento Dopo aver completato l’installazione e il collegamento Es.: Quando la regolazione non è stata ese- Rapporto di aspetto Bilanciamento del bianco guita correttamente Regolare il rapporto d’aspetto delle immagini vi- Regolare il bilanciamento del bianco delle im- sualizzate. -
Page 62: Prima Della Guida
Sezione Prima della guida Prima della guida 2 Combinatore Configurazione delle Posizione corretta del Menu Descrizione impostazioni delle funzioni combinatore Regolare l’angolazione del combinatore Imposta la lingua di visualiz- Lingua dell’unità in modo che l’intero diffusore possa essere zazione. Prima dell’uso, accertarsi di verificare che l’e- riflesso dal combinatore. - Page 63 Sezione Prima della guida % Premere il pulsante Nota Se si modifica la luminosità, anche la tonalità del display potrebbe cambiare. Autogood products «130»...
- Page 64 Autogood products «130»...
- Page 65 Información importante de seguridad Configuración del iPhone o dispositivo En este caso, Pioneer no asume ninguna Para evitar la descarga de la batería Android responsabilidad. Si es difícil ver la pantalla Conexión del iPhone o dispositivo Android a...
-
Page 66: Conexión E Instalación
Sección Precauciones Precauciones ! No instale nunca la unidad ni realice el ca- ! Por su seguridad, pídale a su proveedor que ! Siga las instrucciones de este manual para Estos símbolos en los productos, embalaje, y/o en los documentos que los acompañan bleado en lugares donde pueda afectar al instale la unidad y realice el cableado o cam- conectar e instalar la unidad. -
Page 67: Acerca De Esta Unidad
! Mantenga la batería fuera del alcance de los cas. servicio técnico oficial de PIONEER más pró- miento. Aparque el vehículo en un lugar se- ! No instale la unidad en lugares expuestos a niños pequeños para evitar accidentes. -
Page 68: En Caso De Problemas Con El Dispositivo
Aparque el vehículo en un lugar segu- cambiar la imagen. No se trata de ninguna o el centro de servicio Pioneer autorizado más ro y ponga el freno de mano antes de mane- anomalía. -
Page 69: Información Importante De Seguridad
Se podrían dañar los datos almace- prevé utilizar, haciéndose responsable de difusor o el combinador podrían concentrar nados en la misma. Pioneer no se hace res- cualquier problema que pueda ocurrir. Precauciones sobre el la luz en un rayo intenso, provocando humo ponsable de ningún daño derivado de dichos... -
Page 70: Derechos De Propiedad Intelectual
PIONEER ! Pioneer no garantiza que el producto se ajus- ! No deje el dispositivo Android a altas tempe- CORPORATION. te a los fines particulares de un usuario espe- raturas. -
Page 71: Piezas Suministradas
Sección Piezas suministradas Antes de realizar la conexión Monitor frontal: Precauciones para la conexión Coloque las antenas lo más separadas entre sí que sea posible. ! No ate las antenas, ni las apile o cruce entre PRECAUCIÓN sí. ! No tome alimentación adicional de la inter- El ruido proveniente de la antena y del cable faz bus CAN, etc. -
Page 72: Precauciones Para La Instalación
Sección Precauciones para la instalación Conexiones Diagrama de conexión ADVERTENCIA PRECAUCIÓN ! Fije la unidad a un parasol con una cinta que ! Si instala la unidad en un vehículo equipado evite su caída. con airbags, pregúntele al fabricante qué Si no, la unidad podría caer y provocar un ac- precauciones debe tener para la instalación, cidente y lesiones. -
Page 73: Establecer El Tamaño Del Conector Del Encendedor
Sección Conexiones Posición de instalación 2 Cable de alimentación Notas Cuando sustituya el fusible Precauciones para instalar la ! El indicador LED del encendedor se encien- del conector del encendedor unidad de al activar la unidad y se apaga al desacti- varla. -
Page 74: Preparación Para Instalar La Unidad
Sección Preparación para instalar la unidad Preparación para instalar la unidad Grosor del para- Placa de ajuste de grosor PRECAUCIÓN del parasol No instale la unidad en un parasol inestable o defectuoso; si lo hace, la unidad podría caer, Placa de ajuste de grosor De 15 mm a 20 mm provocando un accidente o anomalías. - Page 75 Sección Instalación de la unidad principal Instalación de la unidad principal 3 24 mm ! Si no puede empujar por completo las placas Alinee la palanca de bloqueo del monitor 4 26 mm frontal en la posición abierta. de bloqueo hacia dentro, entonces debe au- Tire de la palanca de bloqueo del monitor frontal mentar el grosor del soporte.
- Page 76 Sección Instalación de la unidad principal Instalación de la unidad principal Compruebe si el grosor ajustado del so- Unidad principal: Parte posterior de la unidad principal: Sujete los extremos izquierdo y derecho de las porte es el adecuado. placas de bloqueo del soporte y monte la unidad Empuje las placas de bloqueo hacia dentro para en el parasol empujando el soporte hasta el bloquear el soporte.
- Page 77 Sección Instalación de la unidad principal Instalación de la unidad principal Haga atravesar la cinta tal y como se muestra en la imagen. Izquierda Derecha Izquierda Derecha Incline el parasol verticalmente unos 20º y aprie- te firmemente los dos tornillos de montaje en la parte posterior de la unidad principal que aflojó...
-
Page 78: Instalación De La Unidad Principal
Sección Instalación de la unidad principal Instalación de la unidad principal 24 Monte la unidad en el parasol. Realice los pasos 13 a 17 para montar la unidad en el parasol. ! Alinee la palanca de bloqueo del monitor frontal a la posición abierta antes de montar la unidad en el parasol. -
Page 79: Tras La Instalación
Sección Instalación de la unidad principal Instalación de la unidad principal ! No coloque el cable de alimentación a los 3 Cinta de doble cara ! Cierre el difusor cuando no esté utilizando la Para más información, consulte Conexión del Fije el cable con la abrazadera disponible en el pies del asiento del conductor. -
Page 80: Configuración Del Iphone O Dispositivo Android
Conecte el cable USB a su iPhone o dispo- web. http://www.pioneer.eu/navgatehud sitivo Android. Conecte el otro extremo del cable USB fir- Activación de la aplicación memente a la caja de conexión del cable de de navegación... -
Page 81: Modos De Visualización
Sección Modos de visualización Cuando termine la instalación y la conexión Configuración de ajustes de Posición En esta unidad hay disponibles cinco tipos de modos de visualización: AR (baja velocidad y alta velocidad), lista (baja velocidad y alta velocidad), de cruce, ruta y reloj. pantalla Ajuste la posición de la imagen visualizada. -
Page 82: Rotación
Sección Cuando termine la instalación y la conexión Cuando termine la instalación y la conexión % Pulse el botón a/b para visualizar el pa- Pulse el botón a/b para seleccionar un Elemento de trón de red en su totalidad. elemento de ajuste y a continuación pulsa el Descripción ajuste botón d. -
Page 83: Antes De Conducir
Sección Antes de conducir Antes de conducir Configuración de los ajustes Ajuste el ángulo del combinador de ma- Posición correcta del Menú Descripción nera que todo el difusor se refleje en el com- de funciones de la unidad combinador binador. Confirme la versión del soft- Acerca de Los ajustes de funciones de la unidad se pueden... - Page 84 Sección Antes de conducir % Pulse el botón Nota Si se cambia el brillo también puede cambiar el color de la pantalla. Autogood products «130»...
- Page 85 Unfällen, Verletzun- Bei schwer erkennbarem Bildschirm Geräts gen oder Fehlfunktionen führen. In diesem Vorsichtshinweise für den Betrieb bei Anschließen Ihres iPhones oder Android- Fall übernimmt Pioneer keine Gewährleis- hohen/niedrigen Temperaturen Geräts an das Gerät tung. Hinweise zu microSD-Speicherkarten Installieren der ! Für Händler...
-
Page 86: Anschluss Und Installation
Abschnitt Vorsichtsmaßregeln Vorsichtsmaßregeln ! Installieren Sie das Gerät nicht an einer de- Verwenden Sie das Gerät nicht mit einem 24- Wenn bei der Installation des Geräts Löcher V-Fahrzeug. fekten Sonnenblende. in die Fahrzeugkarosserie gebohrt werden Dies könnte zu einem Brand oder einer Fehl- Vergewissern Sie sich vor der Installation, müssen, achten Sie unbedingt darauf, dass dass an der Sonnenblende keine Defekte vor-... -
Page 87: Zu Diesem Gerät
Sprachführung des Navigationssys- ! Verlegen und sichern Sie die Kabel so, dass ! Achten Sie beim Verdrahten der Kabel da- an Ihren Händler oder an eine PIONEER- tems die örtlichen Verkehrsregeln und tat- sie die Fahrt nicht beeinträchtigen. -
Page 88: Vorsichtshinweise Zum Batteriegebrauch
! Die von einer Navigationsapplikation bereit hoher Belastung steht, können auf dem Bild- Ihre Haut oder Kleidung gelangen, spülen ler oder die nächstgelegene PIONEER-Service- gestellten Streckeninformationen und die schirm angezeigte Bilder eventuell verzerrt Sie sie mit sauberen Wasser ab. Sollte Batte- Station. -
Page 89: So Vermeiden Sie Eine
Bild klar auf dem wahrt wird. aufgrund der Formatierung der SD-Speicher- ! Pioneer garantiert nicht den Betrieb mit allen Bildschirm zu erkennen ist. Passen Sie den karte. Darüber hinaus übernimmt Pioneer Lassen Sie das Gerät nicht an einem Ort, an... -
Page 90: Hinweise Zu Android-Geräten
Kunde diese nur bei geparktem Fahrzeug aus. vorab seine Zustimmung gegeben hat. ! Pioneer hat getestet und bestätigt, dass proji- Funktionen dürfen nur genutzt werden, wenn Unsere Website ihre Ausführung in der aktuellen Straßenver- zierte Bilder bei einer Entfernung von 3 m zur kehrssituation sicher ist. -
Page 91: Mitgelieferte Teile
Abschnitt Mitgelieferte Teile Vor dem Anschluss — GPS-Antenne und ihr Antennenkabel Head-up-Display (HUD): Vorsichtshinweise zum — Bakenempfänger und ihr Antennenkabel Anschluss — Stromkabel Platzieren Sie die Antennen so entfernt von- VORSICHT einander wie möglich. ! Beziehen Sie keine zusätzliche Stromversor- ! Binden Sie die Antennen nicht zusammen, Stromkabel x 1 gung von der CAN-Bus-Schnittstelle usw. -
Page 92: Vorsichtsmaßnahmen Zur Installation
Abschnitt Vorsichtsmaßnahmen zur Installation Vorsichtsmaßnahmen zur Installation ! Verwenden Sie bei installiertem Gerät nicht Vor der Installation und WARNUNG die Sonnenblende am Seitenfenster. Befestigung des Geräts ! Sichern Sie das Gerät an der Sonnenblende mit einem Absturzsicherungsband. Schließen Sie das Gerät zunächst vorüberge- VORSICHT Anderenfalls könnte das Gerät herunter fal- hend an, um seinen einwandfreien Betrieb zu... -
Page 93: Anschlussschema
Abschnitt Anschlüsse Anschlüsse Anschlussschema Für Androidgeräte-Anwender Beim Austauschen der ! Verwenden Sie ein USB-microUSB-Daten- Sicherung des kommunikationskabel (2) von 1 m oder we- Zigarettensteckers niger. Es kann kein Ladekabel verwendet werden. Drehen Sie den Stecker entgegen dem Uhrzeigersinn, um ihn zu lösen. Hinweise ! Die LED-Anzeige am Zigarettenstecker leuch- tet bei eingeschaltetem Gerät und erlischt,... -
Page 94: Vorsichtshinweise Zur Installation Des
Abschnitt Installationsposition Vorbereiten der Geräteinstallation Vorsichtshinweise zur Stärke der Son- Justierplatte für die Son- VORSICHT Installation des Geräts nenblende nenblendenstärke Installieren Sie das Gerät nicht an einer instabi- len oder defekten Sonnenblende. Anderenfalls Justierplatte für die Sonnen- 15 mm bis 20 mm WARNUNG könnte das Gerät herunterfallen und zu einem blendenstärke (klein) -
Page 95: Installieren Der Haupteinheit
Abschnitt Vorbereiten der Geräteinstallation Installieren der Haupteinheit Richten Sie die Schraubenlöcher an der Verschieben Sie den HUD-Verrieglungs- Lösen Sie die Sicherungsplatten an der Justierplatte für die Sonnenblende mit hebel in die entsperrte Position. Montagehalterung. denen der Montagehalterung aus und zie- Ziehen Sie am HUD-Verriegelungshebel und Ziehen Sie die Sicherungsplatten an der Monta- hen Sie die zuvor entfernten restlichen... - Page 96 Abschnitt Installieren der Haupteinheit Installieren der Haupteinheit Drücken Sie die Sonnenblende nach unten in die vertikale Position. ! Wenn sich die Montagehalterung leicht von der Sonnenblende lösen lässt, muss die Stär- 1 20 mm ke der Montagehalterung reduziert werden. 2 22 mm Verriegeln Sie die Montagehalterung.
- Page 97 Abschnitt Installieren der Haupteinheit Installieren der Haupteinheit Hauptgerät: Rückseite des Hauptgeräts: Drücken Sie die Sonnenblende nach oben in die horizontale Position. Halten Sie die linke und rechte Kante der Siche- rungsplatten der Montagehalterung und befesti- gen Sie das Gerät an der Sonnenblende, indem Sie die Montagehalterung ganz hinein drücken.
- Page 98 Abschnitt Installieren der Haupteinheit Installieren der Haupteinheit 16 Verriegeln Sie die Montagehalterung. 19 Passen Sie die Neigung des Hauptgeräts Passen Sie die Richtung des Hauptgeräts so an, Drücken Sie fest von links und rechts auf die Si- dass die Streuscheibe und der Combiner in cherungsplatten, um die Montagehalterung zu Passen Sie den Winkel des Hauptgeräts so an, Fahrtrichtung zeigen.
- Page 99 Abschnitt Installieren der Haupteinheit Installieren der Haupteinheit 1 Fixieren Sie das Kabel mit handelsübli- 26 Verlegen Sie das Stromkabel. Verlegen Sie das Stromkabel so, dass das Kabel chen Kabelklemmen. ! Befestigen Sie das Kabel nicht an der Wind- nicht die Fahrt und das Sichtfeld des Fahrers be- einträchtigt.
-
Page 100: Nach Der Installation
Abschnitt Installieren der Haupteinheit Installieren der Haupteinheit ! Befestigen Sie ein iPhone oder Android-Gerät ! Schließen Sie unbedingt die Streuscheibe Nach der Installation sicher in einer handelsüblichen Halterung. und den Combiner, wenn das Gerät von der ! Stecken Sie den Zigarettenstecker des Strom- Sonnenblende abgenommen und aufbe- VORSICHT kabels in den Zigarettenanschluss des Fahr-... -
Page 101: Einstellen Ihres Iphones Oder Android-Geräts
1 m oder weniger. Einzelheiten zur Navigationsapplikation finden Es kann kein Ladekabel verwendet werden. Sie auf folgender Website. http://www.pioneer.eu/navgatehud Schließen Sie das USB-Kabel an Ihr iPhone oder Android-Gerät an. Starten der Navigationsap- plikation Verbinden Sie das andere Ende des USB-... -
Page 102: Bildschirmeinstellungen
Abschnitt Anzeigemodi Nach Abschluss der Installation und der Verbindungs- herstellung Anpassen der Bildschirmein- Drücken Sie die a/b-Taste, um einen Ein- Dieses Gerät ist mit fünf verschiedenen Anzeigemodi ausgestattet: AR-Ansicht (langsamer und schneller stellpunkt auszuwählen und drücken Sie Modus), Listen-Ansicht (langsamer und schneller Modus), Kreuzungs-Ansicht, Streckenübersicht und Uhr- stellungen dann die d-Taste. -
Page 103: Zoom
Abschnitt Nach Abschluss der Installation und der Verbindungs- Nach Abschluss der Installation und der Verbindungs- herstellung herstellung % Drücken Sie die a/b-Taste, um das Gitter- Beispiel: Bei nicht korrekter Anpassung Drücken Sie die a/b-Taste, um einen Ein- muster in eine viereckige Form zu bringen. stellpunkt auszuwählen und drücken Sie dann die d-Taste. -
Page 104: Vor Der Fahrt
Abschnitt Vor der Fahrt Vor der Fahrt Konfigurieren der Geräte- Passen Sie den Combiner-Winkel so an, Korrigieren der Combiner- Menü Beschreibung dass die gesamte Streuscheibe auf den Com- funktionseinstellungen Position biner projiziert wird. Bestätigen der Gerätesoftwa- über Die Gerätefunktionseinstellungen können über reversion und rechtliche Überprüfen Sie vor dem Gebrauch, dass sich den Einstellungen-Bildschirm konfiguriert wer-... - Page 105 Abschnitt Vor der Fahrt % Drücken Sie die -Taste. Hinweis Durch das Ändern der Helligkeit kann sich zudem der Farbton der Anzeige ändern. Autogood products «130»...
- Page 106 Autogood products «130»...
-
Page 107: Batterijen
Als het scherm moeilijk zichtbaar is geval, letsel of storingen veroorzaken. Na de installatie Voorzorgsmaatregelen voor gebruik bij een Pioneer kan niet aansprakelijk worden ge- Sluit de stroomkabel aan op de aansluiting hoge/lage temperatuur steld in zulke gevallen. voor de sigarettenaansteker... -
Page 108: Aansluiten En Installeren
Hoofdstuk Voorzorgsmaatregelen Voorzorgsmaatregelen ! Voor uw veiligheid en die van andere perso- De symbolen op producten, verpakkingen Als het toestel wordt geïnstalleerd in een Gebruik de meegeleverde kabels en sluit ze en/of bijbehorende documenten geven aan voertuig met airbags, informeer dan bij de fa- nen moet u de installatie, bekabeling en aan zoals voorgeschreven. -
Page 109: Informatie Over Dit Toestel
Als u dat niet doet, kunt u een ongeval ver- Daardoor kunt u een verwonding veroorza- gevolg. dichtstbijzijnde Pioneer-servicecentrum raad- oorzaken of verkeersregels overtreden. ken. ! Het toestel kan niet worden bediend wanneer ! Installeer het toestel niet op plaatsen waar plegen. -
Page 110: Bij Problemen
! De functies van het toestel garanderen op ding uitschakelen en uw dealer of het dichtstbij- afhankelijk van de prestaties van het gps-sys- zijnde Servicestation van PIONEER raadplegen. geen enkele wijze dat de omgeving veilig is. teem op de iPhone of het Android-apparaat... -
Page 111: Voorkomen Dat De Accu Leegloopt
! Pioneer garandeert niet dat alle typen SD-ge- bergt. ma en volg de instructies als u de SD-geheu- ! Het beeld op het scherm is zichtbaar onder genkaart wilt formatteren. -
Page 112: Auteursrechten
Bezoek onze website dere afdelingen of onderaannemers van geparkeerd is. Pioneer, maar alleen als de klant op voor- Gebruik geen enkele functie tenzij het veilig Hier vindt u onze site: hand toestemming geeft. is om deze te gebruiken onder de heersende http://www.pioneer.nl... -
Page 113: De Elektriciteitskabel Aansluiten
Hoofdstuk Meegeleverde onderdelen Vóór aansluiting Head-up display: Voorzorgsmaatregelen voor Plaats de antennes zo ver mogelijk uit elkaar. ! Bind antennes niet samen, stapel ze niet en aansluiting laat ze niet kruisen. Ruis op de antenne en de antennekabel ver- LET OP mindert de ontvangstgevoeligheid. -
Page 114: Toestel
Hoofdstuk Voorzorgsmaatregelen voor installatie Verbindingen ! Na installatie van het toestel kunnen een Aansluitschema WAARSCHUWING lampje op de zonneklep en optionele acces- ! Zet het toestel aan de zonneklep vast met soires op en rondom de zonneklep (zoals een een valbeveiligingsriem. kaarthouder en een spiegel) wellicht niet Als u dat niet doet, kan het toestel vallen met meer worden gebruikt. -
Page 115: Formaat Van De Stekker Voor De Sigarettenaansteker Instellen
Hoofdstuk Verbindingen Installatiepositie Opmerkingen De zekering van de stekker Voorzorgsmaatregelen voor ! De LED-indicator op de stekker voor de siga- voor de sigarettenaansteker installatie van het toestel rettenaansteker gaat branden als de stroom vervangen wordt ingeschakeld en gaat uit als het toestel WAARSCHUWING wordt uitgeschakeld. -
Page 116: Voorbereiding Voor Installatie Van Het Toestel
Hoofdstuk Voorbereiding voor installatie van het toestel Voorbereiding voor installatie van het toestel Dikte van de zon- Afstelplaat voor dikte van LET OP neklep zonneklep Installeer het toestel niet op een onstabiele of beschadigde zonneklep. Daardoor kan het toe- Afstelplaat voor dikte van 15 mm bij 20 mm stel vallen met mogelijk een ongeval of storing zonneklep (klein) -
Page 117: Installatie Van Het Hoofdtoestel
Hoofdstuk Installatie van het hoofdtoestel Installatie van het hoofdtoestel 1 20 mm Breng de HUD-vergrendelingshendel 2 22 mm naar de geopende positie. 3 24 mm Trek aan de HUD-vergrendelingshendel en 4 26 mm schuif de hendel naar de geopende positie. Plaats de bevestigingsklem op de zonne- klep. - Page 118 Hoofdstuk Installatie van het hoofdtoestel Installatie van het hoofdtoestel Voorzijde van hoofdtoestel: 12 Draai de afstelschroeven in de lengterich- ting op het toestel één slag los. Voorzijde van hoofdtoestel: Controleer of de bevestigingsklem na de aanpassing de juiste dikte heeft. 10 Plaats de bevestigingsklem met de juiste Duw de vergrendelplaten op de bevestigings- dikte voor het hoofdtoestel.
- Page 119 Hoofdstuk Installatie van het hoofdtoestel Installatie van het hoofdtoestel 14 Duw de zonneklep naar beneden in zijn 18 Vergrendel het hoofdtoestel op zijn posi- verticale positie. tie. Trek aan de HUD-vergrendelingshendel en schuif de hendel naar de vergrendelde positie. 15 Zet het toestel op de zonneklep vast met 1 Diffuser een valbeveiligingsriem.
- Page 120 Hoofdstuk Installatie van het hoofdtoestel Installatie van het hoofdtoestel 1 Pas de combiner zo aan dat de diffuser in 26 Leg de stroomkabel op zijn plaats. het midden van de combiner wordt weer- Leid de stroomkabel zo dat hij niet kan storen bij gegeven.
-
Page 121: Na De Installatie
Hoofdstuk Installatie van het hoofdtoestel Installatie van het hoofdtoestel 1 Zet de kabel vast met in de handel ver- ! Bevestig een iPhone of een Android-apparaat Na de installatie krijgbare klemmen. stevig in een in de handel verkrijgbare hou- ! Bevestig of monteer de kabel niet op de voor- der. -
Page 122: Sluit De Stroomkabel Aan Op De Aansluiting Voor De Sigarettenaansteker
! Gebruik een USB-microUSB-communicatie- Raadpleeg de volgende website voor meer infor- kabel van 1 m of minder. Een oplaadkabel matie over de navigatietoepassing. kan niet worden gebruikt. http://www.pioneer.eu/navgatehud Sluit de USB-kabel aan op uw iPhone of Starten van de Android-apparaat. navigatietoepassing... - Page 123 Hoofdstuk Weergavestanden Weergavestanden Als de toepassing niet automatisch wordt ge- Het toestel beschikt over vijf weergaven: AR-weergave (lagesnelheidsmodus en hogesnelheidsmodus), lijst- start wanneer u het Android-apparaat op het weergave (lagesnelheidsmodus en hogesnelheidsmodus), kruispuntweergave, route-overzicht en klokweer- toestel aansluit, moet u tikken op het pop-up- gave.
-
Page 124: De Weergave-Instellingen
Hoofdstuk Wanneer de installatie en aansluiting voltooid zijn Wanneer de installatie en aansluiting voltooid zijn % Druk op de a/b toets om het rasterpa- De weergave-instellingen Positie Druk op de a/b toets en selecteer de ge- troon helemaal weer te geven. wenste instelling. -
Page 125: Vóór Het Rijden
Hoofdstuk Wanneer de installatie en aansluiting voltooid zijn Vóór het rijden De functie-instellingen Instelling Beschrijving Menu Beschrijving configureren Rood De rode tinten aanpassen. De softwareversie en wette- Over De functie-instellingen worden geconfigureerd lijke informatie weergeven. Groen De groene tinten aanpassen. in het Instellingen scherm. -
Page 126: In En Uit Het Voertuig Stappen
Hoofdstuk Vóór het rijden Vóór het rijden % Druk op de Pas de hoek van de combiner zo aan dat Correcte positie van de toets. de hele diffuser op de combiner kan worden combiner gereflecteerd. Controleer vóór gebruik of de onderzijde van de combiner zich boven uw gezichtslijn bevindt wanneer u zit en recht vooruit kijkt in de rijhou- ding. - Page 127 Оглавление Оглавление Соединения Регулировка угла оптического Меры предосторожности Схема подключения экрана О руководстве по эксплуатации Выбор размера штекера для При посадке и выходе из Информация для пользователей по подключения к прикуривателю автомобиля сбору и утилизации бывшего в Замена плавкого предохранителя Правильное...
-
Page 128: Меры Предосторожности
начают, что бывшая в эксплуатации элек- могут привести к несчастному случаю, тротехническая и электронная продукция травме или неисправности. Компания и отработанные элементы питания не Pioneer не несет ответственности за должны выбрасываться вместе с обы- такие случаи. чным бытовым мусором. ! Дилерам... - Page 129 Раздел Меры предосторожности Меры предосторожности При установке данного блока в автомоби- ! Не устанавливайте данный блок на де- При установке данного блока путем свер- ! Прикрепите данный блок к солнцезащит- ному козырьку с помощью ремня для ле, оборудованном подушками безопас- фектный...
-
Page 130: Сведения Об Этом Устройстве
тесь с дилером или с ближайшим сервис- во время движения. В противном случае В противном случае возможна травма. привести к возгоранию, поражению элек- ным пунктом PIONEER. Запрещается возможно ДТП или нарушение законода- трическим током или неисправности. ! Следите за тем, чтобы пальцы не попали... -
Page 131: При Возникновении Проблем
авторизованным сервисным центром тролит попал на кожу или на одежду, про- ! Не пользуйтесь устройством во время блокировки, которая определяет, когда PIONEER. мойте это место чистой водой. При движения. Это отвлекает от безопасного автомобиль движется, и блокирует интер- Продолжение эксплуатации в таких условиях... -
Page 132: Во Избежание Разрядки Аккумуляторной
руководство к программе форматирова- рошо было видно изображение. дить данные, содержащиеся на карте ния и следуйте указаниям при формати- памяти SD. Компания Pioneer не несет от- Во избежание разрядки ровании карты памяти SD, которую вы ветственности за любой ущерб в резуль- Меры... -
Page 133: Об Устройствах Android
руководстве по эксплуатации к устройству CORPORATION можно получить на степени естественной освещенности. ном свету в течение длительного време- нашем веб-сайте. ! Компания Pioneer не гарантирует, что из- Android. ни. Это может вызвать неисправности в делие отвечает определенным задачам работе iPhone. -
Page 134: Перечень Поставляемых В Комплекте Деталей
Раздел Перечень поставляемых в комплекте деталей Перед подключением Меры предосторожности Блок проекционной индикации: — приемник сигналов радиомаяка и ка- бель антенны; при подключении — Шнур питания Размещайте антенны как можно дальше ВНИМАНИЕ друг от друга. ! Не используйте в качестве источника пи- ! Не... -
Page 135: Меры Предосторожности При Установке
Раздел Меры предосторожности при установке Меры предосторожности при установке Не удаляйте защитный лист проекционно- ! Во время установки блока на вас могут ПРЕДУПРЕЖДЕНИЕ го дисплея до завершения установки. падать детали, пыль и т.п. Для предотвра- ! Прикрепите данный блок к солнцезащит- Проекционный... -
Page 136: Соединения
Раздел Соединения Соединения Схема подключения Замена плавкого Примечания ! Светодиодный индикатор на штекере предохранителя горит, когда питание включено, и гаснет, прикуривателя когда устройство выключено. Если устройство не выключается, когда Поверните штекер против часовой выключено зажигание автомобиля, отсое- стрелки, чтобы отвернуть его. дините... -
Page 137: Положение Установки
Раздел Положение установки Подготовка к установке блока Меры предосторожности Данный блок поставляется с установленной ВНИМАНИЕ пластиной регулировки толщины солнцеза- при установке блока Не устанавливайте данный блок на плохо за- щитного козырька (средней толщины). крепленный или дефектный солнцезащит- Используйте пластину регулировки толщины ПРЕДУПРЕЖДЕНИЕ... -
Page 138: Козырька
Раздел Подготовка к установке блока Установка основного блока Снимите восемь винтов, включая Закрепите пластину регулировки в Переместите рычаг блокировки проек- Разблокируйте фиксирующие пласти- винты регулировки в продольном на- продольном направлении на пластине ре- ционного дисплея в положение снятия ны на монтажном кронштейне. правлении... -
Page 139: Установка Основного Блока
Раздел Установка основного блока Установка основного блока Откройте козырек вниз вертикально. ! Если монтажный кронштейн можно легко снять с солнцезащитного козырька, тол- щину монтажного кронштейна необходимо уменьшить. Снимите монтажный крон- штейн с солнцезащитного козырька, вер- нитесь к шагу 3, отрегулируйте положение масштаба, а... - Page 140 Раздел Установка основного блока Установка основного блока Основной блок: Задняя часть основного блока: Поднимите солнцезащитный козырек в гори- зонтальное положение. Удерживайте левый и правый торцы фикси- рующих пластин на монтажном кронштейне и установите блок на солнцезащитный козы- рек путем перемещения монтажного крон- штейна...
- Page 141 Раздел Установка основного блока Установка основного блока 16 Зафиксируйте монтажный кронштейн. 19 Отрегулируйте наклон основного 2 Оптический экран 21 Снимите фиксацию положения основ- Отрегулируйте направление основного Надавите на фиксирующие пластины слева блока. ного блока. и справа, чтобы надежно зафиксировать Отрегулируйте угол, чтобы выровнять основ- блока...
- Page 142 Раздел Установка основного блока Установка основного блока ! При установке подушки солнцезащитного 25 Подключите кабель питания к блоку. козырька закрепите ее на держателе по- душки солнцезащитного козырька, прикре- пите к ремню для предотвращения падения, а затем закрепите ремень для предотвращения падения. Проложите...
-
Page 143: После Установки
Раздел Установка основного блока Установка основного блока 29 Снимите защитный лист проекционно- ! При снятии блока с солнцезащитного ко- го дисплея. зырька и хранении блока закрывайте Убедитесь, что кабель питания подключен и диффузный экран и проекционный дисп- проложен правильно, а затем снимите за- лей. -
Page 144: Настройка Iphone Или Android
через iTunes App Store или Google Play. появляться. рядки использовать нельзя. Подробную информацию о приложении для навигации см. на сайте Подсоедините кабель USB к iPhone http://www.pioneer.eu/navgatehud или Android. Запуск приложения для Плотно вставьте штекер USB на проти- навигации воположном конце кабеля в разъем сое- динительной... -
Page 145: Режимы Отображения
Раздел Режимы отображения После завершения установки и подключения Регулировка параметров Положение На этом устройстве можно выбрать один из пяти режимов просмотра: режим объемного изображения (низкоскоростной и высокоскоростной), режим списка (низкоскоростной и высокоскоростной), режим дисплея Регулировка положения изображения. информации о перекрестках, режим обзора маршрута и режим часов. После... -
Page 146: Вращение
Раздел После завершения установки и подключения После завершения установки и подключения % Нажимайте кнопки a/b, чтобы увидеть Кнопками a/b выберите нужный пара- Параметр Описание сетку целиком. метр и нажмите кнопку d. Выберите для регулировки Красный оттенков красного. Выберите для регулировки Зеленый... -
Page 147: Перед Вождением
Раздел Перед вождением Перед вождением Настройка параметров Правильное положение 2 Оптический экран Меню Описание функций устройства проекционного дисплея Отрегулируйте угол оптического экра- Проверьте версию про- на таким образом, чтобы на нем отражал- Параметры функций устройства можно на- граммного обеспечения Перед использованием обязательно убеди- Информация... -
Page 148: Серийный Номер
Примечание: В соответствии со статьей 5 закона Российской Федерации «О защите прав потребителей» и поста- новлением правительства Российской Федерации № 720 от 16.06.97 компания Pioneer Europe NV оговаривает следующий срок службы изделий, официально поставляемых на российский рынок. Автомобильная электроника: 6 лет... - Page 149 先鋒股份有限公司 台北市內湖區瑞光路407號8樓 電話: 886-(0)2-2657-3588 先鋒電子(香港)有限公司 香港九龍長沙灣道909號5樓 電話: 852-2848-6488 ã 2013 PIONEER CORPORATION. All rights reserved. ã 2013 PIONEER CORPORATION. Tous droits de reproduction et de traduction réservés. ã PIONEER CORPORATION, 2013. Все права защищены. <KOKZ13H> <CRD4765-A> EW Autogood products «130»...
Need help?
Do you have a question about the NavGate HUD SPX-HUD01 and is the answer not in the manual?
Questions and answers