Table of Contents
Advertisement
Advertisement
Table of Contents

Related Manuals for Trojan POWER RACK 400


Summary of Contents for Trojan POWER RACK 400
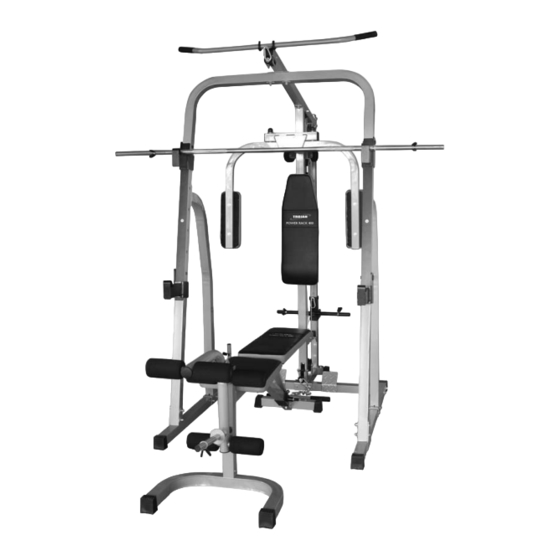
- Page 1 P O W E R R A C K 4 0 0 H O M E G Y M HOME GYM ASSEMBLY, CARE AND INSTRUCTION MANUAL CAUTION READ ALL PRECAUTIONS AND INSTRUCTIONS IN THIS MANUAL BEFORE USING THIS EQUIPMENT KEEP THIS MANUAL FOR FUTURE REFERENCE 0861 876526 0861 TROJAN WARRANTY www.trojanhealth.co.za...
-
Page 2: Table Of Contents
WARM - UP AND COOL-DOWN 10. EXERCISE PROGRAM 11. FREQUENTLY ASKED QUESTIONS 12. PARTS LIST - CAGE 13. EXPLODED DRAWING - CAGE 14. PARTS LIST - BENCH 15. EXPLODED DRAWING - BENCH 16. TROJAN 1 YEAR LIMITED WARRANTY 17. TROJAN REPAIRS PROCEDURE 10148-2... -
Page 3: Safety Instructions
1. SAFETY INSTRUCTIONS It is the sole responsibility of the purchaser of TROJAN products to read the owner’s manual, warning labels and instruct all individuals, on proper usage of the equipment. Understanding each and every warning to the fullest is important. If any of these instructions or warnings are unclear, please contact Trojan Customer Services on 0861 876526 (0861 Trojan), within the Republic of South Africa. - Page 4 1. SAFETY INSTRUCTIONS INSPECTION • Do not use or permit use of any equipment that is damaged or has worn or broken parts. For all TROJAN equipment use only replacement parts supplied by TROJAN. • Always make sure that all nuts and bolts are tightened prior to each use.
-
Page 5: Pre Assembly Check List
2. PRE ASSEMBLY CHECK LIST Thank you for choosing the TROJAN POWER RACK 400. We take great pride in producing this quality product and hope it will provide many hours of quality exercise to make you feel better, look better and enjoy life to its fullest. -
Page 6: Hardware List - Cage
3. HARDWARE LIST - CAGE 10148-6... - Page 7 3. HARDWARE LIST - CAGE 10148-7...
- Page 8 3. HARDWARE LIST - CAGE 10148-8...
-
Page 9: Assembly Steps - Cage
4. ASSEMBLY STEPS - CAGE STEP 1 • Attach Bell Tube (24) to the Right Base Tube (10) using one 3/8” x 3/4” Hex Bolt (54) and one 3/8” Washer (64). Install the Round Rubber Bumper (34) onto the Bell Tube (24). •... - Page 10 4. ASSEMBLY STEPS - CAGE STEP 3 • Attach the Upright Frame (5) and the Back Base Tube (2) to the Connect Frame (20) using two 3/8” x 3-1/8” Hex Bolts (61), four 3/8”Washers (64) and two 3/8”Locknuts (67). STEP4 •...
- Page 11 4. ASSEMBLY STEPS - CAGE STEP 5 • Attach the U Connect Tube (9) to the top of the Right Vertical Frame (13) and the Left Vertical Frame (14). • Attach two Connect Plates (12) to the Right Vertical Frame (13) and Left Vertical Frame (14) using six 3/8”...
- Page 12 4. ASSEMBLY STEPS - CAGE STEP 7 • Attach the Right Butterfly Arm (7) to the Butterfly Extension (3) using one 5/8”Washer (66), one 5/8” Locknut (69) and one Plastic Dome Cap (33). • Attach the Left Butterfly Arm (8) to the Butterfly Extension (3) using one 5/8”Washer (66), one 5/8” Locknut (69) and one Plastic Dome Cap (33).
- Page 13 4. ASSEMBLY STEPS - CAGE STEP 8 Make sure the Upper Cable (50) is in the groove of Pulley (32); • Install Pulley A into the slot of the Top Cross Frame (1) using one 3/8” x 2-5/8” Hex Bolt (57), two 3/8”Washers (64), two Bushings (36) and one 3/8”...
- Page 14 4. ASSEMBLY STEPS - CAGE STEP 9 • Attach one end of the Butterfly Cable (51) to the Left Butterfly Arm (8) using one 3/8” x 1” Hex Bolt (55), one 3/8”Washer (64) and one 3/8”Locknut (67). • Make sure the Butterfly Cable (51) is in the groove of Pulley (32); install Pulley A into the Turn Pulley Bracket (25) using one 3/8”...
- Page 15 4. ASSEMBLY STEPS - CAGE STEP 10 Make sure the Lower Cable (52) is in the groove of Pulley (32), • Install Pulley A into the slot of the Upright Frame (5) using one 3/8” x 2-5/8” Hex Bolt (57), two 3/8”Washers (64), two Bushings (36) and one 3/8”...
- Page 16 4. ASSEMBLY STEPS - CAGE STEP 11 • Attach two Curl Cushions (48) onto the Butterfly Arms (7, 8), using four M8 x 55 Hex Bolts (63) and four M8 Washers (65). • Attach the Backrest Cushion (49) onto the Upright Frame (5), using two M8 x 63 Hex Bolts (53) and two M8 Washers (65). 10148-16...
- Page 17 4. ASSEMBLY STEPS - CAGE STEP 12 • Place the Short Barbell Frames (15, 16) onto the Vertical Frames (13, 14) at the same height. • Place the Long Barbell Frames (17, 18) onto the Vertical Frames (13, 14) at the same height. •...
-
Page 18: Hardware List - Bench
5. HARDWARE LIST - BENCH 10148-18... - Page 19 5. HARDWARE LIST - BENCH 10148-19...
-
Page 20: Assembly Steps - Bench
6. ASSEMBLY STEPS - BENCH STEP 1 • Slide the Slide Frame (7) onto the Main Frame (1) using one PT-1B Pop Pin (22). • Attach the Front Base Tube (6) onto the Main Frame (1) using three 3/8“ x 3/4” Hex Bolts (28) and three 3/8”... - Page 21 6. ASSEMBLY STEPS - BENCH STEP 3 • Insert the two Short Foam Rods (11) into the holes of the Leg Extension (4). • Slide two Foam Rolls (12) onto each Foam Rod (11). • Insert one Foam Rod (10) into the holes of the Main Frame (1) and slide two Foam Rolls (12) onto each Foam Rod (10). STEP 4 •...
-
Page 22: Fitness Tips And Techniques
7. FITNESS TIPS AND TECHNIQUES AEROBIC EXERCISE Aerobic exercise is any sustained activity that sends oxygen to your muscles via your heart and lungs. Aerobic exercise improves the fitness of your lungs and heart - your body’s most important muscle. Aerobic exercise fitness is promoted by any activity that uses your large muscles (arms, legs, or buttock, for example).Your heart beats quickly and you breathe deeply. -
Page 23: Conditioning Guidelines
8. CONDITIONING GUIDELINES How you begin your exercise program depends on your physical condition. If you have been inactive for several years, or are severely overweight, you must start slowly and increase your time on the equipment; a few minutes per workout. Initially, you may be able to exercise only for a few minutes in your target zone, however, your aerobic fitness will improve over the next six to eight weeks. -
Page 24: Warm-Up And Cool-Down
9. WARM-UP AND COOL-DOWN WORKOUT GUIDELINES Each workout should include the following three parts: A warm-up, consisting of 5 to 10 minutes of stretching and light exercise. A proper warm-up increases your body temperature, heart rate, and circulation in preparation for exercise. Training zone exercise, consisting of 20 to 30 minutes of exercising with your heart rate in your training zone. -
Page 25: Exercise Program
THE WORKOUT The Warm Up Always warm up thoroughly before each workout session to help minimise the risk of injury.Warm up on any Trojan exercise bike or treadmill or any other similar machine. Weekly Routine Perform a weight training routine 3 times per week, ensuring a day of rest and recovery between sessions. - Page 26 10. EXERCISE PROGRAM Reps and Sets Repetitions (Reps) is the term used to denote the number of consecutive times a certain movement is repeated without a break, while Sets denotes how many times you should repeat that exercise in a training session e.g. 3 sets of 10 reps means you should perform 10 reps for 1 set, have a break and then repeat another 2 sets.
-
Page 27: Frequently Asked Questions
11. FREQUENTLY ASKED QUESTIONS Q1. How do I maintain my cables? The cables work in conjunction with the pulleys.When assembling the unit; make sure not to over tighten the pulleys. The pulleys are meant to move freely. Before your workout; make sure all the cables are lined up correctly on the pulleys. Q2. -
Page 28: Parts List - Cage
12. PARTS LIST - CAGE #ITEM DESCRIPTION Q’TY #ITEM DESCRIPTION Q’TY Top Cross Frame Bushing Back Base Tube 44 Square End Plug Butterfly Extension 50 Square End Plug Support Frame Taper End Plug Upright Frame Bushing Back Beam 25 Round End Plug Right Butterfly Arm Square End Cap Left Butterfly Arm... -
Page 29: Exploded Drawing - Cage
13. EXPLODED DRAWING - CAGE 10148-29... -
Page 30: Parts List - Bench
14. PARTS LIST - BENCH DESCRIPTION DESCRIPTION Main Frame 25 Round End Cap Back Base Tube 50 x 50 Square End Cap Backrest Adjust Tube Bushing Leg Extension Frame Hook Adjust Frame Spring Clip Front Base Tube Pt-1b Pop Pin Slide Frame 3/8“... -
Page 31: Trojan 1 Year Limited Warranty
Consumer upon collection or delivery of the repaired product. The Consumer does not need to return the product to the store. The Consumer shall phone the Trojan hotline on 0861 876526 (0861 Trojan) and the Manufacturer’s authorized agent will at its discretion either repair the item at the Consumer’s residence or collect and repair the item at their premises. -
Page 32: Trojan Repairs Procedure
17. TROJAN REPAIRS PROCEDURE 1. Procedure for repairs Should you experience any faults or breakdowns on your Trojan equipment, please adhere to the following procedure to have the fault rectified speedily and professionally. • Do not return the product to the store* •...
Need help?
Do you have a question about the POWER RACK 400 and is the answer not in the manual?
Questions and answers