
Related Manuals for Elation Event Brick W System


Summary of Contents for Elation Event Brick W System
- Page 1 Event Brick W System Elation Professional 6122 S. Eastern Ave. Los Angeles, Ca. 90040 www.elationlighting.com Rev. 5/01/2009 Software Ver 1.0...
- Page 2 Event Brick System™ ©Elation Professional® Event Brick System™...
-
Page 3: Table Of Contents
13. DMX Channel Traits…………………………………………………………………….. 38 14. Lens Replacement……………………………………………………………………….. 47 15. Cleaning and Maintenance……………………………………………………………… 48 16. Photometric Data………………………………………………………………………… 49 17. Dimensional Drawings………………………………………………….……………….. 50 18. Circuit Schematic………...………………………………………………………………. 51 19. Battery Pack………………………………………………………………………………. 52 20. Warranty…………………………………………………………………………………... 53 21. Technical Specifications…………………………………………...………….………… 55 ©Elation Professional® Event Brick System™... -
Page 4: General Information
These instructions contain important information regarding safety during use and maintenance. UNPACKING: Thank you for purchasing the Event Brick System™ by Elation Professional®. Every unit has been thoroughly tested and has been shipped in perfect operating condition. -
Page 5: Warranty Registration
Caution! There are no user serviceable parts inside this unit. Do not attempt any repairs yourself, doing so will void your manufactures warranty. Elation Encourages Recycling: Please do not discard the shipping carton in the trash. Please recycle whenever possible. -
Page 6: Safety Instructions
1. In the event the main power cord to this fixture becomes damaged, it should only be repaired or replaced by Elation Professional, an authorized Elation service center, or a similar qualified technician to prevent electrical hazard. - Page 7 21. Do not short batteries. Do not attempt to disassemble the batteries. Avoid contact with sulfuric acid leaked from the broken batteries. Important Notice: Damages resulting from the disregard of safety and general user instructions found in this user manual are not subject to any warranty claims. ©Elation Professional® Event Brick System™...
-
Page 8: Features
• 8 User Assignable Program Presets - Internal Program: Edit and save programs to the incorporated EEPROM through the front control panel or external controller; you can save a maximum of 48 scenes, and run the saved programs by using the “run” menu on the front control panel ©Elation Professional® Event Brick System™... -
Page 9: General Guidelines
Do not attempt to operate this fixture until you have familiarized yourself with its functions. Do not permit operation by persons not qualified for operating this type of theatrical fixture; most damages are the result of operations by persons unfamiliar with this type of product. ©Elation Professional® Event Brick System™... -
Page 10: Fixture Overview
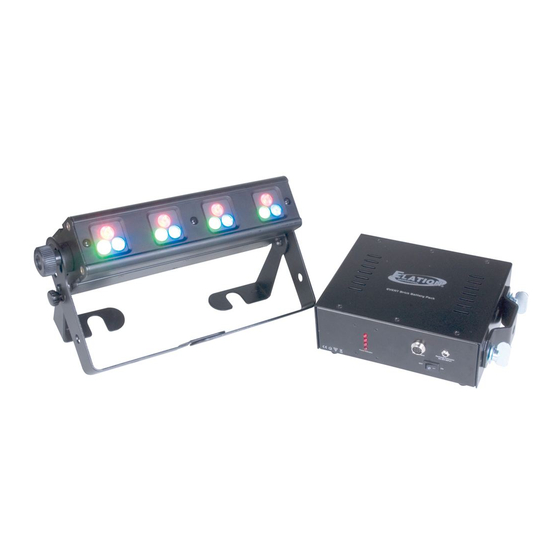
2. LED Assembly/Diffusion Lens – One-watt Lumileds LED’s by Luxeon rated at 100,000 hours (4 red, 4 green, 4 blue). This lens is used to both protect the LEDs as ©Elation Professional® Event Brick System™... - Page 11 In the event of fuse failure, always be sure to replace with an exact match fuse unless other wise specified by an authorized Elation Professional technician. Using a fuse other than that specified could seriously damage the unit and will void your manufactures warranty.
- Page 12 14. Wireless DMX Receiver Antenna – This antenna is used to receive a wireless DMX signal form an Elation EW DMX Transmitter. When not in use this antenna is tuck away inside the fixtures chassis. When using this fixture in a wireless system be sure to extended the antenna for optimal use.
- Page 13 5) Power Switch – This switch controls output power flow. 6) Power Input – Input power connection used to charge the battery. Be sure to only use the charging transformer that was included with your system. ©Elation Professional® Event Brick System™...
-
Page 14: Mounting And Installation
The device can be placed directly on the stage floor or rigged in any orientation on a truss without altering its operation characteristics. When connecting the hanging yoke to the fixture, refer to the illustration below. ©Elation Professional® Event Brick System™... - Page 15 Mounting The Event Brick W System™ is fully operational in any mounting position, hanging upside-down from a ceiling, or set on a flat level surface (see illustration on next page) etc. Be sure this fixture is kept at least 0.5m away from any flammable materials (decoration etc.).
-
Page 16: Mounting Points
If you lack these qualifications, do not attempt the installation yourself. Improper installation can result in bodily injury. CAUTION! Be sure a qualified electrician performs all electrical connections. ©Elation Professional® Event Brick System™... - Page 17 M10 screw fitted through the center hole of the hanging yoke. As an added safety measure be sure to attach at least one properly rated safety cable to the fixture. See illustration below. ©Elation Professional® Event Brick System™...
-
Page 18: Securing
Be sure to only use the designated rigging point for the safety cable and never secure a safety cable to the hanging bracket. ©Elation Professional® Event Brick System™... -
Page 19: Understanding Dmx
DMX cable rated at 120 ohms, this cable is designed for DMX transmission and may be purchased from your Elation dealer or at most professional lighting retailers. Your cables should be made with a ©Elation Professional®... - Page 20 XLR input and output connectors. Always be sure daisy chain your in and out data connections, never split or “Y” your DMX connections unless you are using an approved DMX splitter such as the Elation Opto Branch 4™ or DMX Branch/4™. ©Elation Professional®...
-
Page 21: Dmx Terminator
2 and 3 of a male XLR connector (DATA + and DATA -). This fixture is inserted in the female XLR connector of the last fixture in your daisy chain to terminate the line. Using a line terminator (Elation part: DMX T PACK) will decrease the possibilities of erratic behavior. - Page 22 DMX input jack. The DMX controller is switched off or defective. The DMX cable or connector is defective. A DMX terminator has been inserted into the last fixture in your DMX chain. ©Elation Professional® Event Brick System™...
-
Page 23: Fixture Menu
FLIP ON/OFF When “ON” this function rotate the display 180° CHAN Set 3 channel mode 3 CH Set 4 channel mode 4 CH Set 6 channel mode 6 CH Set 12 channel mode 12CH ©Elation Professional® Event Brick System™... - Page 24 Set speed of scene CHS5 FADE 001-255 Set speed of fade STRB 000-255 Set value of strobe SPED 001-255 Set speed of scene CHS6 FADE 001-255 Set speed of fade STRB 000-255 Set value of strobe ©Elation Professional® Event Brick System™...
- Page 25 1) If the fixture does not receive a DMX signal the menu display will flash repeatedly. 2) SPED: Adjust the hold time for each scene in built-in chase programs. 3) FADE: Adjust the fade time between each scene in the built-in programs. ©Elation Professional® Event Brick System™...
-
Page 26: Dmx Addressing
DMX” function and press ENTER. “Address via DMX” is the function that turns the RDMX function on and off. 4. Press the UP button to display “ON” to activate this function, or “OFF” to deactivate this function. 5. Press ENTER to confirm. ©Elation Professional® Event Brick System™... - Page 27 420, set channel 1 to a value of “7,” channel 2 to "8" and channel 3 to "164" (256+164=420). 4. Wait for approximately 20 seconds for the unit to complete the address reset function. ©Elation Professional® Event Brick System™...
-
Page 28: Operation
• Set To Slave – This function will set the fixture to slave mode for use in either the auto program or music control program modes. • DMX control mode - This function will allow you to control each individual fixtures traits with a standard DMX-512 controller such as the Elation Show Designer 2 or Show ®... - Page 29 10.3 Universal DMX Control: This function allows you to use a universal DMX-512 controller such as the Elation Show Designer 2™ or Elation® Show Designer 3™ to ® control head movement, the color wheel, the shutter (strobe), and all other DMX traits.
-
Page 30: Built-In Wireless Receiver
Event Brick System™ 11. USING THE BUILT-IN WIRELESS DMX SYSTEM The Event MH comes equipped with an Elation Wireless DMX Receiver built-in. This receiver is fully compatible with your existing Elation Wireless DMX System. 11.1 Working with the Wireless DMX (WDMX) System: •... - Page 31 2) Slow flashing Red/Green: Paired with a transmitter. Transmitter is not receiving a DMX signal from a controller. 3) Solid Green: Paired with a transmitter and receiving DMX data. 4) Solid Red: Not paired with a transmitter (free) ©Elation Professional® Event Brick System™...
-
Page 32: Working With Built-In Programs
You can repeat the procedure for all functions listed below: “Auto Program” – Allows access to all 12 of the channel’s DMX traits. “Color Macro” – select a built-in color mixing macro ©Elation Professional® Event Brick System™... - Page 33 64 scenes. Keep in mind that a scene can only be access when it is stored inside one of the 10 available programs. Follow the procedure below to build an internal program: • Access the main menu and toggle to “Edit Programs” which is menu function 8. ©Elation Professional® Event Brick System™...
- Page 34 If e.g. a Slave unit is set to “Slave 1” in the menu “Set to Slave”, the Master unit sends “Auto Program Part 1” to the Slave unit. If set to “Slave 2”, the Slave unit receives “Auto Program Part 2”. ©Elation Professional® Event Brick System™...
- Page 35 Slave program is to be sent. Selection “Part 1” means, that the Slave unit runs the same program as the master units. • Press the Enter button to confirm. • Press the Mode/Esc button in order to return to the main menu. ©Elation Professional® Event Brick System™...
- Page 36 Auto Pro Part 1 is Program 2; Auto Pro Part 2 is Program 3; Auto Pro Part 3 is Program 6 The 3 Slave groups run the Auto Program in certain time segments, as shown in the following picture: ©Elation Professional® Event Brick System™...
- Page 37 Event Brick System™ ©Elation Professional® Event Brick System™...
-
Page 38: Dmx Channel Traits
DMX channel’s functions and their values (3 Channel Mode): Channel 1 - Red: 0-255 Red (0-Black, 255 - 100% Red) Channel 2 - Green: 0-255 Green (0-Black, 255 - 100% Green) Channel 3 - Blue: 0-255 Blue (0-Black, 255 - 100% Blue) ©Elation Professional® Event Brick System™... - Page 39 This channel has two functions depending on the operating mode. When running the built-in programs this channel will control the program speed. 0-255 Dimming (0%-100%) ~ Normal Operation 0-255 Speed (min to max) ~ When running built-in programs on channel 4 ©Elation Professional® Event Brick System™...
- Page 40 Internal program 1 41-70 Internal program 2 71-100 Internal program 3 101-130 Internal program 4 131-160 Internal program 5 161-190 Internal program 6 191-220 Internal program 7 221-255 Internal program 8 Channel 5 - Strobe: No function ©Elation Professional® Event Brick System™...
- Page 41 0-255 Dimming (0%-100%) ~ Normal Operation 0-255 Speed (min to max) ~ When running built-in programs on channel 4 ©Elation Professional® Event Brick System™...
- Page 42 Red (0-Black, 255-100% Red) Channel 2 - Green: 0-255 Green (0-Black, 255- 100% Green) Channel 3 - Blue: 221-255 Blue (0-Black, 255- 100% Blue) Channel 4 - Red: 0-255 Red (0-Black, 255-100% Red) Channel 5 - Green: ©Elation Professional® Event Brick System™...
- Page 43 221-255 Blue (0-Black, 255- 100% Blue) Channel 10 - Red: 0-255 Red (0-Black, 255-100% Red) Channel 11 - Green: 0-255 Green (0-Black, 255- 100% Green) Channel 12 - Blue: 221-255 Blue (0-Black, 255- 100% Blue) ©Elation Professional® Event Brick System™...
- Page 44 CHANNEL 9:Blue CHANNEL 10:Red CHANNEL 11:Green CHANNEL 12:Blue CHANNEL 13:Auto Programs (Built-in Programs) CHANNEL 14:Strobe CHANNEL 15:Dimmer/Speed 15 Channel Mode: The charts below and on the next page detail the DMX channel layout for 15-channel assignment. ©Elation Professional® Event Brick System™...
- Page 45 - Red: 0-255 Red (0-Black, 255-100% Red) Channel 8 - Green: 0-255 Green (0-Black, 255- 100% Green) Channel 9 - Blue: 0-255 Blue (0-Black, 255- 100% Blue) Channel 10 - Red: 0-255 Red (0-Black, 255-100% Red) ©Elation Professional® Event Brick System™...
- Page 46 0-255 Dimming (0%-100%) ~ Normal Operation 0-255 Speed (min to max) ~ When running built-in programs on channel 4 ©Elation Professional® Event Brick System™...
-
Page 47: Lens Replacement
(see first illustration below). 3) Locate the 8 securing screws on the inner cover and remove them. 4) Remove the inner cover to access the lenses (see second illustration below). Once the lenses are changed reassemble in reverse order. ©Elation Professional® Event Brick System™... -
Page 48: Cleaning And Maintenance
There are no user serviceable parts inside this. Please refer all other service related issues to an authorized Elation service technician. Should you decide to service the fixture yourself please order genuine Elation parts directly from Elation. ©Elation Professional®... -
Page 49: Photometric Data
Event Brick System™ 16. PHOTOMETRIC DATA: ©Elation Professional® Event Brick System™... -
Page 50: Dimensional Drawings
Event Brick System™ DIMENSIONAL DRAWINGS: (All measurements are in millimeters) ©Elation Professional® Event Brick System™... -
Page 51: Circuit Schematic
Event Brick System™ 18. CIRCUIT SCHEMATIC: ©Elation Professional® Event Brick System™... -
Page 52: Battery Pack
*Led No. 1,2 ON = the Battery life is 50% *Led No. 1 ON = the Battery life is 25% CAUTION! Never have the battery pack plugged in to wall power while running the fixture on battery power. ©Elation Professional® Event Brick System™... -
Page 53: Warranty
B. For warranty service, send the product only to the Elation Professional® factory. All shipping charges must be pre-paid. If the requested repairs or service (including parts replacement) are within the terms of this warranty, Elation Professional®... - Page 54 No warranty, whether expressed or implied, is given or made with respect to any accessory supplied with products described above. Except to the extent prohibited by applicable law, all implied warranties made by Elation Professional® in connection with this product, including warranties of merchantability or fitness, are limited in duration to the warranty period set forth above.
-
Page 55: Technical Specifications
80mm (h) x 414.5mm (W) x 219mm (d) ~ bracket vertical Weight (net) 7.9 Kgs / 35 Lbs (including battery) Please Note: Specifications and improvements in the design of this unit and this manual are subject to change without any prior written notice. ©Elation Professional® Event Brick System™... - Page 56 Elation Professional 6122 S Eastern Ave Los Angeles, CA. 90040 323-582-3322 / 323-832-9142 fax www.ElationLighting.com / Info@ElationLighitng.com Rev. 5/01/2009 Software Ver 1.0...
Need help?
Do you have a question about the Event Brick W System and is the answer not in the manual?
Questions and answers